Pages

Tuesday, January 28, 2014

Easy trick to BJD making Creative Paperclay by Gloriann Irizarry


Easy trick to Creative Paperclay BJD making by Gloriann Irizarry
by Gloriann Irizarry 


Hola to all my wonderful followers, collectors and friends. 
Yes it is Gloriann Irizarry once more. Today I am revealing wonderful sculpting secrets.
 This is my  January Creative Paperclay tip. 

I been working on my Paper clay Ball Joint Doll for a while and learn many tricks on the way. 
Now for all of those who had tried to create one of these art dolls know these know they have tons of little pieces and yes they all need to fit together perfectly. 
Well many trial and fail experiments i came across one I l will like to share with you. 
A very neat secret to make joints a little easier.
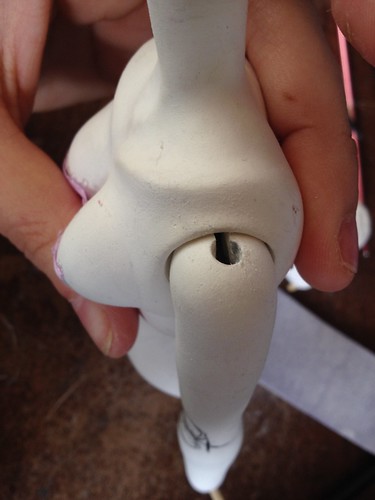

This is what we I'm going to explain. How to make a perfect ball joint in this case I will use the shoulder.

I have a nice set of round drill bits also know has bevelers in different sizes.
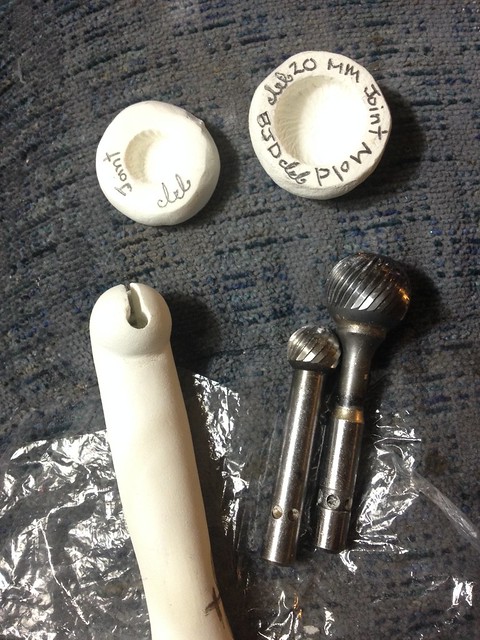

I got mine out of metal but there are some out there that look more like these 


Either one will work.

I start by rolling a ball of paper clay and cover it with a small plastic sheet.
Now I press the desired size to create a hard mold.


I use to paper to make sure i can easily remove the drill bit out. 
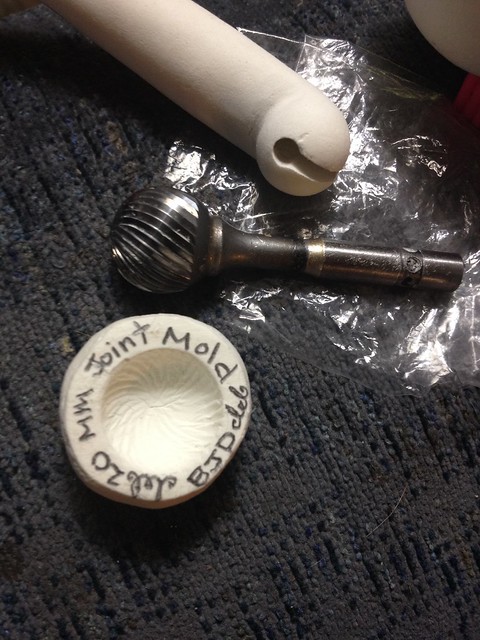

Now let it dry completely before is ready to be use.
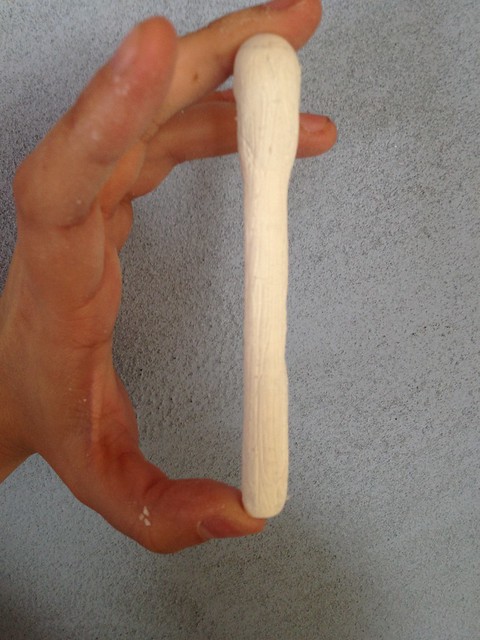

To be able to use the new mold lay a clear sheet of plastic over it. 


Grab your hollow arm piece and add clay to the mold and press the arm in while your rotating it to create the perfect size elbow joint.
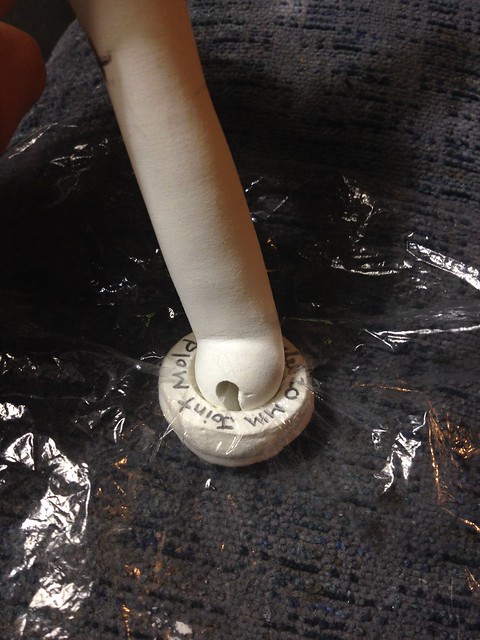

If you need more clay make sure you moist it before adding it to the mold.
Keep moving the arm in circular motions to create the perfect round  joint.
Lay it down to dry.


Sand the shoulder smooth. Mark with a pencil the threading and drill the hole from the top to the already hollow arm.


 Now use the same size bit and start to drill the shoulder socket to your desired depth.
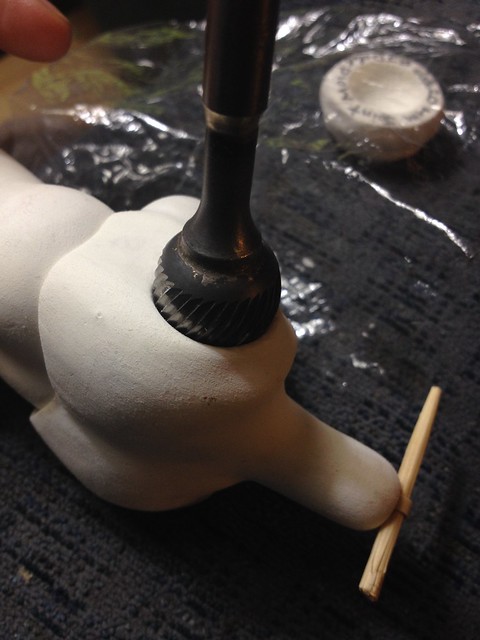

Make sure you check the deepness constantly so you don't over drill the shoulder.
If you do over drill there is no problem you can fill the hole with fresh clay let it dry and start the drilling process once more. 
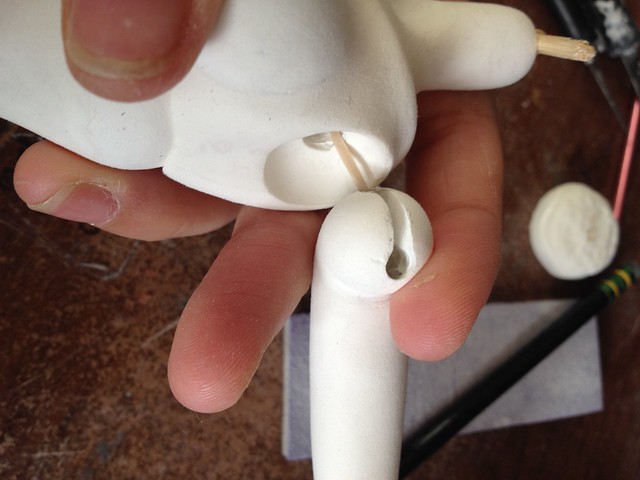

Once you have the desired look and you had drilled the new joint . I use the pencil and mark the drilling points one on the top ans another on the side. I use the hobby knife to cut an open canal between the two holes. 
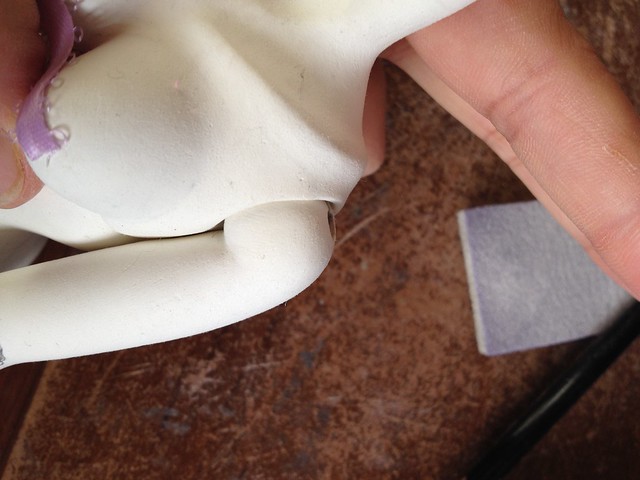

Sand here and there to achieve the look your looking for. Tread with the elastic and try your new joint. 

I use this process to create all my dolls joints. 


I hope this help. Free free to leave me a comment below or 
email me any question at Gloriann@byglori.com


Have a bless day and happy crafting!

Sincerely Gloriann Irizarry 

Sunday, January 26, 2014

Party Favor Moustache -- by LeeAnn Kress of Charmed Confections

Hi Everyone!  Welcome to the Creative Paperclay® Blogsite!

It's LeeAnn Kress from Charmed Confections with my next tutorial for you.  Ok ... this tutorial is a little off the beaten path for me, but I couldn't resist.  I was having the worst time trying to figure out what type of tutorial to do this month. 

So, for inspiration, I went to Michaels to check out their latest offerings.  As I was browsing the aisles, I came across these wooden moustaches on a stick.  I started to giggle a little when I saw them, and the lady in the aisle with me said that they were pretty cute, but what do you do with them ... paint them?  Well, it got me thinking why not try paperclay.  So, I bought two of these for .99 cents a piece (so cheap).  How could I not try it!  Michaels has these in various shapes and they even have several types of hats and glasses to match.

These would be so darling made up for someone's birthday party.  Tie a little tag to the stick to personalize it.


Here is what they look like.  Cut out wooden moustaches on a stick. 


Here is what they look like finished! These would be great for a party favor. 
So cute and funny too!

Supply List:
Creative Paperclay®
Delight® (clay)
Moustaches
Paint / Paint Brushes / Paper Towels
Sand Paper (Rubber Scrubbers)
Wood Stain
Matte Varnish
Glue
Scissors
Decorative Styrofoam Ball
Tinsel


In the above picture, I have already finished one side of the handlebar moustache.  I basically rolled out the clay like a snake added it to the wood.  Make sure you wet the wood with your paintbrush before you add the clay (if the clay is not sticking to the wood, rub a little water on your rolled out clay).  The water will help adhere the clay to the wood.


In this picture, I am smoothing the clay around the edge of the wood.  Smooth the clay all the way around to the back.  This will hold the clay more securely and finish the edges.


Here is another view at adding the second layer.  Continue to add snakes of clay to match the other side.  Remember to bring the clay over the edges of the wood and smooth to the back.


Here I am using my paintbrush to smooth the clay on the backside of the piece.  We will sand this later to smooth it completely and blend it into the backside.


In this photo, I am measuring the lengths of the snakes to make sure they are even on both sides.  Would hate for this handlebar moustache to be uneven!  Whoops!


Here is the finished sculpt!  Let's put this aside and move on to the next moustache!  


Besides Creative Paperclay® the manufacturer also has a clay called Delight®. I have never used it before. Thought that I would try it out on the next moustache to compare the difference.


When I first opened the package, the clay is very different from Creative Paperclay®.  The texture reminds me of the inside of an Oreo Cookie.  In fact, it is quite similar.  It is light, fuffly and kind of spongy.  This would be great for making accessories / ornaments that need to be light in weight.


In the above photo, I completed one side using the same techniques.  Instead of snakes, I just smoothed a lump of clay over the entire front surface and smoothed to the back covering the edges.  I carved some lines in the clay to give it texture.


Here are the finished pieces.  One using Delight® and the other using Creative Paperclay®.  The handlebar moustache using Creative Paperclay® was heavier than the moustache using the Delight®. 

Before moving on to the next step, make sure your clay is completely dry.  Lightly sand the piece, the edges, and backside to blend the clay into a smooth finish.  Use your fine grit sandpaper or rubber scrubbers to do this.  (Don't know what rubber scrubbers are - see my tip on sanding in older posts.)


Paint your moustaches any color you would like.  I have painted the one on the left with a black basecoat and the other with a brown basecoat.  In the picture, you will see two different shades of lighter variations of paint on my paper towel.  I used these to bring out the detail and to highlight the pieces.  After drybrushing the moustaches, I used wood stain on them to enhance the colors.  When using wood stain, paint on and rub off the excess until your achieve the look you like.  Dry completely.


Next paint your stick.  Again, paint the stick whatever color is your preference.  I have chosen to paint mine with stripes.  After stick is dry, coat the entire piece (moustache and stick) with matte varnish.  Let dry.


Here I glued on a glittered, black syrofoam ball to the end of the stick and then added some tinsel to finish it off.


Since I didn't have human model to help me show them off to you, my doggie, Jake said he would fill in.  Here he is modeling the brown stash.  So handsome!


Here is Jake again, modeling the handlebar moustache.  He is looking quite distinguished!  This might be the latest fad in luxury accessories for dogs and humans.  Hope you enjoyed it! 

If you have any comments or questions about this tutorial, please leave a comment below and I will get back to you as soon as possible.  To see more of my creations, please visit me on my blog at www.charmedconfections.com and say hello.  Until next time ~~ LeeAnn

p.s.  I finally have a moustache I'm proud of!  HA! HA!

Friday, January 24, 2014

Egyptian Inspired Jewelry

I love the clean, simple lines of Egyptian jewelry. This piece was inspired by a collection at the Metropolitan Museum. It is an elegant piece of jewelry, but the project is one that even a young artist can be success with.


I started by extruding several lines of clay using different tips to see which would give me the look I was trying to achieve. I decided on the finest full round tip for this jewelry piece.


I extruded a 24" length of clay on my work table. Measuring the clay helps ensure size consistency from piece to piece. You could also roll the clay into a long, slender snake by hand. The extruder makes it quicker—and I'm an instant gratification kind of gal. ☺


I worked flat on the table, rotating the disc rather than trying to wrap the length of clay around the outer edge. I used a coffee stir as the foundation for the coiled bead. Carefully rotated the stir with one hand while guiding the length of clay around it with the other.

When I was finished with the coiling, I gave each piece a gently water wash with a soft brush dipped in warm water. After the pieces were dry I coated them with Duo Adhesive and Brilliant Gold Gildenglitz. Alternatively, you could coat the pieces with a gold metallic acrylic paint. Here you can see the disc and coiled bead during the gilding process.

Coiled bead

Coiled disc base

I used E6000 to attach the coiled bead to the center of the disc and to and a pin finding to the back of the disc. My Egyptian inspired pin look fabulous on a dark jacket lapel!!


Mark your calendars for our blog hop on February 8!! Lot's of fab projects to share.


Thursday, January 23, 2014

Susan's January tip & game: Wood armatures for sculpting.

Greetings from Susan at theboredzombie.com! I'm so glad you stopped by today for a few thoughts on wood armatures for sculpting. Armatures are important in your work for several reasons:
  • Strengthen your work by giving the clay a stable surface to adhere to through the entire sculpture
  • Can be used to permanently attach your work to a base
  • Saves clay and money by using inexpensive materials (such as wood or foil) for thick areas
One benefit of Creative Paperclay® Modeling material over polymer clay is that Creative Paperclay® can adhere to wood.  Wood is a natural material that shrinks and expands with varying amounts of moisture. It almost always leads to damages and cracks when used in polymer clay pieces. Creative Paperclay® is unaffected by the wood shrink which opens a world of options for this polymer artist.

I went on a trip to the craft store to take a look at some of the wood shapes they had. Here's a selection of them that have potential and all cost less than $2.75, most around $1.00.


Being able to use wood is so exciting to me! There's so many options and things to be made I just can't seem to make a decision. I thought it might be a fun challenge to make it a little game. You've all heard about the Creative Paperclay® Modeling Material Blog Hop coming up on February 8th right? I'm going to let you pick my armature! Choose which shape you like best for whatever reason you like it, even if that reason is to challenge my brain! Put its number in the comments and any suggestions you have to help me along. I'll buy the armature with the most votes on Jan 27.


If you're feeling really froggy, maybe you'll try the winning shape too?


Wednesday, January 22, 2014

Easy Valentines Idea - From Lynda

Hello everyone, I apologize for this post being late - it's been an interesting time in the past few weeks, and I am a bit behind because of it all!  I really love to do easy projects, or projects that can be tweaked into anything you would want!  This project is no different, so lets get started! 


Supply list:
Creative PaperClay
Something to flatten the clay (I use a rolling pin)
Various rubber stamps
Xacto knife
Clear jars
Ribbon
Paint of your choice
Adhesive (I used hot glue)

Directions:  
Step one:  Flatten out your clay so it's about 1/8" or so...  You don't want it "too" flat!  
Step two:  Take your stamps and stamp in to the clay, making a firm impression.
Step three:  Using your Xacto knife, cut out the stamped shapes, let dry.
Step four:  Using your paint, paint the stamped clay images as soon as they are dry enough.
Step five:  Take the 2 pieces to the lid, cover the flat round part with ribbon - I put strips down to cover the silver piece.  Take hot glue - and glue this to the underneath part of the other part of the lid.  
Step six:  After pieces have dried completely, add to the lids of the jars to decorate.  
Step seven:  Add ribbon to the lid to finish decorating the piece!

I am putting chocolates in it - and will give away for Valentines day!  I really had fun doing both of the jars - and depending on the holiday at hand, I can create one of a kind projects for every holiday!  I hope you enjoyed today's idea...and I am sorry it is late!  
Lynda Jeffs
Creative PaperClay Design Team and

Sunday, January 19, 2014

A "SLIP"pery Tip, by Diane

Hello and welcome creative friends!
Diane here, ready to share a tip that I use everyday in my studio, while working with Creative Paperclay®

I'm going to talk about "SLIP" 
Slip is something I like to keep right on my worktable at all times while sculpting. 
When I create a sculpt and it has dried, sometimes there will be a few small cracks on my dried piece.
There are several methods for filling those cracks, but for me I have found that filling the cracks in with slip is a quick and efficient method. 
This is how I create my SLIP.

Making a batch of slip:
When I am working with my clay, I may have small scraps. Those little scraps dry and get a little crusty on the ends very quickly and I don't want to use those crusty pieces on my sculpt....


So, they get tossed in my little air tight plastic container.
As you can see in the pic above, I break the clay up into small pieces. I add just a little water, maybe a teaspoon or so. Then I place the lid on the container and let it sit a couple hours, or sometimes overnight if I get sidetracked..


When you come back to your slip it will have absorbed the water and have a fluffy, yet slimy appearance.
I stir it up and try to get all if any lumps out. You want it to have  smooth consistency. I try to get the consistency a little thicker then cake batter... maybe a thick mustard. I add a couple drops of white glue ( Elmer's) and mix it well. By adding water, its breaking the clay down and loosing some of its strength. By adding the glue, it gives the slip its strength back when dry and it also adds to the nice smooth flow and ease when filling in your cracks.


Here is a crack that I am going to fill in.


With my paintbrush I apply the slip to the crack.


Work your slip in the crack and smooth out. Allow to dry thoroughly, then sand your sculpt.


after filling in all your cracks, replace  the lid to keep your slip slippery ;)


Thanks so much for stopping by to see one of my tips. I hope it has been helpful with your Creative paperclay®  journey!
~ Diane
dianiemacdegns.blogspot.com