Pages

Thursday, May 30, 2019

How to transform a bottle with Creative Paperclay


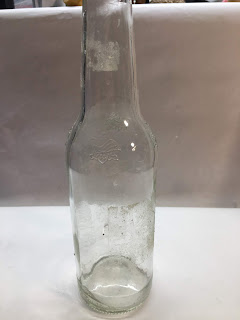
I had this old bottle for quite some time and it just sat there wanting me to do something with it. The inspiration finally hit me and I decided to use my Creative Paperclay to make it beautiful.

Supplies Needed for this Project:

Glue
Embellishments
Words typed on paper
Spray sealer


These are a few of the things that I used in making over a plain glass bottle.


It all started with a simple bottle.  I conditioned my Creative Paperclay and then rolled it out to about 1/4" thickness. Use a little of your glue and put it on your bottle. Take the clay and wrap it around the bottle. Trim all the excess clay off the bottle and smooth it with a little water until you can't tell where it starts and ends. 


Use a mold of the face of the sun and place it onto a ball of the clay and push it into the bottle opening. Pull the clay back out and apply a little glue to it before inserting it back in.
Roll out a piece and make lines in it to look like a collar standing up. Wrap it around the sun just below the face. Roll out a snake that is not very thick and make marks in it to look like rope. Wrap that around below the collar.

Paint all of the bottle part in Plaid colorshift paint. Paint the head and collar of the bottle in Plaid Paints that you choose. Glue your embellishments on in any manner you choose. The wording on this bottle says " And the greatest of these is love." Make the bottle your own with the words and decorations that you choose.


Spray seal your bottle with a good finish and there you have it! Who would even think that there was a bottle underneath that beautiful exterior.

Check out the Creative Paperclay and the Delight Clay, you'll be glad you did. Plaid Online has some amazing paints and products that you need to take a look at too.

Barbara

Friday, May 24, 2019

How to Create a Mask With Creative Paperclay®


Hello everyone! My name is Cinnamon Willis and I am going to walk you through the steps on how I created this mask. I wanted to create another persona for this doll and I figured a mask would be the right way to go about it.

Supplies:

Creative Paperclay®
Saran Wrap
Masking tape
Sand paper
Acrylic paint
Sealer, Varnish


I first placed saran wrap around the head of a doll that I previously made. Make sure to wrap the head really tight and secure with masking tape when you do. This part is crucial so that the mask fits snug around the face.


Place a layer of clay over the wrapped face, make sure to press the clay down into all of the crevices under the nose, and eyes and wrap it around the face as close as possible. This will help ensure that the clay will fit snug onto the face when it dries. Also be sure to add clay to the sides of the face going back towards the ears. It’s better to have more clay that ends up being sanded down in the long run then to not have enough to work with later. 
Optional: While the clay is still moist, get a needle and make a hole on each side to attach a piece of string later to tie the mask onto the doll’s head to hold it in place.  


Allow the clay to dry overnight. Do a light sanding to get it to a level of smoothness that you are looking for. At this point you can start to work on some of the facial features.  


Here I let the mask dry and sanded down some of the sides to get them both even. I worked on the eyes a bit and allowed it to dry so that I could come back and work on it in a few more stages.


At this stage the features are all done and the mask is all sanded down and smooth. It is ready to be painted.


While creating this piece, I had some of the colorful masks that I seen in New Orleans in mind. The design for this one in particular came from a porcelain one that I brought as a souvenir. Make sure that you seal whatever design that you create with varnish when you are done.


Thank you all once again for stopping by, and I hope that you enjoyed today's tutorial! You can find Creative Paperclay® at the following retailers Creative Paperclay® Online Store, Michael'sAmazon, Joann's.

See more of my work at Melandolly.com and be sure to catch updates on my Instagram page!


Thursday, May 16, 2019

Beaded Clay Pendant by Jenn

Hello everyone! Jenn here today sharing a pendant I have created using Creative Paperclay® and Dew Drops!
One of my favorite things to create with Creative Paperclay® is jewelry. For this pendant I wanted it to look natural. I hand molded the shape rather than using a silicone mold. For the jewels I rolled small balls of the clay and then used the end of a paintbrush to hollow the middles. I used Dew Drops from The Robin's Nest to the holes to appear like gemstones. The middle is another rolled small piece of clay that I used a clay tool to put lines in. I then carved some lines into the leaf to give it texture.
I used Plaid paints in metallic green and copper to finish it, then added a hemp cord.

Here is a collage featuring some other jewelry I have created using this amazing clay!

Creative Paperclay® is moldable and sculptable!


Thanks so much for viewing my post today! I hope that you are inspired to give this amazing clay a try and create something amazing!
Creative Paperclay® and Delight™ are conveniently available for you to purchase online and at the below listed retailers.

Until Next time Stay Creative!


Monday, May 6, 2019

A Mermaid Tail Jewelry Holder

Hi! Who doesn't love mermaids? I sure love them and today I have a magical tutorial showing you how to make your own mermaid tail jewelry holder. Isn't that gorgeous?


It's really simple and you only need a few supplies:


  • Creative Paperclay®
  • foil
  • foil tape or masking tape
  • a toothpick
  • sandpaper
  • gesso
  • PVA glue
  • acrylic paints
  • pencil or sharp tool
  • sculpting tools
  • water
Follow along in the video below:


Here is the completed sculpture:


You can share your creations with us on our Facebook page. We would love to see them! For more inspiration have a look around the blog. There are tutorials for many levels using Creative Paperclay®. You can also visit my blog www.papermachepatch.com.


You can find Creative Paperclay® online at Creative Paperclay Co and also at Michaels, Hobby Lobby, Dickblick and Amazon. 


Thanks for stopping by!

Suzette