Halloween is my favorite holiday and the cooler autumn air has me thinking the same question I have pondered every year around this time since I was about 5 years old: What will I be for Halloween this year? I decided to make some cute Halloween magnets to celebrate this special and spooky time of year! This tutorial will walk you through the process of making a pumpkin, a witch's face, a ghost, and a skeleton's face.
What You Need
Creative Paperclay
Round magnets the size of nickels
Aleene's Tacky Glue (or your favorite craft glue)
Acrylic Paint (not pictured)
Cup of water for sculpting and paintbrush wash
Sharp pottery tool or toothpick
Chopstick and/or regular pen
1. Take a lump of clay at least the size of a quarter. You can work larger if you want as long as the piece is light enough for your magnet to hold it to your fridge or filing cabinet later!
2. Let's make a pumpkin first. Take your sharp tool or toothpick and carve two lines.
3. For the stem, make a small teardrop shape out of the clay. Use your sharp tool or toothpick to score the teardrop onto the top of the pumpkin. Basically, you want to take your toothpick and blend small the end of the teardrop shape into the top of the pumpkin. Don't worry about this being smooth. In fact, if it is a bit rough, it will look more realistic.
4. Set your pumpkin aside to dry. Let's start the witch! Start with a lump of clay the same size as the pumpkin.
5. Make another tear drop shape from the clay. Dampen this teardrop with a drop of water. Place it in the middle of your round shape of clay. This will be the witch's nose.
6. Poke two holes, one on each side of the nose you just created. Carve out a mouth as well. I prefer happy witches!
7. Make a witch's hat by sculpting a small cone-shape, and a flat round shape. Make a slip to attach the cone to the round, and then the hat to the witch's face. "Slip" as potters call it is a paste made from clay and water. Place a little paperclay on your finger, dip into water, and then rub between fingers. It should be sticky and paste-like. This is slip! Use it to attach sculpted parts together!
8. To make your witch's hair, take small bits of paperclay, dampen your toothpick or sharp tool in a bit of water, and poke the bits of paperclay under the witches hat. Once you've applied all of the hair you want (just a few in the front will do), press the back of the hat rim down. Remember, these are magnets, so they need to be relatively flat in the back. The good thing is, this will secure your witch's hat and her hair!
9. Set your witch aside next to your pumpkin and let's start on the ghost. Sculpt a bell shape out of paperclay about the same size as your pumpkin and witch. Pinch the bottom of the clay two or three times to make slight waves.
10. Use your sharp tool to poke eyes and a mouth. Again, I prefer happy smiling ghosts. Here's a picture of the three sculpted pieces together.
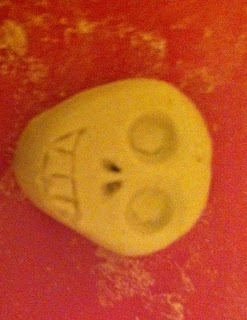
11. Finally, let's make a skeleton face! Make an egg shape with the paperclay. Take the end of your sharp tool, the blunt of a chopstick or pen and press two eyes. Take your sharp tool tip or toothpick and make a couple of holes for the skeleton's nose. You can carve out a mouth or paint it on if you prefer.
12. Now that you have your Halloween characters sculpted, allow them to dry completely or pop them in a toaster over - bake at 225 degrees for 10-20 minutes turning once halfway.
13. Now it's time to paint! Cheap acrylic paint works well!!! Michael's Craft Stores usually has a good deal where you can buy two 2 ounce bottles of acrylic paint for under $2. And then you can go over to the clay isle to get a few new packages of Creative Paperclay!
14. Once the paint is dry on both sides, apply a good drop of white craft glue to one magnet at a time and place your Halloween character on top. Give a good press and allow to dry before your adorn your fridge with your lovely new creation! Repeat three more times and enjoy!
Love Creative Paperclay? Let Michael's Craft Stores know as they may be discontinuing the sale of this excellent product!!! If they do, you can always purchase your Creative Paperclay on their website:
http://creativepaperclay.com/
Vist My Blog Here When You Get a Chance!
http://marissartdolls.blogspot.com/


Those Halloween magnets are just adorable! What a cute gift or decoration. Great tutorial.
ReplyDeleteHugs XX
Barbara
I LOVE this. Thanks for all the hints on how to create the shapes. Wonderful job.
ReplyDeleteHugs
Brenda
I would be honored if you came to see my blog here
great job as always.. tfs....
ReplyDeleteThanks everyone! Not sure why the pics are sideways though!!! Lol!
ReplyDelete