SUPPLIES YOU'LL NEED:
- Newspaper or tin foil
- Creative Paperclay® modeling material
- Masking tape (if you use newspaper)
- Acrylic Craft paints (I used Folk Art)
Gather your supplies.
I'll be using news paper for this tutorial. Start by balling up some news paper. This will be the INSIDE of your egg. It will help your project dry faster, and save you the amount of clay you need to use.
Next, use your masking tape to bind the paper into a "ball" shape. At this point, exact ballness isn't important. If you're using foil, just bunch it up, and skip the masking tape.
Do this for each egg. I stopped at three.
Next, add Creative Paperclay to the outside of your ball. I created a ball first, and then added another small ball of clay to the top, and used that to make the egg shape. I didn't worry too much about getting the shape exactly right here either. Just close is good.
Once you have all your cores built up with clay, let them dry.
Once they are dry, you can sand them to help fine tune their egg shape. I'm pretty happy with how these turned out, but that one in the middle on the bottom could use a LITTLE more sanding... I will just turn it so that part is closest to the nest.
Next, I painted the eggs blue.
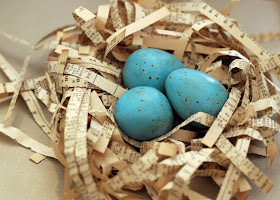
Then I used some stain to make them a little less bright, and used a toothpick dipped in brown to tap speckles onto the eggs. Some strips cut from a dictionary make a cute nest for them all to rest in!If you create something inspired by my project, please leave a comment with a link here, so I can come and visit to see! I would love for you to visit me at my "house" too!! Thank you so much for reading!! ~rachel


Oh I love the speckled look. Now I am going to try. TFS
ReplyDeleteThese were so EASY, Jess! I need to make more. LOTS and lots more. :)
ReplyDeleteYour projects are amazing!
ReplyDeleteThank you, Dawn! Sometimes I worry they may be TOO simple, but I really want people to "get" that using Creative Paperclay is EASY and fun for ANYONE!
ReplyDeleteLove this idea. Love the "core" even better. Great job
ReplyDeleteoh this is a great project, I am wanting to do.... so cute
ReplyDelete