WHAT YOU WILL NEED
- Creative Paperclay® modeling material
- Acrylic Craft paints (I used Folk Art)
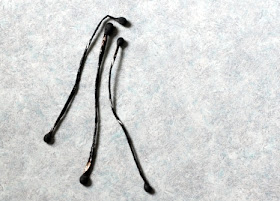
- Double Sided Flower Stamen (Or something similar. These are pictured below.)
- Valspar antiquing stain (watered down black paint will work also)
- Crafter's Pick the Ultimate Glue (hot glue or any thick glue will work also)
Then, I started pressing just inside the very edge of each ball, until I had created small bowl shape. Then I started nesting each piece inside the other.
I used different amounts to each flower. The larger the flower, the more layers I gave it.
Next, I painted my poppies red. Once the paint was dry, I worked antiquing stain into the crevices of the flower, and wiped off the excess with a cloth.
 |
| Prior to staining |
I plopped a dab of glue into the center of the flower, (it dries clear) Then I stood the cut stamen into the wet glue.
Once the glue dried in the center, I reapplied some stain to the very center of the flower, to cover the transparency of the glue. I have plans to use these on a piece of Spring artwork, but they would be really cool as jewelry too.
Does YOUR Spring Fever have you wanting flowers!? Leave me a comment, and let me know if you create any flowers using my tutorial! I would love for you to visit me at my "house" too!! Thank you so much for reading!! ~rachel


I love the red richness of your poppy flowers. TFS!
ReplyDeleteThese are super neat!
ReplyDeleteLove your red poppies. I would love to try my hand at making some myself. TFS how to.
ReplyDelete