 | ||
| Lynda's Snowman |
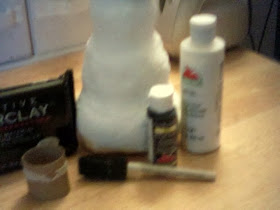
Supply list:
 Creative PaperClay
 Recycled creamer container
Tin foil
Toilet paper roll (empty)
White and black paint
Glass to cut brim of hat
Buttons (black, orange and gold)
Red brad
Red ribbon
Green felt
Hot glue gun (or adhesive of your choice...)
Xacto knife
Directions:
Step one: Clean out the creamer container...(you don't want it to smell funny LOL) - allow to dry without the lid on to make sure it is completely dry. I used a small Coffee Mate brand container for my base. Starting at the top, start to add tin foil around the top to create the first ball.
Step two: Repeat adding the foil to create the next two ball's...making sure they go larger as you get to the bottom. I used the existing container to start out the "balls", adding the foil around by bunching it up to form the ball around the base, glue with adhesive of choice.
Step three: Start to roll out the clay - to make it as flat as you can (but not too flat) - and as long as you can. Try to roll out enough clay that it will be able to go over the whole container - pressing down the clay as you go.
Step four: Allow creation to dry, making sure to wet your fingers or use a spray bottle to smooth out any type of imperfections you don't like.
Step five: If you need to add any more clay at all, add now...double check to see if there is any spots you have missed or you need to add more clay to.
Step six: After creation has completely dried, start to paint with the white acrylic paint. I ended up doing about 4 or 5 coats... Allow to dry good in between each coat.
Step seven: Cut toilet paper roll in half. Roll out another piece of the clay - to put around the roll and on top of the hat. Take the glass (making sure it is completely round) and cut the brim of the hat. Place the toilet paper piece on top of the round piece, making sure to cut the clay out of the middle of the roll. Using your fingers - start to roll the edge of the brim of the hat made out of clay up - and create it to look like a hat brim.
Step eight: After the hat has finished drying...paint 3-5 coats of black, making sure to get the brim underneath too! Allow to dry between each of the coat of paint.
Step nine: Using the hot glue gun (or adhesive of your choice) - add the buttons to the top for the eyes, nose and mouth. Just make sure you have let it sit for a few hours at the least before you add the buttons.
Step ten: Cut the felt piece 1 1/4". Fold in half and then cut the "tassels". Put around the neck, and then add the brad to it to keep the piece together. **This is what supplies I had on hand...I might end up changing this at some point in time...feel free to change!
Step eleven: Add the red ribbon around the bottom edge of the hat using your glue gun (or adhesive of choice).

At first I was scared to death to even try something this big, BUT...after spending that time with Terri, and watching a bunch of video's...I was a lot more comfortable in making something this large. Oh don't get me wrong, I still love it for my cards and scrapbooks, but I also love it for these bigger projects now too! I can't wait to get started on the next thing - you can see the other snowman we ended up doing in the background, lets see what I can come up with for her!!!! Thank you so much for checking out my project today! You can see more of my work at Memories in Tyme for scrapbooking and card making! I hope to see you there!
Lynda Jeffs


very cute
ReplyDeleteNice! It's always great to add new tricks to your tool box. Who knows what you'll come up with next! :)
ReplyDeleteGreat job, Lynda! Wonderful that you challenged yourself to do something larger. It turned out fantastic! LeeAnn
ReplyDeleteLynda,
ReplyDeleteWhat an adorable snowman!
Great tutorial.
~Diane