Pages

Friday, October 30, 2015

Halloween Blog HOP

It' time for a Fun Halloween Theme Blog hop


The Creative Paperclay Design Team has team up with
Gina's Designs Lasercuts Design Team
for a Halloween Theme
Blog hop

We are excited to show off our Halloween project and even
more excited about the fact 
YOU can win a prize

Prize Package Included
1 pound package of Paperclay
1 sample package of Sandits
and 
$25 shopping spree to Gina's DesignsLasercuts

How to enter - each of these will get you one entry
1)  enjoy the hop
2)  Stop by each blog on the hop and leave a comment
3)  Pin each project on your Pinterest site
4)  share this post on your Facebook page

Here is the List of BLOGS


Sunday, October 25, 2015

Halloween Giveaway starring Gina Designs!


The winners are:

Sandra Cook
Brenda NeBlock
Erica Hofstetter

Please contact me at meriw@cox.net and send me your address.  I'll ship off your goodies ASAP.
Thanks for participating

BOO!
It's time for a Giveaway!
Hi there everyone, it's Meri from ImagiMeri's Creations.  I'm a bit messed up this month as I've been busy with my house, which is up for sale, and I suffered a bout of food poisoning.....not fun.  I apologize for being late, but better late than never!  Creative PaperClay is joining with Gina Designs for a fun blog hop this month and I thought I'd show what I made and offer them as fun giveaway prizes, too!  All you have to do is leave a comment here, with valid email and I will choose three winners, using a random number generator, on Halloween Day!  That's it.....how easy is that?

First up is the "Creepy Stuff" shrine I created using Gina Designs skeleton shape set, house shrine box and paper from Authentique's "Spirited" collection.


I embossed the medium size skeleton with white
embossing powder and I used dresden in orange
and black to outline the box.


Second is this fun "Boo"vignette using Gina Designs spider web shape set, spooky shape set, and tombstone standups.  Pretty much all the pieces are finished using embossing powders for color and texture.  There's a fun bat on a corkscrewed wire which can dance when lightly tapped.


"Here Lies Jule....he died a fool"
Having some fun with tombstones!

Third is this fun "Spooky" vignette using pieces from the spooky shape set and the tombstone standups.  I used Creative PaperClay to mold the angel on the tombstone, covered the word "spooky" with paper from "Authentique's spirit collection" and embossing powders on pretty much everything else.


The angel is made of
Creative PaperClay

To win one of these three fun vignettes, all you have to do is leave a comment here with a valid email.  On Halloween day I will chose three random winners and I'll contact you for shipping information.

Here's wishing you all a happy Halloween and thank you for stopping by.  Do not forget to check out Gina Designs for amazing lazer cut outs for your crafting.

Hugs,
Meri


Friday, October 23, 2015

Tip Time Today

Hello, Ann here today with a quick tip about working with Creative Paperclay® modelling material.  I find that sometimes the CP needs a little help in adhering and staying on a vertical wooden surface.  So through a few trials and errors I  now use the following method:


I dilute some tacky glue with water, brush it on the wood, let it set about 20 seconds, and then I apply the sheet of Creative Paperclay® I have rolled out.

I make sure to overlap the clay around the sharp edges and corners of certain pieces.


There you go, easy and fun!

I hope that you find this helpful.  To read about other projects I makd, please come on over to my blog at http://annmakes.blogspot.com.

Thank you for stopping by.


Thursday, October 22, 2015

Play with Techniques

I love to see how different surfaces take techniques and I hadn't played with Delight very much. So in the spirit of the season, I rolled out Delight and used my Halloween cookie cutters to make little skulls.

SUPPLIES

Skull cookie cutters
Delight
Paint
Glitter
Micro Beads
Objects
Curry powder


Left to right: Skull coated with polymer medium followed by a wash of Quinacridone Nickol Azo Gold when dry. My favorite. Clear glitter with typewriter keys, black with a metallic pearl rub, and burnt umber with curry powdered applied while wet. Now, I have to run to the fabric store. I think collars out of netting would be cool.

Part of being an artist is being a mad scientist.

Dream in Color and Take Time to Play — Darlene Olivia McElroy

Garden Troll Baby

Darlene Olivia McElroy, Creative Paperclay® project
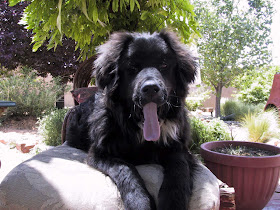
Watching a 70's flashback TV show inspired me to make a Garden Troll Baby. Bernie, my newfie, gladly let me cut some of his hair off and away I went. I painted in soft colors as I wanted the viewer to have to look closely to see what it is.

SUPPLIES

Creative Papeclay®
fondant mold
baby face mold
paint
Sandits

Darlene Olivia McElroy, Creative Paperclay® project
I started by casting the baby face, getting my aluminum foil shaped for the body and cutting the hair from my dog. Don't worry, it didn't make a different. He still looks great.

Darlene Olivia McElroy, Creative Paperclay® project
Next, I covered the aluminum foil with clay, cast leaves and flowers in the fondant mold and put them all together.


Darlene Olivia McElroy, Creative Paperclay® project
When I was finished adding all the elements, I made a hole in the head and added the hair.

When it had dried, I sanded edges with Sandits and smooth over some cracks with a clay slurry.


Darlene Olivia McElroy, Creative Paperclay® project
Have fun with art & dream in color!

Darlene Olivia McElroy

Tuesday, October 20, 2015

How NOT to be Overwhelmed with Projects - Tori's Tip for October


Some components from my first Design Team post - an "Inspiration Mobile"


At the beginning of this year I started my term on the design team - I was really excited to share some of my ideas, projects and techniques with other fans of Creative Paperclay®.  During the year I realized that some of my projects are...well.....kind of complicated.  Or at least they seem that way when I scroll back through some of them.  The mobile project involved patterns, making cookie cutters, bending wires, planning it out, etc. because that's what it took to make it.  It was also fun to create, though seeing all the steps at once might not make it seem that way.

  So, in the hopes that if you see a project that you'd like to make but feel it might be too much for you, I am posting seven tips that might make you decide to "go for it"

1.  Relax and don't worry about the outcome.   Ask yourself what you will have lost if the project turns out to be a total flop (which, in truth, isn't very likely).  The answer is usually "a few craft supplies and some time".  Hopefully you will have enjoyed the process, and either way, you will have gained experience and know what to do differently the next time.

2.  Read through the directions at least once before starting on anything.

3.  Gather materials - Gather them according to what is listed for the project, and, as you read through the directions again, because once in a while authors of craft instructions forget to put something on the tools and materials list.

4.  Work when you work best.  When I see or think of a project that inspires me I want to start on it right away.  Sometimes I do that and then quickly run out of energy or enthusiasm because the initial excitement wears off.  Projects go much more smoothly when a time is set aside for them and preparation has been made, so for me (a morning person) I try to set things up the night before so I have everything ready to get to work in the morning.

5.  Realize that results  may WILL vary.  That's a good thing!  When I teach classes I am always amazed at the variety of projects the students create from the same set of instructions and materials.  Don't expect what you create to look just like the photo of a project (it may turn out much, much, better!)

6.  Take breaks.  If you feel frustrated or one step in the project isn't going as planned, take a little break, go for a short walk, do some stretches, or just stare out the window for a bit and think of something else.

7.  The most important tip - HAVE FUN!  Remember that the directions are not rules, and you are free to do your own thing.  If it isn't working, turn it into something else, or have an aggression relief session and destroy it in the most creative way possible. Go Play!

and remember....Halloween will be here soon!  Join us for the Link-Up Party  and the Blog Hop with Gina's Designs


I'd love for you to join me for more projects & art adventures on my personal blog
Find me on Facebook, or peruse & ponder pics with me on Pinterest


Sunday, October 18, 2015

Lynda's Halloween Idea


I was born 5 years after my older sister.  When she was a teenager, she was carving a pumpkin and cut her hand, and ended up having to have surgery... after that, Halloween for me was pretty much done!  No more carving pumpkins - no more fun decorations - or time spent on costumes...it was just another day!  So, not normally being a Halloween person, this project was actually fun - and getting me out of my "norm", because of the person I am working with - my husband Del! 
This month - on the 31st, the team is doing a blog hop if you haven't heard!   We are all working really hard on bringing you a fun hop - so make sure you check back for sure!  This project is part of a whole scene Del and I are working on, I just can't share the rest with you until the day of the hop!  I assure you, the whole hop will be worth it!  
Del has been fun to work with -and necessary since I have been in a cast!  I could not have done all of this without him - goes back to not being a Halloween person, he is helping with ideas AND working on it!  I could not do this whole project without him, his hands, and especially his creative feedback - for that, I thank him from the bottom of my heart!  We are already thinking about a fun winter scene - LOL can't wait to get it rolling too!
  
Supplies needed for project
Creative Paperclay product
Gina's Designs die cut shapes
Paint - white, black, gray
Basic toolbox supplies

For this part of the scene - directions for doing the skeleton and the tombstones is below, as well as how to finish off each of the little pieces you see here!  

Directions (Skeleton):

Step one: Flatten out a small piece 4x5" x 2x5" of Creative Paperclay product. 
Step two:  Roll the die cut shape into the clay (lightly) - which will make an impression of the shape - into the Creative Paperclay.  
Step three:  Cut around the details of the shape, whether it is a word or the skeleton like we used. Set aside and let dry.
Step four: After the piece is cut out, using your finger and water - smooth the edges out of the shapes, to help with sanding later on! 
Step five:  After the piece completely dries, paint in the little accent parts of the skeleton (or whatever piece you choose) in black.
  
Directions (Tombstones):
Step one:  Since my bases are going to be covered, I chose not to paint them...though this part might change depending on the rest of the project!  Decide if you want to cover it or not...and paint it black if you want (or a color of your choice).  
Step two:  Using a flattened piece of Creative Paperclay - add it to one of the tombstones, making sure to smooth the edges going around the tombstone.  Repeat for as many tombstones as you are looking at creating.  Allow to dry.
Step three:  After the shapes have dried, lightly sand them to get out any imperfections.  Paint in silver - repeat for each of the tombstones.

Directions (rest of the project):
Paint each individual piece -such as the casket, witches cauldron, the witch (shown below here) and the sun which will be going on the house when I get that piece finished up!  The moon is a Creative Paperclay piece also painted - with the witch hot glued to the front of the moon!  

Gina's designs makes it really easy for you to create really fun - one of a kind things!  What one person does, someone else might do something totally different with it!  Add to it fun Creative Paperclay creations - and you get decorations that will last a lifetime!  I can't wait to finish up the rest of these decorations, and share it with you on the blog hop!  
Until next time,
Lynda Jeffs
Creative Paperclay Design Team


Friday, October 16, 2015

Eyeballs In a Bottle

Chloe is really getting into Halloween this year. She started putting out decorations in the middle of September!! We've been making lots of little things that will be a part of our Halloween apothecary's curiosity box. Filling tiny bottles and jars with all sorts of spooky things. But, the eyeballs in a bottle have to be one of our favorites.

We started by making lots of small balls of Creative Paperclay®. I put a pin in each one to facilitate handling later in the process. Then, they were set aside to dry for a day.

When they were dry, we coated them with PPA, an acrylic medium, to seal the clay.

Next, was the addition of the veins and optic nerve. We cut small lengths of red yarn and frayed the ends until we had "veins."

Another layer of PPA on the eyeball as an adhesive for the yarn. This is where that pin comes in really handy.

When the veins were dry, it was time to add the iris. I printed out a whole sheet of irises using the print-and-cut feature in Make-the-Cut, then used my Zing to cut them out. These were also glued on with PPA.

The final touch was to add a drop of PPA right on top of the iris.

I layered paperclay eyeballs and clear resin in my bottle, letting each layer set up before added the next, so it looked as though the eyeballs were floating. 

We have two great events coming your way. Mark your calendars for our blog hop and our link up party!!
 Halloween Link Up!!


Happy Hauntings!!

Carole

Chloe

Table Cell Table Cell

Friday, October 9, 2015

Haunted Altered Bird House

Hello, it's Ann here today with a spooky project!  I am getting a jump start on Halloween cause it is so much fun!  For my project on the Creative Paperclay® Design Team I turned an unfinished new wooden bird house into a Haunted house with some Creative Paperclay®.  Here is a picture:


To make one similar to this you start with an unfinished wooden bird house (I got this one at Dollarama, Dollar Store), and Creative Paperclay®.  


First take a large chunk of clay and roll it out to about a 1/4 inch in thickness.  Use a non stick mat on your work surface to make lifting the clay easier.


Using an embossing folder or any other texture marking tool, press into the clay to create the look of bricks.


Brush on a thin coat of watered down tacky glue to the wooden surface of the house and then apply the clay sheet over that.  Press down the clay to make sure it sticks well.


After the clay has been placed it is time to use some imagination and some dry paint brushes and old toothbrushes to add texture.


Once the clay is dry it is time to give the house a few coats of paint in a scruffy manner to make it look more distressed.


Once the paint is dry, glue on some Halloween themed party favours and  embellishments. 


 To give more interest I added some silver metallic Creative  Medium, and rubbed it on here and there.


Supplies:
Wooden unfinished bird house (Dollarama)
Crafter's Acrylic Paints in Slate Blue, and Black (Deco Arts)
Halloween themed party favours, and embellishments (Dollarama)
iLoveToCreate® Aleene's Tacky Glue
Hot Glue (Dollarama)
Brick Pattern Embossing Folder Tim Holtz (Ranger)
Creative Paperclay® Modeling Material
Imagine Crafts Creative Medium in Metallic Silver


I hope that you are inspired to make your own decorations.  To see other projects I make please stop by my blog at:  http://annmakes.blogspot.com

Thank you for stopping by.


Come back and check out our Halloween Blog Hop Projects, we promise to be Spooky!