Supplies:
Creative Paperclay®
Pencil
Plastic knife or flat clay tool
Acrylic paint
Sanding paper
Plastic knife or flat clay tool
Acrylic paint
Sanding paper
Masking tape or artist tape
Protective varnish or clear coat covering
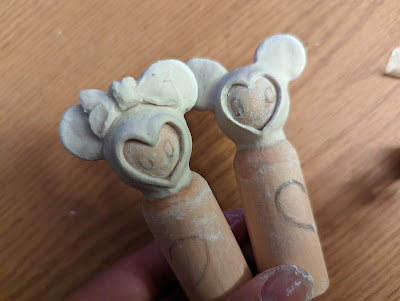
I did the same ear shaping process with the girl version and added a bow to her head. Set the pieces aside and allow them to dry for around 24 hours or more. The drying time will vary depending on the moisture in the air.
Begin painting your pieces how you would like.
I wanted to add polka dots to the other piece. I free styled the dots on this piece but I am sure that you can find or make a stencil to get perfect dots!
Start by planning out how you want your pieces to look. Get a pencil and draw on the peg to plot where you will add clay. Don't worry about making mistakes at this stage, you can cover them up later with paint or clay.
I knew that I wanted to put some kind of embellishment on the head. Take a dab of water and rub it on the part of the peg that you would like to add clay to. This will help it stick to that part.
I wanted to add ears to these pieces to make them look like everyone's favorite mouse couple. I shaped pieces of clay into disks and pushed them down into the head. After pushing the ears onto the head, I took a flat tool and went all around the base of the ear to secure the ears in place. The ear will lose it's shape at this stage, go back and rework the ear while it is still in the pliable stage.
When the pieces are dry, get your sanding paper and smooth out the lumps on your pieces to the texture that you would like.
Begin painting your pieces how you would like.
I used masking tape to get straight lines on this piece. Tape off the part that you don't want to have paint on and paint the other side. Carefully pull back the tape after it dries.
And here they are. I decided to keep them faceless and I used gold acrylic paint. Don't forget to seal your work with protective varnish!
Thank you all once again for stopping by, and I hope that you enjoyed today's tutorial! You can find Creative Paperclay® at the following retailers Creative Paperclay® Online Store, Michael's, Amazon, Joann's.
See more of my work at Melandolly.com, catch updates on
my Instagram page and here is a link to my shop!


No comments:
Post a Comment