Hi there, Paperclay® fans. I'm so glad you stopped by. I love working with Creative Paperclay®, and today, I did a little experimenting. I love ancient artifacts, and I wanted to try to achieve that look. So, I decided to combine Creative Paperclay® and Delight™ together, and see what happens. I have to say, I was very pleasantly surprised. By combining the two products, I was able to achieve these really cool cracks in the finish without having to do anything further. Here is my finished piece.

Here is a close up of some of the cracks made in the finish. Unfortunately, the camera does not do it justice, but it is really a cool effect.

Supplies Used:
FolkArt acrylic paint - Seamist
Baroque Gilder's Paste - Antique Gold
Spellbinders Texture Plate - Grate Works Two
Wilton silicon cake mold - Jewelry Designs, Global Designs
Directions:Spellbinders Texture Plate - Grate Works Two
Wilton silicon cake mold - Jewelry Designs, Global Designs
Start with an inexpensive glass candle holder. I got this one at Michael's for 99¢. Clean glass with alcohol or glass cleaner.
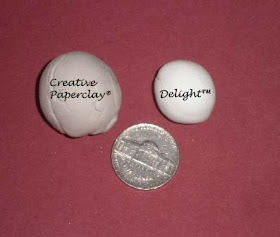
Knead together Creative Paperclay® and Delight™. I have no real recipe, but I started out with approximately a 3:1 ratio, respectively. Then I added more Delight™ until I liked it.
Roll out a piece of the clay mixture long enough to wrap around your candle holder.
Wrap clay around candleholder, and use your clay roller to adhere it really well to the glass.
Smooth the edge where the clay mixture joins, and trim off the excess clay from the top and bottom.
Add texture by pressing the Spellbinders texture plate into the clay on each side. I did not worry if my impressions were not perfect. Remember, this is supposed to look like an ancient artifact, thousands of years old and recently unearthed. (Sounds like my studio).
Mold two rows of border in the Global Designs cake mold.
Remove from mold and adhere around top edge of candle holder. I wet the border before adhering it. This makes it stick better to the clay sides.
I made a small amount of slip to adhere this border because part of it touches the exposed glass on the very top, and I wanted to make sure it adhered really well. Slip is made by adding water to a small amount of Creative Paperclay® until it is spreadable, like white glue, as in the picture below.
I made two rows of a smaller border from the Jewelry Designs cake mold and adhered it along top edges, mitering the corners as I went along.

I simply used my fingers to finish off the edges, using more slip, as needed, to make it look seamless.
I allowed the piece to dry overnight. Then, I painted the entire piece with Seamist acrylic paint and allowed it to dry.
I used my fingers to hit the high spots with the Antique Gold gilder's paste. I used a Q-tip to apply some of the gilder's paste into the tighter spots.
Voila! My ancient artifact is finished, and I am ready to put it to modern use, i.e., it makes the perfect holder for my mini misters.
What will you use your ancient artifact for?
I hope you enjoyed my project today, and that you will give Creative Paperclay® and Delight™ modeling material a try. Hey, after all, it is so easy and fun to use, with great results every time. It is amazingly mistake-proof, and you are limited only by your imagination. So, check out the blog for more inspiration, tips, and techniques on how to use these wonderful products. I would also love for you to check out my blog for more ways to play with Creative Paperclay®.
Thanks for stopping by today, and in the meantime, have a wonderful, crafty week!
Barbara


This came out fabulous! love it! TFS
ReplyDeleteLove the crackles!!
ReplyDeleteWOW
ReplyDelete