Pages

Tuesday, April 28, 2015

Creative Paperclay Material Sanding Tips By Gloriann Irizarry

 
Tips and tricks by Gloriann Irizarry for Creative Paperclay®
 
Welcome back to your Creative Paperclay® Blogs spot. Today I have a great tip to finish and clean your Paperclay creations.
 
If your like me and like to have a clean sanded project you see your self all cover in white and spreading all the dust everywhere.
 
 
Well I manage to cut down on dust by reducing the amount of sanding by using a nice
soft square flat brush before the piece completely dry.  
 
 
With the combination of these brushes and water will significantly reduce the amount of sanding.
Your probably wonder how, Well is not that difficult to do. Simply dab your brush in water once your done with your piece and before you place it to dry smooth any edges with the wet brush.
Make sure every so often you clean the brush in a washcloth to remove any Creative Paperclay® build up from the brush.  Once your satisfy with the look you can go ahead and set the piece aside to completely dry. I found this technique very helpful by cutting my sanding process in half.
 
If you smooth and rough edges before it dry with the brush it will less clay you need to sand off to make it look smoother. Keeping the brush with clean water will leave a nice smooth surface for you to work on when it dry. Go ahead try it. The softer the brush the better results you will get.
 
 
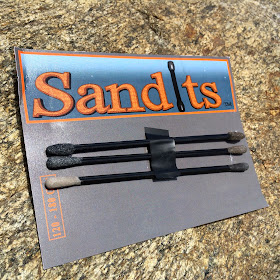
Another tip is also to get better results on your next  Sandits™  sanding project make sure you gently wash your Sandits™ tip with a toothbrush and warm running water. This will removed any fine Creative Paperclay® excess and give you the nice porous surface the tools need for your next project.
 
I hope these tips help you on your next Crafting project and remember.
 
 
Sincerely Gloriann Irizarry
I  


Monday, April 27, 2015

Tip Day!

Hi all, this is Donna from Memes Art Place and I am glad you stopped by!

Remember my last post with the cute little birds?

Well the pictures had some great tips in them. Let's review!

 I save all the Styrofoam packaging from anything. This makes the best stands for drying!
Best of all.......they are FREE!
 I use them for drying the paint also.
 Toothpicks.....they also are a good use while using Creative Paperclay®! I use them to let things dry. I use them to connect a head to a body. I use them to stuff hair into a small hole. I use them for a dot on a eye.
I have used this tray for two separate projects and I still have plenty of areas that I can still use!

Try to think outside of the box when needing tools. Sometimes we can make due with what we have on hand.

Thanks for stopping by. I hope you find this tip helpful!

Saturday, April 25, 2015

Fun Birds!

Hi all, it's Donna from Memes Art Place and I have a fun little project for you today!

This is one you can easily do with children!


Materials needed:
Creative Paperclay®
Styrofoam balls
Paint
Felt
Paper
Wire
Toothpicks
Embroidery Floss
Quilt pins


Start by rolling out your Creative Paperclay® and apply it around your Styrofoam ball. I use toothpicks to hold them up while drying. Let dry, if any cracks appear fix and let dry.


Once they are all dry, you can sand them with some sandpaper. They don't need to be super smooth.
 Wipe all the dust off and paint the balls any color you choose. These are just the colors I liked.
Let dry, second coat if needed.
Next you will take tiny amounts of Creative Paperclay® and make small round flat eyes. Then we will use the quilt pins for the black part of the eyes. 

Once you have made your flat circles attach them to the birds using some glue. Once dry, paint with white paint.

The quilt pins will need to be painted black. This is easy, just dunk them into the paint and let dry.
Once the pins are dry you will need to cut them a bit. Just use a wire cutter and cut about halfway.


Now they can be inserted into the flat white part of the eye. Just give a bit of a push.

As you can see in my picture below my birds are upside down with a toothpick sticking out of it's head. No worries, you will see what we do.

Cut orange felt into a diamond shape for beak and adhere to bird.
Cut wings and adhere to birds side.


Now we are going to fill that toothpick hole with some hair. Cut some embroidery floss and fold in half and then half again. Using the toothpick and some glue tuck the floss into the hole.

Cut your wire and shape it any way you would like and insert into ball with a bit of glue on it.


Now you have some cute bird shelf sitters!

These would look adorable on the edge of some summer flower pots!


I hope you have enjoyed these fun little guys! I hope you give them a try, they are super fun and easy. You could even give the wiggle eyes, that would be cute also.

Thanks for stopping by and make sure you stop by often as the designers always have great ideas!


Friday, April 24, 2015

Quick Tip Time

Hi, it's Ann (http://annmakes.blogspot.com) today with a neat tip for our Creative Paperclay® peeps!  Did you know that Creative Paperclay® sticks to many surfaces without needing extra adhesive?  Isn't this cool?  Well I tried this on a canvas and I was delighted to see the results.  Which made me try to use the product as a stencil paste.  It worked!


So there you go lovely peeps, Creative Paperclay® can be used like a paste on canvas.  Once it dries it can be sanded and painted.  It is a great way to add dimension to an otherwise flat surface and create some interesting art work.


 Thanks for stopping by, and please share your own discoveries with us.

Thursday, April 23, 2015

Create a Journal for You and Your Friends

Take an old book from a thrift store and turn it into a journal for yourself or for a gift. Simple and easy.

Supplies
Old book
Gesso
Paint
Creative Paperclay®
Stamps
Collage elements


I started by painting gesso on the interior pages. This adds a little weight to the pages as well as give you a great surface for journaling on. I let some of the text show through for interest.


Next, I added Creative Paperclay® on the cover of the old book and added texture and pattern by brayering stamping and stencils on the clay.


I added paint, metallic rubs and then glued on collage elements.

This is a great gift for all ages. Have fun.

—Darlene Olivia McElroy

Tuesday, April 21, 2015

Spring Birds by Linda Hess & her 2nd grade students

Hi all!  Spring has sprung in a big way here in Virginia.  The trees are out, the birds are singing, the allergy eyes are itchy!  All of this has me creating wonderful Spring projects with my art classes.

A few weeks back (just before Easter) I made pinch pot birds with my 4th graders.  We used earthen clay that goes into the kiln to cure.  Sadly I had a few students who trapped air in their bird sculptures...the result of this is EXPLODING birds in the kiln.  Sadly, when they explode they not only destroy that creation, but they take out a few around them as well :-(  For that reason, when I decided to create birds with my 2nd graders I wanted to simplify the process and remove the possibility of the creations meeting an "untimely demise".  Naturally I pulled out my go-to airdry Creative PaperClay.

To create these birds you only need a few materials:
Creative PaperClay (obviously)
a small bowl of water
a damp paper towel
tools: plastic knife, pokey tools (a pencil or pen will work for this!)
acrylic paint & a brush

That's it!  Now to create.
1)  For my 2nd graders I cut each package of Creative PaperClay into 6 equal pieces.  Each student received a piece of clay and a damp paper towel. 
2) The piece of clay was torn in half.  One half was placed into the damp paper towel to keep it moist (lay out the paper towel, place the clay on one side, an then fold the paper towel over).  The other half was rolled into a ball and then into an egg shape. 
3) The egg shape was flattened to create a bird body (no thinner than a pencil).  Wasn't that easy??  Now, time to add details!

NOW any of you who work with children know that they all go to their own beat when creating.  You can tell them "We are creating birds", but they will come up with other options..."Can I make a bunny?" "Can I make a snake?" "Can I ...?"  You get the idea.  So of course when I started to demo the details, the questions began.  The bunny option got a yes...the snake option, a no...and so on.

4) "Remove the extra clay from your paper towel.  This will be used to create wings, beak, eyes, and any other details you wish to add." 
5) For a beak, roll a ball of clay.  Flatten slightly.  Pinch one end to form a tear drop.  Dip one finger in the bowl of water and rub onto the bird shape where you want to place the beak (the water forms a glue between the 2 pieces of Creative PaperClay). 
Press beak into place.  Edges can be smoothed and beak lines can be added.
6) For the wings, repeat the beak steps, but with larger balls of clay. 

Again, dip one finger into the water and rub it onto the bird body.  Press wings in place.  Detail wings if desired.
7) Eyes are SUPER easy...just 2 small balls rolled and pressed into place above the beak (using the water "glue" of course). 
8) Add additional details and then set the bird aside to dry. [NOTE: Clay can be "speed dried" by placing into your oven at 275 degrees for ~20-30 minutes]
9) Once dry, paint with acrylic paints.

That's it!  I hope you have enjoyed this Spring project and the simplicity of using Creative PaperClay.  Here are the birds that my 2nd graders designed.  As you can see a few of them go to the beat of their own drum, but that is what makes my job so rewarding...seeing and experiencing the creative souls that surround me on a daily basis.  I never know what will emerge from those pint-sized brains and I love the surprises :-)


Tori's Tip for April - Check your mailbox for FREE Craft Supplies!


Some people might hate getting "junk mail", but I always look forward to my fresh batch of craft supplies!  I can use the paper for paper maché, either in strips or after it has been through the shredder, and use the windows from the envelopes, shiny advertisements, etc. for collages or embellishments.  My most favorite junk mail gifts though, are the great tools that come disguised as credit cards.  There are many uses for them just as they are; smoothing clay, spreading glue or paint, scraping or using as a spatula when clay sticks, smoothing repairs of fresh clay onto dry, and slicing clay rolls, but they can also be cut and shaped in a variety of ways as well! (As an added bonus, the sticky junk that holds them to the envelopes can also be used to lightly tack small objects in place on a stick to hold the object for painting).

Here's a sampling of some of the ways the cards can be modified:


Turning the cards into clay texturing/sculpting tools with specialty scissors gives you lots of options.   The tool can be used for creating rough textures or smooth - if you are going for the smooth look, dip the tool in water before using, scrape across the clay a little bit at a time, and wiping off excess clay as necessary.


As always, play, experiment, and have fun!
Thanks for joining me on the blog

I'd love for you to join me for more projects & art adventures on my personal blog
Find me on Facebook, or peruse & ponder pics with me on Pinterest
Connect on Google+ or see what new creations I may have on Etsy


Monday, April 20, 2015

Alice Inspired Pin Cushion for Mom

 Good Morning!

If you have a Mom who likes to sew then this cute teacup pin cushion gift will be a real winner!


It doesn't matter how old you are, mom will always cherish something handmade by you. She still has a shoebox full of magnificent drawings you created in elementary school .... am I right?


Here is what you will need

Creative Paperclay®
Sandpaper
Sandits®
Styrofoam ball
Poly fiberfill
Fabric
Plastic flowerpot
Baking spray
Sewing pins
Needle and thread
Americana Muti-surface paint®
Mod Podge®
 E6000 glue

Let's get started

Making the cup
1. Lightly spray a plastic flower pot with baking spray so that your paperclay will not stick.
2. Roll out a sheet of paperclay and drape over the flower pot.
3. Trim off excess.
4. Smooth out paperclay using water on your fingertips
5. Cut a strip of paperclay and roll it to form a solid tube. (This will be for your handle)
6. When dry smooth out the cup more (if needed) using a fine grit sandpaper. The handle had a lot of  curves. I found it was easier to finish using Sandits®.
7. Paint your pieces and decorate to your liking.
8. Attach the handle to the cup using E6000 glue.
9. Mod Podge the entire piece to seal.


Making the pin cushion 
1.Cut a square piece of fabric large enough to wrap around your ball.
2.Wrap some fiberfill around the styrofoam ball.
3.Wrap your fabric around the ball to hold the fiberfill on pinning in place.
4. Take a needle and thread and stitch together at the bottom of the ball gathering excess as you go.
5. Remove the pins.
6. Glue the finished fabric covered ball into the cup using E6000 glue.


Top view of the finished pin cushion
Thanks for following along with the creation of my quirky Alice in Wonderland inspired pin cushion.

Happy creating!
Shari


I have been creating art for as long as I can remember. I studied graphic design in Portland, Oregon before moving to Denton, Texas and putting all my focus on creating mixed media art. In addition to being on the Creative Paperclay design team, I am a contributor for the Robin's Nest Design Team, an article writer for Mixed Media Art, and a blogger for DecoArt.
I strongly believe in giving back. I volunteer at Scrap Denton Creative Reuse Center where I teach workshops, art camps, and perform art demos. I am very passionate about mixed media art and enjoy helping and watching others discover their creativity.
Follow more of my creative journey on My Altered Life's blog and My Altered Life on FB

Sunday, April 19, 2015

Lynda's Tips

Creating with Creative Paperclay and Delight products can be so much fun!   Each of the products can do different things - the Delight product dries faster, the Creative Paperclay product is a bit more messy to work with - yet imperfections fixed easy!  Both are fun to work with!
 

My last project (pictured above) turned out exactly the way I wanted it to - and was a bit of a learning experience for me all at the same time!  I got out of my comfort zone, and now can't wait to get the other things created for Mothers Day - and birthdays coming up that I now have jumbled in my mind!  This months tips - are based on the project I made!      
  • If you do use the oven to dry your pieces a bit faster - they are not completely dried on the inside, but they are dry enough to complete your project.  If it is a flat project - keep it flat until the piece is entirely dried, or it will dry funny. (Lesson learned)   
  • Have a container, drawer, or area for the supplies you use, such as mold's, pieces that have been molded but not on a project, or tools you use specifically for this.  That way, you don't have to go to different places to locate everything you want to work with!  If you do use mold's, make sure to create a few pieces to have around when you need them!  
  • Get out of YOUR comfort zone!  Do something different or unique!  Just play with the product...don't waste it, but play with some of it!  Look back on the blog, check out Pinterest - tweak something you have seen into your own inspiration!!!  
Mothers Day is coming up - I have the perfect thing for both mom's now in my head, I just have to get them on paper and started!  I can't wait to share them next month!  Have fun, and see you next month!  

Lynda Jeffs
Creative Paperclay Design Team
and Memories in Tyme      
 

Friday, April 17, 2015

Spring Bird's Nest

Spring is on its way!! We hear the birds chirping their morning greetings. This month Chloe and I decided to make our own bird's nest.

We used Creative Paperclay®, a clay extruder (my favorite clay toy tool), and a canape cutter.

Chloe rolled a piece of clay into a log and put it in the extruder; I did the plunging. We coiled the extruded strands into a nest shape.

Next, we rolled out a piece of clay to about 1/8" thickness, and cut a circle for the back of the nest. We used a thin layer of slip between the nest and the circle to be sure the two pieces fused. This circle serves two purposes—it closes the bottom of the nest and provides a flat surface to attach a pin back or necklace bail.

Three small pinches of clay were formed into egg shapes to fill our nest. 

After the nest and eggs were complete dry, we began the painting process. Before applying paint I always seal pieces with PPA. A short wait for the PPA to dry, then painting. We used raw umber acrylic paint for the nest and turquoise, golden yellow, and maroon for the eggs. (Game of Thrones fans do you see a connection here???) When those were dry, we dry brushed both the nest and eggs with a gold metallic acrylic to add highlights. 
Our nest and eggs are tiny!!

Here's our finished bird's nest—the perfect decoration for spring. And don't forget that you could add a pin back or jewelry bail to have a wearable piece of art.


Carole

Chloe

Table Cell Table Cell