Supplies:
metal over door clothes hanger
Pliers
foam-core or cardboard
Creative Paperclay® modeling material
Delight™ air dry modeling compound
acrylic paints, paintbrushes
Sandits sanding sticks
collection of flower molds and cookie cutters (I created all of my own, the smaller flowers were from molds of various jewelry pieces, and the large flowers were cookie cutters made from my patterns - see how to make your own cookie cutters from cardboard on my January post)
gesso
acrylic varnish
coffee filters, newspaper, or other paper maché material
white glue
 |
| This is what I started with, a simple metal door hanger that hadn't been in use |
Using pliers, I straightened out the bars that allowed the piece to hang on the door, then laid the flattened piece on a large piece of paper and traced around it to use as the basis for my design.
As you can see, the bars aren't perfectly flat. That's okay, they will still work for this project. I also enlarged the screw holes slightly to allow standard nail-in picture hangers to fit through them. When I was done modifying the metal, I applied several layers of gesso and a coat of varnish to cover any exposed metal in the chipped paint areas, to prevent the metal from rusting.

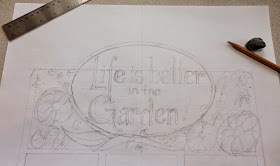
Once I had the design sketched out, I cut a piece of foam core to fit the outline, then glued it to the metal piece. To further secure it and create a smooth transition from the metal to the foamcore, I covered all of the connecting edges with a layer of my favorite paper maché material; coffee filters and white glue.
When the paper maché layer was dry, I applied a thin layer of Creative Paperclay®, and then added cut-out clay forms over that. I made extra leaf shapes to add in with the flowers later, and set this all aside to dry while I created some flowers!
The flowers were made by mixing various colors of acrylic paint with Delight™ air dry modeling compound, then pressing the clay into molds or rolling the clay out, stamping it with a cookie-cutter, then cutting out the clay shapes and assembling the pieces (a technique very similar to the one demonstrated by Linda Hess).
I laid them on the design sketch while I was working, and also made some extra flowers for filling in areas, or to use should I decide to change the design a bit.
...BTW, there are lots of great flower making techniques on this blog, just type "flower" in the search box at the right under the blog heading!

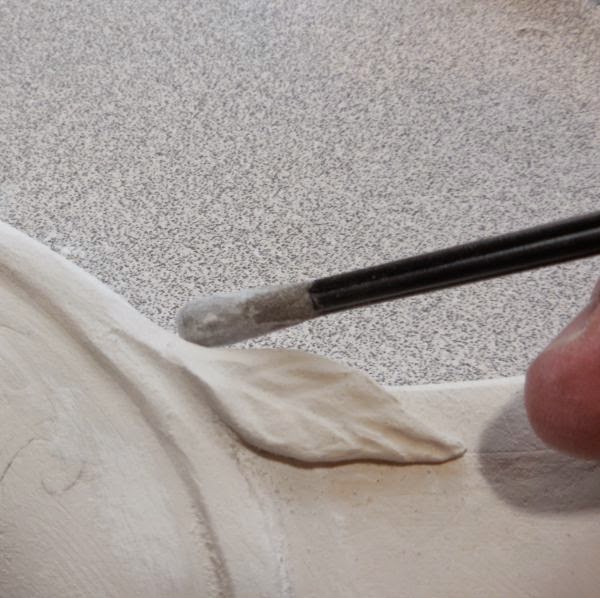
When my base piece was dry I used Sandits to shape and smooth the leaves and vines. They work well for getting in to smaller areas, but what I like most about them is that they seem to have just the right amount of flexibility and length in the shafts to make smoothing around curved areas easy.
When everything was sanded, I applied a base application of paint in various colors of green as a background to the flowers.
All that was left to do was glue the flowers and leaves in place, paint the saying in the center, and add some sparkle! Although you can't see it very well in the photo, I used Twinkling H2O's on the center lettering, and on all of the flowers except the small purple ones. I wanted the effect to be subtle, which it is, the glimmering just catches my eye as I'm heading out to the garden!
I hope Spring is blissful wherever you are! Thanks for joining me here!
I'd love for you to join me for more projects & art adventures on my personal blog


What a fabulous idea. that sure is very pretty place to hang up your things.
ReplyDeleteThis is gorgeous!! What a wonderful tutorial
ReplyDeleteThis comment has been removed by the author.
ReplyDelete