Hi I'm Susie
Krichbaum of Art by Susie K and new design team member at Creative
Paperclay®. Join me every 2nd Friday
starting November 11th, 2019 for tutorials, tips and tricks using Creative Paperclay® and DelightTM air dry modeling compound to create the fun and unique.
A little bit
about me: I'm located in sunny SW Florida and in my studio is where I spend most of my days. I create peculiar characters that tell a story - from the oddly
sweet to the peacefully zen. I pull inspiration from me Irish Roots, the allure of nature, fascination with strange tales and a love for Halloween. I have been published several times in Art
Doll Magazine and Prim Magazine and have exhibited my art at Spirits in Sanford
Art Show in Orlando, FL, Hauntizaar Halloween Art show in St. Petersburg,
FL and Heart of Halloween Art Show in Cumming, GA.
I have been
using Creative Paperclay® modeling compound since
2009 and it’s become my favorite clay to use.
For this tutorial I am using both Creative Paperclay® and DelightTM air dry modeling compound to create this almost feather light Christmas ornament. I hope you enjoy browsing
the pictures and have fun creating your own unique Santa Gnome. Just for kicks I included a fast motion
video at the bottom of the page, one of the sculpting process and one of the painting and embellishing process. Sometimes it’s fun to watch the hands work (even though I go out of frame a few times, but I’ll get better at that).
Supplies:
Creative
Paperclay® and DelightTM air dry modeling compound (I used both / option to use one or the other is
fine)
18 Gauge
wire (I buy at a hardware store like Home Depot)
Foil
Masking tape
Small cup of
water
Paper towels
Tools for
cutting the wire
Clay tools
(optional) fingers work very well
rolling pin
or large dowel, smooth bottle etc
Lace or
doily
White and
red paint
Antique
medium
Varnish or sealant (here I'm using a brush on so it stays sticky
for the glitter)
Red glitter
Clear
glitter
Small piece
of garland or ribbon
The most
import thing on the list is to have fun and make it your own, add your own
twist and see what you come up with.
Creating the Armature
 |
| Cut a piece of 18 gauge wire about 20" long and make a soft fold or loop joining the two ends together. Start to twist the wires about 6" from the top. |
 |
| You end up with a little fish with the body roughly 5" long. Everyone will have slightly different measurements. No Gnome is the Same :) |
 |
| Pull off about a 10" sheet of foil and start to form it to fit in the middle of your "fish" shape |
 |
| Setting inside the wire and keeping it to about 1" wide from front to back. Using the armature gives strength to the piece as well as helping you use less clay and have a lighter piece. |
 |
| Secure the foil in place with masking tape. Tape also give the clay something to hang onto during the modeling process. |
 |
Now you look like you've created a bug with long antennas, here in Florida it's the making of the worst kind of bug we have, la cockroach!!Adding the Clay |
 |
| Start to wrap your clay around the masking taped area of your piece. Trim off the extra and with wet fingers work the clay into a nice smooth piece. |
 |
| Wet the area where you want the nose to go and place a small ball of clay in place. You can go any size you want, his nose is his only form of expression so you can be creative here. |
 |
| Starting to swirl like an ice cream cone. |
 |
| I decided to leave the back plain for a signature or maybe dating the Christmas year or a simple Christmas message. |
More clay and texture for the hat
 |
| Wrap the clay around the hat area and trim off the excess. |
 |
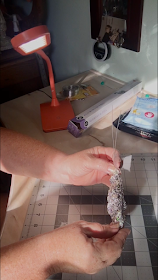
| Yay! more texture. I am using a doily here to press in some interesting impressions onto the clay. This is a fun technique to use and super easy. Do as much or as little as you want. |
 |
| There he is all ready to dry overnight. In the morning he will get a good ole' sanding and paint job. |
Sand, paint, glaze and embellish
 |
| Using a fine grit sand paper start to gently smooth out the rough areas, but don't sand away all the texture details. Use a damp cloth to remove the clay dust. |
 |
| Using gesso or a white full body acrylic paint, coat the entire piece with paint and let dry. Don't forget to paint the nose. I used a flesh tone mixed with red. |
 |
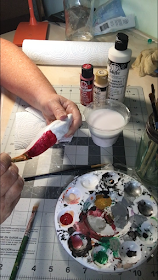
| Start by painting the hat. I used red, but any color will do. The paint extended right to the bottom edge. We will be adding a little white trim after it dries. |
 |
| Using the paper towel to remove 99% of the medium, but allowing it to sink into the texture and around the bottom of the hat like a shadow. |
 |
| I also use Q tips to get into the small spaces. |
 |
| Repeat the antiquing for the hat. |
 |
| Allow everything to dry before adding a glaze. I used a brush on glaze so it would remain tacky to allow glitter to stick. |
 |
| I started with the hat and glazed only the red. This way I can shake some red glitter on the hat and it won't get stuck in the beard or white fur around the hat. |
 |
| Tadaa! Little red sparkle hat and I couldn't resist adding a touch of glitter to the nose. |
 |
| Repeat for the beard and hat fur and add white glitter. Loop the wire in an attractive way and cut off any excess. |
 |
| Add a sprig of holly or tinsel. Personalize by painting the date, name etc on the hat. Make it your own and have fun with it. Click here to see the video for the sculpting process
Thank you all so very much for visiting and taking a look at this tutorial. I hope to see you again in December.
I invite you to visit my website and other social media platforms to see what I'm creating for the holidays.
Happy Thanksgiving,
Susie Krichbaum
Contact: Susiewhc@gmail.com
Facebook and Instagram search @artbysusiek
Website : https://artbysusiek.com Here you can sign up for my Creative
Breakfast Club
ETSY: www.artbysusiek.etsy.com
PINTREST: https://www.pinterest.com/susiewhc/
|


Great Job SUSIE!
ReplyDeleteThanks Carly! Simple and Sweet
ReplyDeleteWOW I am going to have to mark my calendar and stop back regularly. Thank you! Great job.
ReplyDeletelove love love
ReplyDeletelove love love
ReplyDelete