Showing posts with label hearts. Show all posts

Wednesday, February 13, 2019

Valentine Love


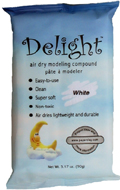
Happy almost Valentine's Day!  For my blog post this month I went back in time...WAY back to when my husband and I were dating for a couple of throwback photos.  I put those together with texture, Pan Pastels, a few hearts, a painted canvas, and (of course) my favorite Delight! Air Dry Modeling Compound.

Over the summer I experimented with acrylic flow painting and a variety of ways to create the "flow".  It took 3 attempts and a large number of canvases to get my mix "just right", but in the end I was thrilled with the canvases.  I went to my stash of painted canvases for the base of this project and found the perfect one!

As I looked at the canvas I knew I wanted wording on it.  Bless my man's heart, he surprised me with a Cricut Maker for Christmas.  I knew it was about time to open the box and experiment (yes, it took me THAT long!).  After learning the basics and going through a bit of frustration (thank you Leticia for all the hand holding!), I was able to create the perfect saying for my canvas.
NOTE 1:  I would NOT suggest starting out with something this difficult, but then I am known for jumping in with both feet. NOTE 2: If you don't have a Cricut the saying can be added with sharpie directly to the canvas OR printed on vellum and attached to the canvas OR printed and decoupaged to the canvas (this option will cover the painted background though)

 With my saying firmly attached to the canvas it was time to start the clay work.  This is my FAVORITE part!!  Delight Air Dry is my go to choice when it comes to "quick & easy" projects (not counting the canvas and Cricut experiments 😉).  I pulled out a few tools to work with:
1) texture (a rubber stamp sheet and a favorite leather stamp)
2) Pan Pastels
3) a couple of heart cutters
4) a knife/cutting tool of some sort
5) and (of course) Delight Air Dry Modeling Compound

Pull off a bit of clay and flatten it with an acrylic roller or rolling pin or pasta machine (I have all 3 in my studio).  Once flattened, impress with the texture.
 Cut out a heart (whatever size needed to frame the chosen photo elements).  
Use the knife (unless you have a larger heart cutter) to cut around the heart, creating a small frame once the inner heart is lifted out.

Remove the inner heart and set aside.  Place frame around photo element and trace the outer edge with a pencil/pen/marker.  Remove the clay frame and cut out photo.


The texture of the frame is highlighted by rubbing a bit of Pan Pastel over the top.  For this step remember to use a light touch and little bits of the pastels!  I had a small amount fall into the embedded texture...a quick "blow" removed it.
I repeated the process (flatten, cut, texture, pastel) with additional clay.  This piece was textured with one of my favorite leather stamps.
 (Oh my goodness, we were young!!)


Now to arrange the components on the canvas.
I thought it looked a little heavy.  It needed a little something else.  I removed both solid hearts, used a tiny heart cutter and cut out the insides of each. 
First I switched the insides
That looked nice, but still a little "heavy" when placed on the canvas.  So I decided to open them up.  After a bit of experimentation with the arrangement, I stopped with a mix of open hearts and solid hearts.  I let the components dry in place.  Once dry they were glued down (any glue will work but my favorite is Aleene's "The Ultimate! tacky glue).

I hope you have enjoyed this functional art piece.  You have enough time to create one of your own for last minute gift giving!  Have a beautiful Valentine's Day with your significant other.  See you next month!
 ❤


Thursday, June 14, 2018

Jim Dine inspired heARTs by Linda Hess

In my roll as an art teacher I love to expose the students to new artists as well as materials.  Ask any of my students (no matter the age) what is the favorite medium and you will get a resounding "CLAY!".  What better way to introduce my 3rd graders to the work of Jim Dine than with a mixed media project that includes Delight™ Air Dry Modeling Compound!  Let's get to work.

I have my 3rd graders once a week for 45 minutes.  This project took a total of 3 weeks to complete.  Today's blog post shows the first week of creation: the heart 💜

Materials:
Delight™ Air Dry Modeling Compound
watercolor markers (my classroom is stocked mainly with Crayola⌐)
texture tools (plastic texture sheets, wire tools, toothpicks, etc)
damp paper towel

Step one:  I opened each package of Delight™ clay and cut the block of clay into 8 pieces.  Each student received a piece of clay with instructions that the entire piece of clay had to be used during classtime to create a heart.  The piece of clay needed to be divided into however many colors each student wanted for his/her heart.  Once divided, the clay pieces can be placed on the damp papertowel and the towel folded over to keep the clay moist until ready for use.

The really cool thing about the Delight™ clay is that it accepts color easily.  I demoed how to dab the marker onto the clay and then fold/mix the color in.  Deeper color saturation can be achieved by dabbing and mixing multiple times. (PLEASE NOTE:  Colors will dry lighter than they appear while "wet")

Many of the students were so into the mixing process that I had to remind them to start creating a heart!  Others only heard the "dab color and mix" ignoring the separate colors instruction (ooops).  Thankfully I only had one or 2 who ended up with "mud" clay.

Step two:  Begin forming the heart.  
This (of course) is a freeform project.  I demoed how to take a ball and roll it to form a teardrop.  The teardrop was then flattened and then top dented in with the back of a plastic knife to create the heart shape.  If working with children you will need to give helpful hints such as "Do not flatten it as thin as a piece of paper!" "Use gentle pressure" and "make sure it does not stick to the table!"

The students quickly got into layered hearts much to my excitement.  2-3 hearts were stacked (in different colors), snakes of clay were wrapped around, dots of clay embellished...we had a whole lot of creativity going on!!

  Step three: texture and embellishment
I am all about embellishment!  A plain, colored heart makes more of an imact with the addition of texture and design.  We looked again at pictures of Jim Dine Hearts.  They are so vibrant in both color and design.  The 3rd graders immediately started using wire tools, texture sheets, toothpicks and pencil tips to bring the hearts to life.  Oh My Goodness, so gorgeous!!

I always tell my students "Your piece is not going to look like mine or your neighbor's or your best friend's.  It will look like Yours and that is the way it should be". One of the students who ended up with "mud" during the mixing process was much happier with his heart once the detail was added. 

Step four:  Set the hearts aside to dry
I have stackable wire racks (a clearance find a few years ago) that I placed the hearts on to dry.  The wire rack lets air circulate around for more even drying.  If left on the wax paper (seen above) the top will dry, but the bottom may stay damp.  Since I only see my 3rd graders once a week, the hearts had plenty of time to dry by the next class.

Next up:  More pattern and texture!
Materials:
craft sticks (I used the thinker tongue depressor type)
crayons
watercolors

Step one:  Craft stick crayon resist
Next class I had each student retrieve his/her heart.  Then they chose enough craft sticks to create a surface large enough for the heart to be mounted on without overlapping (most took 6-7 for the base and 2 more for the sides).  FYI for teachers: Have students write names on the back of every single stick!  Trust me, it will make life much easier if anyone doesn't not complete the "backing" in one class!
We talked about crayon resist and the need for a firm pressure when creating the patterns on each stick.  Students were instructed to add patterns to every stick, leaving space between the patterns for paint.  Of course I had a few friends who decided to just color and not paint (gotta love those "dare to be different" friends 💜).  Once the patterns were completed, they began to watercolor.

 We let the sticks dry before arranging them to form the backing. (NOTE:  I used 6 sticks,side by side, for the backing and then glued one more stick along each edge to hold the frame together.  Students decided if the glued pieces would become the top/bottom or the sides of the frame.  Once complete, the hearts were glued in place.
Art by Olivia M (left) & Angelina O (rt)

Step two: Wire & beading
This step was completed during the third class.  I predrilled holes, one in each corner and one in the center of each side and the bottom.  Beads and wire were put out. 
As you will see from the pictures, some of my students do not understand the term "less is more" (haha).  They definitely had a great time embellishing.  I sadly had a substitute for this final day, but she sent me process pictures and I got to see the finished mixed media hearts upon my return.

I think Jim Dine would be amazed at how the children were inspired by his art.
 Art by Olivia V (left) & Paige E (rt)
 Madison C (left) & Kendra (rt)
 Jasmine D-V (left) & Isabelle G (rt) 

 Diego R (left) & Alexis C (rt)


Saturday, May 11, 2013

Conversation Talisman Heart Pendants

I absolutely love incorporating jewelry with superstitions, don't you?
I'm Diana and I'm going to show you how I made these beautiful conversation talisman hearts pendants:


You will need:

Creative Paperclay
Acrylic Paint (I used Burnished Copper by Dick Blick)
Shimmer markers
Dictionary or text book pages (or even type and print your own on your computer)
Spray acrylic sealer
glue stick

The process is simple.
You're going to roll a quarter sized bit of clay into a ball, then pinch the bottom, and shape it into a triangle. Once you've done that, you can go ahead and get a toothpick, to shape the top (that will be the shape of the heart).
Make a few if you want, like I did:

Remember to poke a hole in them, for easy jewelry making (you can do this using the aforementioned toothpick).
Let them dry for a bit, then paint them up:


Be generous with your paint, and give them a few coats of paint.
After that, apply some words to resonate your superstitious intentions. You can use some words such as "Dream", "love", "hope".
Once you have applied the words, you can go over the edge of the text with a shimmery marker. I would give you the brand name, but the marker is so old and used that the name has rubbed off, and I my memory fails me. But use whichever you prefer.
Once you've done that, go over them with a generous spraying of Acrylic Sealer. This can be found at the art supply store.
And Voila, you end up with this:


Sometimes clay cracks a bit, and in this case, that is perfectly okay. In fact, it's better that these hearts do not look too "perfect" since I did intend them to be primitive looking.

Thanks for reading my tutorial! Happy Crafting!


Diana

Thursday, January 17, 2013

Jess B's - Valentine's Delight Day Cards

Hello and Happy Thursday

Finally had an opportunity to use
DelightTM 
and it works great!

Valentine's Day Cards
Mixed my acrylic paints red, light pink and black  (not shown)
with DelightTM and lled out a very thin layer
used a heart cookie cutter 

let dry (read instructions)
 DelightTM  it super light and feels like foam!

I had more fun by using stamps and stencils

Hero Arts Zig Zag Cling Stamp
with Tim Holtz Antiqued Bronze Distress Stain
 Creative Workshop - Branches Stencil

Masculine Card


 Feminine Card


Friday's is our family night
I will let them have fun using DelightTM 

 Thanks for 
stopping by