Friday, May 28, 2021

Create a Propagation Stand


Hello everyone and happy Friday, Cinnamon here and I am going to show you how I created this propagation stand for plant cuttings. I have been picking up these test tubes from Michael's for a dollar for over the past few years and I've finally found a way to make good use out of them.

Supplies:

  • Creative Paperclay
  • Test tube (Can be found in a local craft store)
  • Steel Galvanized wire (16 gauge or lower in numbers for strength) 
  • Pliers
  • Sand paper
  • Masking Tape
  • Acrylic Paint
  • Tape measure
  • Sealer, varnish
  • Xacto Knife (optional)


Make sure that the wire you use can hold it's shape and support the weight of a test tube filled with water and a plant cutting. I am using an 18 gauge wire here, but I strongly recommend going with a stronger wire that's at least 16 gauge. 


Start by making a a box out of the wire to start the base of the piece.


Use your tape measure if you want to make sure that all of your sides match up. 
I used it here to ensure that the back support beams were the same length for stability reasons.


Get your masking tape and start wrapping around the areas that you wish to have covered with clay. I left an opening in the top so that I would be able to put the test tube through it.


When you are done with the tape, begin covering the piece with clay. Keep in mind that the bottom part of the base should be heavier then the top so that it doesn't topple over while it is being used. Make it twice as thick as the top and a bit wider if you need to!


When covering the piece with clay, keep an eye on the opening on the top part that holds the tube. Check periodically by placing the tube in the middle to keep track with how wide the opening should be.


When checking the size and fit for the stand with the tube, push the tube down slightly into the bottom. You'll want to can make an indent for the tube to sit properly so that it doesn't slide around after the piece is done. 


Set the piece aside to dry.


When the piece fully dries, sand it down to get it to the level of smoothness that you would like it to be. I'm using a sanding stick to open up the center a bit more, the opening was too small for the tube.


Paperclay shrinks a bit while it dries, keep track of how the tube fits throughout the process and make adjustments if needed by either sanding the clay down or adding more. 


Paint your piece with acrylic paint. I used black here for the base coat so that I could top it with the a gold dry brush technique.


I am lightly brushing on gold paint on top of the black undercoat here to give the stand an antique look. Seal with varnish when completed.


Here's how it came out! I am accepting all forms of positive vibes to help encourage my little basil cutting to grow some roots!

Thank you all once again for stopping by, and I hope that you enjoyed today's tutorial! You can find Creative Paperclay® at the following retailers Creative Paperclay® Online Store, Michael's, Amazon, Joann's.


See more of my work at Melandolly.com, catch updates on 

my Instagram page and here is a link to my shop!


Friday, May 7, 2021

May 2021 First Friday Fan Day


Need some inspiration for your next Creative Paperclay® project? Check out what folks are making with Creative Paperclay™.


Amazing Miniature Creatures
Tea Party
Decorative Birds
Earrings (this works with air dry clay, too!!)

Home Décor Items
Gnome Home
Spring Bugs

HELP US FIND YOU!!
  1. Use the hashtag #CreativePaperclay on all your social networks.
  2. When using Facebook, be sure the your posts and images using the #Creative Paperclay hashtag are set to public, otherwise we won't be able to find you.
  3. Share your projects on the Creative PaperClay® Facebook page.
I'm always trolling the web, looking for great Creative Paperclay® projects. If you find something, post it on our Facebook page.

GOT QUESTIONS???

Find the answers to your paperclay questions. See what other folks are creating. Stop by our Facebook group and say, "Hi!" Creative Paperclay Q&A
Carole

Monday, May 3, 2021

Make a Marbled Bowl with Creative Paperclay®

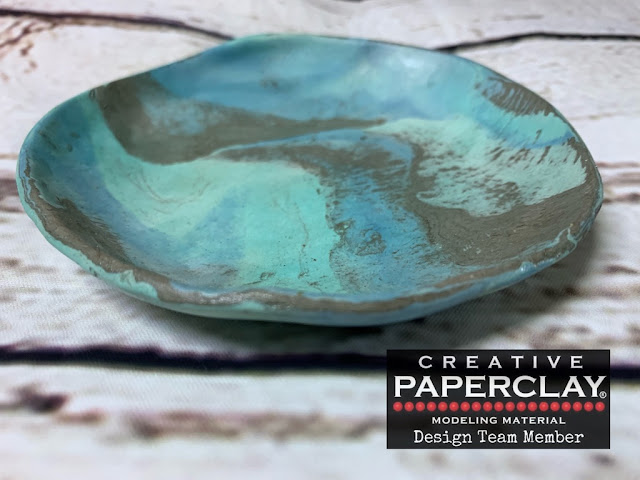
Hello, welcome to another tutorial. This month I have been experimenting with colouring my clay before I use it. This time around I decided to try spray inks and mica powder and they both were a great success. I did three different colours and then slightly blended them to give a marbled effect. I then formed into a bowl shape. When the clay dried the colours has dulled a bit but a little gloss varnish resolved that quite easily. Here is the finished bowl.


The supplies I used are:


  • Creative Paperclay® 
  • Dylusions Ink Vibrant Turquoise 
  • Adirondack Color Wash Denim
  • PearlEx Antique Gold
  • Pebeo Gloss Varnish


Tools:

  • rolling pin 
  • craft knife
  • paint brush
  • water
  • a bowl


Follow along in the video below to see how to make this beautiful bowl. 


I do hope you enjoyed the tutorial. You can share your creations with us on our Facebook page. We would love to see them! For more inspiration have a look around the blog. There are tutorials for many levels using Creative Paperclay®. You can also visit my blog suzettehussey.com


You can find Creative Paperclay® online at Creative Paperclay Co and also at Michaels, Hobby Lobby, Dickblick and Amazon. 


Thanks for stopping by!


Suzette


Blog: https://suzettehussey.com/

Instagram: https://www.instagram.com/papermachepatch/

YouTube: https://www.youtube.com/c/PaperMachePatch

Skillshare: https://skl.sh/2QyIn93

Website:  https://www.papermachepatch.com

Friday, April 23, 2021

How to Create a Cameo Framed Art Piece


Hello and happy Friday everyone, Cinnamon here and I am going to show you how I created this cameo framed art piece.  Follow the steps below to see how this was done.


Supplies:
  • Creative Paperclay®
  • Small hand roller or something to flatten out clay
  • Decorative frame
  • Exacto knife 
  • Sand paper
  • e6000 glue
  • Acrylic Black and gold paint
  • Sealer, Varnish
  • Sheet of black felt


 I have a few of these pretty frames that I brought from my local 5 Below discount store. It has a very vintage and distinguished look so I wanted to create a cameo piece and place it in the middle. I have always admired vintage cameo portraits and wanted to try to recreate one of my own.


***This is not a necessary step****, but I chose to create my own silhouette from an image I found online in Adobe Illustrator. You can just grab a silhouette from a quick Google search online or draw one by hand. 


I took the silhouette and made it to the size of the opening of the frame and cut it out. Again, you can just do this by hand and not get on the computer to do this step.


Once I cut out the silhouette, I used it as a guide to make sure that I create my piece to size.
I have a flat tool that I use to shape clay which allows me to cut pieces of the clay as needed to create fine details. You can use a pin or anything that allows you to shape those little details while the clay is still pliable. It's important to get you basic shape down at this point so that you don't have to do as much sanding and cutting into the clay later.


Keep building up the piece and focus on getting the profile just right. 


I wanted to add a braid to the hair of the piece. My clay was a bit dried out so it broke in a few places when I tried to rolled out thin pieces of it. If you use fresh paperclay, you won't run into this problem. If you do, it can easily be corrected by brushing a bit of water onto the pieces and blend them together.


I took the braid and pressed it into the piece with a wet brush to help it stick in place. I brushed the pieces on the braid with the damp brush to join some of the pieces that were splitting from each other. Set the piece aside and allow it to dry.


Once the piece dried, I did a light sanding to clean up the details and smooth it out.


Be sure to try the piece out in the opening of the frame to see if you are happy with the size. Adjust as necessary.


After I was done with sanding, I moved on to painting the piece with a black undercoat of acrylic paint.


After applying the undercoat, I painted gold acrylic paint onto the piece using the dry brush technique. The braid was fully painted in gold so that it could be the focal point. Set aside to dry and then seal it with varnish.


Take your felt sheet and cut it down to the size of the opening of the frame. After you cut it down to size, glue it onto the back of the frame with the the e6000 glue.


If your piece is dry, glue it onto the frame with the e6000 glue as well.


And this is how it turned out!


Thank you all once again for stopping by, and I hope that you enjoyed 
today's tutorial! You can find Creative Paperclay® at the following 

See more of my work at Melandolly.com, catch updates on 
my Instagram page and here is a link to my shop!


.  


Monday, April 19, 2021

Kitchen Witch Tutorial


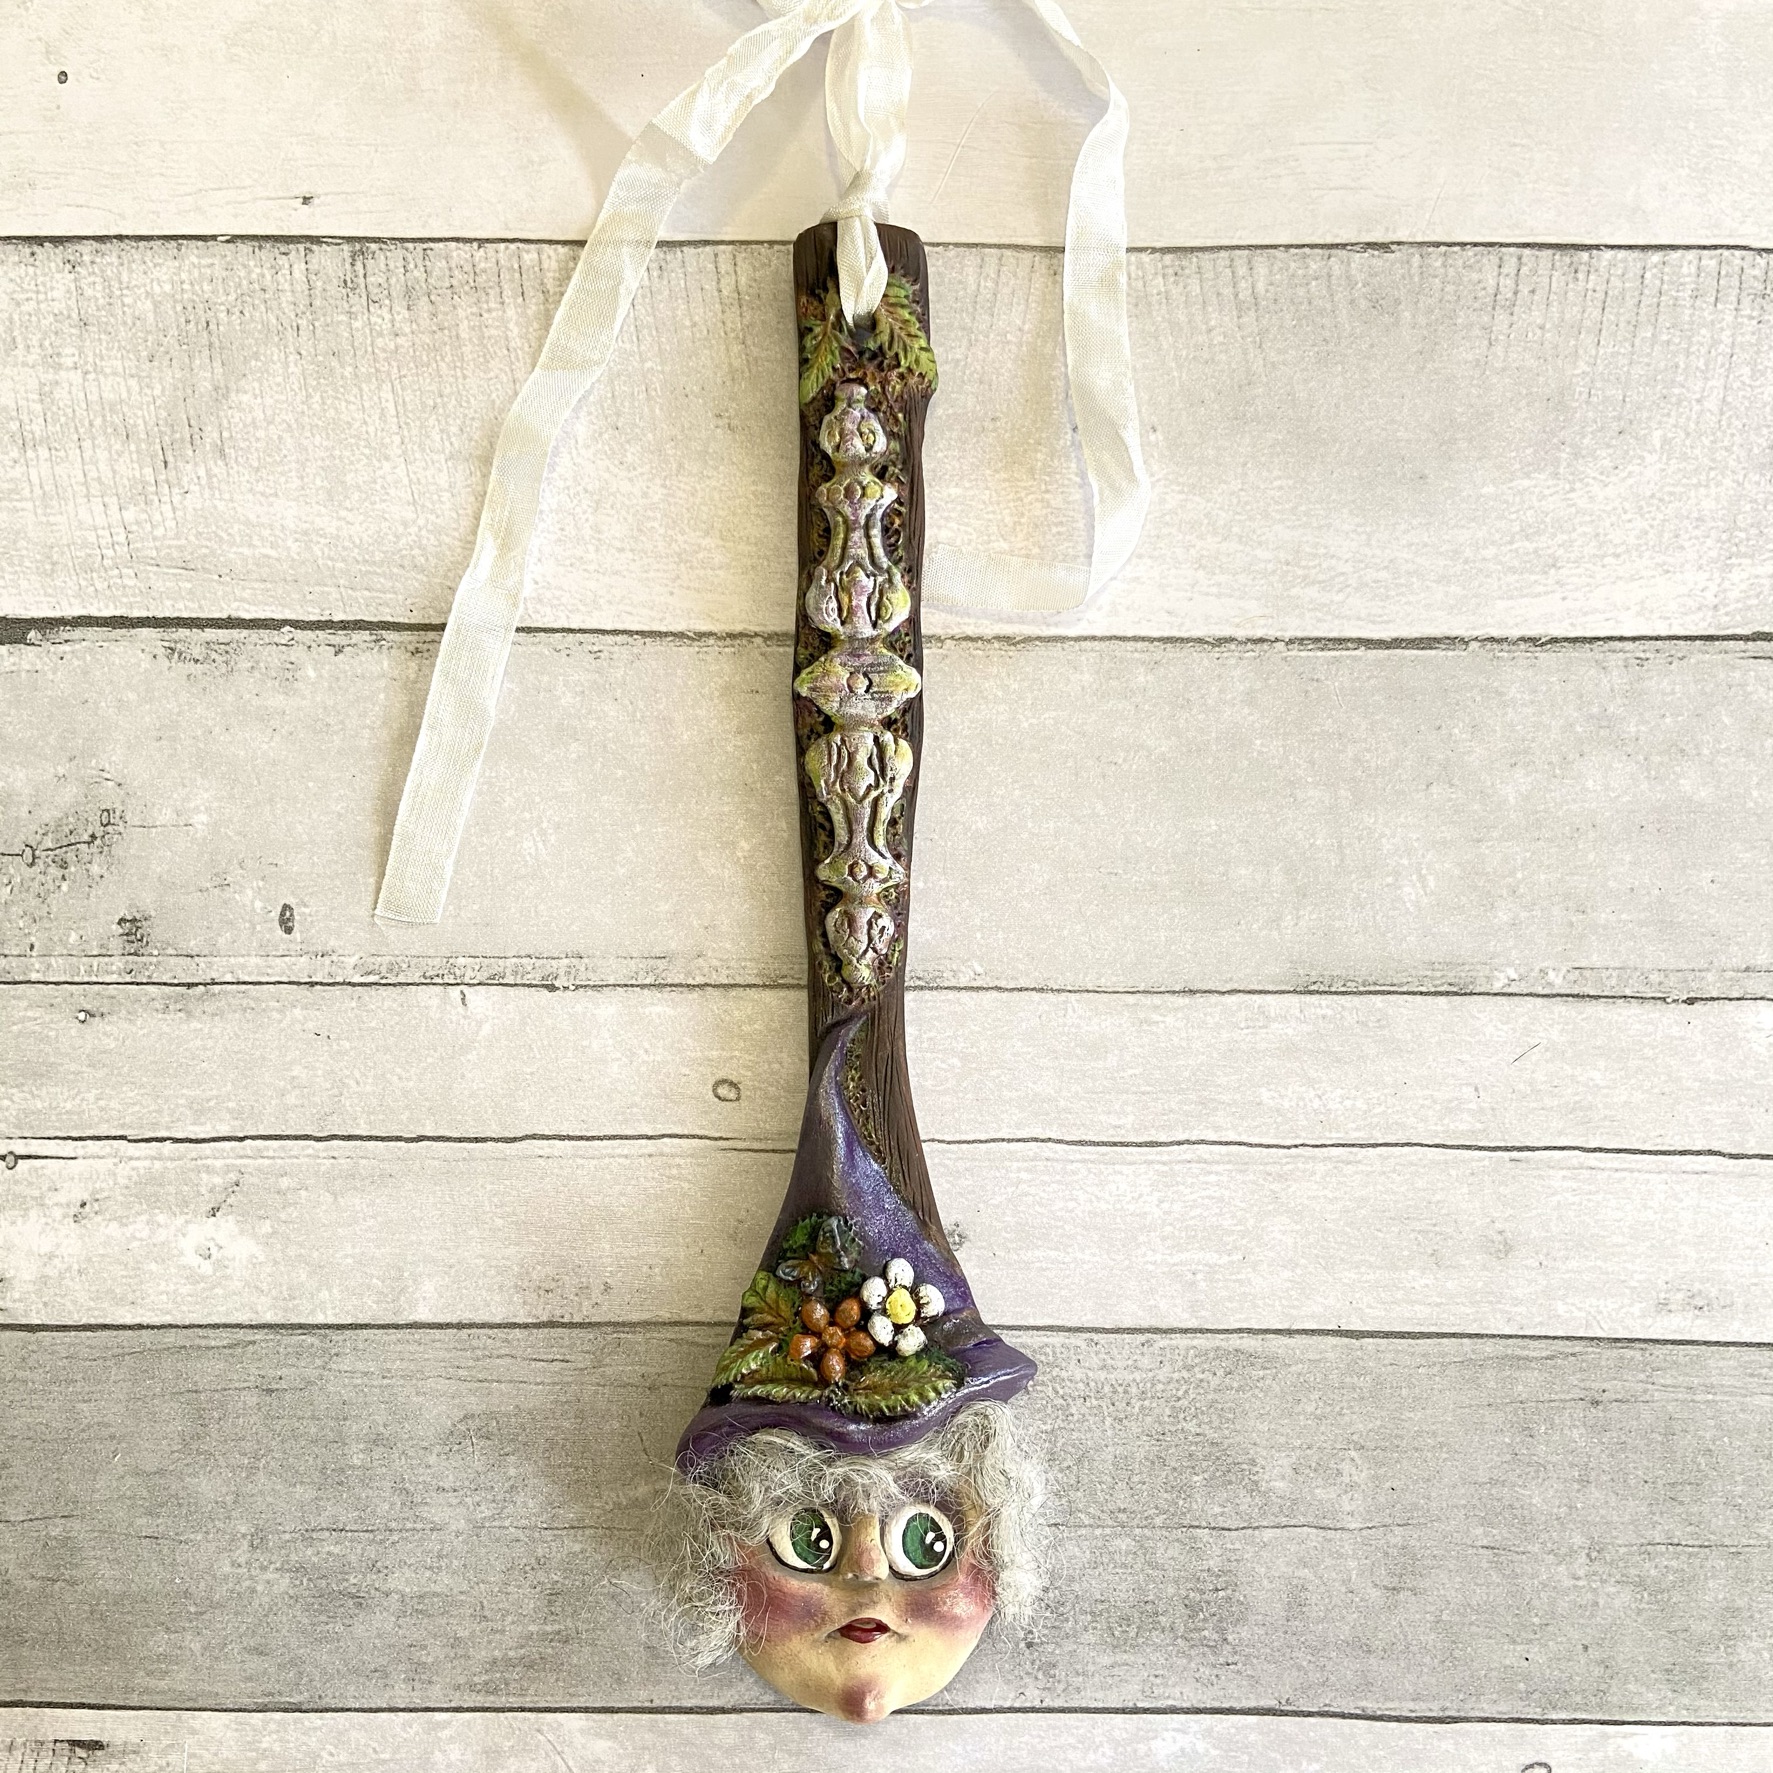
Protect your home, hearth and the next stew in your caldron by hanging a Kitchen Witch in your kitchen. A fun tutorial using simple supplies and Creative Paperclay®.


Supplies: Wood Kitchen Spoon Creative Paperclay® Delight Air dry clay (optional) tools for clay clay molds (optional) foil glue fine sandpaper white gesso acrylic paints sealer (optional) ribbon to hang spoon Wool or yarn for hair


Click on the video below to watch the tutorial.  Please reach out if you have questions or have a difficult time viewing the video.  


To find me on Facebook, Instagram and TikTok you can find me by searching  @𝗮𝗿𝘁𝗯𝘆𝘀𝘂𝘀𝗶𝗲𝗸  𝐹𝑜𝓇 𝒫𝑒𝒸𝓊𝓁𝒾𝒶𝓇 𝒶𝓃𝒹 𝐻𝒶𝓁𝓁𝑜𝓌𝑒𝑒𝓃    and   @𝗪𝗶𝗹𝗹𝗼𝘄𝗛𝗼𝗹𝗹𝗼𝘄𝗪𝗼𝗼𝗱𝘀   𝒻𝑜𝓇 𝐸𝒶𝓇𝓉𝒽𝓎 𝒞𝒽𝒶𝓇𝒶𝒸𝓉𝑒𝓇𝓈 𝒶𝓃𝒹 𝑀𝒶𝑔𝒾𝒸𝓀

Visit my website at www.ArtbySusieK.com (easy link in Bio) and join my Creative Minds Breakfast Club. **by joining the Creative Minds Breakfast Club on my Website you will receive an email for a 15% discount on your first order of art on my website.  As a member you will receive exclusive offers throughout the year and an email no more than once a month with a promise not to share your email address. 

Creative PaperClay® Design Team Member @creativepaperclay


Wednesday, April 7, 2021

Mini Boho Hanging Planter


I really enjoyed creating this little planter.  It is a perfect springtime project.  It makes a great little gift for May Day or Mother's Day or just to show that you care.  

Here is what you need to make it......

Wire cutters, assorted pliers, round nose and flat nose

Creative Paperclay, rolling pin, masking tape, 16 to 20 gauge craft wire, plastic wine glass or any cover-able vessel.  I was originally planning on using glass but opted to save this one from the landfill.  

A rubber stamp or other texture tool (Optional) 

Modpodge Outdoor

White gesso

Acrylic paint 

Yarn, twine, or cording

Also something to make large holes in your brads with. I used a knitting needle.  

Start by creating a loop at one end of your wire.  Trim ends neatly.

Form wire around your vessel. Use masking tape to hold it in place.  Create a loop at the bottom and the opposite side.  Cut off excess wire.  
Roll out a sheet of Creative Paperclay that is larger enough to cover your vessel.  

Cover your vessel.   Smooth seams.  

Make 6 beads about the diameter of a nickel.  Be sure to make your holes large enough for your stringing material.  Texture your beads (Optional).

Texture your vessel with stamp (Optional).

I chose this spotty dotty stamp.  I forgot about my Trypophobia until I started painting and the bubbles popped in the crevices.  I'm sorry if you also have this affliction.  

Allow your vessel and beads to dry completely.  Overnight is best.

Paint in color of your choosing.  I made a soft green with blue, yellow, and white gesso.  I like the matte look of gesso.  

After the paint dries apply  coat of Mod-Podge Outdoor to protect the clay surface from water damage.  


Make a wire ring about 1.5 - 2 inches in diameter.  This will be the hook for hanging your planter.  

Using stringing fibers of choice, about 2 yards long, attach to wire ring with larks head or slipknot. Braid or knot your fibers adding beads after every few knots.

 I used a simple macrame square knot.  Here is a video tutorial of that step:


Attach braided/knotted fibers to planter.   Add a few decorative, netting knots around base of planter and knot at the very bottom.  Tie off and create decorative fringe with excess fibers.  

Add a plant or even an electric candle. Hang it up and enjoy or give as a thoughtful gift.