Tuesday, July 28, 2015

Creative Paperclay Doll Face Plate tutorial by Gloriann Irizarry

 
 Welcome back to another full tutorial by Gloriann Irizarry

Since we are fast approaching to the hottest day of the summer I wanted to focus on simple easy to do and fast drying projects. These doll face plates are so much fun to make and they are so adorable to decorate any house or even make cool enhancers to any other future  mix media crafting.
I hope you have  great fun summer and don't be afraid to include your little one. This project is so much fun and easy that little one can also customized their own doll faces. The possibilities for this doll plates are endless so let have fun and start the crafting.
 
 
Materials
Acrylic paint
Folk Art Stencil Cream Set
3M Fine and Medium Sanding sponges
Plastic Roller
Brushes
Saran Plastic Wrap
Styrofoam Half Ball
Gold and silver Sharpie Markers
Arleene's Fast Grab Tacky Glue


Start by covering the Styrofoam half ball with the plastic Saran wrap. This will allow you to separate the clay from the Styrofoam a lot easier once it dry.


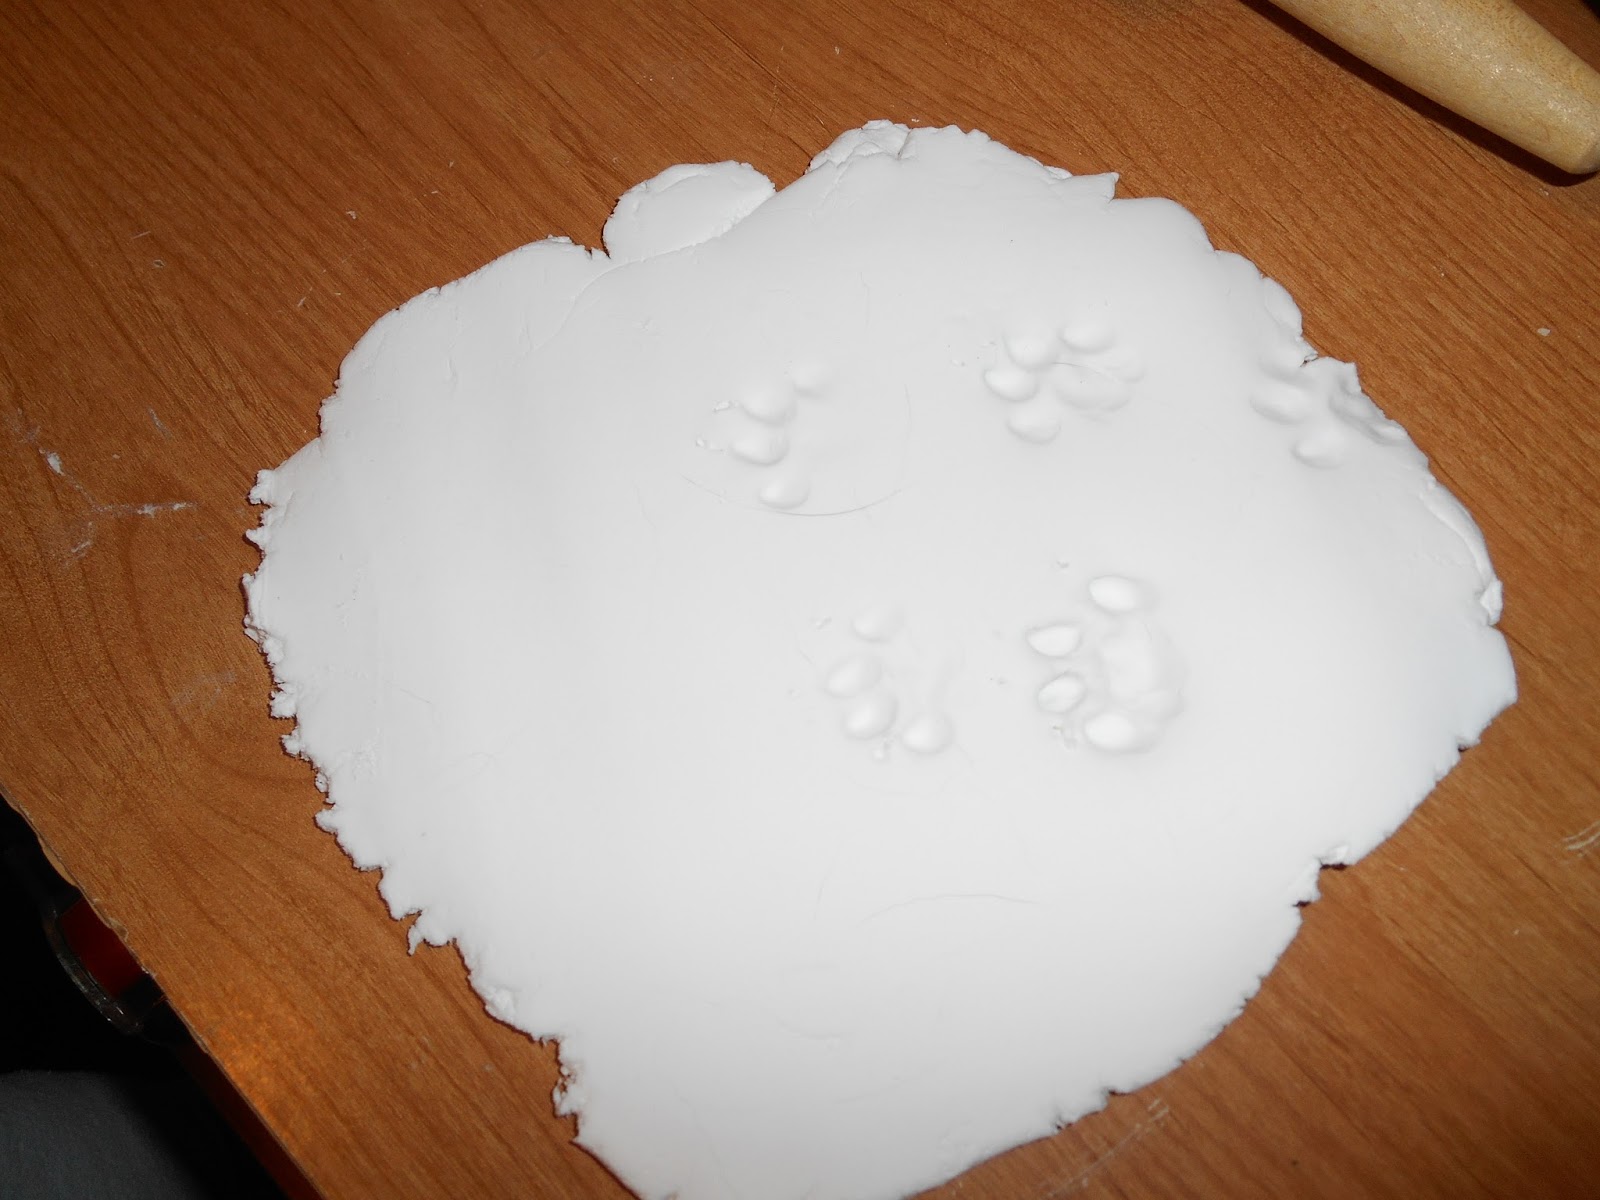
Open the package of Creative Paperclay® and roll a sheet to a 1/4 inch thickness.
Cover the Styrofoam Half ball with the sheet by shaping the curve and cutting off any excess clay. Add some eye brows and chin detail. After your satisfy set  the Doll Face Plate aside to dry.
 
 
After the Creative Paperclay® dry removed the form from the Styrofoam half ball by moving the Saran Plastic sheet. You can lightly sand the doll face with the 3M Foam Sanders.
Start by using the Medium grid and use circular motions. Make sure you brush off all the dust off so you can see any spots that might need more detailed sanding.
 
 
Once your satisfy with the 3M medium grit and brushed off any clay dust  you can now start to sanding  the piece with the 3M Fine grit and just repeat the same circular motion and clean any dust to make sure all the detail sanding is done right.
 
 
Clean the Dust off with a small brush and damp paper towel to make sure all the particle's are gone before we proceed with the paint. This will ensure the Acrylic paint will adhere properly to the sculpted Doll Face.


Use the Acrylic paint color Touch of pink by Delta Creative Ceramcoat and apply 2 coats of paint on both inside and back of the plate. Set aside to dry between coats.
 
 
Now that the Acrylic paint dry we can add more details like brushing the skin a little. For blushing I'm using the Folk Art Stencil Creams. The creams will allow you to have more control over the paint while applying it to the face plate. All you need to do is rub a little to your finger tip or use a paper towel to rub the paint to the doll face.
Concentrate your work the forehead, cheeks and chin with red tone. Set aside to dry.


Now that the blushing is all dry we can add some eyes, eyebrows and mouth details with the Folk Art Licorice black. Choose your favorite fine brush to help you control the paint. Tip here is not to dip the brush in thick paint but water it down instead. This will help you with the flow of the paint stroke when drawing the lashes and eyebrows. Set is aside to dry.


Now that the black paint is dry I mix some of the blue and red Folk Art Stencil Creams and rub some on to give her some eye shadow. You can also paint the lips red in a heart shape and add more details like freckles and eyebrows lines with the gold sharpie marker. I added a silver eyeliner to enhance her magical look. Set her aside and let her dry.


Once the Doll face dry we can proceed to the holding ribbon.
This will allow you to hang her and decorate any room.
Cut a 1/4 inch ribbon to a 12 inches long in any color.
 
 
Add the Fast Grab Tacky Glue to the back of the doll face. Don't worry much about the messy since this will go in the back and the glue dries clear.
 
 
Flip the ribbon like in this photo and apply more glue to the back to make sure it adhere securely on the dolls face.
 
 
Apply some glue to the top of the lopped ribbon and adhere it to the  face plate.
You don't need much glue. I like to use just a little. It will cut the drying time to half .


Now your dolly is ready to be display or hanged.
 
 
Feel free to experiment with this face. You can add hair or added to a mix media canvas the possibilities for her are endless just have fun and keep adding more.
 
If you have any questions you can find us on Facebook. Feel free to share your project use #CreativePaperclay in your social media and show us what you have done using the amazing Creative Paperclay® Material


Creative Paperclay® is now available
in these 3 different sizes. 16oz, 8oz and 4oz.
 More fun for you to choose from.


Thank you for
 

Friday, July 24, 2015

Sticky Tip

Hello, I m Ann from The Design Team here at the Creative Paperclay® Blog  Design Team, I also have a blog at : http://annmakes.blogspot.com.  Today I have this fun tip to share.


Did you know that Creative Paperclay® sticks very well to chipboard and card board?  Well, I have tried it several times and it has worked well for me.  I have turned flat chipboard into dimensional embellishment by adding and sculpting Creative Paperclay®.


I found that by adding generous amounts of clay that go over the edge of a flat piece and spritzing with a bit of water  ensures success.  Once the project piece is dry then it can be enhanced in anyway. My preferred method is to use acrylic paints.  Such projects tend to be very light weight also making it easy to adhere them to a lot of surfaces: paper, card, and canvas especially.


So go through your own collection of forgotten chipboard pieces, or die cut some cardboard and transform them into clay embellishments.  Have fun!


Thank you for stopping by today.  Don't forget to pop over to my blog and see what other things I have to share.  I am here.

Supplies:
Creative Paperclay®
Chipboard pieces (from my stash)
Acrylic paints by DecoArt®

Thursday, July 23, 2015

Creative Paperclay for a Cause

I shared my Creative Paperclay ideas with friends at an outdoor art play party. Two of them were working on charity box auction and decided it would be a great product for their pieces. The auction was for Kitchen Angels, who provide food to those less fortunate, so they picked garden/food themes.

SUPPLIES

Creative Paperclay®
styrofoam
acrylic paint
box
fiberpaste
wire mesh

Dave Robinson, artist/photographer, brought his muse to the party. On his box he had already built up the body of the pineapple with carved styrofoam glued to the box. After much brainstorming, we decided the best way to get the texture was to lay ceramic clay over the pineapple to use as a mold for the paper clay. He then gave it a light mist with PAM cooking spray before laying the paper clay over the mold.
  The mold created out of ceramic clay is on the top. The clay was pressed onto the pineapple. The clay mold was sprayed lightly with PAM then the Creative Paperclay was pressed gently into the mold. It was removed and applied to the pineapple shape on the box. This was done in sections.
The cast paper clay was applied to the carved styrofoam block to make the pineapple's body. The top part of the pineapple was made with wire mesh cut into shapes then covered with fiber paste, which is flexible. When dry, they were painted then glued into place.
Teena is an encaustic artist so after she created her box using Creative Paperclay, she painted it with colored wax.

Get your friends together, find a cause or just have a good time.

Darlene Olivia McElroy


Tuesday, July 21, 2015

Faux Tiles for a Special Journal Cover - Tori's July project

Hi again, it's Tori West - Earlier in the month I showed you how to make and use little rollers, and now I'm going to show you one of the ways I use them.  I wanted to use a sketchbook as a journal, and create a cover that was meaningful to me.  The poem "Hold Fast Your Dreams" by Louise Driscol, has long been a favorite of mine.  Many years ago I had a framed copy sitting by my bed, but over the years it was displaced by other items; besides, I had it memorized.  Recently, in going through items in preparation for a move, I was looking through the book I originally got the poem from; "Best Loved Poems".  The book was my mother's, and this book, along with the poems it holds, is truly one of my best loved.


For this project I used:

Delight™ Air Dry Modeling Compound
Creative Paperclay® modeling material
a sketchbook
cardboard - 1/8" (standard) and thin box cardboard or heavy card stock
heat-set computer printouts of moth, marking gauge, and photographs of old book pages and poetry
scissors
craft knife
white gesso
acrylic glaze medium and acrylic paints
Delta Ceramcoat  Exterior/Interior gloss varnish (product link)
***Note:this is the key component in making the tiles have the look of ceramics, and the durability to withstand grouting***
rubber stamps
pens and colored pencils
fine point ball stylus
ruler
work board, or tile (work board - how-to)

The faux tiles will be made from Delight™ Air Dry Modeling Compound, then grouted with Creative Paperclay® modeling material.  The best part about this method is that since they'll be painted later, you can make up several (or a whole bunch) of sheets and then just cut them apart as needed.

The first step is to decide on the tile size.  Tiles for mosaics come in many sizes, but I chose to create the 3/8" size which is one of the most commonly used.

Start by rolling out Delight™ to a 1/16" thickness.  Transfer the clay to work board, then mark off the size of your tiles.  I have printed corner pieces in various sizes, you can also just gently lay a ruler along the edges and mark the distances.


Using the ball stylus or the back of a craft knife, score lightly along the marks to create a grid - Do not go all the way through the clay.  Trim the outside edges and set the clay aside to dry.
(If desired, you can also stamp letters into the tiles or press designs into them at this point, however, in my test tiles for this project I found the letters created with the stylus on dry clay were easiest to read)


While the clay is drying, work on the area you'd like to tile.

For my project, I wanted to take literally the first line of the poem "Hold fast your dreams within your heart" and figuratively, have the words/my dreams look like they were cemented there.

I covered the pages of the book with plastic wrap to protect them, applied gesso to both sides of the sketchbook cover to help stabilize the paper, and when that was dry, cut out the heart shape, following the basic layout pattern I had sketched.


I glued thinner cardboard to the back of the cover and painted it with gesso.  While that was drying, I printed out the poem in several different sizes, as well as some of my other favorites that would be relevant to the journal, then layered them with glazes of warm colors in the range of the old book pages.  Here is the inside of the cover.


Now we're going to go back to making the tiles :)

When the clay is dry, remove it from the board and press letters into the tiles with the ball stylus.


Then just cut them apart with scissors!


Mark a grid in the area you have prepared for the tiles, then glue them in place.


When the glue is thoroughly dry, paint as desired.  I chose a terra cotta color for mine, with a wash of burnt umber to accent the lettering.  When the paint is dry, cover each tile with gloss acrylic varnish.  Try to get just the tops and a bit of the edges of the tiles, rather than pushing the brush onto the cardboard.  Put on AT LEAST three coats of varnish.  When the varnish is completely dry, grout the tiles with Creative Paperclay® in the same way that you would real tiles, by pushing it in between and around each tile.  The exception is that you do not want it to dry on the tiles, so wipe off the tops of the tiles with a damp cloth as you go.  Let the clay dry, fill in any gaps that might have shown up, and, if desired, add a wash over the clay & tiles to add an aged look, and buff the tops of the tiles with a soft cloth.


For my finished journal - In addition to the printed poems and glazes, I wrote out some key phrases from the poems, added some stamped images, and a dimensional image of a sphynx moth.  In some cultures, the moth is a symbol of transformation and knowledge - so I thought this would be a great journal addition, besides, I think these moths are beautiful!

I'll be showing you how to create a dimensional image using Delight™ Air Dry Modeling Compound in one of my upcoming tips.

Give this project a try if you've ever wanted to use mosaic tiles in you paper crafting but thought they'd be too heavy!

I'd love for you to join me for more projects & art adventures on my personal blog
Find me on Facebook, or peruse & ponder pics with me on Pinterest


Sunday, July 19, 2015

Lynda's July Post

The projects I have been making lately are wonderful for beginners to start out with, especially if you have basic supplies to create with!  Some of my favorites right now are mold's, being able to mold out fun flowers and things ahead of time, creating when you have the time!  However, this project - though you can use mold's for embellishments, I chose to make my own!!!  


If you craft with paper - and have pets, you will have to create yourself one, using your pets paw prints!  I have 3 cats, and found this darling idea on Pinterest to capture each of their paw prints - and I am using the Delight product for it!  So, grab some fun paper, a box, something to cut the circle out with for each paw, bakery twine or ribbon, and Delight product - and lets get to work!!!  


Supplies used:
2 sheets of cardstock
Box
Hot glue gun
Delight product
Rolling Pin
Round object
Ribbon/twine
Small hole punch (I used Silent Setter)
 Directions:
Step one:  Roll the Delight product out, have cat/dog walk over the product.
  
Step two:  Take round object and cut out one or two of the paw prints.


Step three:  Take another round object (I used my Silent Setter) to create the hole at the top to thread through your twine/ribbon, etc.  
Step four:  Cover your box using your favorite papers.  Since my box is going in the kitchen - I used kitchen papers!  I can always change the embellishments as I want to! 


Step five:  Add the ribbon to the top of the box, and the paw print charms to the front of the box!  
Step six:  Add the cat treats (or dog treats) to the box -  

This was such a fun project - using the paw prints of the 3 most precious cats - at least to me they are!  I hope you have enjoyed this easy project - you can do this with a baby's prints - or any paw print from animals!  I really hope you enjoy creating your own, and share them with me!!!  
Lynda Jeffs
Creative Paperclay Design Team
and Memories in Tyme

Friday, July 17, 2015

Fairy Village

This is a super simple kid's project that is perfect for those rainy summer days.

Chloe and I have been admiring all the fairy gardens at our local garden stores this summer.We decided to make some of our own fairy houses using Creative Paperclay®.

We started by rolling out a small ball of clay to a thickness of between 3/8" and 1/2". Next we used a plastic picnic knife to cut rectangular and square shapes. These varied from 1" to 2" in height. To form the roof, we cut away a small triangle on each side of the top.

We used a toothpick to etch lines for doors, windows, and shingles. When he clay pieces were dry, we lightly sanded them, then painted accents with acrylic paints. This was our smallest house—a one story.

 Our two story houses gave a bit more surface area for decoration. We were able to attach a real doorknobs made from tiny balls of clay.


Our three houses already have imaginary fairies living in them!!
Fairy house village
Carole

Chloe

Table Cell Table Cell