Showing posts with label melandolly. Show all posts

Saturday, September 24, 2022

How to Create a Zombie Ornament


Hello everyone! My name is Cinnamon Willis and I am going to show you how I created this ornament! I had some left over plaster disks laying around after working on another project and I wanted to see if I can get some use out of them. You won't need plaster to make this ornament, you can just use some foil, paper or whatever you would like to use for the middle and cover it with the Creative paperclay.


Supplies:
  • Creative Paperclay®
  • Acrylic paint
  • Sanding paper
  • Aleene's Original Tacky Glue
  • Exacto knife
  • Wool or whatever you would like to use for hair
  • Pliers
  • Flexible wire


This is some left over plaster from a previous project, I let it cure in the bottom of a plastic cup so that I could get this disk shape and use it later. Take whatever you are using for the core of your piece and cover it with paperclay


Take your wire, tie it in a knot and then cover the knot with masking tape.


Take the knotted wire, put it in the back of the flat disk and cover it with clay. Bulk out the back of the head so that the wire sits smack in the middle of the piece. This ensures that the piece hangs right on the tree, if it is too far in the back the front will dip forward towards the floor.


Here I just started working on the face a bit. After working up the cheeks I sit the piece aside to let it dry for about 24 hours.


I find it easier to work in layers with paperclay. I let the first layer dry and then come back to work up more of the features like the eyes and mouth. I go through this process about four times before things start to look right for me.


Chisel into the face with your exacto knife to further create the desired face shape for your piece.


Now that I am happy with the way things look with the face, I can begin to sand it down to get it to look smooth.


Paint your piece with acrylic paint. I wanted to go for a zombie look.


Wanted to give her a little bit of freckles to add more interest to the face. After you are done with painting, make sure you cover the piece with varnish to protect the paint.


I am using yarn here for the hair. Cut to the length that I wanted want and then felted the pieces together so that there is a base for the head.


Take your Aleene's tacky glue or whatever glue you like to use and smooth it on to the top of the head.  Then take the hair that you prepared and push it down in place.


I take saran wrap and secure it over the head with a rubber band to make sure the hair stays in place. Let it sit overnight and make sure there isn't any glue coming through the hair to glue the wrap to the doll's head.


Here is the completed piece and it is currently for sale here!


Thank you all once again for stopping by, and I hope that you enjoyed today's tutorial! You can find Creative Paperclay® at the following retailers Creative Paperclay® Online Store, Michael'sAmazon, Joann's.

See more of my work at Melandolly.com and be sure to catch updates on my Instagram page


Friday, August 19, 2022

How to Create a Unique Wall Piece


Hello everyone! My name is Cinnamon Willis and I am going to show you how I created this cute wall piece!


Supplies:


Gloves
Drill with small bits
Copper acrylic paint
Drop cloth or someplace to work on that can support a mess
Creative Paperclay®
Water
Sanding paper


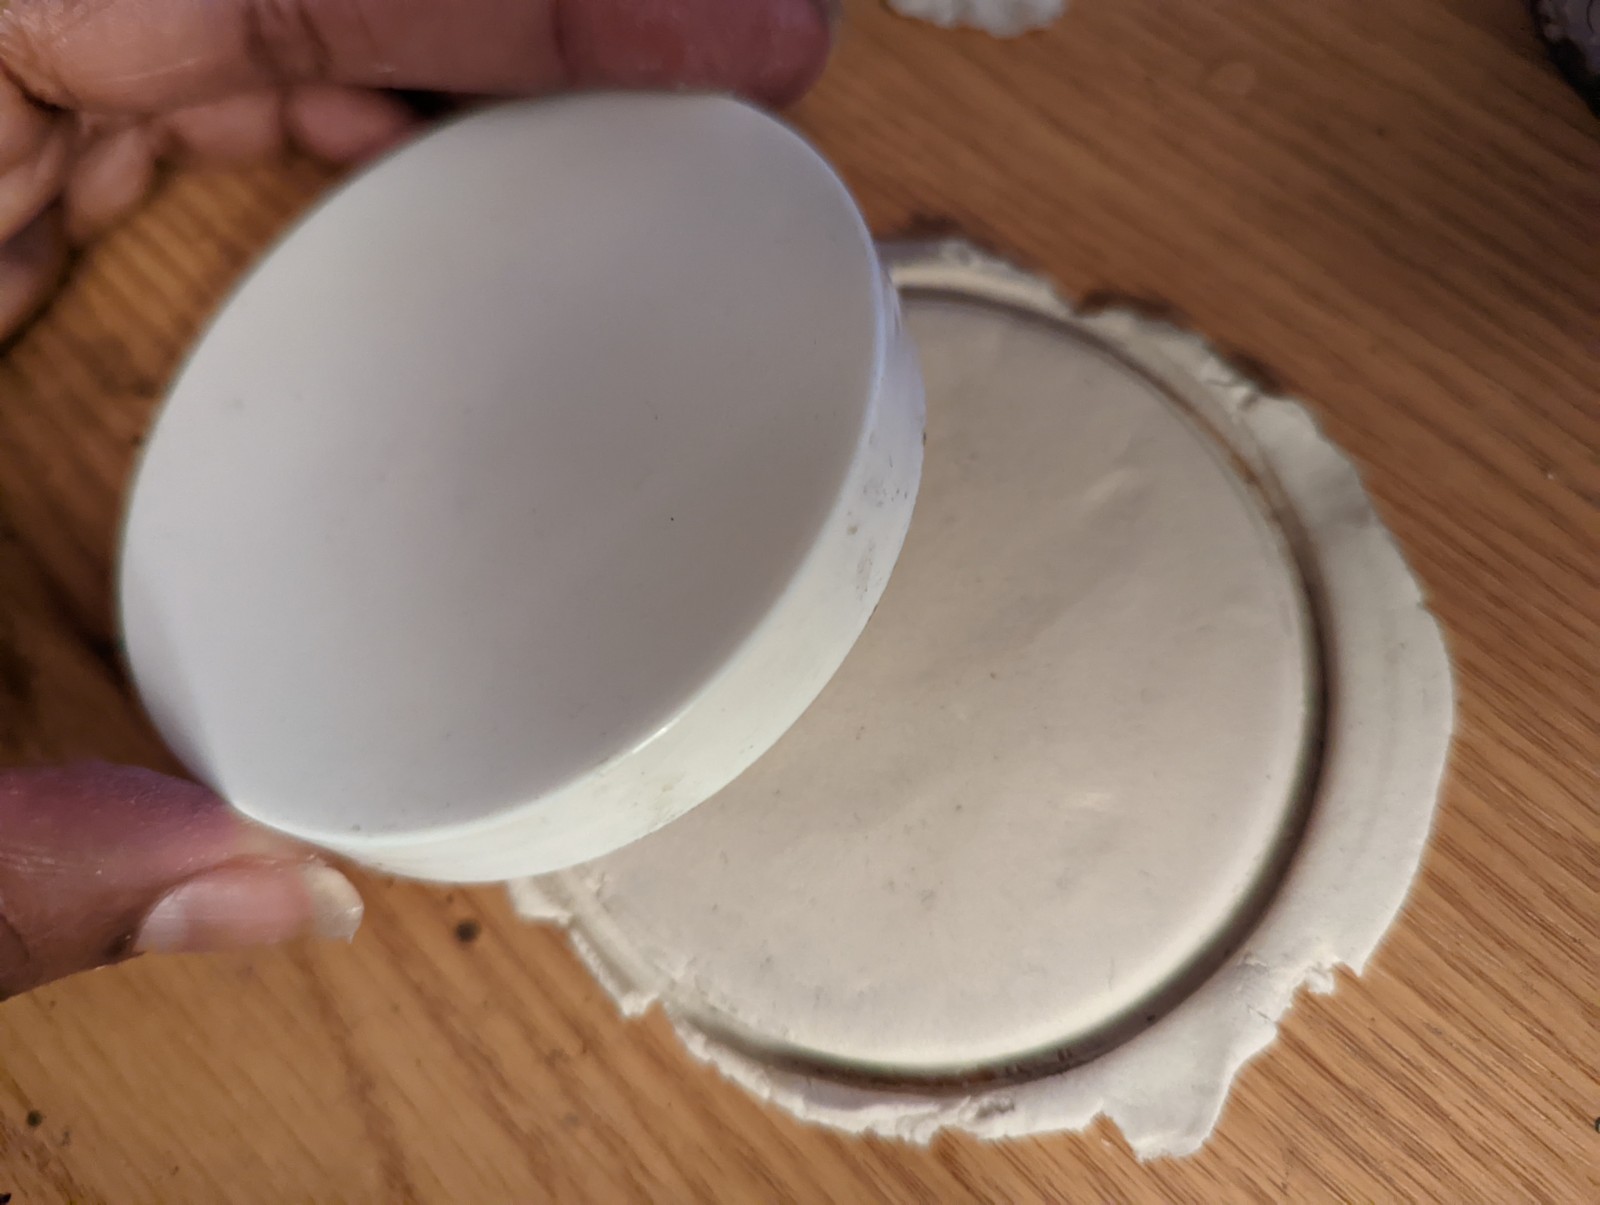
Roll and flatten out your clay. I used a lid to a container to flatten and then cut a disc out like you would with a cookie cutter.


When you get the shape just right, take your disc and set it aside to dry. Monitor the drying to make sure that the disc doesn't warp upwards. You might want to set a book on top of the clay with a piece of parchment paper in between.


When the piece dries, take your drill and drill the a hole in the top of the disk.


The nice thing about paperclay is that you can draw directly on it like paper. Draw the design that you would like to have on your piece. 


Just like with paper, you can erase your drawings with a eraser. You can go back and forth with your design until you are happy with it.


Paint your piece with any type of acrylic paints that you would like to use. I choose to put gold on the side of my piece.


Use a protective coating to seal your piece. This is how it turned out.

Thank you all once again for stopping by, and I hope that you enjoyed today's tutorial! You can find Creative Paperclay® at the following retailers Creative Paperclay® Online Store, Michael's, Amazon, Joann's.

See more of my work at Melandolly.com, catch updates on 

my Instagram page and here is a link to my shop!


Friday, March 25, 2022

Make a DIY Table Card Holder


Hello everyone, Cinnamon here and I am going to show you how I created this table card holder. This holder was inspired by the character from the Japanese brand Comme des Garçons. I fell in love with it and I finally got my hands on a pair of sneakers by the brand. Keep reading to see how this was created!

(Comme des Garçons character)

Supplies:

  • Creative Paperclay®
  • Pliers
  • Wire 
  • Small wooden disc
  • Tool or drill to  put a hole in the wood
  • Masking tape


Take your wire and begin to shape it to the length you would like your table card holder to be with your pliers. 


Create a loop at the top and go around two times. You want to make sure that a piece of paper will hold up and not fall through. Test your loop with paper as you go to make sure that it actually woks.


After you create your loops at the top, create a notch going across the middle so that you have a place to put your heart. This notch is what will keep your heart from sliding out of place on the pole later after it dries.


Cover your notch in the middle with masking tape so that you will have a foundation for your heart.


Cover the masking tape with a layer of clay. Begin creating the shape of the heart, it doesn't have to be perfect at this stage. When you are satisfied, put the piece aside to revist after it dries.


Now it is time to finesse the shape of the character. With the inner layer of the piece dry, you can now put another coat of clay on top of it for the final shaping of the piece. When you are satisfied with the shape, set the piece aside to dry.


After letting the piece dry, I am now getting ready to draw the eyes. I start by drawing a dot for the placement of the eyes from start to finish.  


Draw the eyes when the dots seem to line up at the starting point on the bottom and the end points on the top.


Start painting your piece when you are happy with the placement of the eyes.


I went over the eyes in red by mistake, I am correcting that in the second photo above with white paint.


Take your black paint and paint in the pupils. I dabbed the paint on in a playful way to match the look of the character. Set the piece aside to dry.


Take your wood and drill in the hole for the holder to go down into. I am using a clay tool but you can use what ever you have available to you.


I am cutting down my wire to the height that I would like my holder to stand. In the second photo I am putting the wire in place. You can use glue here to make sure that the wire stays in place with the wood


Here is the final piece in action with my sneakers that have the character in the background!

Thank you all once again for stopping by, and I hope that you enjoyed 
today's tutorial! You can find Creative Paperclay® at the following 

See more of my work at Melandolly.com, catch updates on 
my Instagram page and here is a link to my shop!


.