Showing posts with label fondant molds. Show all posts

Saturday, April 27, 2019

Quick & Easy Facelift for a Frame

Found this funky frame and painting at a junk/antique store and could see the potential in it. You can find these frames everywhere and don't worry if they are not perfect because we can fix that with cast objects. There are basically three easy steps to change the look of the frame.

As a mixed media artist, the hunt for these treasures it part of the joy when I do a piece of art. The magic of art is the other part.

SUPPLIES

Creative Paperclay®
Black spray paint (Krylon)
Fondant molds
E6000 glue


I have a large collection of fondant molds as well as silicone molds that I have created. Depending on the piece of art or the time I have, I may leave the paper clay in the mold until it has dried. If a piece has delicate edges this is a great way for it to dry. It also prevents warping. I keep a square of linoleum in my studio that I put my "wet" cast objects to dry. They tend not warp when I put them on the linoleum.


Next, I glued the cast pieces on to the frame with E6000. I like how fast it sets up. When working on a painting there is so much waiting time for paint or clay to dry. To spray the frame, I used a Krylon matte black.


 Close up of section of the painted frame with cast objects.


Finished painting collaged with part of the original painting an placed in the updated frame. Not only fun but looks so much better than the original. Now, wasn't that easy?

Dream in Color!

Darlene Olivia McElroy


Thursday, October 22, 2015

Garden Troll Baby

Darlene Olivia McElroy, Creative Paperclay® project
Watching a 70's flashback TV show inspired me to make a Garden Troll Baby. Bernie, my newfie, gladly let me cut some of his hair off and away I went. I painted in soft colors as I wanted the viewer to have to look closely to see what it is.

SUPPLIES

Creative Papeclay®
fondant mold
baby face mold
paint
Sandits

Darlene Olivia McElroy, Creative Paperclay® project
I started by casting the baby face, getting my aluminum foil shaped for the body and cutting the hair from my dog. Don't worry, it didn't make a different. He still looks great.

Darlene Olivia McElroy, Creative Paperclay® project
Next, I covered the aluminum foil with clay, cast leaves and flowers in the fondant mold and put them all together.


Darlene Olivia McElroy, Creative Paperclay® project
When I was finished adding all the elements, I made a hole in the head and added the hair.

When it had dried, I sanded edges with Sandits and smooth over some cracks with a clay slurry.


Darlene Olivia McElroy, Creative Paperclay® project
Have fun with art & dream in color!

Darlene Olivia McElroy

Thursday, July 9, 2015

No Bake Cake with Creative Paperclay®

Make a permanent cake for a friend's birthday or wedding. This would be great for table decorations also. I have painted my white with clear glitter but it could be painted in wild colors or your friend's favorite color.

SUPPLIES
styrofoam
toothpicks
Creative Paperclay®
acrylic paint
paint brushes
dimensional paint
molding paste
fondant mold
I stuck two rounds of styrofoam together with toothpicks. You can also use white glue or styrofoam glue. Since I am going to cover the whole shape with Creative Paperclay® this was enough strength for this project.


Next, I covered the form with Creative Paperclay® and stamped into it.


I applied molding paste into the recesses of my fondant mold and waited 24 hours for it to dry. I used the molding paste because it is flexible and I could glue around the curve of the cake shape.


I made and applied roses and cast leaves while I was waiting for the next batch of cast molding paste to dry. I dipped my finger in water and smoothed out the rose petals and let the piece dry.


I added finishing touches to the clay and sanded any rough edges with Sandits then painted and added glitter and a tea light.


The last step was to paint my piece white, add some glitter and a tea light. This would be great presented on a plate with a doily.

Have fun and dream in color — Darlene Olivia McElroy
Thursday, June 11, 2015

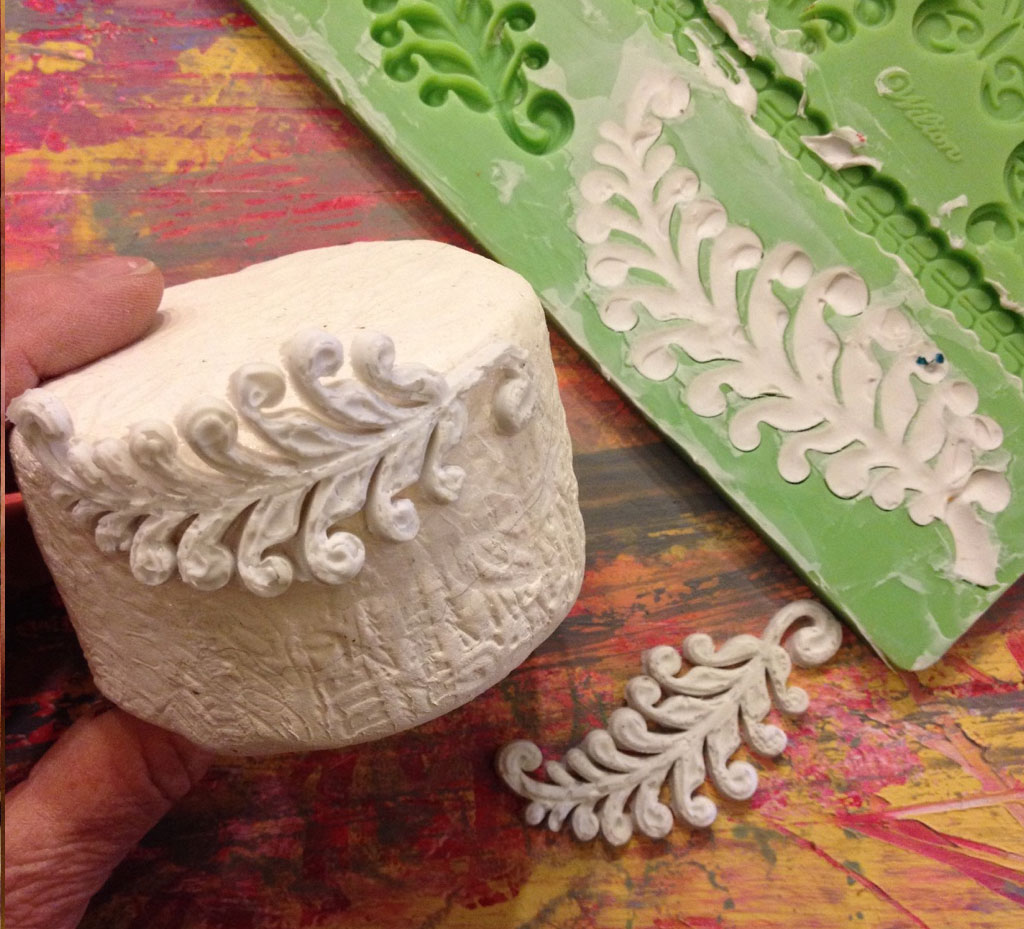
Creative Paperclay® Tips with Fondant Molds

I have a collection of well used fondant molds (find in the cake decorating department of a craft store) that I use in my art. I find that if I let the Creative Paperclay® completely dry while still in the mold I have no warping to deal with. This is great for adding dimensional elements to your art.

SUPPLIES

Creative Paperclay®
Fondant Mold 
 I pack the Creative Paperclay® in the mold, removing the excess and brayering flat. I try and clean up the edges in order to save me work later.
I leave the clay in the mold until completely dry.
When dry, you can just pop them out and start painting or gold leafing. There is a wide selection of these molds available.

Have a fun dressing up your art.

—Darlene Olivia McElroy