Showing posts with label mushroom. Show all posts

Friday, February 14, 2020

Second Friday Tutorial -Mushrooms and Butterfly Kisses


Hi everyone, it's Susie Krichbaum from Art by Susie K and it's Second Friday Tutorial Time!


I love to upcycle items and turn them into art.  I pick up things from thrift stores and probable save way too many bottles and jars.  Today's tutorial is created by recycling a bottle, tin foil and cardboard

I hope you enjoy this little mushroom fairy home and add you own details and colors.  Nature is full of amazing color themes so don't be afraid to have fun with it.  


Supplies:
bottle - I used a Pierre bottle because I like the shape and color
Card board
Tin foil
masking tape
18g wire (good weight yet easy to bend)
 Creative Paperclay®
basic clay tools, or other tools that make textures
shape cutters (optional)
small razor knife
Gesso (optional)
acrylic paints
paint brushes
string of mini lights / I bought wine cork string lights on Amazon.  


Armature:


Start building the armature and get an idea of the shape you are wanting.  Card board, tin foil and wire held strong with masking tape.  


Bulk out the structure with tin foil and cover with making tape.   
For the mushroom that sticks out to the side I re-enforced with wire and plenty of foil.  

Cut out the area that you want to represent windows and have a little light peeping out.  Now your armature is ready for clay.

Adding Clay:

Start rolling out some clay and build up the walls of the structure first.  Adding texture as you go so the clay won't be too dry.  Run a pin or other sharp tool down the clay to create mushroom stem texture.

Have fun with adding rocks 


Add texture around the windows on the back as well

For the mushroom caps I went all smooth and other added texture on the bottom side.  Texture in the form of shingles/ flower petals with cover the caps as you move along.  


To create the petals / shingles to the house:
I have this handy little shape cutter, but you can create a shape with cardboard and press that onto the clay and cut out.  Or simply form a shape with your fingers.

Start on the outer edge when layering the shingles/petals
Add texture while the clay is still wet.

Larger shingles for the main mushroom
Layer and texturize

This is where I found that cork was way to visible and needed a little cover. Started to form a foil cone to fit

Created a little cap over the cone with some light card board (file folder).  covered in tape to keep the moisture of the clay from distorting it as it dried.  I also added a generous piece of wire so I could create a stem.  


Fashion a couple of leaves from wire, cover in foil and tape.  Bend the wire how you like to create a cute little flower cap

Underside of flower cap  

More petals for the flower cap


Add texture

I decided the main roof look too plain so I added flowers and more texture

Stand back and take a look.  Make sure it isn't too heavy on one side and wants to tip.   You can always weight the bottle with rice or beans

Texture and more texture
I thought the butterfly was a good touch, totally optional


Painting Time:
        grab a bunch of fun colors and some gesso.


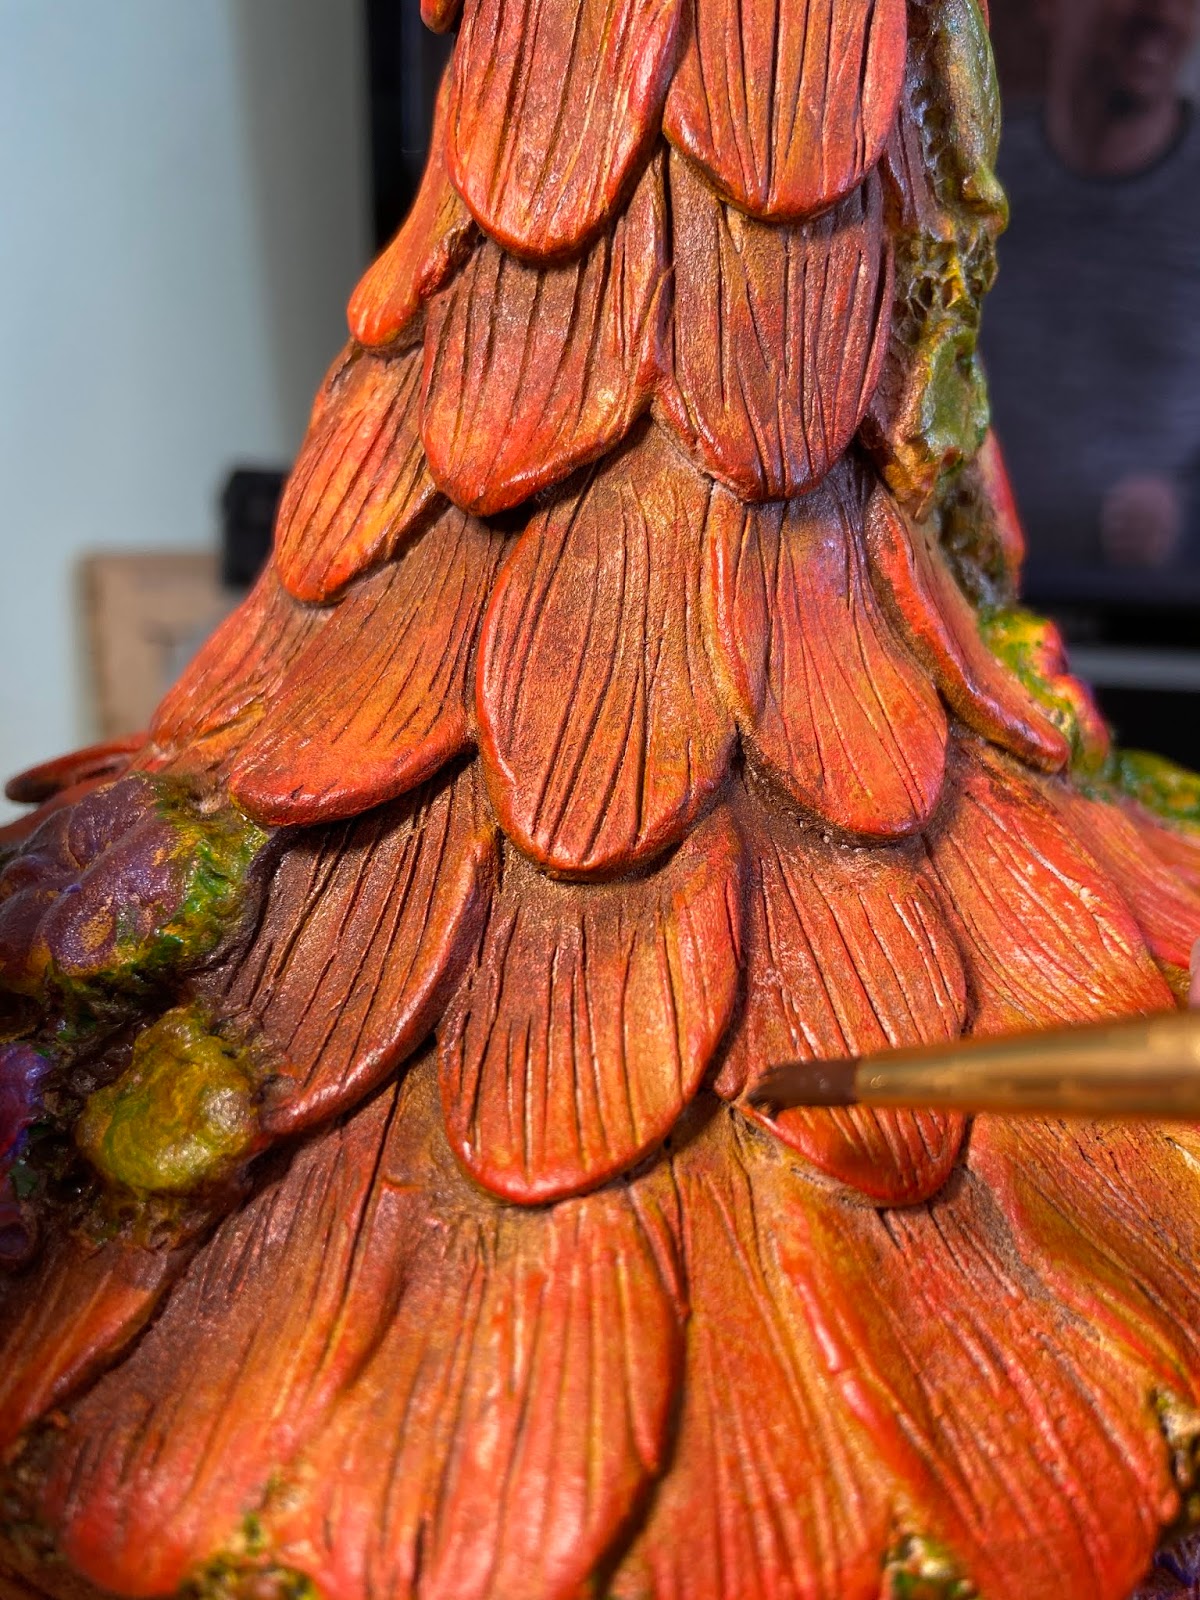
After the gesso has dried, start by adding a light layer of your base color.  This will change in saturation as you blend, shade and add other colors.  


Here I am shading under each petal and making sure the texture lines have the darker shade sinking in.


EMAIL: Susiewhc@gmail.com
FB and IG: @artbysusiek and @artbysusiek4home
WEBSITE:  https://artbysusiek.com sign up for my Creative Breakfast Club 🎨
ETSY: www.artbysusiek.etsy.com
PINTEREST: https://www.pinterest.com/susiewhc/
CREATIVE PAPERCLAY® Design Team Member  https://creativepaperclay.blogspot.com 

Tuesday, February 25, 2014

Glow Mushroom Nightlight with Creative Paperclay by Gloriann Irizarry


Glow Mushroom Nightlight with Creative Paperclay 
by Gloriann Irizarry

Hi my dear friends. It is Gloriann Irizarry  once more with a new idea for a very unique project.
In this article I will show you detailed step by step  instructions how to create a very cute 
and whimsical magic mushroom lamp to illuminate you. 
This idea has been on my sketch book for a while, but wanted to constructed in a easy manner so after some thinking I finally figure it out. All I need it was to find  the smallest battery operated lights and glass to reflect them out.  

I love to hunt for materials so I visited all my favorite crafting store to get the best items for this project.

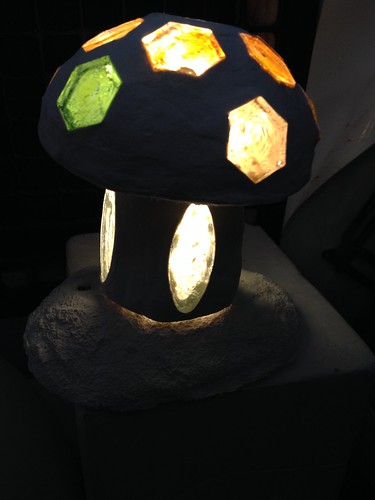
Now here is what I made with what I found on my quest. 


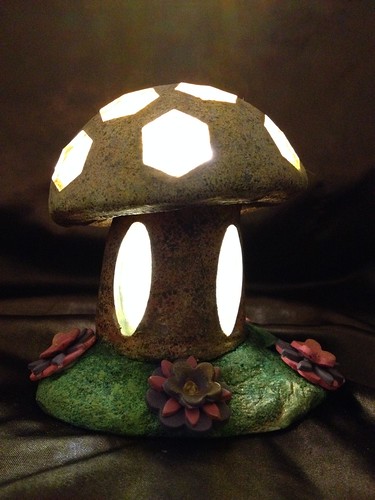
Glow Mushroom and Night Time


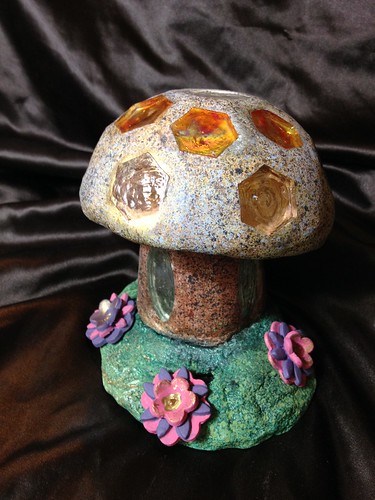
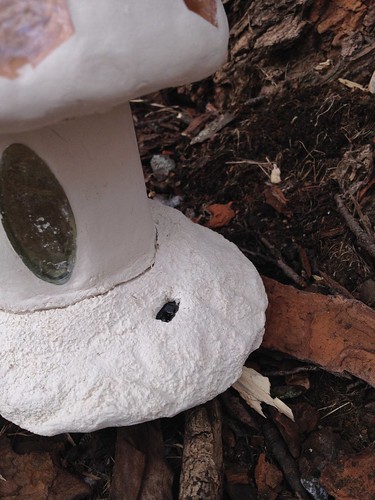
Glow Mushroom at day time 


Materials need it for this project are:

One pack of Creative Paperclay ®
Your favorite palette of acrylic paints
Paint brushes
Tooth brush
Styrofoam ball
Empty toilet paper roll
Mosaic glass beads
Tacky Glue Fast Grab
AA Battery operate LED lights or similar.
Plastic Sheets
Clay roller 
Scissors
Spray water bottle
Clay tools


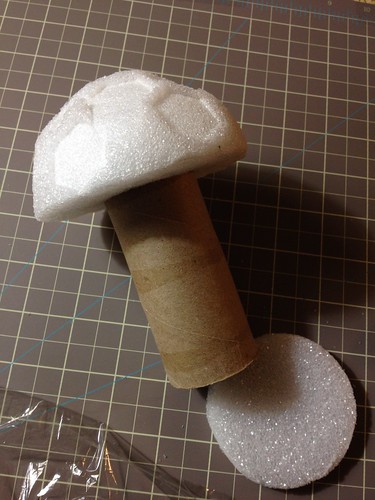
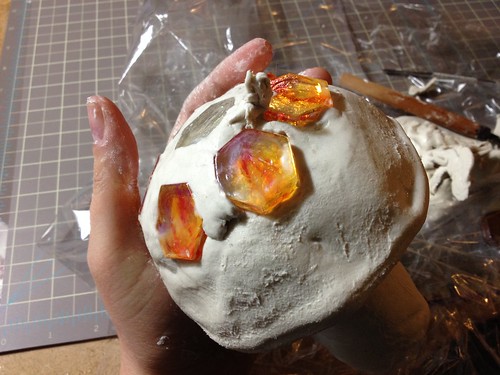
I cut the Styrofoam ball in half and I start by arranging the glass bead to 
achieve the pretty glow effect I was looking for.


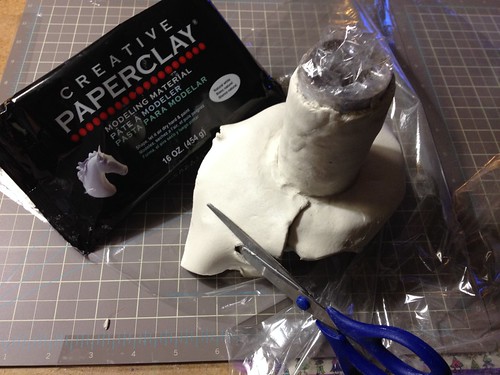
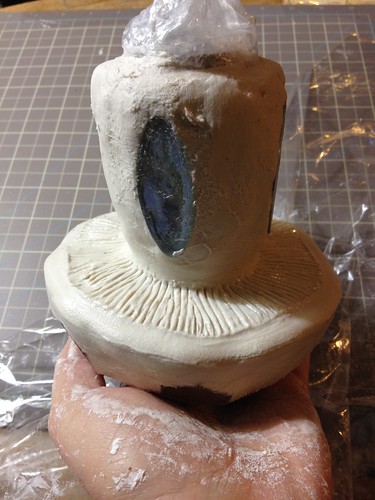
Press the empty toilet paper roll to the Styrofoam ball.


I cover the whole armature in clear plastic sheet so I'm able to clean the final piece.
I use the plastic roller and start rolling my Creative Paperclay into a 1/4 inch thickness.


I use my clay sheet and began to cover the entire armature. 
Little by little  and use the scissors to cut any excess to shape. 


Make sure the entire piece is fully cover with the 1/4 thick Creative Paperclay.


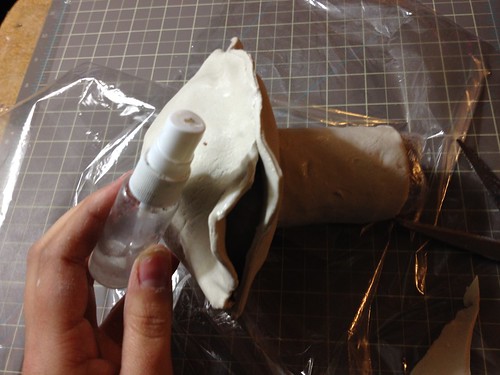
Use the spray water bottle to moist the paperclay and seal the seems 
by smoothing them with your clay tool or finger.


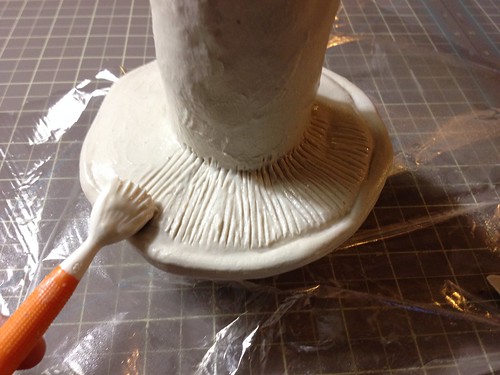
I used my clay tool to give the mushroom the natural look underneath the head.


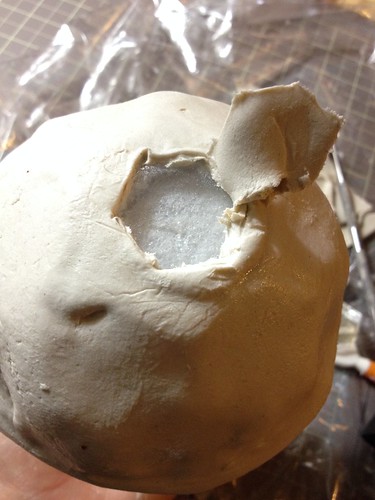
To attach the glass beads to the Mushroom press it lightly and remove it. 


Now use the indentation has a pattern to be cut the 1/4 Creative Paper clay sheet away. 


Once the beads are in add more clay to cover the bead all the way to the seems.


Follow the same procedure to do the trunk of the Mushroom.
Now set to dry. It might take long to dry depending on the weather.

Once is fully dry take all the inner core out.
Start by removing the toilet paper roll and scoop out the Styrofoam armature.


Lets talk LED Lights options:

You can find these LED light mostly located at the floral section of the your favorite craft store.
Available in so many styles, sizes  and colors to choose from you can have much fun choosing your favorite.
I decided to choose the clear light and AA Batteries operated. This will facilitate me the quest of finding and replace them so much easier . Why? Well I knew this light would be a total hit with my 6 yrs and I can guarantee I will be replacing them very often. She has baptized this mushroom has the Boogie man repellent mushroom. I cant disagree with her.   :)


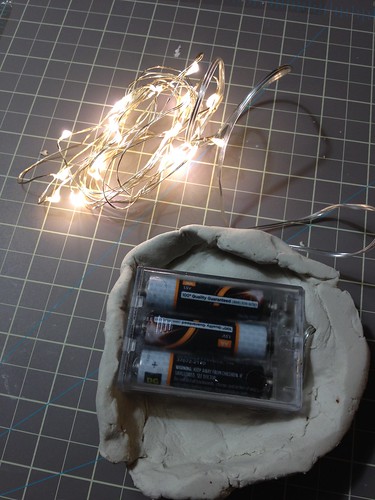
To create the base. I grab some Creative paper clay and cover the Battery case.


I used an old Styrofoam to give the texture to the base.
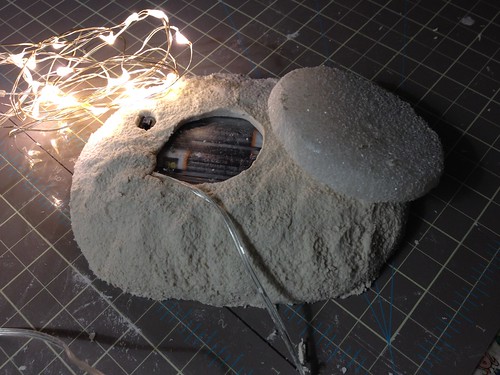
Make sure you leave the on and off button open to operate the lamp lights.


Dry test. I place the lights inside the now dry mushroom and the base to make sure everything works.
I love it!


Since dry test past feel free to add fresh Creative Paperclay to the already base.
Now attached the mushroom to the base and let it dry.


Make sure the on and off button is not covered on clay. Cut off any excess if need to .


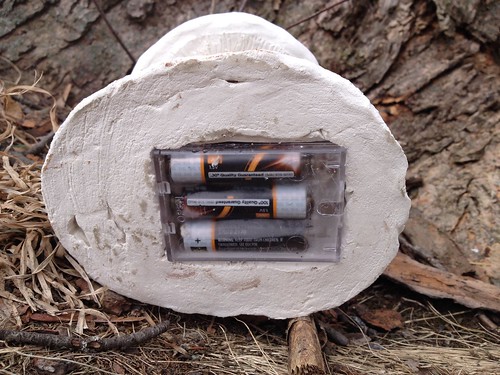
Here you can see the battery are free to be replace if need it.


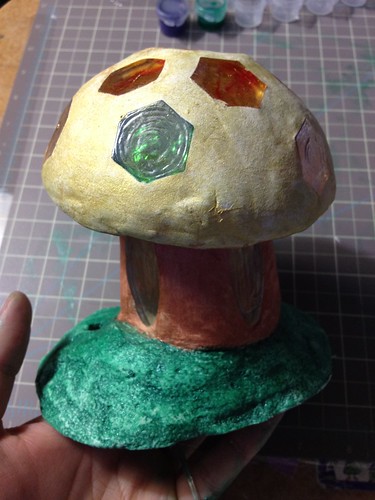
Now I water down some acrylic pearls green paint for the entire base.


For the mushroom head I used for base a watered down of pearl Inca Gold.


and for the trunk I used a water down copper acrylic paint.


I wanted to give the piece a natural but at the same time magical effect.
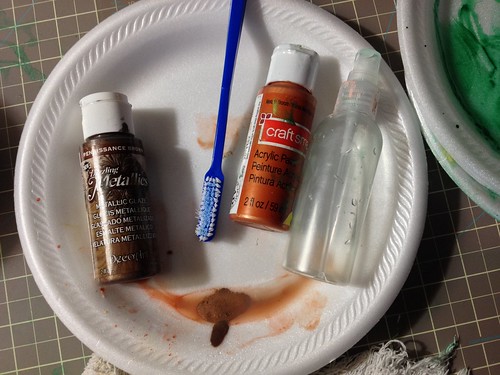
 I watered down more Copper and renaissance brown. 


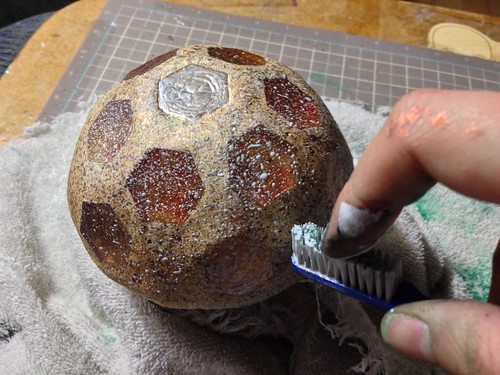
Grab the toothbrush and covered with the watered acrylic paint.
Use your thumb and add spots to the mushroom by rubbing your thumb away from the piece.
I used this color only on the head part.


Mix some black and silver and watered down.


Repeat the same tooth brush technique has before this new color mix will be
 used on the head and truck of the mushroom. 


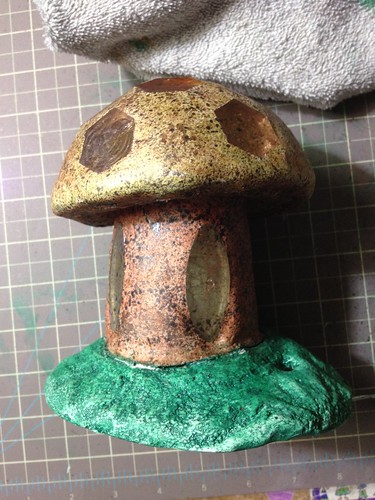
Here are all the spotted head and trunk mushroom. 


Do not forget to spot underneath the mushroom head.


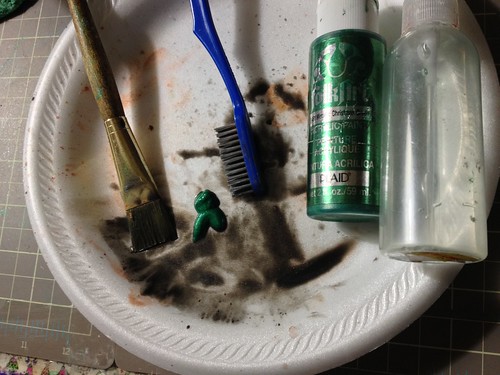
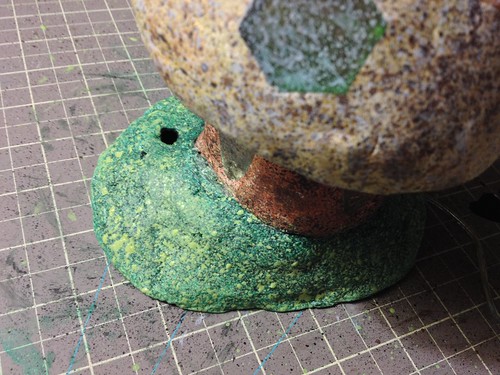
Now for the base I now added some black to the green and mix then watered down 
is tooth brushed to the base only.


Now I wanted a highlight effect for the piece so I used for the head a watered down 
Quarry Pebble acrylic paint and spotted the top only.


And a mix of yellow to the watered down green to spot the base only.
Let paint to dry.
 Once is dry I grab a old towel. Moist a corner of the towel and clean very carefully each glass bead. 


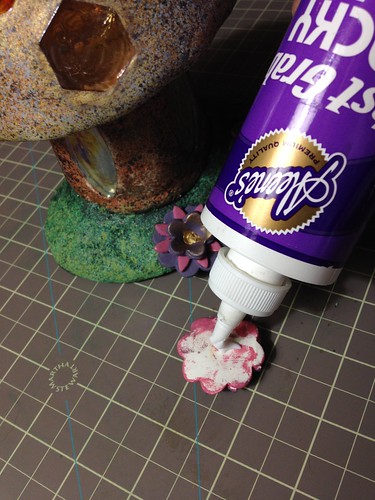
I made some flower out of the Creative Paperclay using the same technique has my Owl 3D Art Wall Art here . Find a placement for the flowers.


Use the Tacky Glue and attach them to the base of the piece.
Wait for the glue to dry and  use a good clear sealer of your choice from many like these to choose from Glossy, Mate, Satin or Frost finish to seal the entire piece. 


If it is going to be displayed on a flower bed or garden make sure you choose a outside lighting options and triple coat completely the mushroom.
 Is not recommend for outside weather but if coated properly it will made it last a little longer if done right.

Once the sealer dry clean the sealer off the glass beads if you prefer a mosaic glass look to the piece.
After cleaning is done you are now ready to enjoy your little one of a kind magical lamp.

I love this project so much I could see a big wings fairy doll sitting on top of this magical mushroom in the near future. It would be priceless to show case at night!

So here are some photos of the final project . Have Fun! 

Daylight View 


Lights on Nighttime  View 


Easy to replace the Batteries located under the piece.


Accented with Creative Paperclay flowers.


I know this little Magic Glow Mushroom will illuminate your darkest night. 
I'm so happy this project turned out just the way I had imagined. 
I looks so beautiful at night. My girls cant stop staring at it at night .
The LED lights are so beautiful and  bright .
The glass  mosaic beads do capture the glow in a fantastic and amazing way.


Now I hope you enjoy this tutorial and feel free to email me any question or place a comment below.


Have a bless day and happy crafting to everyone.

Sincerely