Showing posts with label fairy house. Show all posts

Friday, February 14, 2020

Second Friday Tutorial -Mushrooms and Butterfly Kisses


Hi everyone, it's Susie Krichbaum from Art by Susie K and it's Second Friday Tutorial Time!


I love to upcycle items and turn them into art.  I pick up things from thrift stores and probable save way too many bottles and jars.  Today's tutorial is created by recycling a bottle, tin foil and cardboard

I hope you enjoy this little mushroom fairy home and add you own details and colors.  Nature is full of amazing color themes so don't be afraid to have fun with it.  


Supplies:
bottle - I used a Pierre bottle because I like the shape and color
Card board
Tin foil
masking tape
18g wire (good weight yet easy to bend)
 Creative Paperclay®
basic clay tools, or other tools that make textures
shape cutters (optional)
small razor knife
Gesso (optional)
acrylic paints
paint brushes
string of mini lights / I bought wine cork string lights on Amazon.  


Armature:


Start building the armature and get an idea of the shape you are wanting.  Card board, tin foil and wire held strong with masking tape.  


Bulk out the structure with tin foil and cover with making tape.   
For the mushroom that sticks out to the side I re-enforced with wire and plenty of foil.  

Cut out the area that you want to represent windows and have a little light peeping out.  Now your armature is ready for clay.

Adding Clay:

Start rolling out some clay and build up the walls of the structure first.  Adding texture as you go so the clay won't be too dry.  Run a pin or other sharp tool down the clay to create mushroom stem texture.

Have fun with adding rocks 


Add texture around the windows on the back as well

For the mushroom caps I went all smooth and other added texture on the bottom side.  Texture in the form of shingles/ flower petals with cover the caps as you move along.  


To create the petals / shingles to the house:
I have this handy little shape cutter, but you can create a shape with cardboard and press that onto the clay and cut out.  Or simply form a shape with your fingers.

Start on the outer edge when layering the shingles/petals
Add texture while the clay is still wet.

Larger shingles for the main mushroom
Layer and texturize

This is where I found that cork was way to visible and needed a little cover. Started to form a foil cone to fit

Created a little cap over the cone with some light card board (file folder).  covered in tape to keep the moisture of the clay from distorting it as it dried.  I also added a generous piece of wire so I could create a stem.  


Fashion a couple of leaves from wire, cover in foil and tape.  Bend the wire how you like to create a cute little flower cap

Underside of flower cap  

More petals for the flower cap


Add texture

I decided the main roof look too plain so I added flowers and more texture

Stand back and take a look.  Make sure it isn't too heavy on one side and wants to tip.   You can always weight the bottle with rice or beans

Texture and more texture
I thought the butterfly was a good touch, totally optional


Painting Time:
        grab a bunch of fun colors and some gesso.


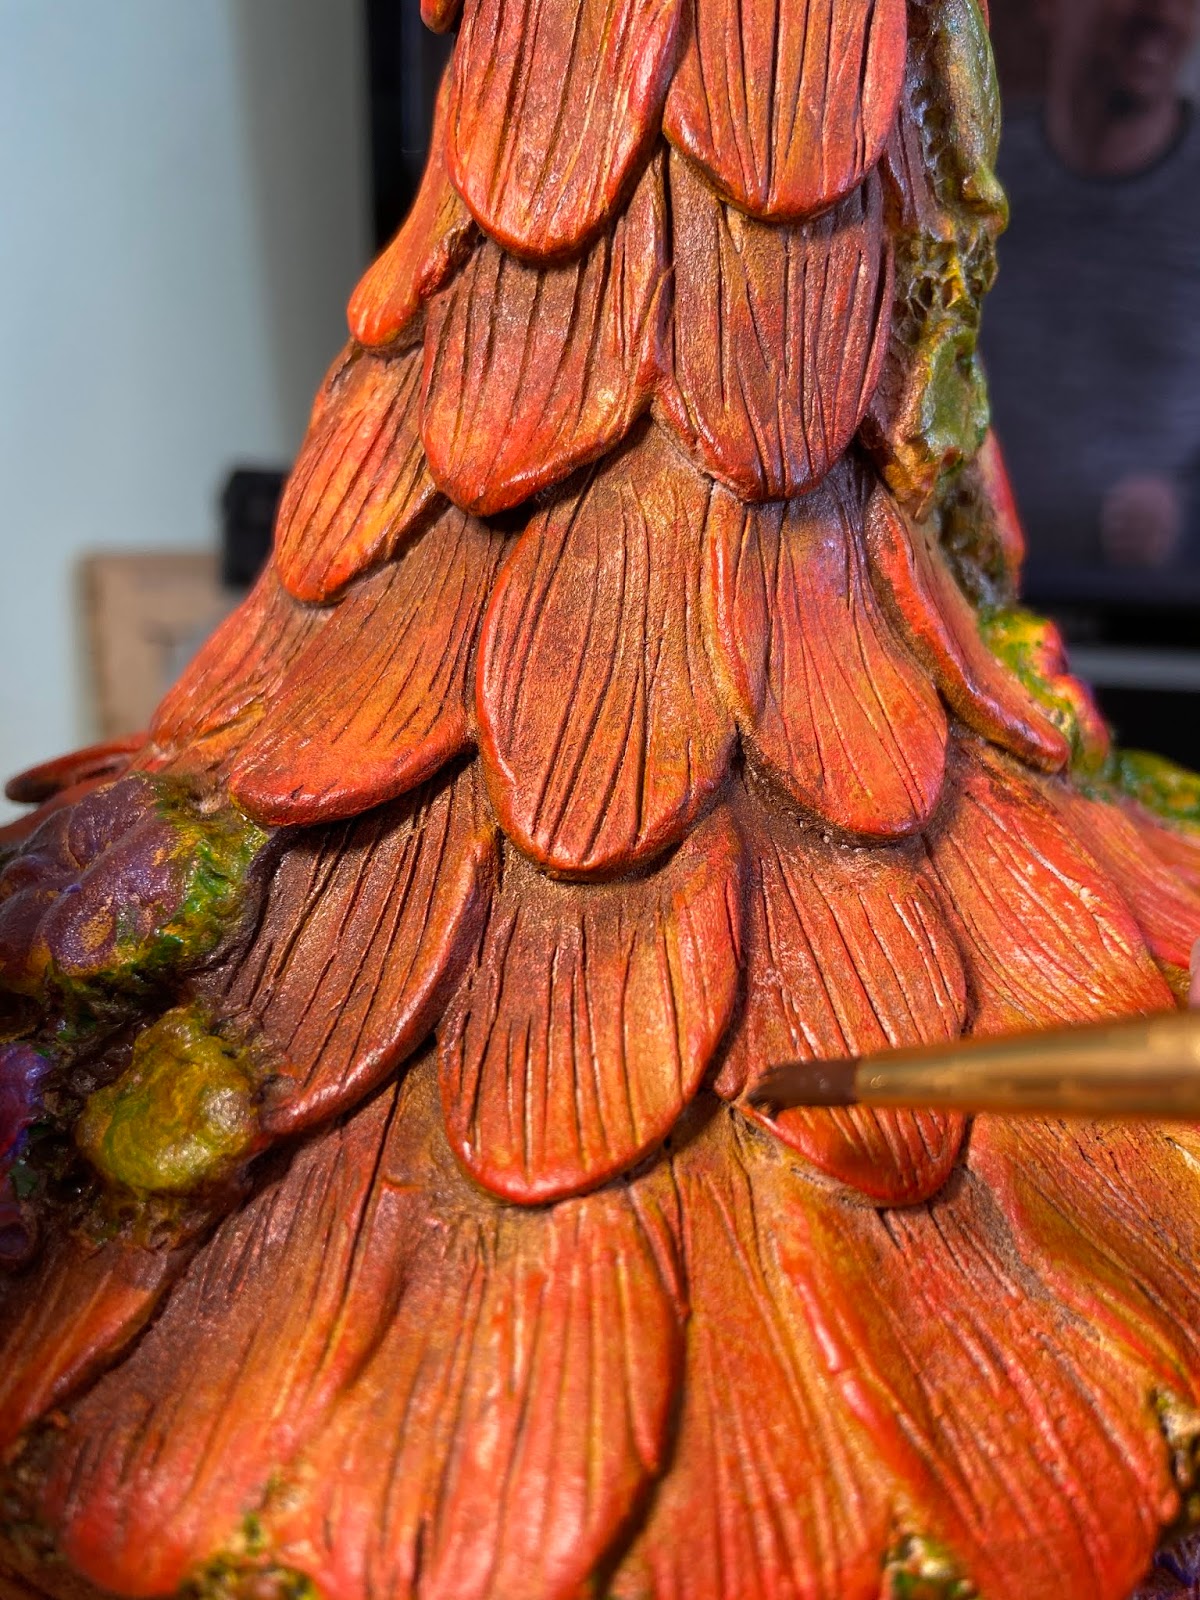
After the gesso has dried, start by adding a light layer of your base color.  This will change in saturation as you blend, shade and add other colors.  


Here I am shading under each petal and making sure the texture lines have the darker shade sinking in.


EMAIL: Susiewhc@gmail.com
FB and IG: @artbysusiek and @artbysusiek4home
WEBSITE:  https://artbysusiek.com sign up for my Creative Breakfast Club 🎨
ETSY: www.artbysusiek.etsy.com
PINTEREST: https://www.pinterest.com/susiewhc/
CREATIVE PAPERCLAY® Design Team Member  https://creativepaperclay.blogspot.com 

Tuesday, July 18, 2017

How to PAINT a Totoro Creative Paperclay® Tea light Fairy House #ArtByGloricom 3/3

Part 1
 
Part 2
 
Part  3


Hola and Hi to all my wonderful friends and followers.
 Like I promise here is the part 3 of this one of a kind tea light fairy house.
 I hope everyone enjoy the step by steps instructions and feel free to share it with all your friends.
Now in this 3rd part I will be showing you how I use a few techniques to paint this magical fairy tea light house with one of my most favorite wood spirit Totoro from the Studio Ghibli film My Neighbor Totoro. 


For this project I used some of my previous FolkArt and DecoArt Acrylic paints
Here is the color list:
FolkArt Licorice Black
FolkArt Antique Copper
FolkArt Rose Shimmer
FolkArt Champagne
FolkArt Metallic Inca Gold
FolkArt Metallic Christmas Green
FolkArt Metallic Periodot
DecoArt Festive Green
DecoArt Renaissance Brown 
 
 
I like to do a couple of coats when I paint my Creative Paperclay pieces just to make sure I have a nice coverage and protection for the final piece. Make sure you wait in between coats to make sure is all dry so the second coat adheres propertly to the clay.
Start covering the truck of the fairy house with the FolkArt Metallic Inca Gold.

 
To color the top of the house use the FolkArt Metallic Inca Gold for the stump with FolkArt Metallic Inca Gold and the base colot of the roof leaf FolkArt Metallic Periodot and make sure you use to coats for each color.
 
 
Now lets give a nice coat for the grass with the DecoArt Festive Green.
 
 
To give the roof a nice 3d effect use the FolkArt Metallic Christmas Green and apply a water down mixture very carefully. You can use a wet down paper towel to remove any excess if you think is too thick after you applied the acrylic paint down.
 
 
 Now this will only work if the paint still wet so make sure you inspect the piece carefully before you leave it to completely dry.
 
 
To create a nice accent tone door use the FolkArt Champagne has a base and give it two complete coats and let it dry.

 
The best way to bring any texture up is to apply a darker color in this case DecoArt Renaissance Brown. I have notice it works best if you water down the paint so the pigments will go down the crevices of the sculpted piece. Again dont be afraid to apply a much since you will be using a wet paper towel to remove any excess paint. this techique work best to exposure the nice sculpted texture you left behind . This really brings the rock appearance of the front door and the grain of the tree bark.

 
We also want to give the grass a nice and natural effect for that we need to add a few layers of colors. For the second layer use a nice water down mixture of the FolkArt Metallic Christmas Green. The more you water it down the easier it will pool in all those tiny little grass we previously sculpted. You can remove any excess again with a wet paper towel.
 
Tip: Always use a new Paper towel for each color you will be removing so your piece will not be stain with the older previous color you already removed.

 
It is now time to color the cute little flower and for that we will be using the FolkArt Rose Shimmer.
Feel free to apply two nice thick coats. No water downs for this step.

 
Remember to leave the window frames for last. The reason for that is you want them to be bold and clean colored. Use two thick coats of FolkArt Champagne.


Now you can see how all these steps came down nicely to create your one of a kind Tea Light Totoro Fairy house. A very lovely way to recycle any old baby food glass jar.


The little house is ready for a cute little LED tea light and it will bright your night away.
 
I hope you enjoy this full free Creative Paperclay tutorial. If you did please like and share for everyone else to enjoy. If you want to follow the previous parts of these How to tutorials i had included all the links in the top portion of the intro. 
 
Sincerely
Gloriann Irizarry
 
#Creativepaperclay #totoro #fairyHouse #artbygloricom #bygloricom  #Anime #manga #otaku #paperclay #fanart #fairygarden #ledCandle #tealightholder #studioghibli #ghibli #HayaoMiyazaki #myneighbortotoro #sprite #fairy #fairies #gallery #art #crafts #tutorial #madewithmichaels #handmadewithjoann #acmooreinspired #hobbylobbyfinds #fairylights #chateauoart