Showing posts with label art doll. Show all posts

Monday, February 4, 2019

Make a Voodoo Doll with Creative Paperclay®


Hello, my tutorial this month is kind of creepy but also fun. I think he is cute! Well, cute for a voodoo doll!


All levels of sculptors can make the doll. I made a video for you to follow along. Here is a list of supplies that you will need:


Follow along in the video below:


Here are some more photos.


I hope you enjoyed the tutorial. You can share your creations with us on our Facebook page. We would love to see them! For more inspiration have a look around the blog. There are tutorials for many levels using Creative Paperclay®. You can also visit my blog www.papermachepatch.com.

You can find Creative Paperclay® online at Creative Paperclay Co and also at Michaels, Hobby Lobby, Dickblick and Amazon. 

Thanks for stopping by!

Suzette


Tuesday, July 28, 2015

Creative Paperclay Doll Face Plate tutorial by Gloriann Irizarry

 
 Welcome back to another full tutorial by Gloriann Irizarry

Since we are fast approaching to the hottest day of the summer I wanted to focus on simple easy to do and fast drying projects. These doll face plates are so much fun to make and they are so adorable to decorate any house or even make cool enhancers to any other future  mix media crafting.
I hope you have  great fun summer and don't be afraid to include your little one. This project is so much fun and easy that little one can also customized their own doll faces. The possibilities for this doll plates are endless so let have fun and start the crafting.
 
 
Materials
Acrylic paint
Folk Art Stencil Cream Set
3M Fine and Medium Sanding sponges
Plastic Roller
Brushes
Saran Plastic Wrap
Styrofoam Half Ball
Gold and silver Sharpie Markers
Arleene's Fast Grab Tacky Glue


Start by covering the Styrofoam half ball with the plastic Saran wrap. This will allow you to separate the clay from the Styrofoam a lot easier once it dry.


Open the package of Creative Paperclay® and roll a sheet to a 1/4 inch thickness.
Cover the Styrofoam Half ball with the sheet by shaping the curve and cutting off any excess clay. Add some eye brows and chin detail. After your satisfy set  the Doll Face Plate aside to dry.
 
 
After the Creative Paperclay® dry removed the form from the Styrofoam half ball by moving the Saran Plastic sheet. You can lightly sand the doll face with the 3M Foam Sanders.
Start by using the Medium grid and use circular motions. Make sure you brush off all the dust off so you can see any spots that might need more detailed sanding.
 
 
Once your satisfy with the 3M medium grit and brushed off any clay dust  you can now start to sanding  the piece with the 3M Fine grit and just repeat the same circular motion and clean any dust to make sure all the detail sanding is done right.
 
 
Clean the Dust off with a small brush and damp paper towel to make sure all the particle's are gone before we proceed with the paint. This will ensure the Acrylic paint will adhere properly to the sculpted Doll Face.


Use the Acrylic paint color Touch of pink by Delta Creative Ceramcoat and apply 2 coats of paint on both inside and back of the plate. Set aside to dry between coats.
 
 
Now that the Acrylic paint dry we can add more details like brushing the skin a little. For blushing I'm using the Folk Art Stencil Creams. The creams will allow you to have more control over the paint while applying it to the face plate. All you need to do is rub a little to your finger tip or use a paper towel to rub the paint to the doll face.
Concentrate your work the forehead, cheeks and chin with red tone. Set aside to dry.


Now that the blushing is all dry we can add some eyes, eyebrows and mouth details with the Folk Art Licorice black. Choose your favorite fine brush to help you control the paint. Tip here is not to dip the brush in thick paint but water it down instead. This will help you with the flow of the paint stroke when drawing the lashes and eyebrows. Set is aside to dry.


Now that the black paint is dry I mix some of the blue and red Folk Art Stencil Creams and rub some on to give her some eye shadow. You can also paint the lips red in a heart shape and add more details like freckles and eyebrows lines with the gold sharpie marker. I added a silver eyeliner to enhance her magical look. Set her aside and let her dry.


Once the Doll face dry we can proceed to the holding ribbon.
This will allow you to hang her and decorate any room.
Cut a 1/4 inch ribbon to a 12 inches long in any color.
 
 
Add the Fast Grab Tacky Glue to the back of the doll face. Don't worry much about the messy since this will go in the back and the glue dries clear.
 
 
Flip the ribbon like in this photo and apply more glue to the back to make sure it adhere securely on the dolls face.
 
 
Apply some glue to the top of the lopped ribbon and adhere it to the  face plate.
You don't need much glue. I like to use just a little. It will cut the drying time to half .


Now your dolly is ready to be display or hanged.
 
 
Feel free to experiment with this face. You can add hair or added to a mix media canvas the possibilities for her are endless just have fun and keep adding more.
 
If you have any questions you can find us on Facebook. Feel free to share your project use #CreativePaperclay in your social media and show us what you have done using the amazing Creative Paperclay® Material


Creative Paperclay® is now available
in these 3 different sizes. 16oz, 8oz and 4oz.
 More fun for you to choose from.


Thank you for
 

Friday, June 12, 2015

Art Doll

Hi, it's Ann here today with a new project, a Creative Paperclay® Doll.  I call her Wanda and she tends to get lost just like Waldo!

I am pleased to say that Wanda is made with some recycled pieces such as an empty pill bottle, some foil, and a new styrofoam ball.  Here she is:


To make her I started with the head which is essentially a styrofoam ball covered with a layer of clay. I rolled out several different sizes of balls to make the eyes, nose, lips, and ears.


I used a spray bottle filled with some water to adhere the pieces of rolled clay together.


The body of the doll is an empty pill bottle that I also covered in clay.


I formed the clay into a cup shape at the top.  By crumpling up foil I was able to insert that into the cup part to solid the neck and shoulder part.


I attached the head to the clay over the foil neck with extra rolled coils of clay and water.
I also usem spritzes of water to smooth out the doll as much as possible.

Once Wanda was dry I used a sanding sponge and some Sandits tools to even out any rough edges.


I used a collection of craft paints to colour Wanda.


For her hair I used ribbon and a hot glue gun.

Supplies:
Creative Paperclay® Modelling Material
Empty pill bottle (from recycling bin)
Styrofoam ball (Dollar tree)
Aluminum foil (Recycled pieces from my kitchen)
Sandits (thank you)
Acrylic Craft Paints "Craft Decor" from Multi Crafts:  Christmas Red, White, Flesh.
Pigma Micron pens in black and green.
Brown Ribbon Stamping' Up!

To look and find where Wanda has gone please stop by my blog : http://annmakes.blogspot.com, and try to spot her!  Also stop by for more FREE project how to's.

Thank you for stopping by today!

Thursday, February 5, 2015

Bad Hair Day Art Doll by Linda Hess

Over the years I have met many wonderful, talented people.  One of those is Penni Jo Couch, owner and designer of Best Flexible Molds.  I discovered her molds while working in polymer clay. SUPER easy to use.  The detail obtained from polymer clay can also be achieved with Creative PaperClay!


 Here is a very easy tutorial using one of my favorite molds from Penni Jo, an art doll mold.

Materials:
Creative PaperClay (www.creatvepaperclay.com)
PJ039 Caboshapes II- Divas!  (http://bestflexiblemolds.com/PJ039.htm)
Handmade paper (www.arnoldgrummer.com)
Toner Funwire (www.tonercrafts.com)
crystal
scissors
Knitting needle or turkey lacer
dremel or small drill

Procedure:
1) Press a bit of creative PaperClay into the large art doll shape.  Be sure to press clay firmly into the mold.  Once filled, flex the mold to remove clay shape.  Set aside to dry (about 24 hrs).
2) If you are not a patient person when it comes to creating (like me), you can quick dry the art doll form by baking it in a low temp oven (275 degrees) for about 15-20 minutes. 
 3) Create a "dress" for the art doll using Arnold Grummer's papermaking kit (I use the PaperMill Pro).  Follow the directions here (https://polymercreations4u.wordpress.com/2015/01/19/painting-with-paper-pulp/) to create pulp.  To create stripes, place colors (one at a time) next to each other on the paper screen.  Follow the directions for pressing out moisture and completing the sheet of paper.
4) While damp, wrap the striped handmade paper around your dried art doll form.  Tear away excess paper.  Press paper firmly around form...take your time! 
Set aside to dry OR put back into your oven at 275 degrees for 15-20 minutes to quick dry.
5) Use a small drill or Dremel to drill holes around the top of the head (5-7).  Creative PaperClay drills so easily, but be careful not to drill to close to the edge!
6) Choose 1 or 2 colors of Funwire (I used Grape Ice and Bubble Gum).  Cut 6" pieces.  Thread wire through holes and twist as shown.
Continue until all of the holes have wire.  Use the knitting needle or turkey lacer to curl wire one piece at a time. 
Arrange hair as you go until all of the hair has been curled.
 
 
Drill another hole at t bottom of the art doll.  Use a final piece of wire to add a crystal. 
 
There!  All done.  Your Art Doll can be hung on the wall by twisting 2 pieces of "hair" to form a loop.  OR add a magnet to the back and it becomes refrigerator art (hehe).
I hope you enjoy this project.  Feel free to contact me with any questions or comments.  Come back and visit again :-)


Tuesday, January 27, 2015

Gloriann Irizarrys ooak cloth dolls how to add a Creative Paperclay face tip


2015 Has arrived with new ways for you to share and learn from your Creative Paperclay Material ®. Yes a more interactive way for you ask questions and learn new ways, tips, tecniques and ideas. You can share photos and get feedback on new ways to tackle any thing Paperclay relate. Yes what a wonderful way to start a day by helping and guide others and we got a new way for your questions to be answer by the whole Creative Paperclay Designer Team and many other Members of our new Facebook community. All you have to do is search for us here  Creative Paperclay Q&A. Simply create a post with each question so we can answer each one to the fullest details. We will gladly share any tips or techniques that will guide you thru your Creative Paperclay Material®  designs.Feel free to stop by and join us for many great questions, tip and techniques.See you there :)

Now let share here one of our dolly community commonly asked question:
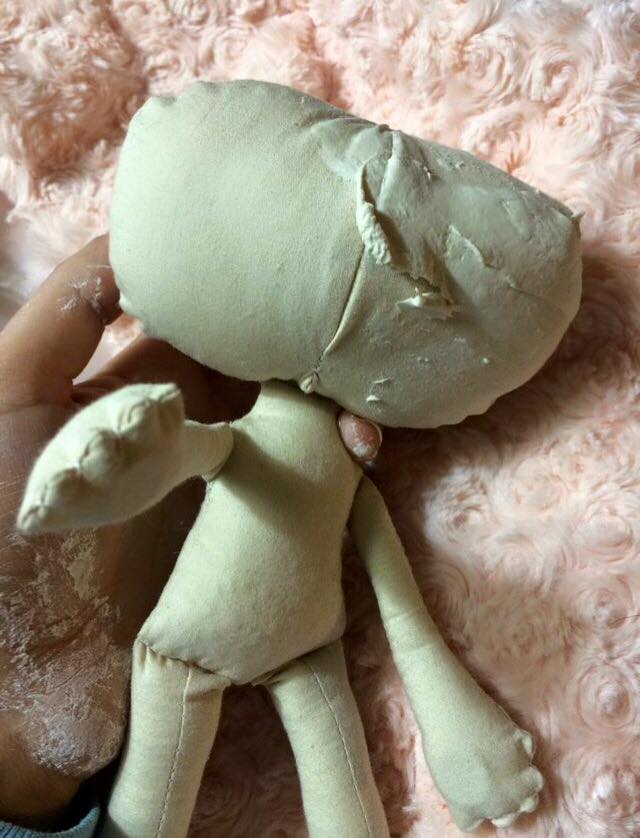
Wonder how do I add Creative Paperclay Material ® to the head of my cloth doll sculpt?
I want to sculpt more detailed face.

Easy I will be sharing my own technique in this post and let you examine all the groups responses just click here Creative Paperclay Q&A. Now  I will post photos of a doll i did and let you know all the techniques learned

2015 Llegó de una manera más interactiva para aprender a usar el Material Creative Paperclay®. Sí, aquí en nuestra nueva página de Facebook Creative Paperclay Q&A. Simplemente háganos sus preguntas en un post, y todo el equipo de talentosos artistas del Diseño podrán darle algunos links para que le ayude en su trabajo creativo.   


Ahora  vamos a compartir una de las preguntas más interesantes que recibimos en nuestra página de facebook,  especializada en hacer muñecas exclusivas, totalmente artesanales.  Todas son unas obras de arte.

¿Cómo podemos añadir Creative Paperclay Material® a las caritas de las muñecas de trapo?
Me gustaria poder escupirle y darles más detalles en las caritas de ellas.

Ahora para esta pregunta voy a compartirles mis propias experiencias y como es que yo las hago. Hay diferentes formas de hacerlo. Aquí les mostraré mi propia fórmula.
Cualquier pregunta, o si quieren compartirnos sus propias experiencias por favor, con  confianza, pase por nuestra comunidad abierta de Facebook clickeando aquí


You want to make sure the clay adheres to the cloth properly so you sculpted face
will not  fall once the clay is all dry.
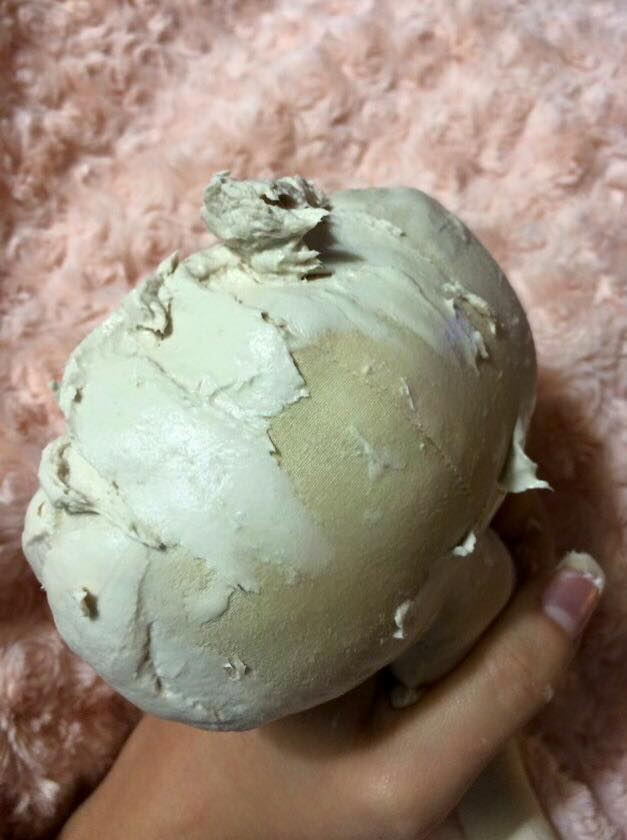
To achieve it make sure you add a thin layer of Creative Paperclay Material ® is very wet
and apply it all over the are you want the dolly face to be.
Press it firmly covering all the face in a thin layer and set it aside to dry.

Para asegurarse de que la masa se pegue bien a la cabeza de la muñeca, deje que cada capa de la masa Creative Paperclay esté completamente seca antes de añadir la segunda capa, sólo así se podrá asegurar que la masa estará completamente adherida a la tela.

La primera capa de la masa Creative Paperclay Material®  debe ser aplicada muy fina y húmeda. Apriete bien la masa con sus dedos contra la tela para que se pegue bien una vez que esta seque. Si desea puede proteger las partes de la muñeca donde no va a ser aplicada la masa de papel, con un plástico o si prefiere déjela al descubierto,  es decisión suya.
Déjela que seque completamente en un lugar seguro.
El tiempo de secado puede variar según el lugar donde usted esté trabajando.


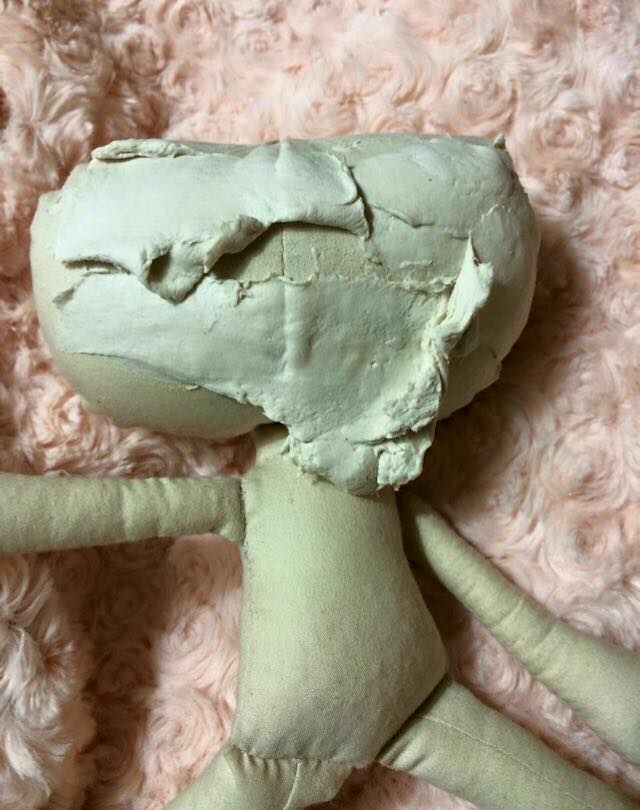
After the first thin layer of clay had dry go ahead and add a second little ticker clay sheet over.
Make sure is very wet and be a little gentle with the second layer you don't want to peel the first layer but to add more thickness so you can later work your details of you dolls face on the following layers.

Una vez que la primera capa de la masa de Creative Paperclay Material® esté completamente seca y libre de humedad, usted podrá comenzar a trabajar la segunda capa un poco más gruesa que la primera.
Hay que trabajar la segunda capa delicadamente ya que la nueva masa va a estar húmeda, y puede que debilite la primera capa ya que fue aplicada muy fina. Poco poco cubra la cara y déjela que seque completamente.

You can add little by little. Layer by layer till your satisfied.  Now there is no wrong way to where the clay needs to stop or were it need to be at. Yes it is all up to you and your artistic vision so feel free to add or remove has long you feel happy with the end result you will be able to create your own pattern for future dolls so feel free to experiment and and always take notes of what you like and don't like for you to reference on your next dolly or BDJ project.

Puede añadir poco a poco capa por capa hasta que se sienta completamente satisfecho del grosor que quiera que su trabajo al final tenga. La última capa es en la que va a esculpir los detalles finales de su muñequita. Siéntase libre de experimentar, poco a poco va a aprender el tiempo que toma en secarse cada una de las capas.
Al final esta masa puede ser tallada y lijada para darles los últimos detalles que va buscando que su muñeca tenga. Asi podra crear sus propios estilos y patrones. Recuerde siempre tomar nota para que le sirvan de referencia en los futuros proyectos que tenga en mente.


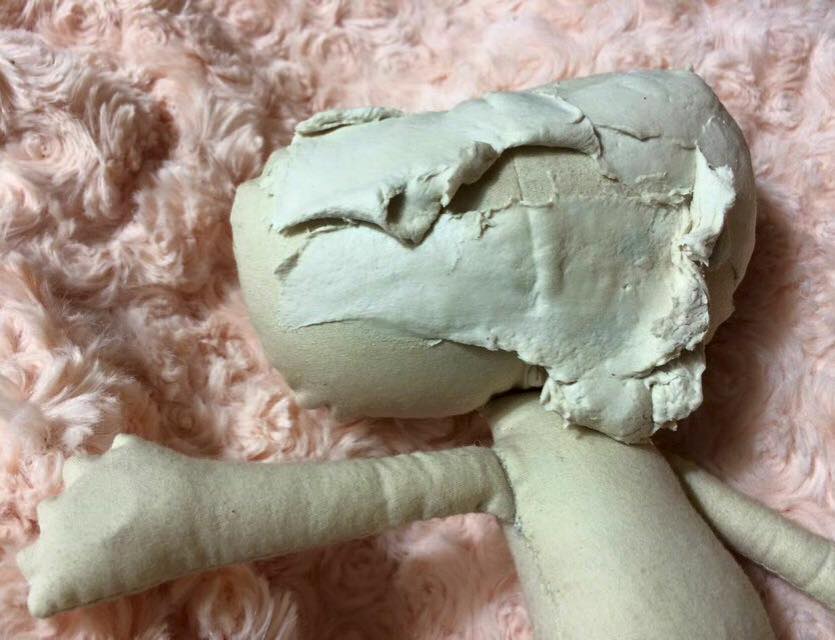
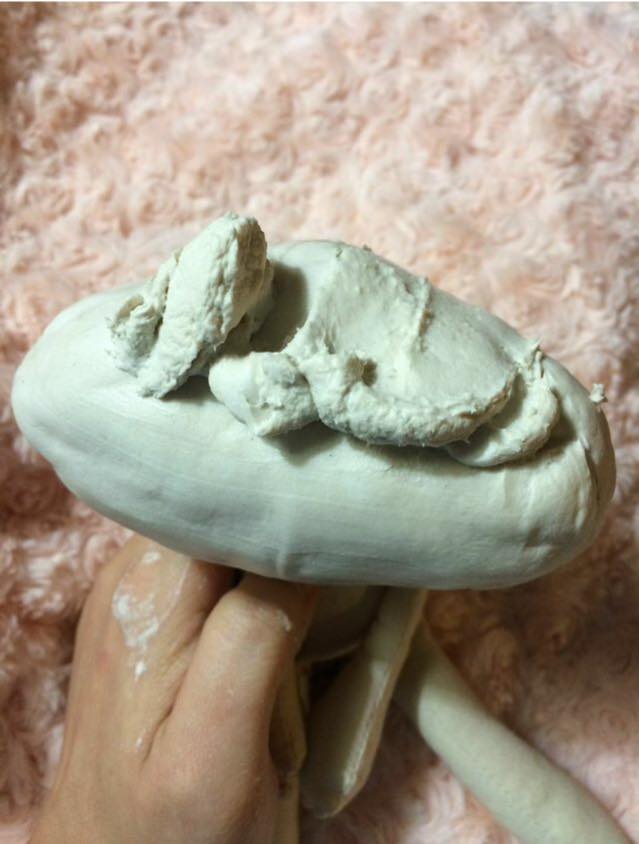
The back of the doll.
Well here you can add more clay if you want the whole clay head or don't if you have a wig plan no need to since these can be glued or even sewn  that will be up and your artistic vision.    

 La parte posterior de la cabeza

Aquí puede añadir masa o dejarla al descubierto.  Para esa decisión, es muy importante que tenga en mente que tipo de pelo va a poner a la muñeca. ¿Usará peluca? ¿O el pelo estará cosido con hilos de lana? Fácil, si le va a poner una peluca, yo recomiendo cubrir toda la cabeza con la masa de papel, y si va a coser el pelo de la muñeca pues déjelo al descubierto. Todo depende de su gusto como artista.

Top view
The top of the dolls head  should be fully covered in a few layers of the Creative Paperclay Material® This thick layer of Paperclay is for your gluing the wig it gets a solid surface to hold on. Make sure you smooth the la yer and set it aside to dry.

En la parte superior de la cabeza de la muñeca se le puede cubrir con más capas gruesas de Creative Paperclay Material®. Recomiendo esto si va a pegar una peluca para que luego esta no se despegue.

Antes de pegar la peluca, asegúrese que la masa esté completamente seca antes de ser pintada. Luego proceda al pintado y sellado dando, a cada paso, el tiempo correspondiente para el secado necesario.


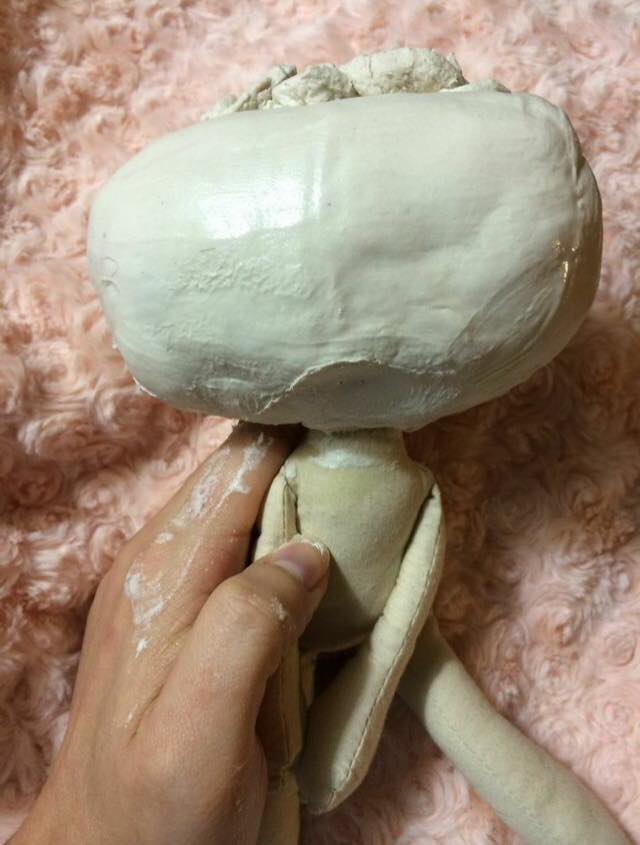
Front view.

Make sure all the clay is smooth before you let her dry so her head will be even and shape to the final size your looking your one of a kind Cloth + Creative Paperclay Material ® Doll.
Rubbing it with totally wet hands helps smooth the surface and reduces the chances of sanding later on. The finish product is entire up to you since there is so many ways to create many finished with the paperclay and this is why it is interesting once it added to a normal sewn cloth doll.
The possibilities are endless so feel free to experiment and share your finding with our Facebook community Creative Paperclay Q&A .


With this January 2015 Dolly Tip  I now leave you and remember  


Cuando trabaje la última capa asegúrese de humedecer bien los sus dedos y frote todas imperfecciones de la masa, esto le  va a economizar tiempo en el momento de   El resultado final es totalmente suyo, ya que solamente su visión le que va a guiar a lograr que su muñequita sea única y especial

Recuerde que si usted puede soñarlo, Usted puede hacerlo. Nunca se rinda.


Sincerely
Sinceramente


Tuesday, December 9, 2014

Sing A long Christmas Ornament The Little Drummer Boy by Gloriann Irizarry


1


Happy holidays to all and a bless new year to all my wonderful friends, followers and collectors.
This season is full of the family gathering, food, decorations and many Christmas Songs.
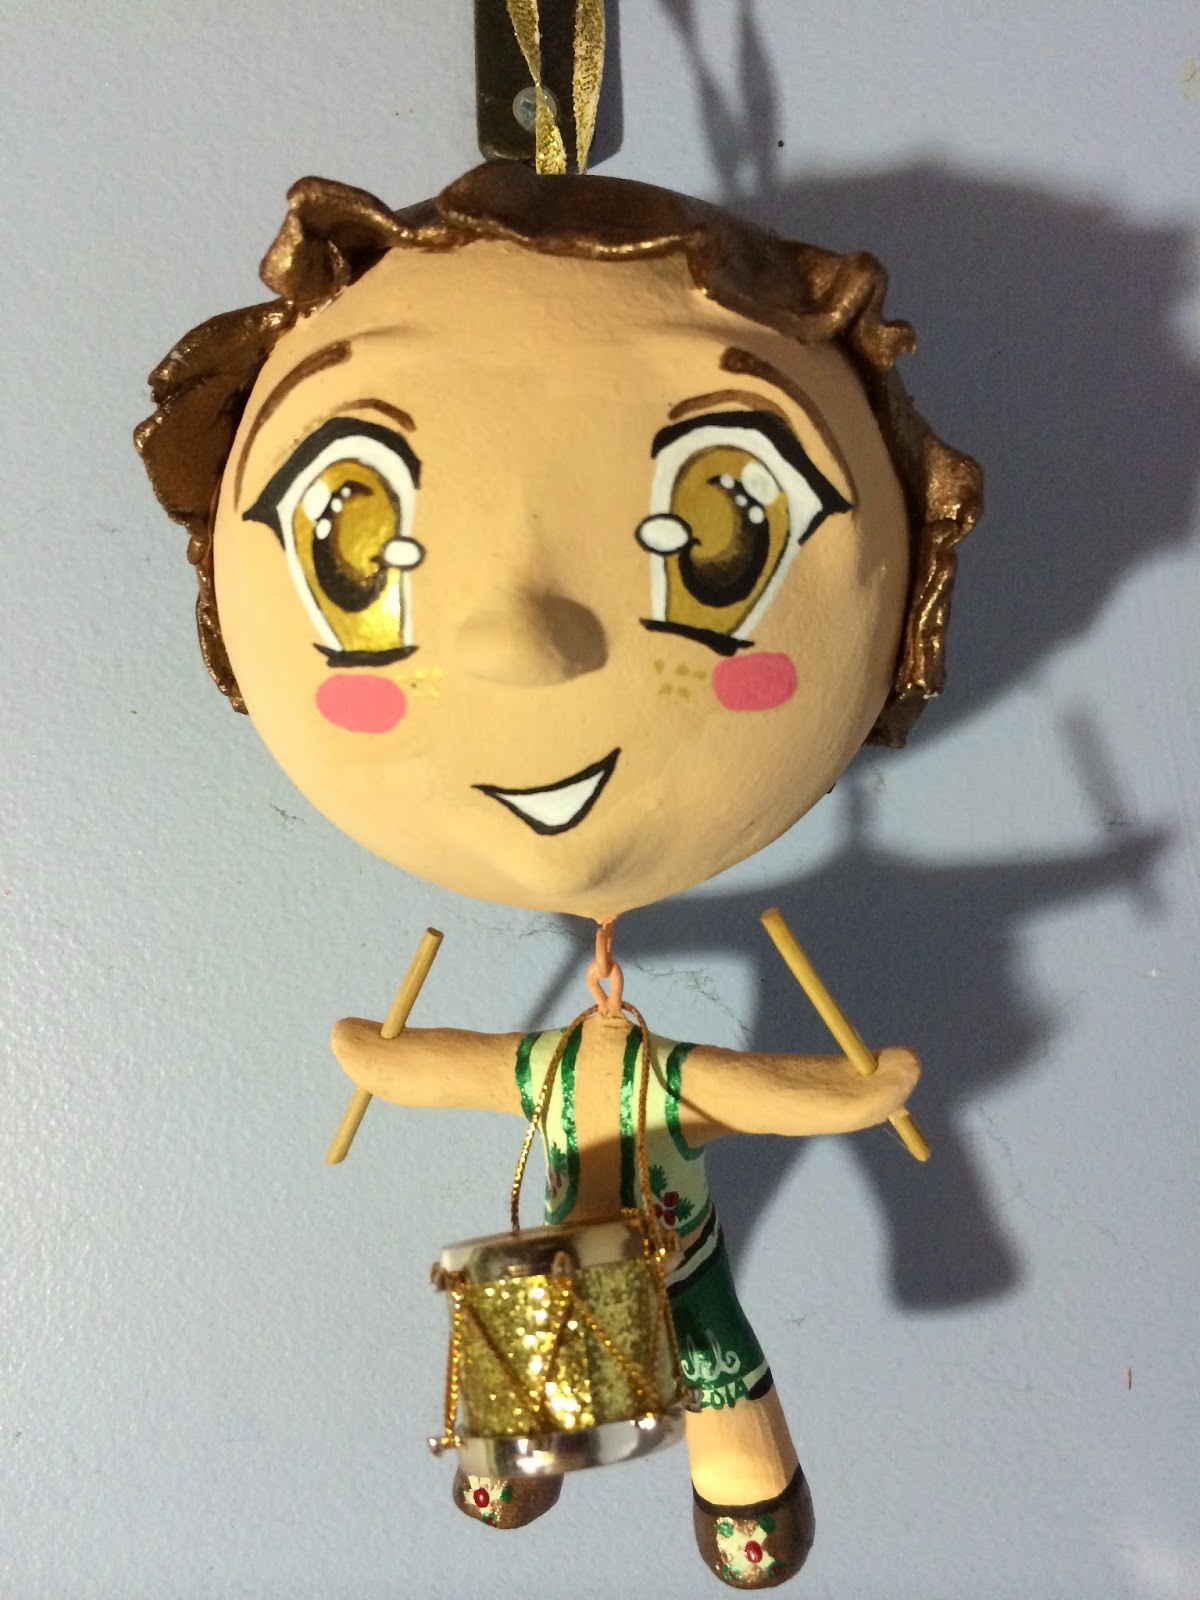
Thanks to these beautiful songs and to show the holiday spirit why not make an ornament. I have to say been part of crafting groups sure help to inspire you. These groups challenge you to create and make your gears turn. This is how this Sing A Long ornament took shape. With the help of my girls we choose The Little Drummer Boy we give him a Anime Manga better know has Chibi style and brought him to life in a cute ornament to hang from your Christmas tree or anywhere you want.


Materials
 
Delight™ Modeling Material
Foam round ornaments
Mini Drum Christmas Ornament
Wires
Multi use pliers
Aluminum foil
Acrylic paints
Brushes
Scissors
Water Mist bottle
Tacky Glue
 #2 Pencil


Cut a small piece of wire to create the small body armature.
Since is a chibi body it doesn't have to be big.
Chibi is a style of Anime/Manga drawing style used in characters to show smaller children as the actual meaning of the word is "short person" or "small child." have very small bodies with large heads.  


Is very important you pay attention to the neck piece a hop is required to hang the head from it.
Just bend the wire in half and shape a hoop with the pliers.
Now cut a strip of the aluminum foil and start wrapping around the armature.
 
 
Make sure your press the foil secure to the armature to shape the belly and back. 

 
Used your pliers cut a 3 inches long wire and curl it up like in the photo above.


Twist the wire inside the foam ball.
This will anchor the wire on your ornament head.
These ornament balls are seasonal items and I found these at Walmart fairly priced $.48 each
 
 
Now time to cover the ball with the Delight™ Modeling Material . Start by rolling a big ball flat to be able to cover the entire doll head.
I choose Delight™ Modeling Material due to be one of the most light weight clay I ever seen.
It help when your making a ornament because it is easy to use and once it dry has a foam like texture.

 
Once you have the sheet all rolled out like a pizza dough cover the ball and cut any excess out.
Smooth the edges with your finger and some water.
 
 
Do the same with the body.
Roll some clay out and cover all the body making sure all the foil and wires are cover in clay.


Shape all the body parts like the hands, belly and feet.
Chibi style doesn't required many detailed feet or hands so have fun


To make the hair just roll a smaller ball and once flat mist the head and attach the whole rolled clay on top and style to your like. You can also cut any excess out .

 
Move the the clay around roll it a little to give the hair the natural flow and it looks nice once it dry.
Set aside and let it dry.


Once the head is completely dry. Use your favorite acrylic paint in your chosen skin color.
Here the Peach Rose was applied.

 
Make sure your entire body is all painted with at least 2 coats of acrylic paint.
Water the paint down with water to minimized the brush strokes when the paint dry.
 
 
Now that the body base paint is dry you can start by painting the top vest and the little shoes.
Vest is light mint green and the shoes Renaissance Metallic brown 

 
Use the same Renaissance Metallic brown for the hair and apply 2 full coats.
Make sure you always wait for each coat to be completely dry before adding the other .

 
Do the same on the vest add to full coats of the light mint green.


Use Metallic Green for the pants and also use 2 full coats of paint.

 
Line up the vest with the Dark Metallic green.
Create some holly leaf detail on the vest and add dots to the shoes. 

 
To give the final touch to the vest use the Tuscan red and add the holly berries.
3 simple dots will be enough to achieve this look.
Here you can also add some belt detail. Also you can sign and year your ornament.

 
One more red dot of Yellow to create the buckle and a center dot of Tuscan red to make the shoe pop. .

 
For the drum sticks you can use toothpicks.
Stab thru the hand and cut to size.
Use a little dot of Tacky Glue or  Elmer's glue to secure the sticks in place.

 
Now to make the signature Chibi big eyes. Start by lightly sketching the eyes over the dolls head
 with a regular #2 pencil. Make sure the placement is were you want them to be. If the placement r not were you want them to be lines  can be easy removed with a school eraser.

 
Cover the whole iris with white. White is a base to make the top color pop and looks more vibrant.
Wait for them to dry.


Now add 2 coats of  the Teddy Bear FolkArt acrylic paint to create the iris.
Make sure is completely dry before each coat is apply.


Now to give the eyes some shine use Gold acrylic paint  to the final third coat.
For the Pupils use Renaissance Metallic brown to finish the eyes.
Paint 2 coats in a half moon shape. Make sure you wait for the pupils to dry between coats.


After the pupil had dry use the white acrylic paint to finish the eyes.
Water the white paint down to minimized the strokes out.
Paint 2 coats or more depending on the skin color of the doll you might need more. Now again make sure the paint is all dried before the other coat is added to achieve a nice bright eyes. 


Now use the Black acrylic paint to accent the eyes. Water the black out and with a small brush start outlining the eyelashes and pupils.

 
To finish the eyes add some whites to give them some shine.
Use the gold paint and add some freckles.
Use the black to out line the mouth and rose to blush the cheeks.
 
 
To finish the doll out use Black acrylic to outline the belt, pants and shoes.


Before your add the head to the body make sure to thread your cute mini drum ornament.
Use a pair of plier to twist and shape the head wire into a nice hoop and thread it to the body.
Secure it in place with the pliers. Paint it with acrylic paint to cover the wire and give it clean look.
 
Seal the ornament with any matter acrylic sealer to protect the paint over time.


 Now your Little Drummer Boy is ready to be display.
 
Are you ready for the holidays? Let just remember the true meaning of these holidays and make sure we spend time with all your loves ones. Don't be afraid to have fun and let them know how much your love them so they can have great memories to treasure.


Thank you kindly for join us for this Sing A long Christmas Ornament The Little Drummer Boy and if you have any questions feel free to leave us your comments below or email me here
 
 
scan or visit my blog at