Showing posts with label how to work with Creative PaperClay. Show all posts

Sunday, February 19, 2017

Working with Creative Paperclay and Delight Products


I have been on the design team for the past 3 years, and simply have learned so much working with everyone that has been on this incredible team!  I scrapbook and stamp, so I use both Creative Paperclay and Delight in various ways for my scrapbook pages, my cards, and paper crafts galore!  I am working on organizing my space, Creative Paperclay is a part of the spaces I am organizing!  Magnets made with stamps and molds, make my space look inviting and happy!!!
Yet part of working with this incredible stuff, is being able to learn from others on my team and the things they have done as well!  Going in to the next few months, here are a few tips whether you are working on a gift, your own creative space, or your space outside:

  • Take a look at the past projects -we have Easter coming up, Mothers Day, outdoor projects - find something you want to do and get the supplies started for it!  Planning things out a bit, really helps to make sure the
    finished project is PERFECT!  
  • If you want your project to be a bit heavier, use Creative Paperclay!  It hangs better on with a magnet on the back, than does the Delight!  
  • Plan your projects out on paper - before you start to tackle them in real life!  This way, those larger projects you want to be "perfect" will be PERFECT!  
  • If something is simply not working the way you want it to be - start over!  The best part of working with the Creative Paperclay and Delight products - is being able to reuse it if you don't wait too long!!!  
I am working on my designs for a fun fairy garden (thanks to the design team), and a fun angel girl that will sit by my desk (thanks to a past blog post)!  I am designing on paper first - finding the items I need to recycle...(boy do I use a lot of creamer), and by the time May hits - I will have a fun fairy garden for my patio, my angel girl done, and more magnets made for my creative space!  
Lynda Jeffs
2017 Creative Paperclay Design Team


Sunday, February 7, 2016

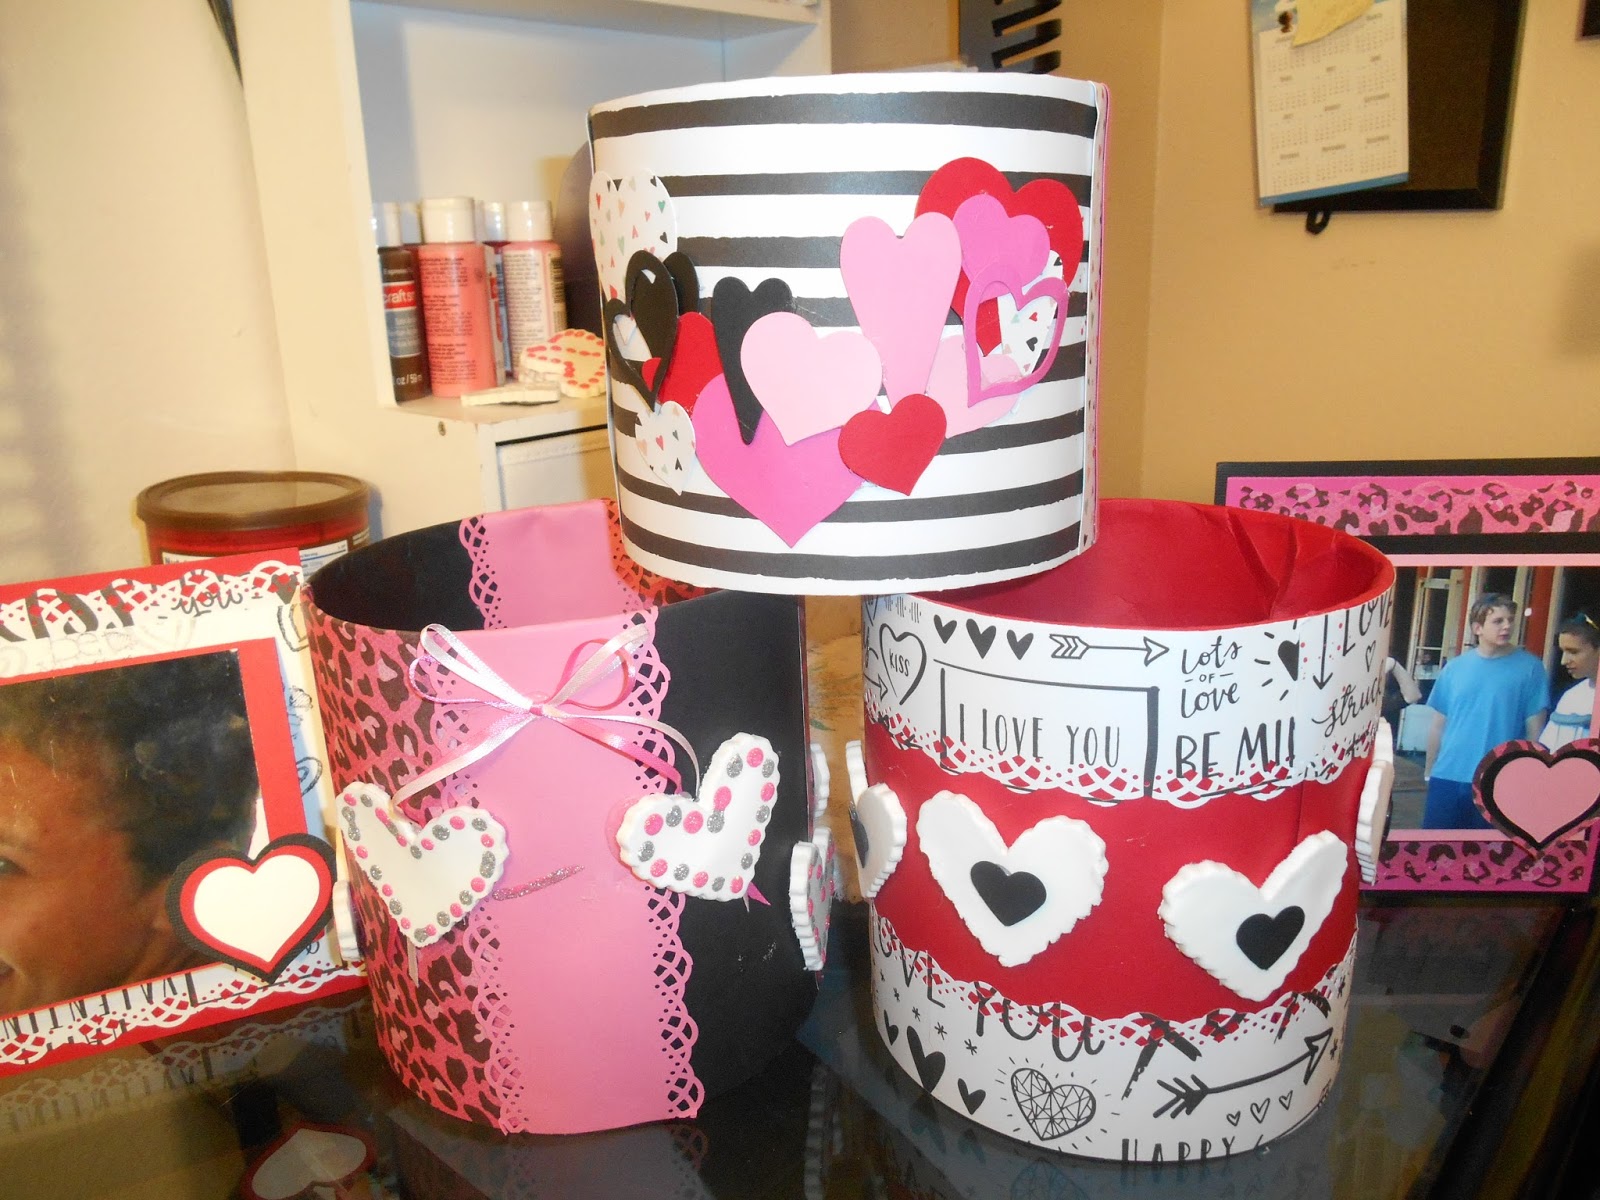
Fun Valentines Day Altered Can Project

When you give gifts out to your friends and family - are they works of art, or are they just shoved in a bag?  I love to reuse things - like coffee cans, to create one of a kind creations to put presents in - normally I am a shove things in a sack and here you go kinda gal!!!  Today's project - how to create your own one of a kind gift container, which can be tweaked for just about any kind of holiday!  Let's get started! 

Supply list:
Can - your choice of size... I use an MJB coffee can (empty of course)
Paper of your choice
Delight product
Heart cookie cutters
Glitter glue
Heart punch
Ribbon
Border punch
Die cuts 

Directions:  
Step one: Using the Delight product, flatten an entire package out to your desired thickness.  If you are reusing the Delight product after you have cut shapes out - simply roll in a ball - and flatten back out!


Step two:  Start to cut out hearts with your heart cookie cutter.  Repeat step one using the leftovers.  Set aside to allow to dry.


Step three:  Take your can and start to cover the outside in an attractive manner.  Measure the outside of your can and add about 1-2" extra paper to allow for you to glue the whole thing down.  


Step four:  Start to add the extra's that will make the can unique, such as a border using the border punch, die cuts or embellishment's that go with the theme you are working on.  

            
Step five:  After the Delight hearts are finished drying, decorate them with punches and glitter glue.  When glue is completely dry, add to the can.  With  the pink can, I added a bow, with 2 hearts on the top of the ends of the ribbon.  With the red can, I added a black heart on each of the Delight hearts, with 1 heart accented in the glitter glue.  


With these can's - you can customize to just about any gift giving event you have, or plain (in a favorite color) for "just because"!!!  Each of the cans are different, with tags created (directions on Memories in Tyme blog) to match each one!  They are a bit bigger - I wanted something they could frame if they wanted to!  

**Tip - watch for cookie cutters at Walmart for .98 cents for about 5 individual cutters!  Or - grab a coupon and go to your local craft store and get them!  You can even check out the thrift stores too!  I spent almost $5.00 at Michael's for 4 cookie cutters, went to Walmart later on - and found them for .98 cents! 

Cookie cutters, added with Delight or Creative Paperclay - can create so many different things!!!  Accents for your scrapbook albums or cards...magnets...or embellishments for altered items!  One package will go a long long way - unless you are making a larger item!!!  Delight product will dry quickly - and can be put in the microwave to create a more 3D look.  Creative Paperclay will dry hard and non-breakable, ready for acrylic paint!!!  So, depending on what you are looking to do - either product will help you get started in creating really fun one of a kind items!  I have a video coming up - tips on using molds to create embellishments and other fun things - I hope you will join me in 2 weeks!  

Thanks for stopping by,
Lynda Jeffs 
Creative Paperclay Design Team     

Sunday, January 17, 2016

Lynda's Creative Paperclay Keychain

I really like easy projects - things that just do not take a long time to finish up!  Yet, on the other hand, I also love to create more "in depth" projects too!!!  Today's project - well, doesn't require a ton of supplies - so lets get started!  

My daughters "word" is believe...  She is an amazing person, who has been through more than her fair share in life...  She has taught me more about life than I have taught her...  I am so thankful she is MY daughter - and that we have become as close as we are right now!  I love making little things for her - such as today's project!  I also decided it is MUCH easier to show you a video, than to explain the directions as to how to make something!!!  

Supply list:  
Creative Paperclay product
Saying stamp of your choice
Paint colors of your choice
Silent Setter (or something to create a hole
Ribbon
Rings

Directions:


Lynda Jeffs
Creative Paperclay Design Team

Sunday, August 2, 2015

Lynda's Monthly Tips


Hello there!  I have loved bringing you beginner projects for you to start out with, especially scrapbook embellishments for you to use with your paper craft projects!  After checking out my own personal calendar for the next few months - I have decided I best get things done early!  In order to get things done, here are a few tips to help you:  

  • Mold things that you like to use on your projects ahead of time!  That way, it saves you time from having to let the piece dry!  
  • Have a container to put all of your supplies in!  That way, you can pull out one thing, and have everything in it you will need!  
  • Also have a container you can take with you if you are going to be waiting for an appointment!  The Delight product won't make your hands TOO yucky, but keep a small container of baby wipes/hand wipes with you!  
  • Learn to look at your calendar for the upcoming months, (once a month challenge on my blog, link below).  That way, you can get things done earlier - and work the bugs out if you have any!
  • Check out some of the fun ideas on Pinterest or this blog!  Tweak them for what YOU want to make!   
I never realized all the fun things I could do with Creative Paperclay and Delight products!  I am so glad to be on this amazing team of people!  So, join me each month at Memories in Tyme, where you will get that challenge once a month to look at your calendar I talked about!  The best thing about that - you don't have to scrapbook to join THAT challenge!  See you in a few weeks with a few fun ideas, and at my other blog!!
Lynda Jeffs
Creative Paperclay Design Team


Sunday, July 19, 2015

Lynda's July Post

The projects I have been making lately are wonderful for beginners to start out with, especially if you have basic supplies to create with!  Some of my favorites right now are mold's, being able to mold out fun flowers and things ahead of time, creating when you have the time!  However, this project - though you can use mold's for embellishments, I chose to make my own!!!  


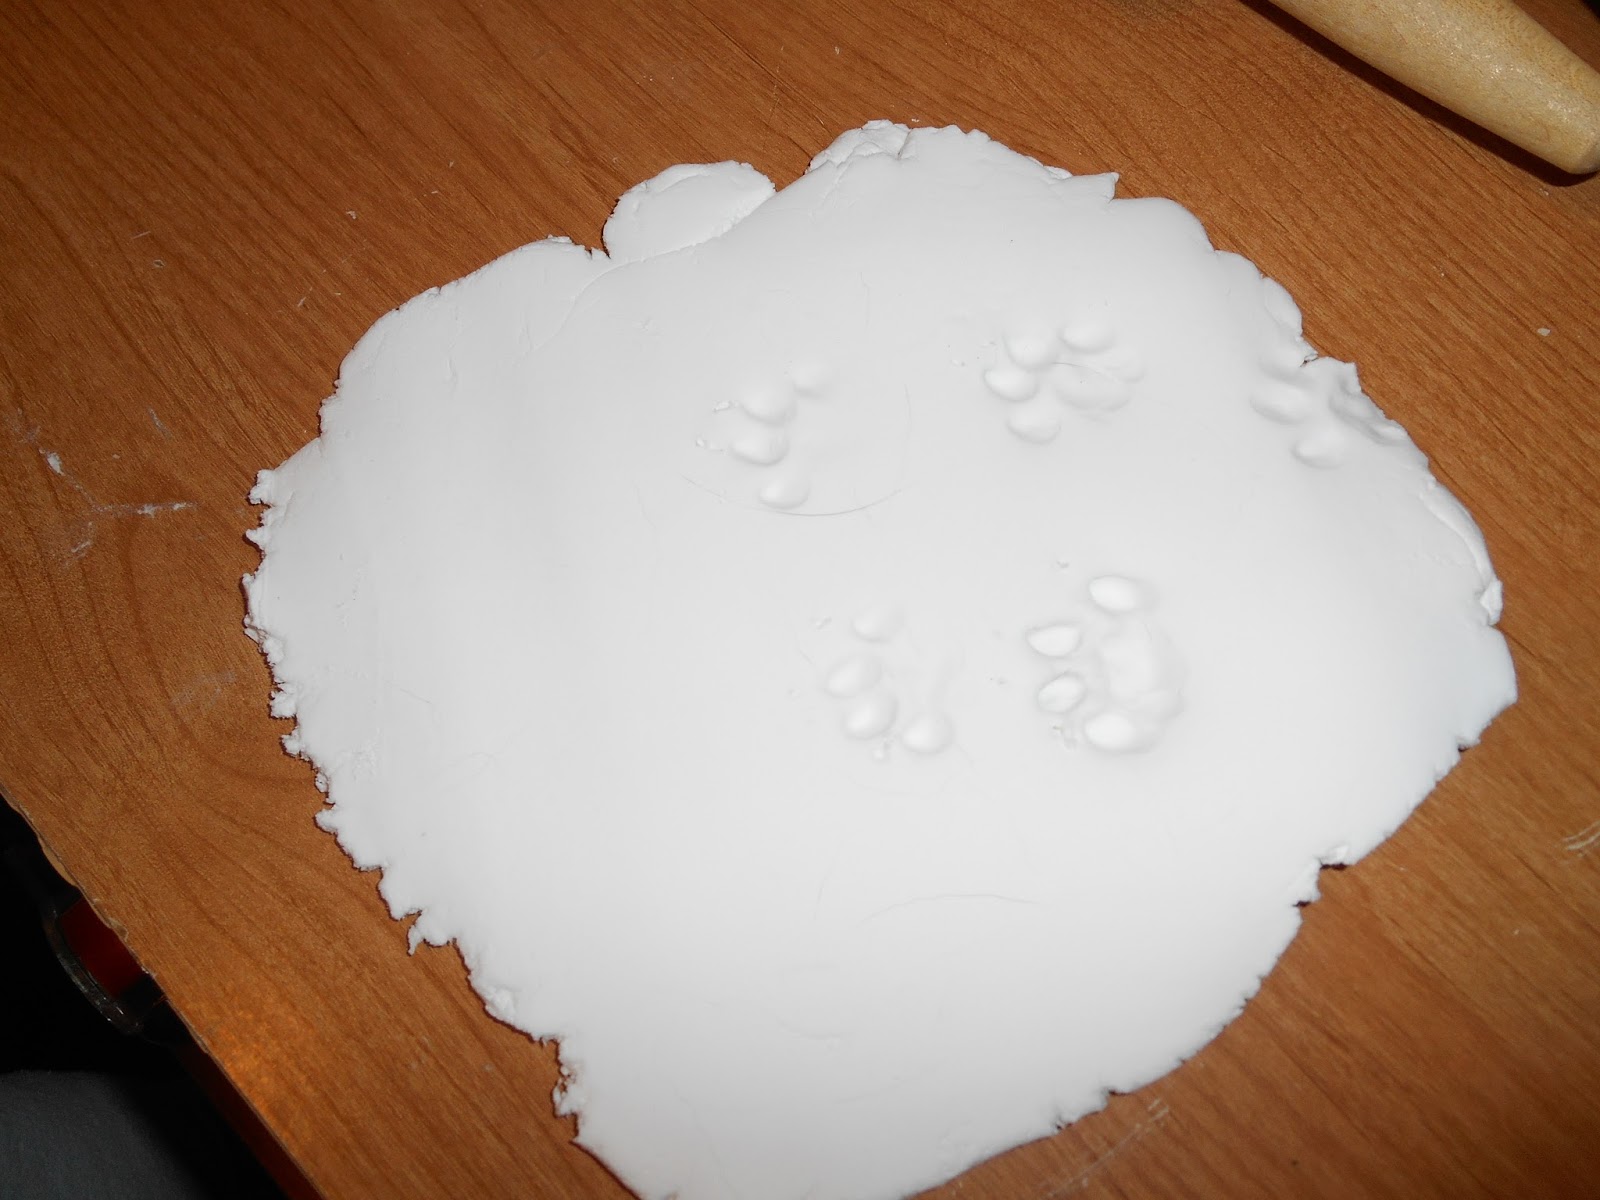
If you craft with paper - and have pets, you will have to create yourself one, using your pets paw prints!  I have 3 cats, and found this darling idea on Pinterest to capture each of their paw prints - and I am using the Delight product for it!  So, grab some fun paper, a box, something to cut the circle out with for each paw, bakery twine or ribbon, and Delight product - and lets get to work!!!  


Supplies used:
2 sheets of cardstock
Box
Hot glue gun
Delight product
Rolling Pin
Round object
Ribbon/twine
Small hole punch (I used Silent Setter)
 Directions:
Step one:  Roll the Delight product out, have cat/dog walk over the product.
  
Step two:  Take round object and cut out one or two of the paw prints.


Step three:  Take another round object (I used my Silent Setter) to create the hole at the top to thread through your twine/ribbon, etc.  
Step four:  Cover your box using your favorite papers.  Since my box is going in the kitchen - I used kitchen papers!  I can always change the embellishments as I want to! 


Step five:  Add the ribbon to the top of the box, and the paw print charms to the front of the box!  
Step six:  Add the cat treats (or dog treats) to the box -  

This was such a fun project - using the paw prints of the 3 most precious cats - at least to me they are!  I hope you have enjoyed this easy project - you can do this with a baby's prints - or any paw print from animals!  I really hope you enjoy creating your own, and share them with me!!!  
Lynda Jeffs
Creative Paperclay Design Team
and Memories in Tyme

Sunday, July 5, 2015

Lynda's July Post -

Creative Paperclay - is such a fun product...for me - my favorite use is with molds!  I can mold a bunch of different flowers, buttons or leaves - and use them later on, painting to match the project at hand!  Being "newer" at creating with the product, I haven't delved into larger projects as much (I have done a few, but nothing really over the top) - I scrapbook, and use the product for embellishments more than anything!   Today's tips, are all things that are helping me out - working on larger projects rather than smaller ones!  


Since I do scrapbook - and mostly use paper products - creating embellishments made out of Creative Paperclay is really fun for me!  Each piece turns out different because of the papers and products I end up using!  I don't like things to look like something else I have made - even though I end up using the same type of things on each project!  Each turns out different because of the products!   
So, I have some tips for you - things that are helping me out - I figured they might help a few of you out as well!  

  • Find a place where you can keep all of your ideas - such as a notebook or sketchbook! This way, as you are looking at things, or thinking about things you want to create, you can keep the information in one place!
  • Sketch the idea out on a sheet of paper, sketch pad, or design sheet!   What do you want the piece to look like when it is finished?  What supplies do you have for it - what do you need for it?  Do you have a container (or something) you can put it in while you are creating?  
  • Look back at the amazing ideas on this blog, on other blogs, Google "Creative Paperclay" and check out the images there, or even look on Pinterest for more ideas!  
  • Lastly - don't be afraid of playing with ideas!  Some of the favorite things I have done, have been done by taking the time to write things as to what I want to do, with it sketched out if possible!  
Thanks for stopping by, I will see you in a few weeks with a few gift ideas you can make, and decorations for your Christmas tree (if you celebrate)!  Most of my ideas you can tweak....use your own supplies and products YOU like while you are at it!  See you next time!
Lynda Jeffs
and Memories in Tyme    

Sunday, January 18, 2015

Idea and Tip from Lynda

Hello again!!!  Lynda Jeffs here, from Memories in Tyme and the Creative Paperclay Design Team!   I get to work today, and forgot one of the girls at work had a birthday today!  I simply told her I left her card at home, thinking throughout my day - as to what I could do for her that would be quick and easy, yet not look like it was "quick and easy"!! Part of the whole idea will be on my blog (link above)...so make sure you check there too for everything that was made for her!
As I sat at work today, I had to think of what I could do that would be easy enough to get done in a quick hurry...  Today's tip and idea...are all based on what I discovered as I was creating!  

  1. As you find a mold you really like, and you know you will use it a lot...make sure you take the time to mold a few extra pieces (or more)!  This way, you can simply grab the pieces you need and design, without having to worry about drying time for the pieces.  
  2. Don't be afraid to experiment with your pieces and ways you can color them!  Ink some pieces, paint others with acrylic paint, and leave other pieces plain!  
    
  
With my idea today, I love how it didn't take too long to complete, supplies were what I had at home, and it is a one of a kind gift for a friend at work!  Here are the inside pages for the whole project - in case you are ready to make your own!    


Supply list:

6 x 12 sheet of cardstock, folded in half
2 sheets 8.5 x 11, trimmed to 5.5", folded in half
Cardstock for inside pages 
Die cut shapes - flower, either leaf or vine
Saying stickers
Creative Paperclay
Flower mold, Stampin' Up
Ink pads, Stampin' Up - Strawberry Slush, Crisp Cantaloupe
Ribbon, floss, and twine
Hole punch

Step one:  Take 6 x 12 sheet of cardstock (already folded), place 2 5.5 x 11 sheets of cardstock already folded inside.  Placing a ruler on the folded side, punch a hole at 2" and 4" to put the ribbon, floss and twine through.  
Step two:  Start to add photo matt's to the inside pages (10 total) measuring 4.5 x 5 for each one.  Add them to the inside pages.  
Step three:  Add the leaf vines and flowers to the front cover.  For the Creative Paperclay flowers, ink them with the ink pads using a sponge.  For a lighter look, make sure you paint with white paint first.  
Step three:  Start to add the inside stickers and embellishments to each page.  

This particular idea will only work in a pinch - IF you have Creative Paperclay embellishments already molded and dried beforehand!  Take a look at different places for mold's - and look for non-traditional molds, such as small lids to make your own embellishments with!  This is such a fun thing to work with - simply add your scrapbook embellishments, stamps, imagination - and you are all set!  
Until next time, 
Lynda Jeffs
Creative Paperclay Design Team 
and Memories in Tyme
     

Sunday, January 4, 2015

Beginner Tips

I am working on a beginner section, where I will give you a ton of information, tips from the design team, must haves as far as supplies, links to plenty of ideas in a beginner format, and more!   For me, it has been fun creating with the Creative Paperclay product, creating unique things!!!  I have a few video's to create on my list of things to do, but unfortunately - things are just hectic right now, and with a cold on top of it...well, this is totally on the backburner until the health gets better!
One thing about just starting out using Creative Paperclay, it is a very easy - fun product to work with, and I've learned a few things along the way!  A few of them include:

  • Don't bite off more than you can chew WITHOUT (and I am stressing without) researching a bit first as to how you can accomplish said "task"!  Some of the projects I have made, might look a bit better if would have thought things out a bit better or more!  
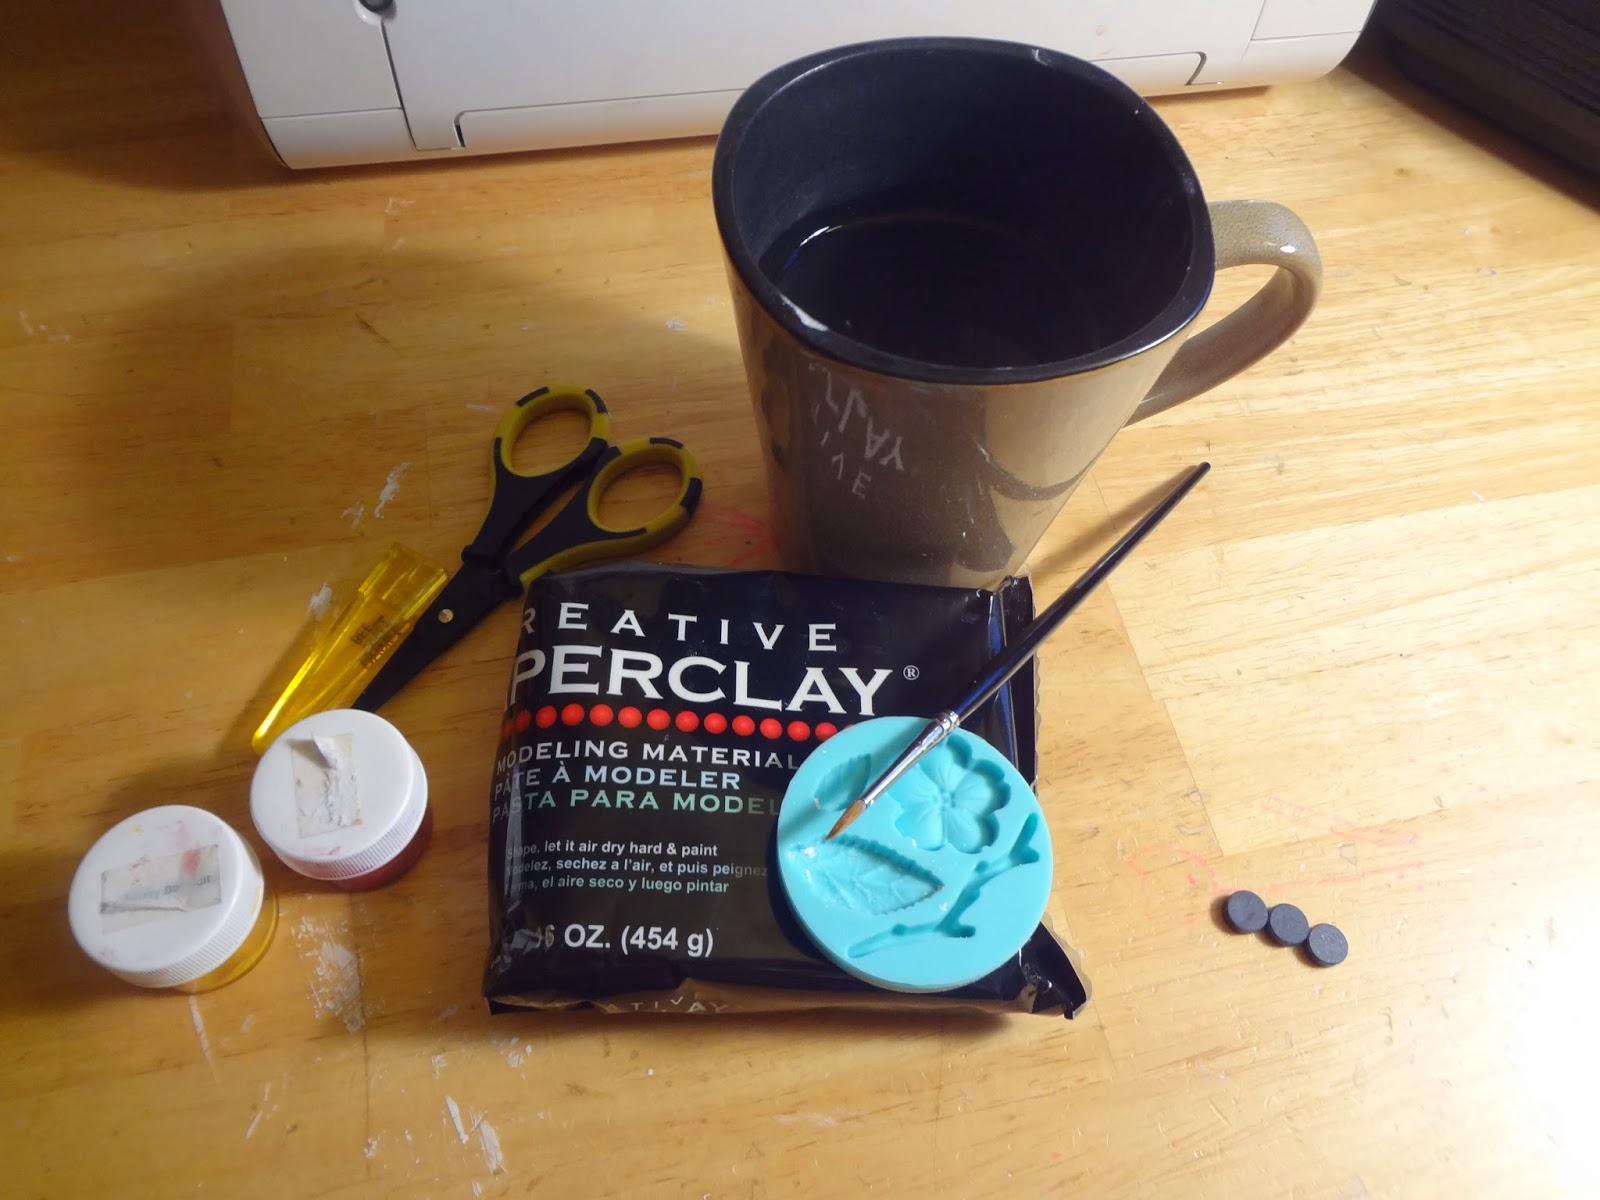
  • Grab all of your supplies first...think ahead as to what you are creating for the supplies you will need to accomplish it!  Add to it a wet cloth of some sort, a dry cloth, as well as a cup of water to smooth your clay out!  
  • Find a space for everything you need to create with, and put it all together!  Have a "toolbox" of basic supplies - a ruler, Xacto knife, a straw (great for creating holes), sand paper, molds, something to roll the clay with to name a few!  
  • With your favorite molds and stamps, try to create a few images you use a lot of ahead of time, this way it saves time for drying!
  • Make the time to create and learn something new...even if you are just starting out. Create something at least every few weeks...in order to keep expanding your knowledge base!  
  • Above all, have fun...if you mess something up, then start over, reusing the same product!  Don't worry about what everyone is has created/is creating - get inspiration and create!  
Thanks for stopping by,
Lynda Jeffs
Creative Paperclay Design Team
and Memories in Tyme

Tuesday, August 5, 2014

Creative Paperclay Tips by Lynda


Big project or small - Creative Paperclay is one of the funnest things you can use to create your own type of projects whether you craft in general or you create scrapbooks and cards!  I can't wait to get done with my creamer so I can create a fun ghost out of the container for Halloween!  I use it for my scrapbooking embellishments, for magnets, and for decorations!  You should see the project I am finishing up right now - a container to put all of my medicine in, that is attractive to put on my desk!!! Working with this fun stuff, I have a few tips to get you started if you are new at it!


  1. Find a box or container of some sort where you can put all of your stuff in, it makes it easier when you are working on things.  I use a container from Jack In The Box when I had a salad!  Simply clean it out and you have a container that can go with you!  
  2. Make sure you have a few Ziploc style bags, either sandwich bags or the larger size to put your clay in if you have any left over.  This way - you can use a small portion when you need to, while saving the rest for later on!  
  3. Let water be your best friend when you are using the clay to create with! Don't be afraid to make mistakes and start over if something is not looking the way you want it to!  
  4. If you want inspiration - simply go back through this blog and you will get a ton of inspiration from past and present design team members that you can create yourself! 
  5. Most importantly - HAVE FUN!  
My supplies are in a container where I can take it outside on the table if I want to work on things outside, or on an appointment if I need to mold a few flowers!  I hope you have enjoyed my tips for today...catch me in two weeks where I will actually have a video of how I made my box to put my medicine in!
Lynda Jeffs
Creative Paperclay Design Team 

Tuesday, July 1, 2014

Lynda's July Tips

One thing about being a part of this group of women - you learn a lot!  Each of us have our own style - or our own particular "expertise" you might say!  There are many different types of projects on this blog, with many different women sharing their Creative Paperclay projects before this team of women.  My area of "expertise" is more scrapbooking and card making - only recently making larger projects as I am more comfortable in creating, thanks to our fearless leader Terri!  So this month, you not only will get a few tips - but you also get a challenge as well!!!   

Now - your challenge this month - is to find projects from this blog that you want to recreate...and to look back at all the tips that everyone has put down here and start to keep track of the ideas and tips you like! If you have a Pinterest account - here is my link, and here is the Creative Paperclay link while you are at it, just type "Creative Paperclay" in the search bar and you will get a lot of projects you can do!  Find your favorites and get started!


A few tips for you:    
1.  Let water be your best friend when you are creating!  Don't be afraid of the clay and in using water to take care of the slight imperfections you might get when you are working with the clay!  
2.  Look at containers you would normally throw away - as a "base" for things you can make!  I turned a cleaned out creamer container into a snowman this past Christmas, so look at what you have - and have some fun!  
3.  Your scrapbook templates can make great one of a kind projects - such as magnets, embellishments for your pages and cards, or to add to larger projects!  Check out what you have at home already before you go out and spend a ton of money!  


Tuesday, December 17, 2013

Dressing Up Your Magnet Boards - So Easy a Kid Can Do It


This was a really fun and easy project, that even a child can do it!  I really like easy things that someone can create without having to spend a lot of time.  I have had the magnet frame for a while, and wanted to dress it up by using magnets with some of the flowers I have made out of Creative PaperClay!  Let's get started with the list of supplies and directions:  

Supplies used:  
Creative PaperClay
Paint (I used Radiant Pearls Paint)
Flower mold
Magnets
Hot glue gun

Directions:

Step one:  Using a small bit of Creative PaperClay, round it in a ball, then flatten it out to get all the imperfections out.  
Step two:  Place the clay in the mold, putting the best looking part of the clay in first, filling up the entire mold. Make sure to trip the back to flatten it out for the magnet. 
Step three:  Allow to dry either overnight, or heat in the oven for 30 minutes at 250 degrees.
Step four:  Paint the clay pieces the colors you want, with the paint you have available.   
Step five:  Add the magnet to the back of the clay pieces - add to your magnetic frame!  

By using molds, any kid can make a one of a kind magnet board for their room, made with little supplies and effort customized to their room!  And the fact they made it themselves is sure a great boost for the ole' soul if you know what I mean!  I hope you enjoy today's project, and it gives you inspiration to create your own magnets!  
Lynda Jeffs
Creative PaperClay Design Team
                                                   and Memories in Tyme  

Sunday, November 10, 2013

Get To Know Your Clay -- LeeAnn's Tip #1

                 
Hi Everyone!

My name is LeeAnn Kress and I am new to the Creative Paperclay® Design Team.  It is such an honor to be able to post my ideas and thoughts here.  I hope that I (along with the other members of the Design Team) inspire you to try out this product!  

My tip for you this month is to “get to know your clay” … In other words, know what your clay can actually do.  I have had quite a few people ask me, “Can paperclay do this …?”  So, for all you newbies out there that would like to try out Creative Paperclay®, these tips are for you!  

Let's go over the basics ---

Creative Paperclay® is an air dry clay.  Meaning, if you leave it out on your worktable without putting it in a tightly sealed container or bag, it will dry out.  When I am sculpting, I will take a piece of it and wrap up the rest until I need it.  This will keep your clay moist and ready to go. 

Have a small bowl of water next to your clay, so that you can occasionally wet your fingers to help keep your clay moist while you are working with it.  Water will help smooth out the surface of your clay and keep it pliable.  (A little water goes a long way – too much water will water down your clay and change the texture of it.  It can also lead to cracking, so use water wisely.  Keep a towel handy to dry fingers that are too wet.


Also, if your hands are getting a little gummy with clay, go wash them or wipe them off.  Tiny flakes of clay stuck on your hands will dry fast and will then stick to the clay you are sculpting on.  Keeping your hands clean, keeps the clay you are working on clean too.  

The same goes for your work area.  Try to keep it clean as lint, dust, etc. stick to clay. 


Some of the ways Creative Paperclay® 
can be used right out of the package ---

Paperclay can be rolled out just like cookie dough. Just sprinkle “a little” baby powder on your clean surface (I use a silicone mat) and your clay won’t stick to your mat or rolling pin.  Baby powder acts like flour would to cookie dough.  Once rolled out to your desired thickness, you can use a template to cut out shapes or letters, use cookie cutters, rubber stamps, and different items around the house to push into the clay to give it texture. 


It's soooo easy!!


You can use Creative Paperclay® with molds too.  I will be showing you a fun project coming up using a cute gingerbread boy mold and all the possibilities just one mold can do!

Use your paperclay on a cloth doll form to add features to the face or body.  Yes, you can use paperclay to sculpt a face directly onto a muslin-type fabric!  Dampen your fabric down (not too wet), apply small amounts of clay while pushing the clay into the fabric.  You will begin to start building up your facial features.  After you are done and the face has had a few days to dry completely, sand the face and fabric around it, paint and seal.

By adding paint, inks or powdered tints to your paperclay, you can change the color of it.  Start in small amounts and go from there.  The world is your laboratory!   I just recently found out that Terri Sproul, the Leader of this Creative Paperclay® Blog, has created wonderful mixers to work with paperclay.  I can't wait to try them out. 


You can also make a drywall type paste with your Creative Paperclay®.   All you have to do is water down your paperclay in a container or zip lock bag until you get the consistency of drywall mud.  This works great for patching cracks or adding texture to something or use it like mortar.  

Your Creative Paperclay® designs can be adhered to glass, plastic, scrapbooking paper/projects, wood, various items like photo frames and doll armature made out of foil or styrofoam.  You might have to add a little glue or water to adhere it to whatever you are working on.  If you are not sure how do this this just ask the Design Team!

Once your project is completed, let it dry completely.  It may take a few days depending on the thickness.  Rotate your piece to make sure it dries evenly on all sides.


After your paperclay is dry, here are some things 
you can do to it ---

Add additional dimension to your clay by adding more clay on top of it.  Just add a little water to the dried area and it acts like glue for the new clay to adhere to.  I use this technique when I sculpt my art dolls.  I start by sculpting the basic head form and let that dry completely.  I then add more clay on top of the dried form by adding small amounts of water to the form’s surface.   By doing this, my clay does not slide around as much when I am adding intricate facial details. 


Sand your clay – I highly recommend sanding to get a beautiful, smooth finish great for painting on.  If you want a more primitive look to your piece, just sand less.  Next month, I will share with you my secret sanding tool that you absolutely love and won’t want to live without.  It is seriously so much better than sandpaper!!  Newbies and Veterans alike will love this!  Guaranteed!

Carve / drill details into your clay --- Just like a piece of wood, you can carve/drill details into this clay once it is dried.  Remember to keep in mind the thickness of the clay.  That will determine how deep your groves can be.

In the below picture, I am holding a ball stylist tool.  This tool has small, metal, round balls on each end.  This is a great tool for carving and deepening groves made by your rubber stamps.   The doll in the picture is done.  However, to make her peppermint candy body, I used my rubber stamps when the clay was wet, and when the clay was dry, I went over it with my ball stylist tool to really define it.  It was then painted, stained and sealed.  


Finish up your project by adding paint, stain, glitter and/or glue on embellishments to your dried Creative Paperclay® project.     


Open your mind to the possibilities --- 

Lastly, get into the habit of asking yourself … “How could I incorporate paperclay into my project?”  You’ll be surprised how your ideas start flowing once you look at things differently and let your imagination run wild.  So be bold my friends and try it out!  You have nothing to lose and hours of fun to be had!  Truly the possibilities with Creative Paperclay® are endless!   Check out all the other wonderful tips and tutorials by the talented Design Team!  Are you inspired yet?

If you have any questions or additional information you would like to share on this post, please leave a comment.   I would love to hear from you and possibly help you to achieve your paperclay goals.  Let's learn together!  You can also visit my site and see my paperclay creations at www.charmedconfections.com
  
Thanks so much for stopping by!  

Until next time … LeeAnn

Thursday, October 17, 2013

Jess B's - Octopus

Hello Everyone,

This will be my last project with Creative Paperclay® and I've enjoyed every
moment sharing and creating with this awesome design team for two terms.

I've learned many fun techniques with Creative Paperclay® and know that
this will be an essential tool to have in my stash.

Octopus!


Thank you Terri Sproul and Creative Paperclay®  for allowing me
to be a part of the family and creating new friends along the way.

The new design team is going to wow you!