Showing posts with label Delight™ air dry modeling compound. Show all posts

Thursday, June 14, 2018

Jim Dine inspired heARTs by Linda Hess

In my roll as an art teacher I love to expose the students to new artists as well as materials.  Ask any of my students (no matter the age) what is the favorite medium and you will get a resounding "CLAY!".  What better way to introduce my 3rd graders to the work of Jim Dine than with a mixed media project that includes Delight™ Air Dry Modeling Compound!  Let's get to work.

I have my 3rd graders once a week for 45 minutes.  This project took a total of 3 weeks to complete.  Today's blog post shows the first week of creation: the heart 💜

Materials:
Delight™ Air Dry Modeling Compound
watercolor markers (my classroom is stocked mainly with Crayola⌐)
texture tools (plastic texture sheets, wire tools, toothpicks, etc)
damp paper towel

Step one:  I opened each package of Delight™ clay and cut the block of clay into 8 pieces.  Each student received a piece of clay with instructions that the entire piece of clay had to be used during classtime to create a heart.  The piece of clay needed to be divided into however many colors each student wanted for his/her heart.  Once divided, the clay pieces can be placed on the damp papertowel and the towel folded over to keep the clay moist until ready for use.

The really cool thing about the Delight™ clay is that it accepts color easily.  I demoed how to dab the marker onto the clay and then fold/mix the color in.  Deeper color saturation can be achieved by dabbing and mixing multiple times. (PLEASE NOTE:  Colors will dry lighter than they appear while "wet")

Many of the students were so into the mixing process that I had to remind them to start creating a heart!  Others only heard the "dab color and mix" ignoring the separate colors instruction (ooops).  Thankfully I only had one or 2 who ended up with "mud" clay.

Step two:  Begin forming the heart.  
This (of course) is a freeform project.  I demoed how to take a ball and roll it to form a teardrop.  The teardrop was then flattened and then top dented in with the back of a plastic knife to create the heart shape.  If working with children you will need to give helpful hints such as "Do not flatten it as thin as a piece of paper!" "Use gentle pressure" and "make sure it does not stick to the table!"

The students quickly got into layered hearts much to my excitement.  2-3 hearts were stacked (in different colors), snakes of clay were wrapped around, dots of clay embellished...we had a whole lot of creativity going on!!

  Step three: texture and embellishment
I am all about embellishment!  A plain, colored heart makes more of an imact with the addition of texture and design.  We looked again at pictures of Jim Dine Hearts.  They are so vibrant in both color and design.  The 3rd graders immediately started using wire tools, texture sheets, toothpicks and pencil tips to bring the hearts to life.  Oh My Goodness, so gorgeous!!

I always tell my students "Your piece is not going to look like mine or your neighbor's or your best friend's.  It will look like Yours and that is the way it should be". One of the students who ended up with "mud" during the mixing process was much happier with his heart once the detail was added. 

Step four:  Set the hearts aside to dry
I have stackable wire racks (a clearance find a few years ago) that I placed the hearts on to dry.  The wire rack lets air circulate around for more even drying.  If left on the wax paper (seen above) the top will dry, but the bottom may stay damp.  Since I only see my 3rd graders once a week, the hearts had plenty of time to dry by the next class.

Next up:  More pattern and texture!
Materials:
craft sticks (I used the thinker tongue depressor type)
crayons
watercolors

Step one:  Craft stick crayon resist
Next class I had each student retrieve his/her heart.  Then they chose enough craft sticks to create a surface large enough for the heart to be mounted on without overlapping (most took 6-7 for the base and 2 more for the sides).  FYI for teachers: Have students write names on the back of every single stick!  Trust me, it will make life much easier if anyone doesn't not complete the "backing" in one class!
We talked about crayon resist and the need for a firm pressure when creating the patterns on each stick.  Students were instructed to add patterns to every stick, leaving space between the patterns for paint.  Of course I had a few friends who decided to just color and not paint (gotta love those "dare to be different" friends 💜).  Once the patterns were completed, they began to watercolor.

 We let the sticks dry before arranging them to form the backing. (NOTE:  I used 6 sticks,side by side, for the backing and then glued one more stick along each edge to hold the frame together.  Students decided if the glued pieces would become the top/bottom or the sides of the frame.  Once complete, the hearts were glued in place.
Art by Olivia M (left) & Angelina O (rt)

Step two: Wire & beading
This step was completed during the third class.  I predrilled holes, one in each corner and one in the center of each side and the bottom.  Beads and wire were put out. 
As you will see from the pictures, some of my students do not understand the term "less is more" (haha).  They definitely had a great time embellishing.  I sadly had a substitute for this final day, but she sent me process pictures and I got to see the finished mixed media hearts upon my return.

I think Jim Dine would be amazed at how the children were inspired by his art.
 Art by Olivia V (left) & Paige E (rt)
 Madison C (left) & Kendra (rt)
 Jasmine D-V (left) & Isabelle G (rt) 

 Diego R (left) & Alexis C (rt)


Monday, August 14, 2017

How to make Butter Slime with Delight™ Clay and Contact Solution

Hi Friends:  Did you know that you can make Butter Slime with Delight™ Modeling Compound and Contact Solution?  It's pretty easy to do, and it makes your Slime flexible while still allowing it to hold it's shape - and it spreads like butter!  I really thought that Slime was just for kids, but I had so much fun making this Butter Slime - it made me laugh and giggle just playing with it!

Butter Slime


Here are some photos showing how well it holds it's shape:

Butter Slime Shapes


Butter Slime Pretzel

Earlier this month, Creative Paperclay® DT member Suzette used a recipe with Borax.  Today, I'm going to use a recipe with contact solution - something many of us may already have on hand.  I tried a couple of different recipes - here's the one that worked best for me:

Recipe:  Mix together the following ingredients in the order shown
1/2 cup white glue
1/2 cup water
Coloring medium / food color
1/2 teaspoon baking soda
1-2 tablespoons Contact/Saline Solution - it must contain Boric Acid to work - add slowly until the Slime starts to pull away from the edges of the bowl

Remove from the bowl, then knead in:
1/4 cup Delight™ Modeling Compound

HAVE FUN PLAYING!!!

Directions: Please see my video tutorial for full details on making this Butter Slime:


Supply List:
Delight™ air dry modeling compound
white glue
water
Stampin' Up! Reinker - Brilliant Blue
baking soda
Contact/Saline Solution

I hope you enjoyed learning how to make Butter Slime with Delight™ and Contact Solution. Thank you so much for stopping by the blog today. Have a great, creative day! -Patti


Monday, August 7, 2017

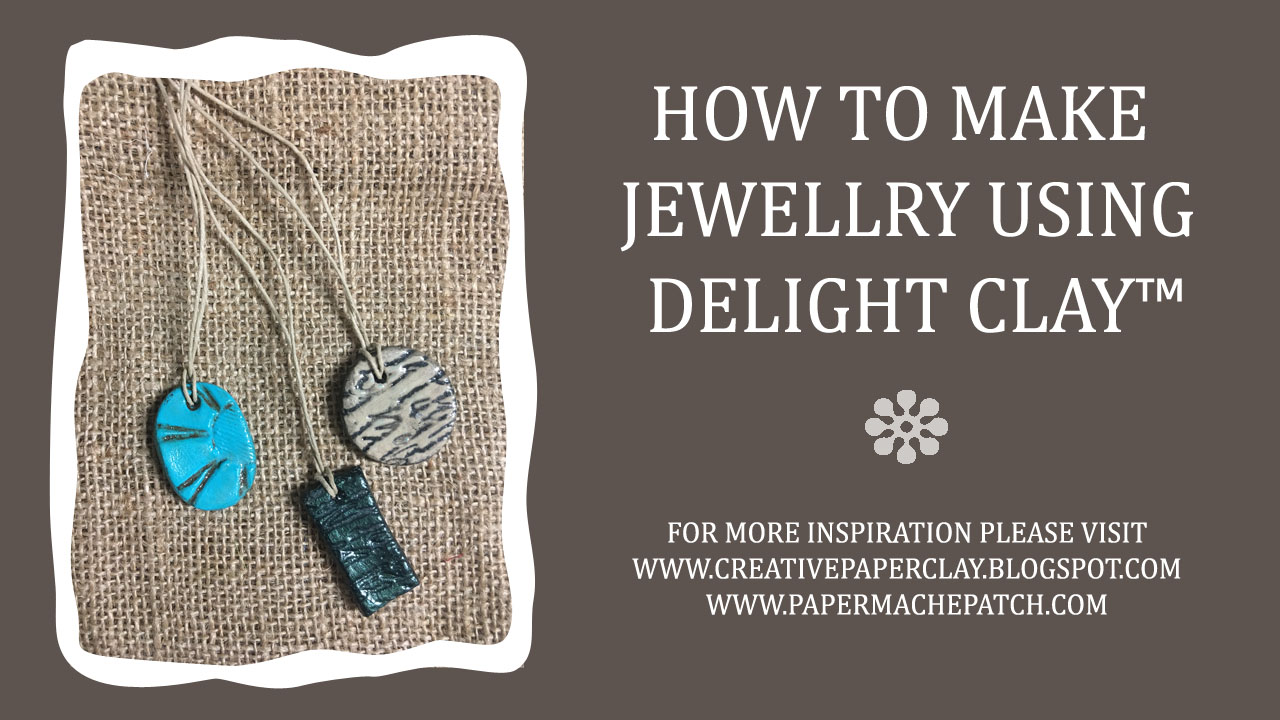
Making Jewellry with Delight™ Clay


Delight™ Clay is so light it's great for making jewellry! Today I will show you how to make these wonderful pendants using Delight™ Clay and a few other supplies you should have laying around the house. Let's get started!

Supplies needed:
Rubber Stamps
Clay or Cookie Cutters
Craft Knife
Craft Sticks and glue
Baby Powder
Paint Brush
Acrylic Paint


Step 1:

Glue two sets of craft sticks together. These will act as a guide for rolling out clay more uniformly.

Roll out the clay between the craft sticks. 


Step 2:
Press your rubber stamps into clay.


Step 3:
Use you clay/cookie cutters to cut out shapes.


Step 4:
Use the end of a paint brush to poke a hole at the top.


Step 5:
Leave to dry.

Step 6:
Apply a coat of gesso and put aside to dry.


Step 7:
Paint with acrylic paint and let dry.


Step 8:
Paint with a contrasting color and immediately wipe off with a paper towel. Alternatively you can brush with a mica powder. See video for demonstration.


Step 9:
Varnish and set aside to dry.

Step 10:
Add your favorite beading cord or string.


Follow along in this short video to learn how to make these fabulous pendants using Delight™ Clay.


Thank you for stopping by! Please be sure to visit me at www.papermachepatch.com for more inspiration and great tutorials!

Happy Crafting!
Suzette


Monday, June 26, 2017

Take Time To Dream Card featuring Delight™ Modeling Compound

Hi Friends:  Have you ever wondered what to use to add gorgeous, lightweight embellishments to your cards?  Delight™ air dry modeling compound is very lightweight and easy to mold and is perfect for mixed media cards because it doesn't add much weight.  In this project, I've used Delight™ in some Prima IOD Moulds to create some beautiful faux metal accents on my card - and the card is much lighter than using metal or resin products.


Detail photos:


Directions:  Please see my video tutorial for full instructions to create this card:


Supply List:
Delight™ air dry modeling compound
Prima Chalk Fluid Edger Pad-Branch Bark (Amazon)
Imagine Crafts Iridescent Creative Medium - Turquoise (Amazon)
Lindy's Stamp Gang Sprays (Amazon):  Tibetan Poppy Teal, Buccaneer Bay Blue
Prima Marketing Memory Hardware Artisan Powder - Vausseroux (Amazon)
Prima Marketing Art Alchemy-Metallique Wax-Aged Brass (Amazon)Prima Marketing Art Alchemy-Antique Brilliance Mystic Turquoise (Amazon)
Prima Marketing Art Alchemy Acrylic Paint, Metallique Steampunk Copper (Amazon)
Prima IOD Moulds - Baroque No. 6 (Amazon)
Prima IOD Moulds - Baroque No. 3 (Amazon)
Tim Holtz Chit Chat Stickers (SSS)
Recollections Sweetwater Rose - Mint (Michael's)
Bo Bunny Somewhere in Time 6X6 Paper Pad (Amazon)
Tim Holtz Layering Stencil CLOCKWORK (SSS)
Tim Holtz Ideology Philosophy Tags (Amazon)
Tim Holtz Sizzix Bigz Die - Weathered Clock (Amazon)
Tim Holtz Edge Distresser (SSS)
Liquitex Gesso - White (Amazon)
Liquitex Professional Matte Gel Medium (Amazon)
Beacon 3-In-1 Advanced Craft Glue(Amazon)
Scotch Advanced Tape Glider (Amazon)
Other:  Lace, cheesecloth, charms, A7 card base, kraft cardstock


I hope you enjoyed my project and learned some new ways to incorporate Delight™ modeling compound into your cards. Thank you so much for stopping by the blog today. Have a great, creative day! -Patti


Sunday, June 18, 2017

Tip of the Month: Coloring Delight™ Air Dry Clay

Did you now that paperclay.com also sells another type of clay called Delight™? This clay is much lighter than Creative Paperclayand air dries to about half the weight! It is still durable and can be colored with water-based media before you sculpt with it. Isn't that exciting! 


In this mini-tutorial I demonstrate using four different types of media to color Delight™ Air Dry Clay:

  1. chalk pastels
  2. watercolor paint
  3. acrylic paint
  4. Dylusions Spray Ink
As a bonus I show you how I use this clay to make flowers which can be used in scrapbooking, mixed media, or your next crafting project.

Supplies include:
Silicone Mold (optional)

Luminarte Silks Acrylic Glaze (optional)


Paintbrushes (optional)


Thanks for stopping by!  For more inspiration visit me at www.papermachepatch.com.

Happy crafting!
Suzette

Monday, May 8, 2017

Live a Beautiful Life Mixed Media Canvas

Hi friends: Today is my very first post for the Creative Paperclay® Design Team and I'm so excited to share my project with you.

Have you ever wondered how to use Creative Paperclay® embellishments in your canvas, cards, or journaling projects?  It's really easy to add them to your projects - here's a quick tutorial for creating this Live a Beautiful Life Canvas using Creative Paperclay®, Delight­™ modeling compound, and lots of fun mixed media supplies:

Canvas Using Creative Paperclay®

Here are detail shots of the Creative Paperclay® and Delight™ embellishments:

Mindscapes Stamp Stamped Into Creative Paperclay®
Rustic Harmony Stamp Stamped into Delight™

Creative Paperclay® from Prima IOD Fleur Mould


Instagram
Pinterest


Directions: Here's the video tutorial - I hope you enjoy watching my first ever video:


Supply List:
Creative Paperclay®
Delight™ Air Dry Modeling Compound
Creative Expressions Cosmic Shimmer Metallic Gilding Paste - Powder Blue (Amazon)
Prima Marketing Art Alchemy-Sparks-Mermaid Sparkle (Amazon)
Prima Marketing Art Alchemy-Sparks-Fairy Wings (Amazon)
Prima Marketing Art Alchemy Acrylic Paint, Metallique Steampunk Copper (Amazon)
Prima Finnabair Art Extravagance Texture Paste Clear Crackle (Amazon)
Prima Art Stones (Amazon)
Prima Mini Art Stones (Amazon)
Prima Marketing Art Alchemy-Metallique Wax-Bronze Age (Amazon)
Prima Marketing Art Alchemy-Metallique Wax-Aged Brass (Amazon)
Lindy's Stamp Gang Sprays (Amazon):  Mission Bells Brown, Steampunk Sepia, Shabby Turbine Teal
Kaisercraft Rustic Harmony Clear Stamps (Amazon)
Inkadinkado Mindscapes Clear Stamps (Amazon)
Liquitex Gesso - White (Amazon)
Liquitex Professional Clear Gesso (Amazon)
Wendy Vecchi White Embossing Paste (SSS)
Tim Holtz Layering Stencil - Flourish (Amazon)
Wooden Frame with Scalloped Edges (Michael's)
Liquitex Professional Matte Gel Medium (Amazon)
Recollections Sweetwater Roses (Michaels)
Beacon 3-In-1 Advanced Craft Glue (Amazon)
DCWV Old World Paper Stack
American Crafts DIY Shop Paper Pad
8x10 Canvas, Lace, Metal jewelry piece

Thank you so much for stopping by the blog today.  I hope you enjoyed my tutorial and that you learned some new ways to incorporate Creative Paperclay® into your mixed media projects.

Have a great, creative day! -Patti

Tuesday, May 2, 2017

Nature's Pen

Hi Creative Paper Clay ® fans, it's Cindy here, welcome to my very first post as a member of this fabulous Design Team! I am so excited to share with you my "Nature's Pen" and show you how to create your own. I chose to create this pen from the Delight Air Dry Modeling Compound, to ensure that the pen remained very light and because once dry the Delight remains very soft and is spongy even after it has dried thus making it very comfortable to use.... there will be no callous' here when I'm writing my memoirs (lol)...


Supplies:
So for this project you'll need the following:
Delight Air Dry Modeling Compound
Clay shaping tools
Rolling pin
Water for smoothing clay
Acrylic paints (I used Vivid Ultra Metallics on mine)
Gel medium
Rhinestones
Paint brushes
Water for your brushes
Spay varnish


Directions:
So I began with some Delight and made some rough 'snakes' ready to form my wooded base of the pen..


Next up with my regular old Bic pen I removed the ink nib from the barrel and started wrapping the barrel with the "snake" strips...
Continue wrapping the barrel, 
until it is fully covered. 

Next up it is time to add detail and make it look more like a log... I achieved this by using small ball tools and silicone tools 

I added smaller details using a scalpel blade.. 

Time for making the leaves, roll out some more Delight.... cut out some tear drop shapes, and shape and then mark and curl them up.... 

I rolled out some more Delight and used a small cap to press out circles.... you need 6 circles to form one flower...  I made three flowers in total...


I also rolled out some very thin snakes...  that I made into the tendrils.... 


Now we are onto the painting...

no rude comments about what it looks like at this stage.... lol...


 Paint up all the pieces...

Next it's time to assemble your Nature pen...

I used Gel medium to adhere the painted flowers, tendrils and the rhinestones in the flower centres...

To finish off my pen, I gave it a spray over with varnish, and re-inserted the ink nib


some close ups of the finished pen


thank you for stopping by and joining me here today,

Till next time
Happy Creating

Cindy Porter