Showing posts with label #Delight™. Show all posts

Thursday, March 7, 2019

Fun Easter Altered Can

Hello everyone, how are you!  I wanted to get a fun project in early enough that you can spend some time in creating this for a special person in your life!  For this project I used:
  1. Delight product
  2. Flower mold (I used Stampin Up' mold, can use any)
  3. Pink cardstock, white cardstock, green cardstock, misc. colors cardstock
  4. Sizzix die cuts - flower, vine, and butterfly
  5. Punches - sun, border, egg or balloon punch (trimmed)
  6. Can of your choice (I used a coffee can)
This started as a thought, and by the time I was done, I was so excited to get it done!  My sister has
an Easter party every year where she has a big dinner and Easter egg hunt!!!!!  I asked for her favorite color - and this is what I ended up with!  I can't wait to share it with her, I love it so much I might have to make one for me kind of like it!

Directions:
Step one:  Using the Delight product and the mold you selected - create enough flowers and allow them to dry!  I used small flowers for the middle of the paper flowers, along with larger flowers to just place where they needed to be!
Step two:  Using the background paper - attach the background paper first.  I used a glue gun!
Step three: Using the border punch - punch 2 strips of the same size (2") for the bottom border.  They will overlap a bit as you attach them to the bottom of the can.
Step four:  Using the Sizzix machine - die cut the vines (6), 4 different colors of flowers (8 each color), and 2 butterfly's - set aside
Step five:  Punch the sun for the middle of the flower in coordinating colors, and some egg shape or balloon punches (cutting off the bottom to form an egg shape)
Step six:  Start to form the flowers - using 2 of the same color flower, with a coordinating middle piece, and we will add the dried flower molds a few steps down the line.  Keep repeating until all the flowers are done
Step seven:  Start to put the vines on - I did this part first to hide the background paper seams!  I then added the flowers so they went all around the can, with the eggs in between
Step eight:  After the molded flowers are dried completely - go around and add the smaller flowers to the middle of the flowers, and the larger flowers around the creation

I can't wait to get the rest of her package ready to mail - some fun bookmarks for her to give out - as well as cards!  This project just wouldn't be COMPLETE without Delight flowers!  Nice and soft to use, and doesn't take a long time to dry!  Find the perfect mold - grab some Delight and enjoy!

I hope you enjoy,
Lynda Jeffs
Lynda Jeffs Designs - formerly Memories in Tyme      

Thursday, January 17, 2019

A Fun Tropical Trio by Jenn

Hello everyone!! Jenn here sharing a fun trio of tropical fun projects created using both Delight™ air dry modeling compound and the original Creative Paperclay®!!
This set includes a vase made from an altered bottle, A trinket dish and an incense burner!
These were created using a variety of silicone molds and some real live leaves from my own yard!
All of the flowers and ferns were molded using Delight™ air dry modeling compund.


The larger leaves were created using real live leaves, a rolling pin, and the original Creative Paperclay®.
Here are some closer views.


To create the leaves above roll out some Creative Paperclay® on to a non stick surface. Lay your leaf flat and roll over it with a rolling pin or brayer. Gently pull the leaf away and drape the piece over something rounded to dry so it dries with a shape like a dish. Dry the longer leaf flat. Add molded flowers and paint!


Two of the long flat leaves were created using the Delight™ and wrapped around the bottle to dry. Once dry, add glue to secure them to the glass. Add molded flowers and coat all with heavy gesso. After gesso dries add paint!


Here is a photo of the set in use as a trinket dish, vase, and incense burner.


Creative Paperclay® is moldable and sculptable!

Delight™ air dry modeling compound is lightweight when dry so it is great for creating projects such as these. It takes very well to inks and sprays when dried and gessoed as well.
Thanks so much for viewing my post today! I hope that you are inspired to give this amazing clay a try and create something amazing!
Creative Paperclay® and Delight™ are conveniently available for you to purchase online and at the below listed retailers.

Until Next time Stay Creative!


Thursday, December 20, 2018

Mixed Media Magic with Delight™

Happy Holidays!! Jenn here today, sharing a wintery tag using embellies molded from Delight™ air dry modeling compound. Delight™ is made by the Amazing Creative PaperClay®!
I love the soft hues associated with Winter and I really wanted to do a collage using some of the many pieces I have molded with Delight™.
Supply List:
Chipboard tag 4" X 7.5"
Heavy White Gesso
Delight™ air dry modeling compound
Iron Orchid Molds
Renea Bouquet Flowers
Tim Holtz Chippie sentiments
Cheesecloth
Art Anthology Inks
Art Stones
Sparks Acrylics
White Crackle texture paste
Stencil
Stamps and inks

Prep all of the supplies including molded pieces. Be sure to allow the molded pieces to dry overnight before adding them and creating the tag.

To create this tag start by coating it in heavy white gesso and allowing it to air dry.
Next add a white crackle texture paste through a stencil. Let the paste dry completely to achieve the most crackling effect.The one used here is bricks by Tim Holtz.

Next add your first molded embellishment. This is a column. On this tag I have created leaves, flowers, clock, and the column all from Delight™ air dry modeling compound using silicone molds.


Next add color using a spray ink or watered down acrylic. Here I started with a purple ink. More color can be added once this one dries or is dried with a heat tool.


Add some scrolled lettering stamping lightly. Continue to build and add embellishments and flowers until you have the desired result.

Delight™ air dry modeling compound is lightweight when dry so it is great for creating projects such as tags and cards. It takes very well to inks and sprays when dried and gessoed as well.
Thanks so much for viewing my post today! I hope that you are inspired to give this amazing clay a try and create something amazing!
Creative Paperclay® and Delight™ are conveniently available for you to purchase online and at the below listed retailers.

Until Next time Stay Creative!

Happy Holidays!!


Thursday, November 15, 2018

Delight™ful Christmas Ornaments!

Happy Holidays! Jenn here sharing my fun Delight™ Christmas ornaments.
If your anything like me when it comes to ornaments, you find that some are just too heavy for the tree branches! These are a great solution! Delight™ air dry modeling compound from Creative Paperclay® dries fast and is very lightweight.

To create these ornaments you will need:

Rolling pin and non stick mat
Cookie Cutters in desired shapes
Embossing folders to add texture
Festive string for hanging
Acrylic paints
Ultra fine glitter
Paper Bows
Glue
Dew Drops from The Robin's Nest
1.Roll a ball of Delight™ to about 1/4" thickness. 
2. Use cookie cutters to cut out shapes. 
3. Use embossing folders to add an embossed pattern for texture.
4. Let dry overnight.
5. Paint in desired colors and while paint is dry sprinkle ultra fine glitter on. Tap off the excess when dry.
6.Add string for hanging and paper bows to the string with glue.
7. Add dew drops or other embellishments for a bit more color and texture.

And there you have it! A super fun DIY project that you can even do with your kids and grandkids!
Here is a close up of the glitter and embossed texture...

Thanks so much for viewing my post today! I hope that you are inspired to give this amazing clay a try and create something amazing!
Creative Paperclay® and Delight™ are conveniently available for you to purchase online and at the below listed retailers.

Until Next time Stay Creative!

Thursday, September 20, 2018

Fun Fairy House


Hello everyone! Jenn here today sharing my Fun Fairy House project I created using the amazing Creative Paperclay®!
This project has actually been a vision for awhile so I decided to just sit down and do it!
To create my house I used the following clay:
Other Supplies:

White Gesso
Molds both silicone and plastic
Acrylic paints and Spray inks
Antique Wax
Woodgrain Stamp
Small Mason Jar with lid
Spray clear sealant
Glue

How It Was Made
Start with a clean, dry mason jar and lid. Roll a piece of paperclay out to about 1/8" thickness. Wrap woodgrain stamp around a rolling pin and roll across the flattened clay. Wrap this around the jar and pinch closed. Smooth out the seam closure with fingers and add woodgrain stamp as needed to match up. Set this aside and allow to dry completely.
Next, mold all pieces needed such as the door, mushrooms, window and all of the leaves for the roof.
Create a base for the lid by molding some Delight™ around the rim and up into the shape of the roof. This will create a nice surface to adhere the leaf roof too. You can use straight pins to hold down leaves that want to be difficult.
Create the lid by gently stacking the molded leaves while they are wet, shaping them as you go. Once they are nearly dry, use a hot glue gun to adhere them in the same places they were dryed in. This ensures that they all fit. Add a fun twisted piece of scrap clay to the top and set aside for drying.


 For the molded door I added a bit more interest by rolling a length of clay across my woodgrain stamp and wrapping it around the door as seen below.


Once the lid is completely dry and all leaves are securely in place, Use a filing tool to smooth out any rough edges on each leaf then painting begins. Start by coating the leaves in white gesso. Alternate between shades of greens and yellows, dark and light to get the look seen below. 
Next I painted all of my other pieces and allowed them to dry. Once dry they were adhered using glue.
When completed the lid will still unscrew and the jar can be used for trinkets, etc.!
Here are some closer views of all the fun detail achieved on this project!


Thanks so much for viewing my post today! I hope that you are inspired to give this amazing clay a try and create something amazing!
Creative Paperclay® and Delight™ are conveniently available for you to purchase online and at the below listed retailers.

Until Next time Stay Creative!


Wednesday, August 29, 2018

Bulletin Board - Delight Style


Hello everyone, long time no see, and for that I apologize!  I hope this project is something you can have fun with - and customize to what YOU want, like I did this one!!!!  I went to Target the other day - and found a plain ole' bulletin board - and instantly knew I had to alter it!  This is what I ended up with, pleased I am!
I wanted something that I could stick a picture on the bottom and be able to frame it when I needed to...or put a pen for the notepad that is next to this!  I wanted to be able to look at something pretty, and have elements that simply was made for a "reason"!   The picture, is something I want to frame, so I simply placed it here, and can be easily exchanged!  Lets get started, shall we!    

Supplies needed for this project:
  1. 2 bricks of Delight Modeling compound
  2. Flower molds
  3. Paint of your choice (My paint of choice is Twinkling H2O's)
  4. Bling of your choice (I used gold and pink adhesive gems)
  5. Black and white floss (or your choice)
  6. Stamped clay butterfly (or your choice of whatever)
  7. Of course - the bulletin board purchased from Target 

I started with the braid around the top edge of the bulletin board!  To achieve this:


Step one:  Using a brick of delight, take your ruler, and cut the whole length of the brick.   Roll this piece out as long as you can.  You need 2 of these pieces to braid.
Step two:  Start at the top and braid the top part of the board, and then start to do the sides.  Using my glue gun - as it dried, I made sure to put plenty of glue on the outside edge.
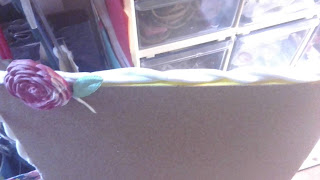

Step three:  From the rolled out piece, you want to roll out a really small piece.  If you look at the leaf, you will see what I am saying!  You will need a few small pieces - one or two leave flat and let them dry!
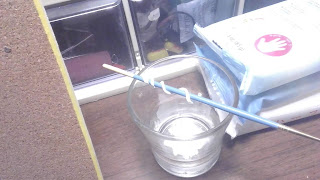
Step four:   After you roll a small piece out - take a paint brush (or something like it) and wrap it around the brush like the picture below!  Let it dry before you take it off the paint brush.     
Step five:  Unless you have flowers already molded (like I do - for this exact reason) - then you will need to mold your flowers and allow them to dry.
Step six:  For the bottom part - you will want to find chipboard of some sort, and cut the pieces you will need for the bottom of your board.  For me, I wanted a shelf to add pictures or even put a pen for notes!   (see below)

Step seven:  Taking flattened Delight - you will start to cover the side pieces,  and then the bottom piece.  I put the Delight on both sides of the chipboard side pieces first.  Let the sides dry first before you do the bottom.  Lay the board flat when you dry this piece.
**TIP - lesson learned on my side, I would only do the front piece with the Delight and not the inside of this piece. 


Step eight:  Once the flowers are dried, start to paint them.  I used to use Radiant Pearls paints and loved them!!!!  I recently found out our Twinkling H2O's are THE SAME THING and happy girl am I!!!!  Paint your flowers (or molded shape) what you want, and put them aside!  Also paint the butterfly (or whatever shape) to put in the top right corner.   My butterfly was for a special person who is gone!


Step nine:  Start to add your flowers and bling in a manor that is attractive to YOU.  Add the floss bow at the right corner for the butterfly to go on.  Add the curl's made in step 4, in random places by the flowers.
Step ten:  Add the bling around the flowers or where ever you want on the board.  I started with the flower on the right middle (white flower) - because I knew I wanted the butterfly at the top right by the bow.
 Step eleven:  Once the bottom part is dried, start to add your painted flowers (or whatever you chose) and leaves to that piece.  The rest of the flowers you paint, can be randomly placed around the rest of what you have already done.  If you look at the picture above - and then the picture at the top, you can see how the rest was filled in!

I love how the whole thing turned out, looks wonderful hanging on my wall!  The push pins are being started on, another blog post on my Memories in Tyme blog when it IS done, until then - have fun making your own bulletin board!  Plenty of paper crafts, creative challenges, and Christmas challenges on the blog!  I hope you join me there too!  Until next month!

Lynda Jeffs
Creative Paperclay Design Team