Showing posts with label #Design. Show all posts

Thursday, February 14, 2019

You are Lovely Altered Frame

Hello everyone! Jenn here today to share my altered frame I created using Creative Paperclay™ and Delight®!

 Creative Paperclay™ Modeling Material and Delight® are great for creating beautiful molded embellishments for all mixed media projects such as this altered frame.
Here is a  photo tutorial on how I created mine:
You can use watercolor pencils as I did with a waterbrush or use paints as well.

All of my embellishments were molded using silicone molds. I always have a stash of molded pieces!
Use scraps of cardboard at different thicknesses to elevate the pieces for dimension.


Be sure to dry in between sprays of color with a heat tool so they do not mix.


 Creative Paperclay® is moldable and sculptable!

Delight™ air dry modeling compound is lightweight when dry so it is great for creating projects such as these. It takes very well to inks and sprays when dried and gessoed as well.
Thanks so much for viewing my post today! I hope that you are inspired to give this amazing clay a try and create something amazing!
Creative Paperclay® and Delight™ are conveniently available for you to purchase online and at the below listed retailers.

Until Next time Stay Creative!


Thursday, September 20, 2018

Fun Fairy House


Hello everyone! Jenn here today sharing my Fun Fairy House project I created using the amazing Creative Paperclay®!
This project has actually been a vision for awhile so I decided to just sit down and do it!
To create my house I used the following clay:
Other Supplies:

White Gesso
Molds both silicone and plastic
Acrylic paints and Spray inks
Antique Wax
Woodgrain Stamp
Small Mason Jar with lid
Spray clear sealant
Glue

How It Was Made
Start with a clean, dry mason jar and lid. Roll a piece of paperclay out to about 1/8" thickness. Wrap woodgrain stamp around a rolling pin and roll across the flattened clay. Wrap this around the jar and pinch closed. Smooth out the seam closure with fingers and add woodgrain stamp as needed to match up. Set this aside and allow to dry completely.
Next, mold all pieces needed such as the door, mushrooms, window and all of the leaves for the roof.
Create a base for the lid by molding some Delight™ around the rim and up into the shape of the roof. This will create a nice surface to adhere the leaf roof too. You can use straight pins to hold down leaves that want to be difficult.
Create the lid by gently stacking the molded leaves while they are wet, shaping them as you go. Once they are nearly dry, use a hot glue gun to adhere them in the same places they were dryed in. This ensures that they all fit. Add a fun twisted piece of scrap clay to the top and set aside for drying.


 For the molded door I added a bit more interest by rolling a length of clay across my woodgrain stamp and wrapping it around the door as seen below.


Once the lid is completely dry and all leaves are securely in place, Use a filing tool to smooth out any rough edges on each leaf then painting begins. Start by coating the leaves in white gesso. Alternate between shades of greens and yellows, dark and light to get the look seen below. 
Next I painted all of my other pieces and allowed them to dry. Once dry they were adhered using glue.
When completed the lid will still unscrew and the jar can be used for trinkets, etc.!
Here are some closer views of all the fun detail achieved on this project!


Thanks so much for viewing my post today! I hope that you are inspired to give this amazing clay a try and create something amazing!
Creative Paperclay® and Delight™ are conveniently available for you to purchase online and at the below listed retailers.

Until Next time Stay Creative!


Thursday, July 19, 2018

Butterflies and Blooms

Hello everyone! Jenn here today sharing this collage created using Delight™ from Creative Paperclay®!
I am constantly molding flowers and other embellishments using Delight™ because they are a great thing to have on hand. For this project I pulled out my stash and made a collage!

Start by coating a small canvas with heavy white gesso and allow to dry. Then gather up molded pieces and arrange them in the composition you like.


Apply heavy white gesso again making sure to get everything coated. Next, add color by starting with a base color such as the Plaid acrylic in Key West (Apple Barrel®) that I chose. Water down by spritzing with a water bottle and dab off excess. Dry with a heat tool.

Continue layering colors in the palette you choose. Build the colors one at a time drying in between each. I used several products in my collage which I have listed at the end of this post.

Add art stones and Dew Drops from The Robin's Nest for texture.


For my collage I used the following products:
Prima and Plaid silicone molds
Art Stones
Mini Art Stones
Wooden swirl embellishments
Plaid™ acrylics
Irridescent acrylics
Art Anthology Colorations
5 X 7 canvas
Heavy White Gesso

Thanks so much for viewing my post today! I hope that you are inspired to give this amazing clay a try and create something amazing!
Creative Paperclay® and Delight™ are conveniently available for you to purchase online and at the below listed retailers.

Until Next time Stay Creative!


Thursday, May 17, 2018

Octopus Vase with Delight

Hello everyone! It's Jenn here today sharing this super fun octopus on a Vase project I created using Delight™ from Creative Paperclay®!
This is a project I have wanted to do for a while and finally I decided to give it a go! I really liked how it turned out! Delight™ air dry modeling compound is a great medium for a project like this. It is super soft and dries fairly quickly. It is easily molded into any shape as well!
The products used to create my vase:
Glass vase found at a thrift store
Heavy White Gesso
Strong glue
Acrylic paints

I started by first molding my octopus and tentacles. Then I rolled many many small balls of Delight™ and gently indented each one with a ball ended tool. I set all of these aside to dry and coated my vase in heavy white gesso.

Next I used my hot glue gun to adhere my dry octopus to the vase. I placed him on the side and adhered each tentacle individually to make him appear as if hes wrapped around the vase. Next I adhered each suction cup using a strong glue.

Once I was sure everything was adhered and dry I painted the vase in shades of blue and my octopus in purple.
Finally I added some wash of ink blue over the octopus and vase and wiped some of it away from the octopus.

Here is a couple more views


Thanks so much for viewing my post today! I hope that you are inspired to give this amazing clay a try and create something amazing!
Creative Paperclay® and Delight™ are conveniently available for you to purchase online and at the below listed retailers.

Until Next time Stay Creative!


Thursday, March 29, 2018

Patina Look Jewelry with Creative Paperclay®


Hello there! Jenn here sharing my jewelry project using Creative Paperclay®.
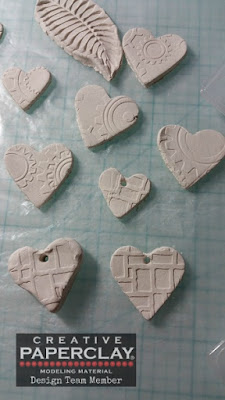
In a previous post I demonstrated how I created molded pieces using embossing folders and cookie cutters. That post can be found HERE.

Patina and rust effects are a major trend right now so I decided to create some jewelry using the hearts and some other items.
The additional supplies I used are as follows:
2 clay molded beads
metal butterfly embellishment
Strong glue
Satin Cord
Copper jump rings
Medium sized rusty washer (this was previously treated with a sulfur to patina) from stash
Earring wires
Acrylic paints in patina/rust shades
Liquid ink in a dark blue shade (I used Art Anthology Minx ink in Stargazer)

Start with a base coat of an aqua colored acrylic paint on all of the hearts, butterfly, and beads.

Using a darker teal acrylic mixed with water apply lightly with a brush and wipe off all excess to re-expose the lighter color in all areas except crevices. This will give more dimension. Alternate between golds, blues, and a bit of the liquid darker blue until you reach the desired patina look.


Make sure all pieces are completely dry. Tie a knot part way down the cord and slide one bead on. Tie a knot on the other side of the bead and make sure both knots are tight and secure.

Next, tie the washer onto the cord in the middle using a slipknot.
Make sure the knot is secure and tight and add a dab of strong clear glue to the back of it.
Place a large jump ring onto the main heart and then onto the washer. Add earring wires to the two smaller hearts and there you have it! Such fun!


I hope that you enjoyed my tutorial today! Thanks for visiting!
For all of your Creative Paperclay® needs visit our online store HERE.
You can also find Creative Paperclay® at the following retailers

Thanks again! Happy Creating!!


Sunday, February 4, 2018

Renewing a Plain wooden frame

Hello there! Jenn here today to show you how easy it is to renew a plain wooden frame using Delight® from Creative Paperclay®!

Supplies
Delight® air dry modeling compound
Plain wooden frame 5x7
liquid adhesive (brushable)
Embossing folders (folders used here are all Tim Holtz)
Semi-sharp edged clay spatula
Deco Art Metallic Lustre wax based paints ( used here: Fab Fuschia, Black Shimmer and Brilliant Turquoise)

Start by rolling out Delight® as shown below.
Using a semi sharp edged spatula, cut into smaller strips as shown below.
Grab some embossing folders. Using light pressure push the Delight® compound into the pattern and then remove. Do this for all of your pieces. For less sticking, add some cornstarch dust sparingly to the embossing folder before pressing.
Grab the wooden frame and brush a light amount of liquid glue to the area before wrapping the embossed Delight® piece. continue adding adhesive and embossed pieces until frame is covered as shown below. Use a rounded handle of a paintbrush or other tool to press the pieces together to appear molded.


Trim off excess compound from back and let dry overnight.


Apply black gesso to entire frame both inside and out. Allow it to completely dry.

Now for the magic!!
Using your finger gently rub on alternating colors of DecoArt Metallic Lustre.


COntinue applying until you are satisfied with the results. The picture below shows the magical metallic look that is achieved.
Because Delight® retains so much detail from the embossing, the Metallic Lustre highlights it perfectly.

Thanks so much for viewing my post today! I hope it inspires you to get creative!

Delight® Air Dry Modeling Compound can be purchased in the online store here.
Creative Paperclay® products are also conveniently available at

Have a happy creative day!!
x Jenn