Showing posts with label #halloweencraft. Show all posts

Monday, October 25, 2021


Easy Bat Ornaments


If you are anything like me you are always behind in decorating for holidays.  

So today I am going to be showing you how to create some cute, quick, & 

easy bat ornaments to hang around your house for Halloween fun!


All you need is:

Creative Paperclay

Acrylic paint - black and white

Knife

Rolling pin

Bat template or cookie cutter


Take about ¼ of a package of Creative Paperclay and using your rolling pin

 (You can substitute a drinking glass if you don’t have a craft rolling pin) 

\flatten out the clay.  


Once the clay is flattened as thick as you would like your ornament to be

 use either a bat shaped cookie cutter or bat template (I’m crafty so I drew a

 bat but you can also easily search for one online to use.  Mix up a couple 

different ones for variety too!) to cut out your bats.  Go for one or make a 

whole family of bats!


After cutting the bats out smooth out the edges using your fingers and 

a wet paper towel.  Put one or two holes in your bats using a pencil or needle.  

One hole if you want them to hang down and two for a more realistic flying bat.


Let them dry out for a day or two!  

To really give the bats character dry them over your rolling pin for a flying bat.


Now let’s paint!

Go for plain black or get creative and add a little shading.


Time to hang them.  Put a little string or yarn through the holes and hang 

them up next to a window or make a bat corner.  


Thanks for joining and Have fun and share what you create with us below!  

We would love to see where you hang your bats!

Find your Joy!


Kelly


Instagram: https://www.Instagram.com/PaperHibiscus


Wednesday, October 9, 2019

Halloween Scenes with Creative PaperClay

Hello again!  This month I bring you Halloween scenes from my Middle School polymer clay after-school program.  I offer clay sessions 4 times a year.  This is the first, running from September-October, with 6 one hour classes in the session.  I never know how many students will take advantage of the after-school program.  This time around I have 4, which is a joy when you consider I normally have a classroom full (20-30 students) during my "normal" class times.

I introduced the students to foil armatures and Creative PaperClay to start the session.  With a variety of ability levels, I was pleased to see all of them take to the project so easily.  We began with sketches of what each envisioned for individual scenes.  After that, it was time to get to work!

I handed them each a large piece of foil.  I demoed how to scrunch the foil (carefully) into the basic tree trunk shape.
The top was then torn into a few sections and scrunched (yes, that is the technical term) into branches.
 

I encouraged them to create the shape slowly.  Foil can be compacted more as the desired shape emerges.  They excited got to work on their trees.


Now the fun part: Covering the armature in Creative PaperClay.  I showed them how easy it is to use, flattening pieces with my fingers or a rolling pin. 
I also showed them how areas can be smoothed out by dipping a finger into water and rubbing over the spot that needs a tweak. 
They all got to work.


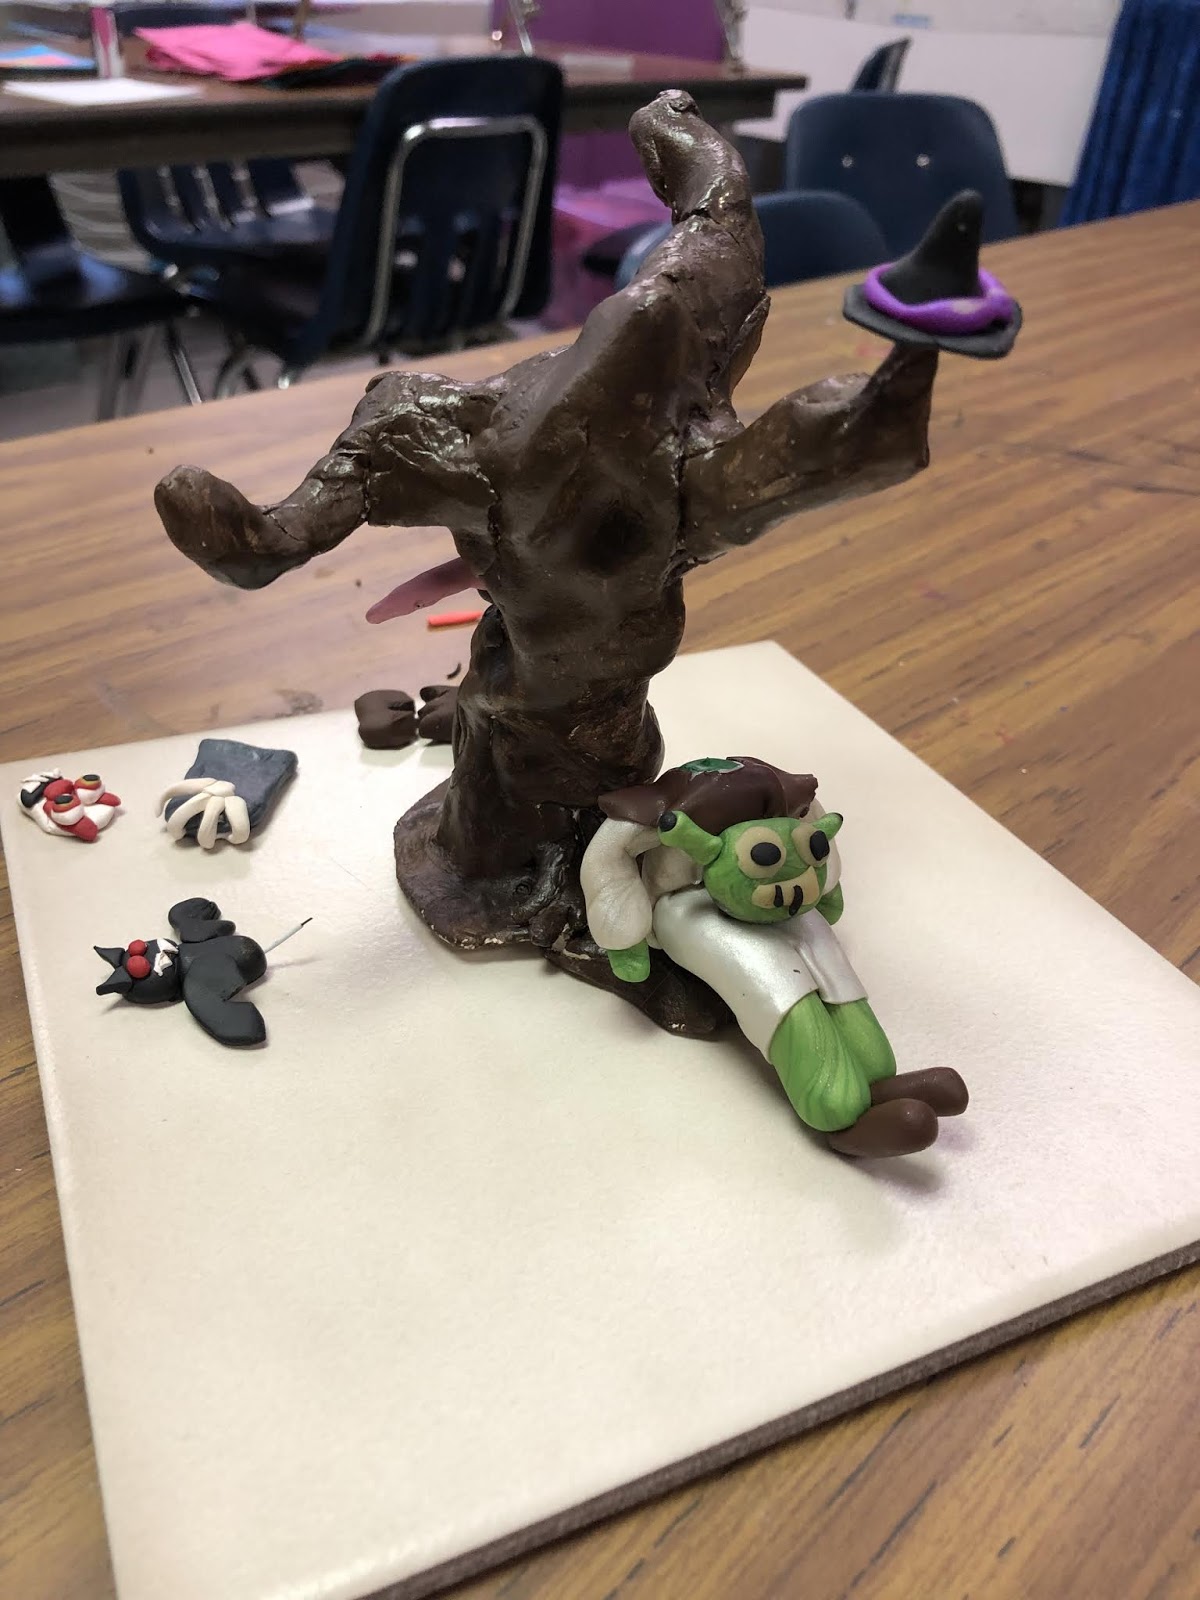
  Soon we had 4 amazing haunted trees!  A couple of the students also created accessories for their scenes from the PaperClay: a tombstone, a creepy hand coming out of the tree, a tiny mouse friend.  All were set aside to dry until the next class.  

The plan was to paint the trees and then start on accessories for the scene, but all decided to work on polymer pieces before painting.  I have to admit it was a great decision on their parts, because when we finally painted the trees and glued them to ceramic tile bases the scenes were able to come to life! 
Let the painting commence...


Once the trees and accessories were painted it was time to begin to put scenes together (goodie!!).
Pieces were positioned and glued.  Some (notice the swing) were hung in place. 
Do you see Hannah's mouse?  Such teeny tiny details created from the Paperclay!

  Check out the swirly detail in Nia's tree!  She designed many of the swirls with open centers to hang pieces.
Isabelle had to have a swing (one of our engineering challenges).  I think it worked out great!  
Peter still wants to add a few touches.  His tombstone needs to be glued in place, but first, he wanted to create a hill type base for it (back to the Creative PaperClay).  I hope you can see the creepy hand reaching out of the tree towards Shrek!


I was so excited to watch the excitement as the original sketches came to life!  All but one looked and decided a few more touches are needed.   I am super excited about what they accomplished.  I can hardly wait to see what these talented students come up with next!


Wednesday, October 10, 2018

Easy Peasy Sugar Skull designs with Delight™ Air Dry Modeling Compound


Hello all and welcome to my Halloween/Day of the Dead design preparations.  In my role as art teacher to grades K-8 I look for easy "filler" projects that the students can create.  Enter Delight™ Air Dry Modeling Compound and a silicone mold! 

Browsing around my favorite craft store I found a skull silicone mold on sale (woohoo!).  Of course I picked it up to experiment with.  As soon as I got home I pulled out my Delight™ clay and went to work.  I pulled off a bit of the clay, squeezed it in my hand, and then rolled it into a ball.  The ball was pressed firmly into one of the skull cavities in the mold until I was pretty sure the clay filled the space.  Then I repeated the process until all of the cavities were filled.
 

I tried to press the clay out of the mold, but it left a huge dent in the skull.  Not the look I was going for, so I placed the mold into my freezer and let it sit for about 15 minutes.  BINGO!  The skulls popped out easily and without distortion.  I repeated the process with the rest of the package of Delight™ (NOTE:  I was able to create 16 skulls [each about 1/2" thick] from one package of clay.  If creating thinner skulls then of course more could be made).
(NOTE: If you are a patient soul, the clay can be left in the mold to dry.  As noted, I am not the most patient of souls when it comes to crafting 😉)

I placed all of the skulls onto a paper towel and set them aside to dry overnight.  In the morning I turned the skulls over to make sure they were dry all the way through. 
An optional drying technique: Place them on a drying rack, so air circulates and speeds the process. Plus, no need to turn the pieces over!

Once dry I went to work with Prismacolor® markers (NOTE: Sharpie® markers would also work for this part).  I Googled "sugar skull designs" and found quite a few ideas for decorations.  I went to work.  

I used the fine tip for the bulk of the coloring process.  The clay took the colors beautifully and didn't seem to "bleed".  Glitter could be added or crystals or paint...if you can imagine it, I am sure it can be done!  I have a few left that I may use nail polish to give dimensional details.


I hope you have enjoyed this quick and easy craft.  Completed skulls can be used in many ways: pins, magnets, table decorations, wreaths, or shadow boxes...they are even lightweight enough to be made into earrings!

Monday, October 1, 2018

A Scary Pumpkin!

 Hello everyone! I have a Halloween blog post for you today, a scary pumpkin!


How cute is he? Does he look scary enough? This is a great tutorial for everyone. The supply list is below and a video for you to follow along. Have fun making him!

Supplies Needed

  •  styrofoam ball
  • foil
  • Creative Paperclay®
  • glue gun and stick
  • acrylic paint
  • glaze
  • sculpting tools
  • water
  • white glue
  • paintbrushes
Follow along in the video below:


You can share your creations with us on our Facebook page. We would love to see them! For more inspiration have a look around the blog. There are tutorials for many levels using Creative Paperclay®. You can also visit my blog www.papermachepatch.com.

Sunday, October 15, 2017

A Folk Art Halloween Ghost

Hello! Welcome to another Halloween tutorial! Today I will show you how to make this cute folk art ghost to add to your Halloween decor.


Halloween Ghost_1Halloween Ghost_2

The supplies you will need are as follows:

1 - 12” piece of wire
2 - 5” pieces of wire
Aluminium foil
Gesso
Acrylic paints
Craft wire approx. 12”
Raffia
Ribbon
Glue gun & sticks
Paint brushes
Sculpting tools
Water

You may follow along in the video below.


Here are some close-ups of the face should you need them for reference.

Halloween Ghost_3

Halloween Ghost_4

Halloween Ghost_5

Thanks for stopping by. Please share your work on our Facebook Page. I would love to see what you make. 

Happy Crafting!
Suzette

Blog: https://papermachepatch.com
Instagram: https://www.instagram.com/papermachepatch/