Showing posts with label #DIYCrafts. Show all posts

Monday, February 28, 2022


Earring Holder


Let’s make a fun DIY earring holder today.


All you need is:

Creative Paperclay 

Acrylic paint 

Knife

Rolling pin

Stamp or something to make a design 

Skewer or needle to make the holes


Take about 1/3 of a package of Creative Paperclay (More if you want to make a larger earring holder) and using your rolling pin flatten out the clay.  


Once the clay is flattened as thick as you would like (Don;t make it too thick or your earring won’t stay on it) cut out the shape of the holder.  For mine I just cut off the ugly edges but followed the rolled shape of the clay.  You could try cutting it rounded or leaf shaped.  Get creative!  Make sure to cut out a squarish base that is atleast 3” wide, the size will depend on how tall your top section is since this is what the holder will stand up on.


Now imprint the pattern.  You could use a stamp, like I did, a piece of lace, or maybe freehand draw a design onto it.


Next use a skewer, needle or even a pencil to create holes for the earrings.  You can group them in pairs or scatter them about like I did.


Using a box place the holder on the box with the bottom hanging over the edge to get the bend in the holder.


Keep an eye on it and once its about halfway hardened, but still pliable at the bend, remove it from the box and bend it a little deeper so that the top leans back away from you a little more.  Let it dry the rest of the way by sitting it on its base.  You may need to prop something against the from at first to keep it from slouching.


Let it finish drying.  It should take a day or two depending on your home.


Now grab your paint and paint it!  For mine I did an ombre look.  Start with your preferred color.  Then add a little white to lighten it slightly and paint a section.  Then add more white and paint another section.  Repeat until you reach the top.


Once the paint is dry it is time to add the earrings!  


I would love to see what designs you come up with!  Comment your photos below.


Cheers until next time!

Kelly Martin

Paper Hibiscus

www.Instagram.com/PaperHibiscus

www.PaperHibiscus.etsy.com

Sunday, January 23, 2022


Potted Hearts and Ornaments


Valentine’s Day is quickly approaching and if you are looking or an easy and fun way to decorate check these out.  Have the kids help too!


All you need is:

Creative Paperclay 

Acrylic paint - I used red and pink

Knife

Rolling pin

Small pot

Foam 

Moss 

Skewer

Stencil, lace or something to make the pattern 


Take about 1/3 of a package of Creative Paperclay (More if you want to make a lot of hearts) and using your rolling pin flatten out the clay.  


Once the clay is flattened as thick as you would like your ornaments to be gently roll over your lace or stencil so the pattern becomes part of your heart.  Next,  draw a heart on scrap paper and then cut it out for a pattern (HINT: choose a side you like best of your heart and fold it in half before cutting it out so that both sides are the same).


Now using your heart pattern, use a knife to cut out hearts.  Have the whole heart covered in a pattern or only a portion of it.  Push a skewer into the bottom of your heart if you want to pot it up and then set it aside to dry.  Alternatively, use a skewer to create a hole near the top of the heart to create an ornament.


Let them dry out for a day or two!  Hint: Flip them over and use a book or two to help keep them flat as they dry.


Now grab your paint and paint them!  For mine once they were painted and still wet I used  a paper towel to remove most of the paint on the patterned sections to highlight them.

Once the paint is dry it is time to pot them up!  

Cut the foam so it fits into the pot and glue it in (I used hot glue).  Next poke the skewer with the heart on it into the foam (Add some glue to keep it in place).  Then put moss on top to hide the foam and complete the pot.


For ornaments just add yarn or string to hang them and you’re done!


I would love to see all your hearts!  Comment your photos below.


Cheers until next time!

Kelly Martin

Paper Hibiscus

www.Instagram.com/PaperHibiscus

www.PaperHibiscus.etsy.com

Wednesday, April 29, 2020

Introducing C. Rona

Preparing for my post this month in a time of continued stay-at-home orders, I was drawn to a cartoon on the internet by Don Landgren titled "Little Shop of Misinformation".  Many artists have been creating their own renditions of the "virus", so it is not surprising that as soon as I saw the drawing, my mind flashed to a project in clay...and Qtips...and watercolor!
Materials:
Delight Air Dry Modeling Compound
1 round glass (or plastic) Christmas ornament
Qtips (I purchased mine at the Dollar Tree)
Watercolor paints and brushes
Water
Scissors
Cutting tool (knife or blade)
Bamboo skewer or stick of some sort
Small piece of foil
Acrylic roller, rolling pin, or glass
Optional: bud vase 
Texture (I used a clean sponge)
Step 1: Remove the metal cap from your Christmas ornament and set it aside.  Wrap the end of the bamboo skewer or stick with foil and compress the foil tightly enough that it will fit inside the Christmas ornament.  (Note: This will allow you to manipulate all of the materials without handling them directly).  
Set this aside (I placed mine in a bud vase for stability).


Step 2: Prepare the Qtips!  Let me say to be sure you paint enough Qtips ahead of time.  I thought that I had enough, but once I started layering them (look ahead to understand what I mean) I discovered I needed more.  No real issue, since you can always paint them afterward, but so much easier to have them painted before placing!
You will see in the pictures that I only applied paint on one side of each Qtip.  Obviously, painting both sides would have been a better choice!
Dip the Qtip end into the water, then roll (trust me) in the chosen paint color.

By rolling in the paint, the Qtip will stay intact rather than shredding! Use your finger or a paintbrush to draw the color down into any areas that are unpainted.  Repeat with the remaining Qtips (I end up using about 30 total).  Set aside to dry.  
Step 3:  Cut open the package of clay and cut the block of clay in half.  Rewrap the part not being used (I put mine in a Ziploc baggie and squeezed out all the air).  Begin flattening the clay.  
NOTE: I start by flattening it with my fingers before placing it on a work surface to roll with the acrylic roller. I kept the thickness between 1/8"-1/4".  Once flattened, wrap the ornament completely.  Seams can be sealed by dipping a finger into water and smoothing over (I suggest using a finger over a brush for this step since there is more control).  Continue all around the form, adding more clay if necessary, until it is covered.

Step 4:   Press over the entire surface with your texture.
 

Step 5:  Now the fun begins!  As I mentioned, I was inspired by a cartoon, so I kept my inspiration close by for reference.
Pull off a small amount of the remaining clay (in Ziploc baggie) and roll it into a snake.  Taper both ends of the snake into points.  Dip a finger into the water and smooth the snake before placing it where desired on the form (I apologize but I don't have a photo of this step. It would help if I had more hands!).
Once placed, use more water to help smooth the seams (one finger at a time or you will be sorry!).  Once the first snake has been placed and smoothly attached, create a second snake from a little more reserve clay and repeat the above directions. Retexture areas as needed.


Step 6:  In the original sketch the virus had a tongue sticking out.  I tried to add this feature, but it obviously needed some support (it kept breaking off), so I made the artistic decision to change the vision (haha).  Even though my "virus" has what looks to be a smiling mouth, I began to add teeth...sharp teeth.  To create the teeth, pull off tiny bits of clay and pinch them into triangles.  Cut a flat edge.  Dip a finger in the water and apply it to the back of each tooth before placing it in the mouth.  Press each into place before moving on.

Step 7:  Time for the Qtips!  Begin by cutting the tips off each side.  
(NOTE: The Dollar Tree Qtips are on a great hollow plastic stick.  If using this brand, reserve the sticks to use later. )  Gather 3 tips together and press into the clay to resemble the virus barbs.  Repeat around the whole ball. "Barbs" are not necessary down the length of the foil-covered stick (this will be cut away after the clay dries).  Continue adding tips until you are happy with the look.  
Remember the unused sticks mentioned above?  I cut those into tiny bits and pressed them into the clay as well. 
If you do not have usable hollow sticks, bits of clay rolled into balls and pressed into place will work.  Beads are also a good replacement, but will probably need to be glued into place once everything has dried.
 Notice the white Qtips??  As mentioned above, I ran out of the painted ones, so added unpainted.  Trust me, so much easier to have them painted beforehand!

Step 8:  Time to paint.  I began with a teeny tiny brush and black paint to carefully paint the inside of the mouth.  I followed that with the lips (a mixture of red and pink, layered), "barbs" (straight red), and finally the "head" (grey overlaid with periwinkle blue).  If the paint is too dark, adding more water will help to thin the color and spread it.  HOWEVER, try no to use too much water or the texture will disappear and the red from the Qtips may bleed.
You may have noticed I peeled away the extra clay from the foil-covered stick.  This is an optional design choice.

A single "barb"? Again, design choice.  Make this your own by adding your own touches! Maybe you want to continue the clay down the stick and keep it covered!  Add some leaves (think of what silk leaves could add to this...oooooooo!)

You may have noticed places where the grey base touched the red "barbs" (Oops!).  This area can be retouched if desired...or not, you choose.

Once the painting is complete, set the piece aside for 24 hrs to allow all the layers to dry completely.  Once dried, if the barbs fall out, a dab of glue will keep them in place (I suggest "The Ultimate" tacky glue).  I pulled out the sick and cut the bottom even with the opening of the ornament.  Then I replaced the metal cap (Again, optional decision).
 

I hope you have enjoyed this tutorial.  I think it is a way to put a comedic spin on this challenging time.  I may have to add a little fabric or paper mask to him/her!  Prayers that things will soon return to "normal".  Until then...
Everyone stay safe!  


Monday, October 1, 2018

A Scary Pumpkin!

 Hello everyone! I have a Halloween blog post for you today, a scary pumpkin!


How cute is he? Does he look scary enough? This is a great tutorial for everyone. The supply list is below and a video for you to follow along. Have fun making him!

Supplies Needed

  •  styrofoam ball
  • foil
  • Creative Paperclay®
  • glue gun and stick
  • acrylic paint
  • glaze
  • sculpting tools
  • water
  • white glue
  • paintbrushes
Follow along in the video below:


You can share your creations with us on our Facebook page. We would love to see them! For more inspiration have a look around the blog. There are tutorials for many levels using Creative Paperclay®. You can also visit my blog www.papermachepatch.com.

Monday, September 3, 2018

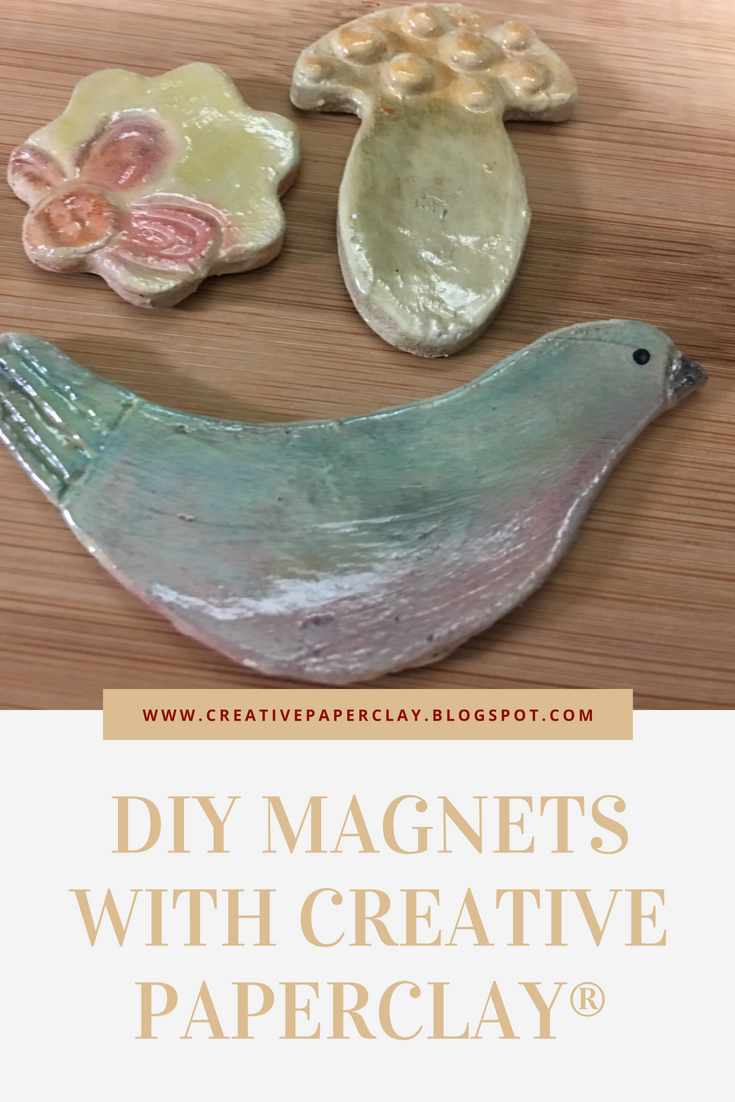
DIY Magnets

Hello, welcome to a new design team post. Today I will share with you how to make magnets with Creative Paperclay®.


You only need a few supplies and its a simple tutorial great for beginners.


Supply list


Follow along in the video below.


You can share your creations with us on our Facebook page. We would love to see them! For more inspiration have a look around the blog. There are tutorials for many levels using Creative Paperclay®. You can also visit my blog www.papermachepatch.com.

Thanks for stopping by!

Suzette


You can find Creative Paperclay® online at Creative Paperclay Co and also at Michaels, Hobby Lobby, Dickblick and Amazon. 

Thursday, July 19, 2018

Butterflies and Blooms

Hello everyone! Jenn here today sharing this collage created using Delight™ from Creative Paperclay®!
I am constantly molding flowers and other embellishments using Delight™ because they are a great thing to have on hand. For this project I pulled out my stash and made a collage!

Start by coating a small canvas with heavy white gesso and allow to dry. Then gather up molded pieces and arrange them in the composition you like.


Apply heavy white gesso again making sure to get everything coated. Next, add color by starting with a base color such as the Plaid acrylic in Key West (Apple Barrel®) that I chose. Water down by spritzing with a water bottle and dab off excess. Dry with a heat tool.

Continue layering colors in the palette you choose. Build the colors one at a time drying in between each. I used several products in my collage which I have listed at the end of this post.

Add art stones and Dew Drops from The Robin's Nest for texture.


For my collage I used the following products:
Prima and Plaid silicone molds
Art Stones
Mini Art Stones
Wooden swirl embellishments
Plaid™ acrylics
Irridescent acrylics
Art Anthology Colorations
5 X 7 canvas
Heavy White Gesso

Thanks so much for viewing my post today! I hope that you are inspired to give this amazing clay a try and create something amazing!
Creative Paperclay® and Delight™ are conveniently available for you to purchase online and at the below listed retailers.

Until Next time Stay Creative!


Monday, July 2, 2018

Upcycle Old Paintbrushes Using Creative Paperclay®

 Hello everyone! Welcome to another one of my fabulous tutorials.😁 Todays project is upcycling an old paintbrush turning it into an amazing work of art. 


It is fairly simple and both beginners and kids (with adult supervision) should be able to manage it. If kids do it, take care with the hot glue gun and acrylic paints/varnish. 

The items you need are very basic. You can find a full list below. You can find Creative Paperclay® online at Creative Paperclay Co and also at Michaels, Hobby Lobby, Dickblick and Amazon. 


Supplies needed:

Follow along in the video below to make your masterpiece.


If you prefer you can also watch the video on YouTube


Upcycle paintbrush


You can share your creations with us on our Facebook page. We would love to see them! For more inspiration have a look around the blog. There are tutorials for many levels using Creative Paperclay®. You can also visit my blog www.papermachepatch.com. If there is anything in particular you would like me to make a tutorial for just leave a note in the comment section below.

Thanks for stopping by!

Suzette


Thursday, May 17, 2018

Octopus Vase with Delight

Hello everyone! It's Jenn here today sharing this super fun octopus on a Vase project I created using Delight™ from Creative Paperclay®!
This is a project I have wanted to do for a while and finally I decided to give it a go! I really liked how it turned out! Delight™ air dry modeling compound is a great medium for a project like this. It is super soft and dries fairly quickly. It is easily molded into any shape as well!
The products used to create my vase:
Glass vase found at a thrift store
Heavy White Gesso
Strong glue
Acrylic paints

I started by first molding my octopus and tentacles. Then I rolled many many small balls of Delight™ and gently indented each one with a ball ended tool. I set all of these aside to dry and coated my vase in heavy white gesso.

Next I used my hot glue gun to adhere my dry octopus to the vase. I placed him on the side and adhered each tentacle individually to make him appear as if hes wrapped around the vase. Next I adhered each suction cup using a strong glue.

Once I was sure everything was adhered and dry I painted the vase in shades of blue and my octopus in purple.
Finally I added some wash of ink blue over the octopus and vase and wiped some of it away from the octopus.

Here is a couple more views


Thanks so much for viewing my post today! I hope that you are inspired to give this amazing clay a try and create something amazing!
Creative Paperclay® and Delight™ are conveniently available for you to purchase online and at the below listed retailers.

Until Next time Stay Creative!