Showing posts with label Air dry clay ideas. Show all posts

Monday, September 7, 2020

Halloween Candy Corn

 Hello, welcome to another blog post! I hope you are keeping safe! On Clay Talk this month, I decided to get started on my Halloween decorations.  I made this adorable Candy Corn.


I just love him! Don't you? Not to worry if you missed Clay Talk, the recording is below. 

Clay Talk - Making A Candy Corn Decoration

Join us as we sculpt a cute Halloween decoration and paint with paints from Plaid Crafts

Posted by Creative Paperclay modeling material on Thursday, September 3, 2020


Clay Talk is held once a month on the first Thursday. It takes place on Facebook Live on the Creative Paperclay Modeling Material page. The next episode will be on Thursday, October 1st at 8pm EST/ 5Pm PST. We will be making a jack o'lantern tea light holder (for battery operated tea light only). Be sure to join us!

Thanks for watching and be sure to look around the blog for more amazing tutorials using Creative Paperclay®. We have an amazing design team that create to keep you inspired.

You can share your creations with us on our Facebook page. We would love to see them! For more inspiration have a look around the blog. There are tutorials for many levels using Creative Paperclay®. You can also visit my blog suzettehussey.com

You can find Creative Paperclay® online at Creative Paperclay Co and also at MichaelsHobby LobbyDickblick and Amazon. 

Thanks for stopping by!

Suzette


Wednesday, September 2, 2020

Angel With Wild Hair Ornament


Angel With Wild Hair Ornament 


Let's have some fun with an angel with wild hair and fiery colors!

SUPPLIES:

Creative Paperclay   
Mod Pogde or other glossy sealer
Alcohol Inks ( I used Jacquard Piñata Inks)
Pan Pastels or chalk pastels
Gold Acrylic Paint 
E600 or other strong glue
about 10" of 16 or 18 ga. wire
Rubber Stamp Ink Pads (I got the best results with StazOn)

TOOLS:

Rubber Stamps & Texture Sheets
Rolling Pin or Jar
Craft Knife
Needle Tool
Pliers & Wire Cutters


Start by rolling out 2 - 12 x 5 inch pieces of Creative PaperClay to abour 1/8


Add texture with rubber stamps, texture sheets, tools, and other items you have on hand.


Find your most pleasing textures and cut out your body and wing shapes with a craft knife.


Roll out your scraps.  You may need to add a few drops of water.  This piece should be very smooth and clean for the rubber stamped face and embellishments.


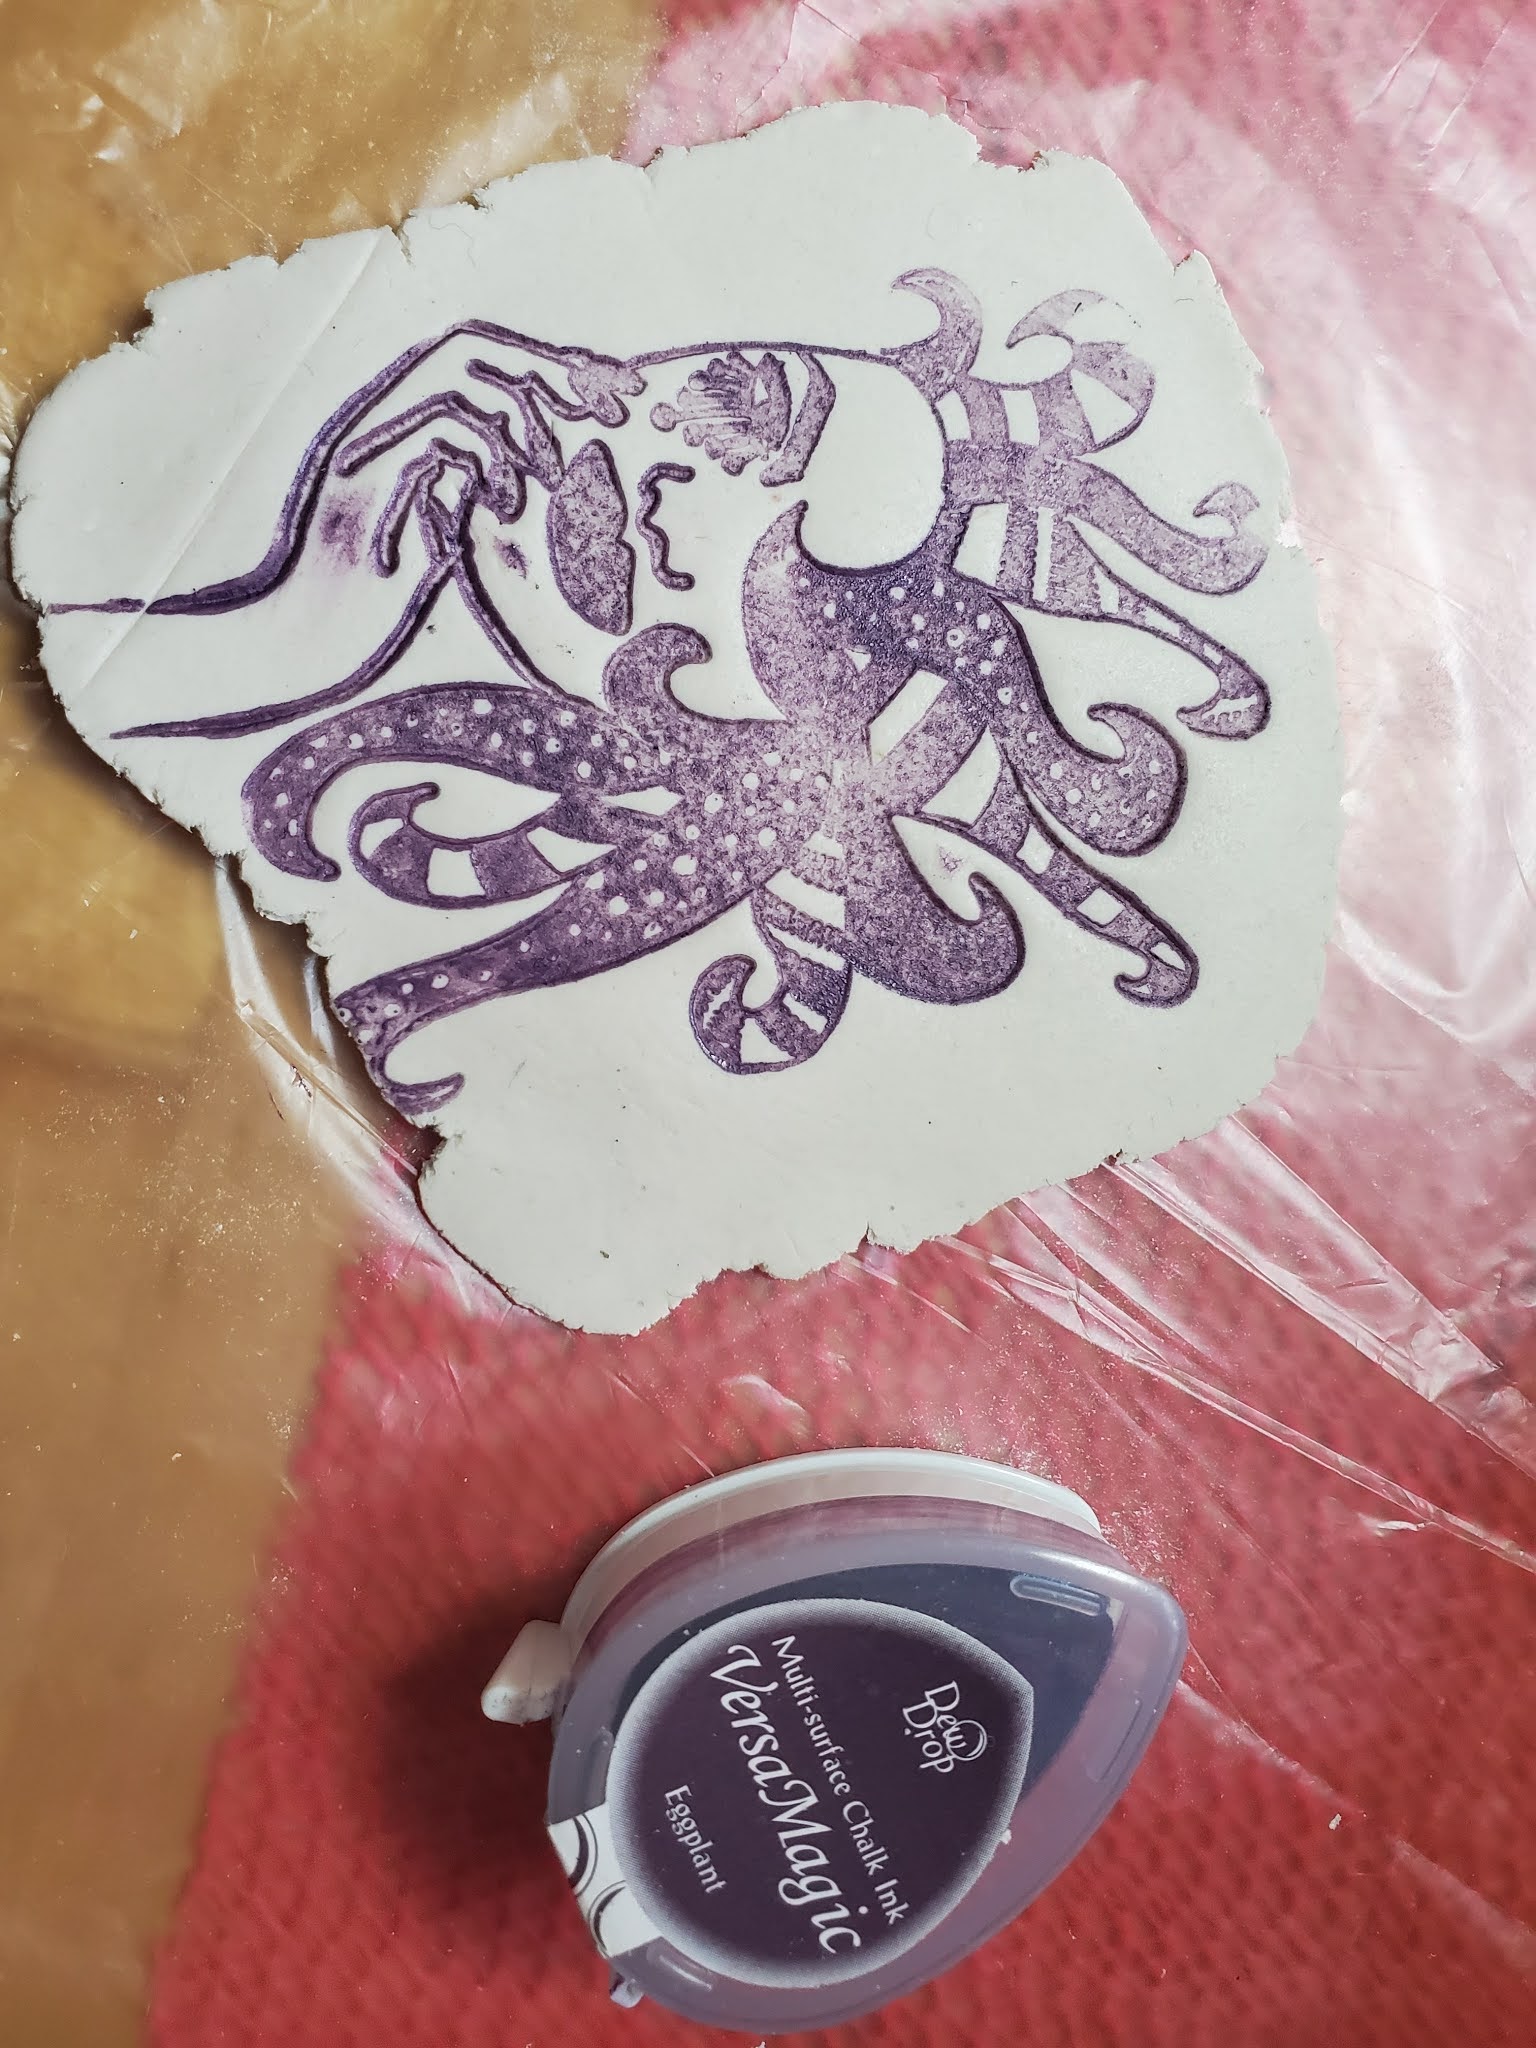
I used these stamps by Ranger.  Any face images you like will do.

It took me several tries to get a good impression.  Don't be discouraged.


I liked the black best.  What's your favorite?


This StayzOn ink pad gave me the best impressions.


I really wanted to love the purple but, it was not pronounced enough.


Add some blush with pan pastels.


Cut out your faces and embellishments with a craft knife.


Add holes in the wings with the needle tool.  Don't get too close to the tips.

Allow all of your pieces to dry overnight.  After about an hour put a heavy book on top to prevent curling.

After all of the pieces are completely dry.  Seal them with Mod Podge or other sealer.  once it dries, add color with alcohol inks.  Start with light colors first, let some blend together before they dry.

Once the inks dry, create a finished edge with gold acrylic paint.  Then seal with another coat of Mod Podge or other sealer.  

Once this last coat of mod Podge dries Glue all 3 parts together.  Allow it to dry again.  

Add wire in a loop through holes in the wings.
                                       Instagram: https://www.instagram.com/redwoodcoastcreativearts/

                                                         https://lorraineteresina.wixsite.com/lala
                                              YouTube: https://www.youtube.com/user/babylalamermaid1
 

Monday, August 3, 2020

Clay Talk: A Whimsical Owl

Hello, I hope everyone is staying safe. Today I am sharing with you a sculpture I made on Clay Talk in June: a beautiful whimsical owl! It was made with Creative Paperclay® and a few other basic supplies. The paints are by Plaid Crafts, my favorite craft paints.


Here is the video showing how to make this.
Sculpt a Whimsical Owl with Creative Paperclay®
A live demo showing how to make your very own whimsical owl.
Posted by Creative Paperclay modeling material on Thursday, June 4, 2020


Clay Talk is held once a month on the first Thursday. It takes place on Facebook Live on the Creative Paperclay Modeling Material page. The next show is this Thursday and we will be making a whimsical bird. Be sure to join us and share with your crafty friends! The details are below.

Thanks for watching and be sure to look around the blog for more amazing tutorials using Creative Paperclay®. We have an amazing design team that create to keep you inspired.

You can share your creations with us on our Facebook page. We would love to see them! For more inspiration have a look around the blog. There are tutorials for many levels using Creative Paperclay®. You can also visit my blog suzettehussey.com

You can find Creative Paperclay® online at Creative Paperclay Co and also at Michaels, Hobby Lobby, Dickblick and Amazon. 

Thanks for stopping by!

Suzette


Monday, July 6, 2020

A Whimsical Snail

Did you miss Clay Talk last week Thursday? We made a cute whimsical snail!


Isn't he adorable? I used Delight Clay™ to make it. I pre-colored the clay with Pearl Ex Powders and added a few highlights when it was dry. If you don't have Pearl Ex, not to worry. I also went over what else you could use.

Here is is in my garden.


And here is the video showing you how to make him.


For those of you who don't know, Clay Talk airs on the first Thursday of every month at 8pm EST/5PM PST on Facebook Live. Here is the link to the Creative Paperclay Modeling Material Page where the show is hosted. I usually host the show but sometimes another fabulous design team member fills in for me. Don't forget to mark your calendars!

Thank you so much for stopping by! You can share your creations with us on our Facebook page. We would love to see them! For more inspiration have a look around the blog. There are tutorials for many levels using Creative Paperclay®. You can also visit my blog https://suzettehussey.com/blog/


You can find Creative Paperclay® online at Creative Paperclay Co and also at MichaelsHobby LobbyDickblick, and Amazon. 

Thanks for stopping by!

Suzette

Skillshare: https://skl.sh/2QyIn93

Monday, September 2, 2019

Corals and Sea Sponges

Hello, welcome to another tutorial. Today I will show you how to make corals and sea sponges with Creative Paperclay® and Delight Clay. I am working towards a bass relief mixed media board using these and the shells we made last month. 


Next month we will paint them and put them all together! The Delight Clay™ was perfect for the sponges. It has a light marshmallow text much like a sponge. The supplies you need are listed below along with a video tutorial showing you how to make the corals and sea sponges.


Supplies

Creative Paperclay® 
Delight Clay™
foil
water
sculpting tools

Follow along in the video below:


I do hope you enjoyed this tutorial. You can share your creations with us on our Facebook page. We would love to see them! For more inspiration have a look around the blog. There are tutorials for many levels using Creative Paperclay®. You can also visit my blog www.papermachepatch.com.


You can find Creative Paperclay® online at Creative Paperclay Co and also at Michaels, Hobby Lobby, Dickblick and Amazon. 

Thanks for stopping by!

Suzette


Monday, July 1, 2019

Seaside Shells with Delight Clay™

Hello and welcome to another blog post. Today I am continuing with my seaside theme. We will be making some shells using Delight Clay™ and a mold. 


Supplies needed:

*If you don't have these use a pearl acrylic paint.

Follow the steps below:

Begin by adding a drop of off-white acrylic paint to the Delight Clay and blending. This will give a nice base color for the shells.


Now press the clay into the mold.


Gently remove and set aside to dry.

Trim the edges with scissors if necessary and sand away any uneven bits. I nail file is perfect for this.


Apply a coat of clear gesso and allow to dry.

To finish off, mix a bit of gold mica powder with an acrylic glazing medium and use to paint the shells.


Arent those beautiful! And they were so simple to make. Be sure to save these as we will be using them on a mixed media board soon. Next month I will be making corals, also with Delight Clay™ so be sure to subscribe so you don't miss out.


Thanks so much for stopping by. You can share your creations with us on our Facebook page. We would love to see them! For more inspiration have a look around the blog. There are tutorials for many levels using Delight Clay™ and Creative Paperclay®. You can also visit my blog www.papermachepatch.com.


You can find Delight Clay™ online at Creative Paperclay Co and also at Michaels, Hobby Lobby, Dickblick, and Amazon. 

Thanks for stopping by!

Suzette


Monday, June 3, 2019

A Starfish Wall Hanging Made with Delight Clay™

Hello and welcome to the Creative Paperclay Blog! I have decided to start an under the sea theme as beach days are upon us, so my next few tutorials will be all based on something from under the sea; corals,  fish, sea creatures, etc. Today I will share with you how to make a starfish. We will be using Delight Clay™.


The supplies you will need are:

Follow along in the video below:


Here are more pictures.


You can share your creations with us on our Facebook page. We would love to see them! For more inspiration have a look around the blog. There are tutorials for many levels using Creative Paperclay®. You can also visit my blog www.papermachepatch.com.

You can find Creative Paperclay® online at Creative Paperclay Co and also at Michaels, Hobby Lobby, Dickblick, and Amazon. 

Thanks for stopping by!

Suzette


Monday, May 6, 2019

A Mermaid Tail Jewelry Holder

Hi! Who doesn't love mermaids? I sure love them and today I have a magical tutorial showing you how to make your own mermaid tail jewelry holder. Isn't that gorgeous?


It's really simple and you only need a few supplies:


  • Creative Paperclay®
  • foil
  • foil tape or masking tape
  • a toothpick
  • sandpaper
  • gesso
  • PVA glue
  • acrylic paints
  • pencil or sharp tool
  • sculpting tools
  • water
Follow along in the video below:


Here is the completed sculpture:


You can share your creations with us on our Facebook page. We would love to see them! For more inspiration have a look around the blog. There are tutorials for many levels using Creative Paperclay®. You can also visit my blog www.papermachepatch.com.


You can find Creative Paperclay® online at Creative Paperclay Co and also at Michaels, Hobby Lobby, Dickblick and Amazon. 


Thanks for stopping by!

Suzette