Showing posts with label ArtbySusieK. Show all posts

Saturday, October 14, 2023

Can we be Friends?


 If you don't like clowns, turn back now!


I had the opportunity to submit art for a Stephen King project in a local gallery.  I have loved Stephen King novels for years, much more than the movies.  I decided to use the image of one of his craziest characters and mix it with a one of his sweetest characters.  

If you are not a fan of clowns, especially Pennywise, click away and I'll be posting another cuter Halloween project soon.  


It all started with the idea of a sculpture, but I wanted it to hang on the gallery walls.  So I joined the sculpture with the canvas and I really enjoyed the process.  


1. cutting cardboard in the shape and size of the sculpture and making sure it fits within the size of the canvas

I layed tracing paper on the cardboard so I could draw out where the hands would be holding the paper boat.  

Originally I was going to have the boat covering some of the face.  That idea changed a lot.

building up the armatures for arms and face by using wire and masking tape.  

Putting on the first layers of Creative Paperclay

I downloaded some photos of gloves and started creating the hands.  

//

Here I'm playing with the size of the boat and making a hood for the raincoat he'll be wearing.  


I lost so many of my face sculpting photos.  I have to say I was getting frustrated with him.  

This face went through so many changes.  I made the eyes by using molds and resin.  They turned out pretty creepy and seem to follow you around.

Silly clown shoes coming up

Added some waxed thread to create the shoe laces.  

creepy eyes

accessories 

The hardest part is waiting for the paint to dry so I could add the textiles and put him all together.

Wanna be friends?

Starting to add the lace of the clown suit and then creating the raincoat out of a plastic table cloth.  

 
This video is a quick slide show of the process.  Unfortunately I lost all my still photos.  


Materials that I used:
18" X 46" Canvas
Large piece of cardboard
masking tape
Heavy wire for armature
Creative Paperclay ( 2 large bricks)
acrylic paints
eyes / or create your own resin eyes or paint your eyes in.
glue
card stock for the boat
Lace for collar, pant and wrist ruffles
yellow plastic party table cloth
red balloon
red ribbon
red hair or yarn
waxed thread for shoe laces

Friday, May 15, 2020

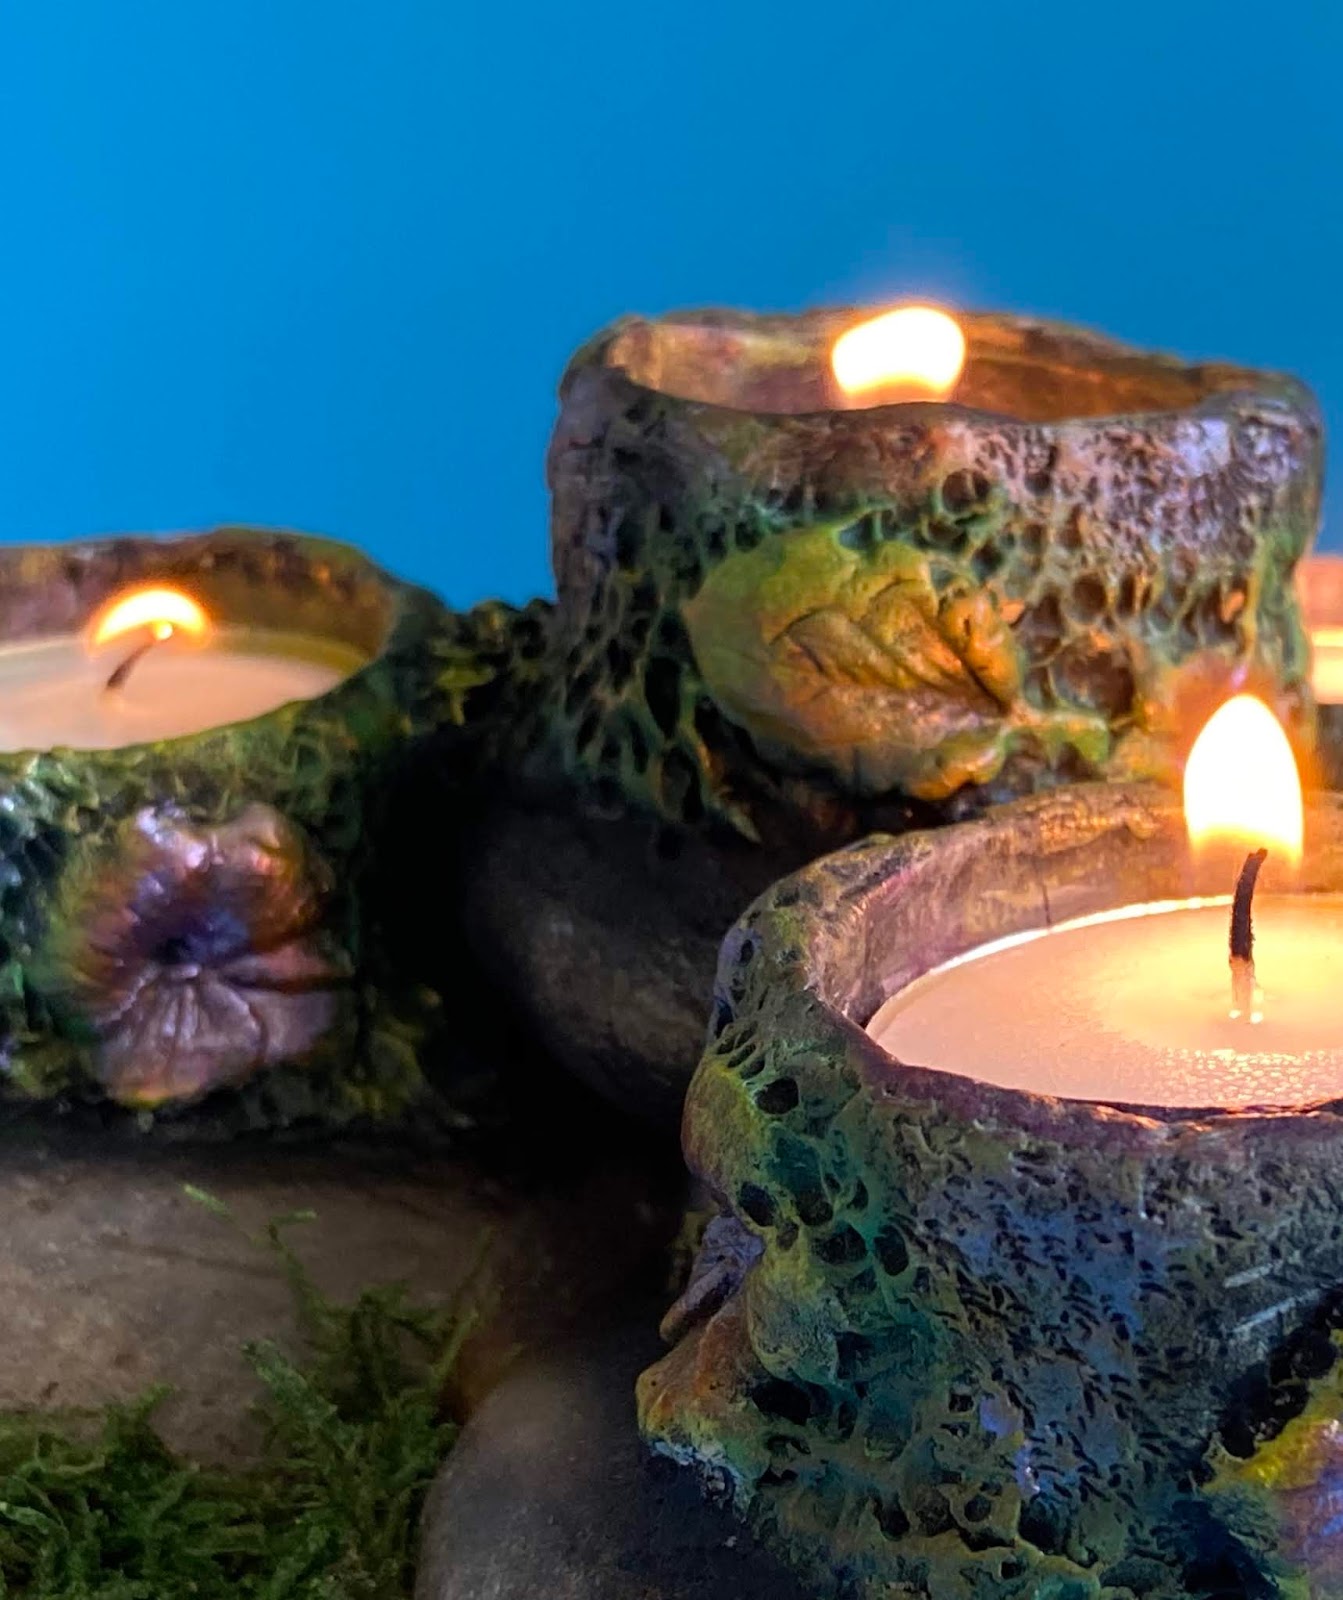
Rock Garden Candle Holder Tutorial


Let's make a Rock Garden and play with texture and color.  


Hi friends! This little Rock Garden is part of a CREATIVE PAPERCLAY® tutorial. I'm part of the design team and am sharing my creation with you today. I'm better at working with clay than working with video so bare with me on this learning curve. Rock Garden Candle Holder Tutorial
I've been doing a lot of gardening so everything I thought about creating was dealing with nature. I picked up a few rocks and decided that was the base for this month's Second Friday Tutorial. Working with wood, rock, clay, moss, textures and finally fire what could be better.. Just a fun little project that can be transformed in so many ways. I hope you enjoy. Supplies: Wood base to hold your rocks Rocks that appeal to you Tea lights / battery operated (*if using flame, keep out of draft and never leave unattended. Use tea lights with metal or glass cups. Not recommended for votive candles) Card stock or file folders masking tape E6000 glue Acrylic paints CREATIVE PAPERCLAY® https://www.paperclay.com/ basic clay working tools or tooth picks and dowels Lace, buttons, molds, ferns, leaf, plant material - anything to create texture Paint brushes


Start by preparing your base of rocks.  View the photos below and then click on the link to see the rest of the process via video.  

Add caption


Click on the link for the full Youtube video Rock Garden Candle Holder Tutorial EMAIL: Susiewhc@gmail.com FB and IG: @artbysusiek and @artbysusiek4home WEBSITE: https://artbysusiek.com sign up for my Creative Breakfast Club ETSY: www.artbysusiek.etsy.com PINTEREST: https://www.pinterest.com/susiewhc/ CREATIVE PAPERCLAY® Design Team Member https://creativepaperclay.blogspot.com


Thursday, December 12, 2019

Paddy O'Malley the Christmas Mouse

It's Second Friday and time for another tutorial.  Sharing some tips and tricks.  

Paddy O'Malley the Christmas Mouse is ready to make an appearance this Christmas.  He loves to help out with the decorations.  


SUPPLY LIST:
Creative Paperclay®
Paper Mache' box or wood box for drum
Acrylics paints
assorted paint brushes
basic clay tools  
tinsel
small ornaments
18 gauge wire
tin foil
masking tape
glue
small wooden skewers 
small bowl of water
2" and 4" foam ball
fine grit sandpaper

Follow this link for a video of the sculpting process and well as the still pictures below with text.  


I started by painting the box to look like a drum and decided where I wanted the mouse to stand and poked a couple of holes in the top to secure the legs.  The larger ball is the body, with 2 wooded skewers as the legs.  

18 gauge wire passed through the body where you would imagine shoulders to be.  Another skewer placed where the neck would be and the smaller foam ball placed on top as the head.  Adjust to where you like it.  


I work on the body and head separately in the beginning.   Here I have covered the body in  Creative Paperclay® and while it drys I'm working on the eye sockets of the head.  just pressing a ball tool in the foam or use your thumbs.  

making small loops for ears and pressing them into the foam.  Kinda Mickey Mouse ears.   Cover with masking tape and then clay.  


I cover foam with masking tape because there is less cracking of the clay as it dries.  I find the foam absorbs the moisture quickly and causes the clay to have more cracks, thus more repair work to do.  

Start adding clay to the bottom of the skewer and add little fun toes.  


Roll out some clay and start to construct a santa like coat.  I made three separate pieces.  One across the back and one for the right and left side of the jacket front.  At the bottom I used a straight tool to add texture.  Making is look like fur lining.  


While the jacket dries I move on the the head.  This takes some time and everyone will have a different look.  Just have fun with it.  

Adding that tin foil to the arm wire.  This adds strength and gives the clay something to hang on to.  Pose the arms the way you like.  I knew I wanted him holding the garland, so I made sure I had the arms arranged in a way that it looked natural.  


Cover the arms with clay, add texture and seams.  


Finally he will need a nice fur collar.  So add a snake of clay to circle the neck area and add the texture.  

Add a hat if you want. I created a tin foil hat and covered int he same fashion as the jacket adding the fur around the base.  

And you're done!   Let him dry before sanding and painting.  Spruce up the drum by adding your design.  

I hope you enjoyed this tutorial.  You can see other things I create by visiting my various social media sites and my Etsy store and website.  If you have questions you can always shoot me an email.  


Contact: Susiewhc@gmail.com
Facebook and Instagram search @artbysusiek
https://artbysusiek.com Here you can sign up for my Creative Breakfast Club
www.artbysusiek.etsy.com
https://www.pinterest.com/susiewhc/


]