

1
Happy holidays to all and a bless new year to all my wonderful friends, followers and collectors.
This season is full of the family gathering, food, decorations and many Christmas Songs.
Thanks to these beautiful songs and to show the holiday spirit why not make an ornament. I have to say been part of crafting groups sure help to inspire you. These groups challenge you to create and make your gears turn. This is how this Sing A Long ornament took shape. With the help of my girls we choose The Little Drummer Boy we give him a Anime Manga better know has Chibi style and brought him to life in a cute ornament to hang from your Christmas tree or anywhere you want.

Materials
Delight™ Modeling Material
Foam round ornaments
Mini Drum Christmas Ornament
Wires
Multi use pliers
Aluminum foil
Acrylic paints
Brushes
Scissors
Water Mist bottle
Tacky Glue
#2 Pencil

Cut a small piece of wire to create the small body armature.
Since is a chibi body it doesn't have to be big.
Chibi is a style of Anime/Manga drawing style used in characters to show smaller children as the actual meaning of the word is "short person" or "small child." have very small bodies with large heads.

Is very important you pay attention to the neck piece a hop is required to hang the head from it.
Just bend the wire in half and shape a hoop with the pliers.
Now cut a strip of the aluminum foil and start wrapping around the armature.

Make sure your press the foil secure to the armature to shape the belly and back.

Used your pliers cut a 3 inches long wire and curl it up like in the photo above.

Twist the wire inside the foam ball.
This will anchor the wire on your ornament head.
These ornament balls are seasonal items and I found these at Walmart fairly priced $.48 each

Now time to cover the ball with the Delight™ Modeling Material . Start by rolling a big ball flat to be able to cover the entire doll head.
I choose Delight™ Modeling Material due to be one of the most light weight clay I ever seen.
It help when your making a ornament because it is easy to use and once it dry has a foam like texture.

Once you have the sheet all rolled out like a pizza dough cover the ball and cut any excess out.
Smooth the edges with your finger and some water.

Do the same with the body.
Roll some clay out and cover all the body making sure all the foil and wires are cover in clay.

Shape all the body parts like the hands, belly and feet.
Chibi style doesn't required many detailed feet or hands so have fun

To make the hair just roll a smaller ball and once flat mist the head and attach the whole rolled clay on top and style to your like. You can also cut any excess out .

Move the the clay around roll it a little to give the hair the natural flow and it looks nice once it dry.
Set aside and let it dry.

Once the head is completely dry. Use your favorite acrylic paint in your chosen skin color.
Here the Peach Rose was applied.

Make sure your entire body is all painted with at least 2 coats of acrylic paint.
Water the paint down with water to minimized the brush strokes when the paint dry.

Now that the body base paint is dry you can start by painting the top vest and the little shoes.
Vest is light mint green and the shoes Renaissance Metallic brown

Use the same Renaissance Metallic brown for the hair and apply 2 full coats.
Make sure you always wait for each coat to be completely dry before adding the other .

Do the same on the vest add to full coats of the light mint green.

Use Metallic Green for the pants and also use 2 full coats of paint.

Line up the vest with the Dark Metallic green.
Create some holly leaf detail on the vest and add dots to the shoes.

To give the final touch to the vest use the Tuscan red and add the holly berries.
3 simple dots will be enough to achieve this look.
Here you can also add some belt detail. Also you can sign and year your ornament.

One more red dot of Yellow to create the buckle and a center dot of Tuscan red to make the shoe pop. .

For the drum sticks you can use toothpicks.
Stab thru the hand and cut to size.
Use a little dot of Tacky Glue or Elmer's glue to secure the sticks in place.

Now to make the signature Chibi big eyes. Start by lightly sketching the eyes over the dolls head
with a regular #2 pencil. Make sure the placement is were you want them to be. If the placement r not were you want them to be lines can be easy removed with a school eraser.

Cover the whole iris with white. White is a base to make the top color pop and looks more vibrant.
Wait for them to dry.

Now add 2 coats of the Teddy Bear FolkArt acrylic paint to create the iris.
Make sure is completely dry before each coat is apply.

Now to give the eyes some shine use Gold acrylic paint to the final third coat.
For the Pupils use Renaissance Metallic brown to finish the eyes.
Paint 2 coats in a half moon shape. Make sure you wait for the pupils to dry between coats.

After the pupil had dry use the white acrylic paint to finish the eyes.
Water the white paint down to minimized the strokes out.
Paint 2 coats or more depending on the skin color of the doll you might need more. Now again make sure the paint is all dried before the other coat is added to achieve a nice bright eyes.

Now use the Black acrylic paint to accent the eyes. Water the black out and with a small brush start outlining the eyelashes and pupils.

To finish the eyes add some whites to give them some shine.
Use the gold paint and add some freckles.
Use the black to out line the mouth and rose to blush the cheeks.

To finish the doll out use Black acrylic to outline the belt, pants and shoes.
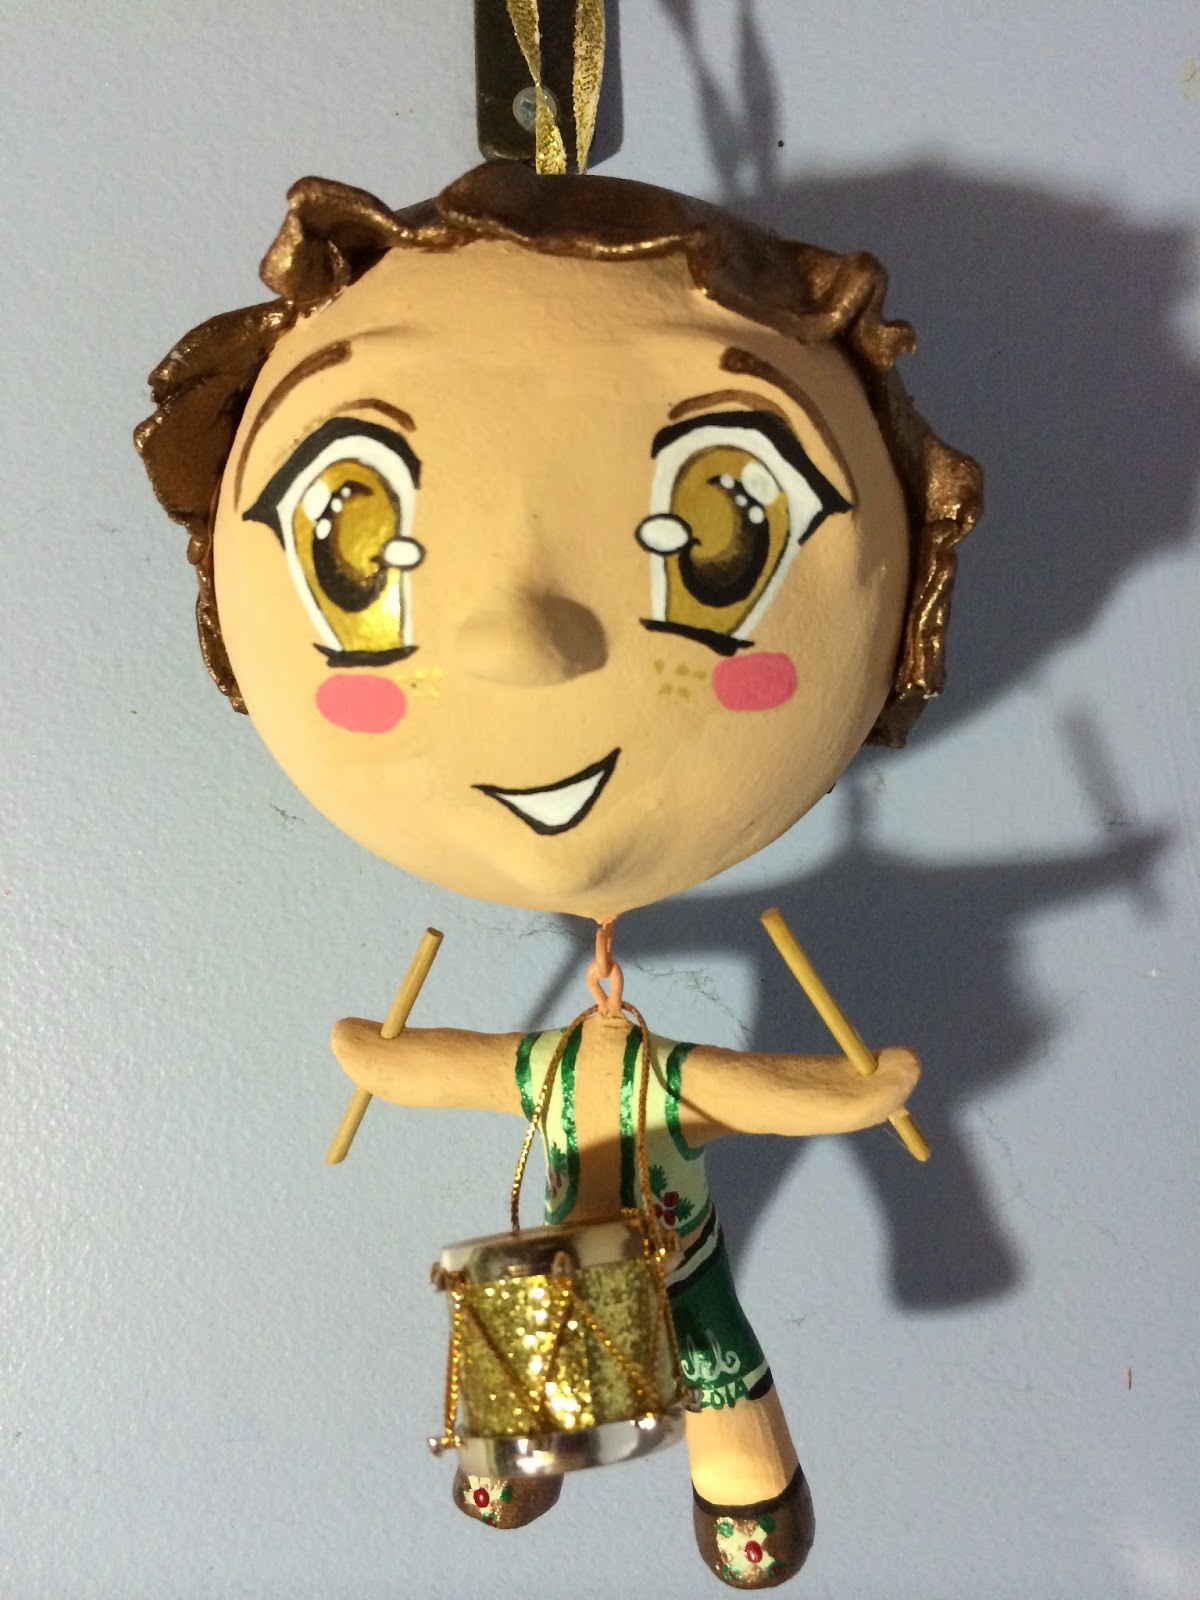
Before your add the head to the body make sure to thread your cute mini drum ornament.
Use a pair of plier to twist and shape the head wire into a nice hoop and thread it to the body.
Secure it in place with the pliers. Paint it with acrylic paint to cover the wire and give it clean look.
Seal the ornament with any matter acrylic sealer to protect the paint over time.

Now your Little Drummer Boy is ready to be display.
Are you ready for the holidays? Let just remember the true meaning of these holidays and make sure we spend time with all your loves ones. Don't be afraid to have fun and let them know how much your love them so they can have great memories to treasure.

Thank you kindly for join us for this Sing A long Christmas Ornament The Little Drummer Boy and if you have any questions feel free to leave us your comments below or email me here
scan or visit my blog at


.jpg)
.jpg)
.jpg)
.jpg)
.jpg)
.jpg)
.jpg)
.jpg)
.jpg)
.jpg)
.jpg)
.jpg)
.jpg)
.jpg)
.jpg)
.jpg)
.jpg)
.jpg)
.jpg)
.jpg)
.jpg)
.jpg)
.jpg)
.jpg)
.jpg)
.jpg)
.jpg)
.jpg)
.jpg)
.jpg)
.jpg)
.jpg)
.jpg)
.jpg)
.jpg)
.jpg)
.jpg)
.jpg)
.jpg)
.jpg)
.jpg)
.jpg)
.jpg)
.jpg)
.jpg)

.jpg)
.jpg)
.jpg)
.jpg)
.jpg)
.jpg)
.jpg)
.jpg)
.jpg)
.jpg)
.jpg)
.jpg)
.jpg)


