Showing posts with label Recycled Crafts. Show all posts

Tuesday, July 18, 2017

How to PAINT a Totoro Creative Paperclay® Tea light Fairy House #ArtByGloricom 3/3

Part 1
 
Part 2
 
Part  3


Hola and Hi to all my wonderful friends and followers.
 Like I promise here is the part 3 of this one of a kind tea light fairy house.
 I hope everyone enjoy the step by steps instructions and feel free to share it with all your friends.
Now in this 3rd part I will be showing you how I use a few techniques to paint this magical fairy tea light house with one of my most favorite wood spirit Totoro from the Studio Ghibli film My Neighbor Totoro. 


For this project I used some of my previous FolkArt and DecoArt Acrylic paints
Here is the color list:
FolkArt Licorice Black
FolkArt Antique Copper
FolkArt Rose Shimmer
FolkArt Champagne
FolkArt Metallic Inca Gold
FolkArt Metallic Christmas Green
FolkArt Metallic Periodot
DecoArt Festive Green
DecoArt Renaissance Brown 
 
 
I like to do a couple of coats when I paint my Creative Paperclay pieces just to make sure I have a nice coverage and protection for the final piece. Make sure you wait in between coats to make sure is all dry so the second coat adheres propertly to the clay.
Start covering the truck of the fairy house with the FolkArt Metallic Inca Gold.

 
To color the top of the house use the FolkArt Metallic Inca Gold for the stump with FolkArt Metallic Inca Gold and the base colot of the roof leaf FolkArt Metallic Periodot and make sure you use to coats for each color.
 
 
Now lets give a nice coat for the grass with the DecoArt Festive Green.
 
 
To give the roof a nice 3d effect use the FolkArt Metallic Christmas Green and apply a water down mixture very carefully. You can use a wet down paper towel to remove any excess if you think is too thick after you applied the acrylic paint down.
 
 
 Now this will only work if the paint still wet so make sure you inspect the piece carefully before you leave it to completely dry.
 
 
To create a nice accent tone door use the FolkArt Champagne has a base and give it two complete coats and let it dry.

 
The best way to bring any texture up is to apply a darker color in this case DecoArt Renaissance Brown. I have notice it works best if you water down the paint so the pigments will go down the crevices of the sculpted piece. Again dont be afraid to apply a much since you will be using a wet paper towel to remove any excess paint. this techique work best to exposure the nice sculpted texture you left behind . This really brings the rock appearance of the front door and the grain of the tree bark.

 
We also want to give the grass a nice and natural effect for that we need to add a few layers of colors. For the second layer use a nice water down mixture of the FolkArt Metallic Christmas Green. The more you water it down the easier it will pool in all those tiny little grass we previously sculpted. You can remove any excess again with a wet paper towel.
 
Tip: Always use a new Paper towel for each color you will be removing so your piece will not be stain with the older previous color you already removed.

 
It is now time to color the cute little flower and for that we will be using the FolkArt Rose Shimmer.
Feel free to apply two nice thick coats. No water downs for this step.

 
Remember to leave the window frames for last. The reason for that is you want them to be bold and clean colored. Use two thick coats of FolkArt Champagne.


Now you can see how all these steps came down nicely to create your one of a kind Tea Light Totoro Fairy house. A very lovely way to recycle any old baby food glass jar.


The little house is ready for a cute little LED tea light and it will bright your night away.
 
I hope you enjoy this full free Creative Paperclay tutorial. If you did please like and share for everyone else to enjoy. If you want to follow the previous parts of these How to tutorials i had included all the links in the top portion of the intro. 
 
Sincerely
Gloriann Irizarry
 
#Creativepaperclay #totoro #fairyHouse #artbygloricom #bygloricom  #Anime #manga #otaku #paperclay #fanart #fairygarden #ledCandle #tealightholder #studioghibli #ghibli #HayaoMiyazaki #myneighbortotoro #sprite #fairy #fairies #gallery #art #crafts #tutorial #madewithmichaels #handmadewithjoann #acmooreinspired #hobbylobbyfinds #fairylights #chateauoart

Monday, February 13, 2017

Creativity Inspired by Paint Brush Muses

Hi!
We all could use a little inspiration from time to time to stir the creativity from within. I created this set of paint brush muses to help me out.

The largest one screams for me to not be afraid to use color. The second one  reminds me that my art is beautiful and to create from my heart. The third one says for me to think outside the box, not all art needs to be so black and white.

Here's how I made these fun little muses out of used paintbrushes, acrylic paint, and Creative Paperclay®.

Supplies
Creative Paperclay®
Paintbrushes for muses
Multiple colors of acrylic paint
Gesso
Tacky glue
Palette knife
Clay carving tolls
Clay sanding tools
Matt acrylic sealer

Instructions
1. Take a ball of clay large enough to fit on the flat of the brush just below the bristles.You are making your face on the brush.


2. Form the shape of a face. Now you can carve the details of your face into the clay, make 3-d facial features, or paint the facial features on.

3. Remove your face from the brush using a pallet knife slipped gently between the clay and the brush.

4. Lay flat to dry or dry in a 180 oven till the clay turns white.

5. Sand your faces.

6. Paint your brushes and clay faces with gesso.


7. Use tacky glue to adhere the faces to the brushes and let dry.

8. Here's where the real fun begins! Use any colors or patterns on your muses. Let your muse's personality form with each addition of paint. Finish with a matt sealer when your paint is dry.


 I hope my muses inspired you to make your own creative posse. Thank you for visiting!

Happy Creating,
Shari


Tuesday, August 25, 2015

Make your Own Recycle Crayons Stamp

 
Make your Own Recycle Crayons Stamp by Gloriann Irizarry
 
Are you ready for the kids to go back to school? It is almost time and with the wonderful task of back to school come the cleaning old supplies. Every year I come across this and since I like to recycle items I decided to find a better way to re use the one item we had the most from last year school supplies. Crayons and more crayons. Here I thought of a a way to use these for my Creative Paperclay Project I hope you enjoy this tutorial. 

Materials

Creative Paperclay Material
Old Crayons
One Glass Cup
Pot
Hot Water
Disposable Plastic Bowls
Hobby Knife


Gather all your left over crayons. 

 
Peel all the paper off the crayons
 
 
Break the crayons in small pieces and place them in the glass cup.

 
Place the cup in a pot full of water and place in a low heat.
Stir the mix until all the crayons are fully melted.

 
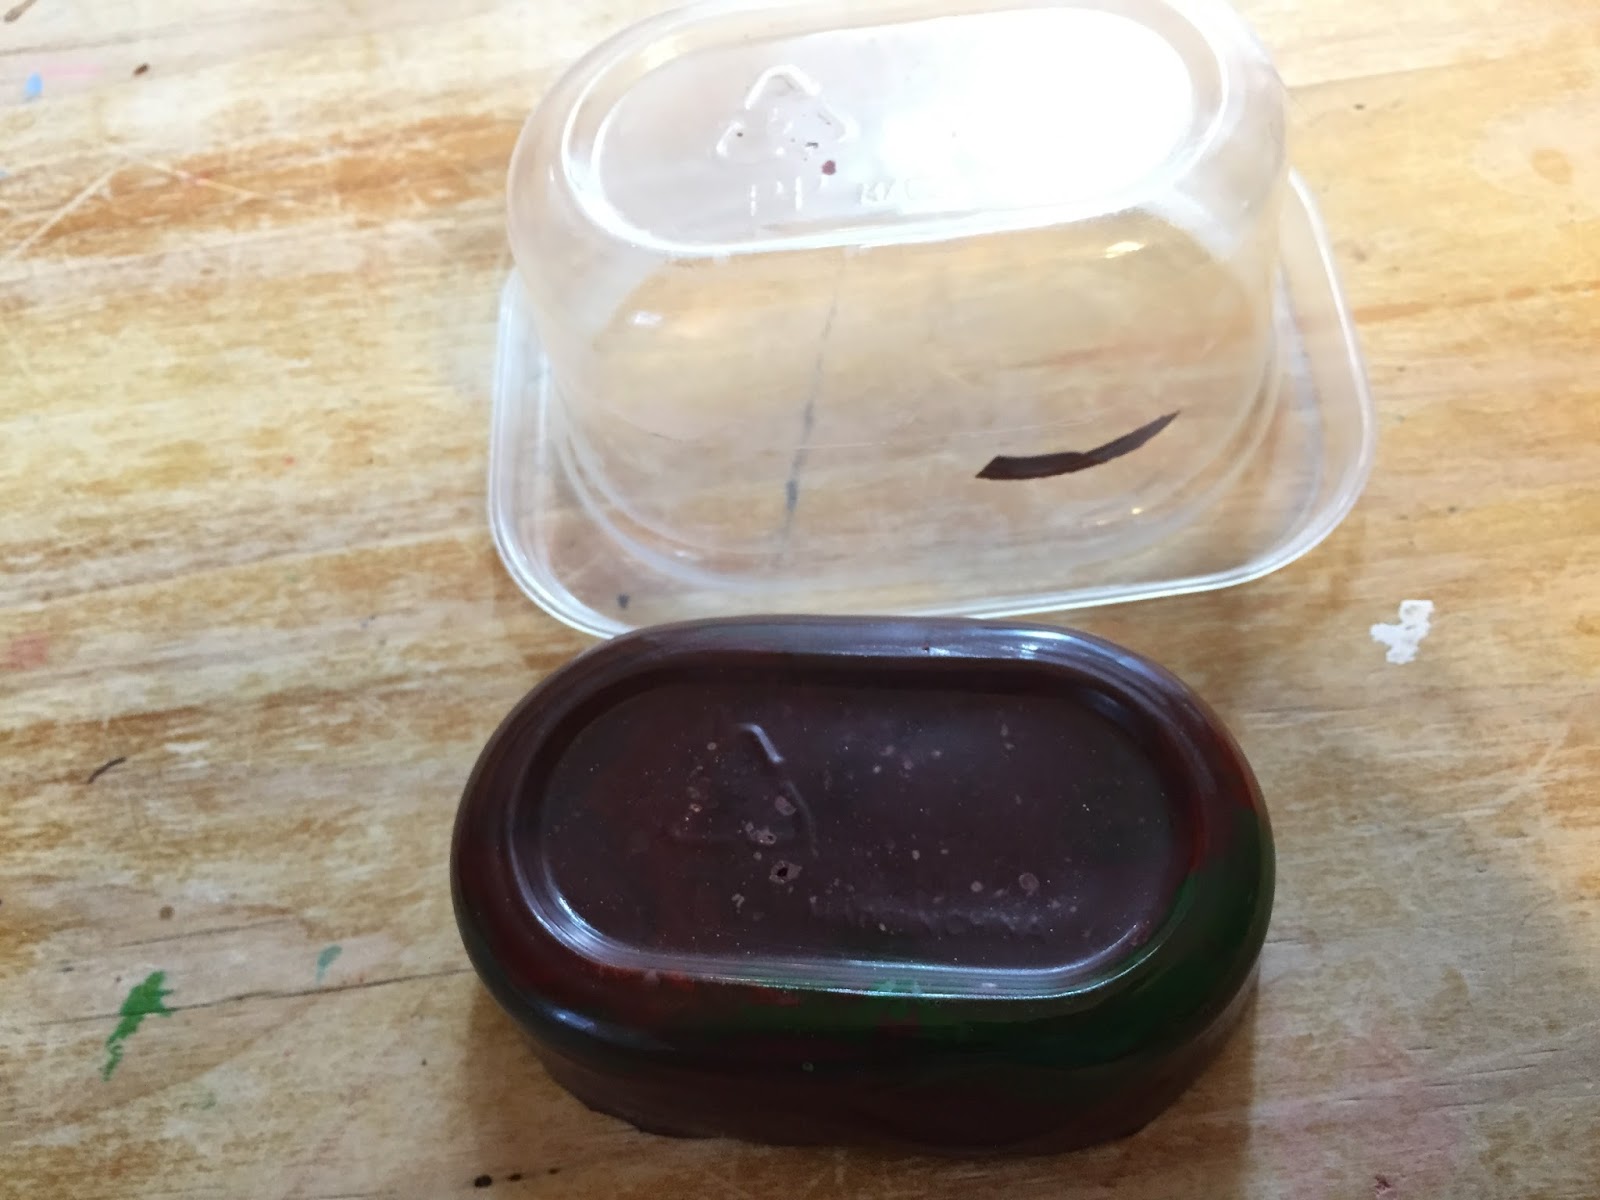
Once the crayon mix is all meted, carefully removed the hot glass cup from the hot water pot and pour the mix in the disposable plastic bowls. Place the hot mix in the fridge.


Wait about and hour and remove the bowl from the fridge.
Wiggle the plastic bowls until the wax mix is released.

 
Clean the edges out with the hobby knife.

 
Start carving your favorite design directly on the wax block.

 
You can make one continue pattern or a combination of patterns on the crayon wax block.

 
Have fun be creative and carve any designs you want. Once your satisfy the crayon block is ready. 

 
Grab your Creative Paperclay roll it out to your desire thickness.

 
Place your new stamp on the rolled out Creative Paperclay Material and apply even pressure to the stamp. Gently remove the stamp from the Creative Paperclay sheet and expose the new design under it. Now your stamp is ready to be use in any future paperclay projects.


 Feel free to join our Facebook Q&A group in click here . We will gladly help you out.
 
Have a great new school year and happy crafting.
 
Sincerely
Gloriann Irizarry


Sunday, December 7, 2014

Sugar Rush - Recycled Pickle Jar

I love to recycle things - whether it is jars, or cans, or boxes, if it can be reused into something else - I do it!  That is the best part about using the Creative Paperclay product - you can recycle many things - to make what you want or need!  This project is simply a Vlasic pickle jar - the biggest jar you can find at Walmart, recycled in to a treat jar on my desk!!!  I hate to throw things away - and I don't know how to recycle the right way, I recycle some stuff into things I can actually use!  I recently shared a recycled peanut jar on my blog (link below), which is for my husband!  This one is mine - and yes, more girlie colors! I truly love how it turned out, so lets get started!    

**I had to take two photos since you couldn't see the whole title on the picture!  It say's "Sugar Rush" as the title, but can be created with whatever title you want!**
Supply list:  
Creative Paperclay (less than half the package)  


White acrylic paint - Craft Smart
Alphabet template - CTMH
Flower mold - Stampin' Up
Garden Party stamp set - Stampin' Up
Ink pads - Stampin' Up
     Coastal Cabana
     Pistachio
     Strawberry slush
     Crisp cantaloupe
Cardstock - Stampin' Up
     Whisper white
     Pistachio
     Strawberry slush
     Crisp cantaloupe
Ribbon - white, teal, mauve, peach
Tools I used - 
     Xacto knife
     Fine tipped scissors
     Hot glue gun
     Sponge
Directions:
Step one:  Take the mold, and mold 5 of each of the 3 size flowers - set aside to dry.
Step two:  Take the clay - and flatten it out to 1/8" or less thickness.  You need it thick enough - but not too thick!  
Step three:  Using your alphabet template, create your title.  I used "Sugar Rush" as my title, you could do whatever you wanted!  
Step four:  After you let the clay creations (both alphabet and flowers) dry 24 hours, sand the alphabet letters to get any imperfections out.  Paint each piece white, both flowers and letters.  
**Tip**  For the flowers, grab a straight pin and poke a hole on the bottom of the flower, to allow you to paint the top to have something to hold on to!    
Step five:  Take your ink pads, the strawberry slush and crisp cantaloupe, with the sponge - and ink the flowers that should be dried from the paint.  Set aside for step seven.      
Step six:  After you let everything dry, you are ready to put it all together!  Take each letter, and hot glue it to a sheet of cardstock (I used strawberry slush).  Take your scissors, and cut around each letter 1/8" or so around each letter.  Do each letter individually until you are all done.
Step seven:  Add the flowers to the top of the letters randomly using the hot glue gun.   Set aside until the rest of the steps are done. 
Step eight:  Cut the white sheet of cardstock to 9 x 5, and then using the stamp set, stamp the flowers and leaves in each of the 4 colors randomly on the paper.  
Step nine:  Matt the white sheet on the pistachio, and then crisp cantaloupe cardstock, finishing off with the letters on top.  

Fun project to create, fill it up with candy to give away as a gift, or make for your own special treats to be put in!  I hope you enjoy today's project, and make sure you check in this month for my beginner tips starting this month!  Nothing but things to help you when you are just starting out!  
Thanks for stopping by,
Lynda Jeffs
Creative Paperclay Design Team 
and Memories in Tyme          


Friday, June 20, 2014

Creative Gift Boxes with Rachel Whetzel


WHAT YOU'LL NEED to make your own gift box:

A box that you can repurpose, or a new box. Either should be made with a paper like finish.
Creative Paperclay®
Paints. I use Folk Art acrylic craft paints.
Stain. I used Valspar antiquing stain, and Ranger Ink Distress Inks (walnut)
Paint brushes
Scissors
Papers (I used an old dictionary page)
Glue. I used Elmer's School Glue for this project. 
Texture Plates, Rubber stamps, and other items for creative texturing. 

Wet the surface of your box, and start pressing clay into it.
When the top is completely covered, start pressing texture into the wet clay. I cut some punchinella, and pressed that onto the top.
To get a lot of my pieces pressed well into the top, I would turn the box top upside down and press into the counter tops.
I kept layering stamps and texture plates until I got the look I liked.
Once the top was dry, I sanded the sides of the box smooth, and glued dictionary pages around the outside. Once the glue was dry, I trimmed the excess paper.
Then I painted the top of my box! Once the paint was dry, I layered in shading by using stain (black paint would work too) and wiping the surface, leaving black in the crevices of the piece, and allowing the blue paint to show through. I used some of my Alumidust BRONZE to add a fun bit of color and shimmer on the US Art Quest stamped area, by using my finger to lightly dust the piece and rub the bronze in.
When I was all finished with my layering, I finished off the look by using Ranger Ink's Distressing Inks to darken up the edges of the box. Then I topped the whole thing off with a pretty white piece of twine.
I also played a bit with the twine placement, so that the lid could be removed without taking off the twine. Now I have a really cool, totally unique gift box to put something pretty in!!
Thanks for reading! If you'd like to keep up with me, and see more of what I'm up to, I'd also love it if you'd visit MY BLOG and Subscribe! You can also find me on FACEBOOK!

Thursday, March 28, 2013

Recycled Jar: Abstract Flower Vase

abstract flower vase
Items used for this project:
Acrylic craft paint
A jar
Gold Leaf
DSCN1127
I started by making the "lattice" part by rolling out some small snakes with the Creative Paperclay.
DSCN1128
Then I applied the snakes to the jar and flattened them out.
DSCN1132
Next I made some circles for the flowers.
Once everything was dry I painted the "lattice" green and added accents with some gold leaf.  Then I painted the flowers blue and pink and adhered them to the lattice once the were dry.
DSCN1139