Showing posts with label jewelry. Show all posts

Monday, September 25, 2017

Make Jewelry Charms with Creative Paperclay®

Hi Friends:  Creative Paperclay® can be used to make great lightweight charms for your home-made jewelry pieces.  Just roll the clay, stamp into it with your favorite stamp sets, then cut with cookie cutters or metal clay cutters to create charms / pendants to use on necklaces, earrings, or bracelets. Once dry, you can paint them to match your favorite outfits or to give as gifts.

Here are some pictures of the jewelry pieces that I made using Creative Paperclay® charms:


The beads on this last one didn't photograph very well - they are lovely iridescent purple/blue beads that really work well with the purple in the charms.

Please see my video tutorial for full instructions for this project:


Supply List:
Creative Paperclay® Modeling Material
Prima Marketing Art Alchemy Acrylic Paint, Opal Magic Yellow-Blue (Amazon)
PrimaMarketing Art Alchemy Acrylic Paint, Opal Magic Violet-Green (Amazon)
Prima Marketing Art Alchemy-Sparks-Fairy Wings (Amazon)
Prima Marketing Art Alchemy-Sparks-Iris Potion  (Amazon) 
Prima Marketing Art Alchemy-Sparks-Magical Pond  (Amazon)
Prima Marketing Art Alchemy-Sparks-Mermaid Sparkle (Amazon)
Prima Marketing Art Alchemy - Metallique Wax - White Gold (SSS)
PrimaMarketing Art Alchemy-Metallique Wax-Brushed Iron (Amazon)
PrimaMarketing Art Alchemy-Metallique Wax-Old Silver (Amazon)
Prima Marketing Art Alchemy-Metallique Wax-Vintage Gold (Amazon)
Liquitex Gesso - White (Amazon)
Prima Marketing Art Alchemy-Metallique Wax-Aged Brass (Amazon)
Studio 71 Black Gesso (JoAnn)Darice 1MM Black Leather Cord (Amazon)
Darice Necklace Kit 1MM Light Brown (Amazon)
Darice 1 inch Silver Fish Hook Earrings (Amazon)
Darice 1 inch Gold Fish Hook Earrings (Amazon)
Beadalon Stringing Wire 19-Strand .015-Inch (Amazon)
Bead Landing 9MM Silver Jump Rings (Michaels)
Bead Landing Assorted Gold Jump Rings (Michaels)
Premo Diamond Metal Cutters (Sculpey)
Premo Circle Metal Cutters (Sculpey)
Faber-Castell Glaze (Amazon)
Versamark Ink Pad (SSS)
Blue Moon Metal Bead Strands - Gold and Silver
Vintage Rose Garden background stamp from Quick Cards Made Easy
Stampendous Tiled Quad Cube stamp
Other:  misc. beads and jewelry findings from my stash


I hope you enjoyed my projects and learned some new ways to use Creative Paperclay® to make charms for your jewelry creations. Thank you so much for stopping by the blog today. Have a great, creative day! -Patti

Monday, August 7, 2017

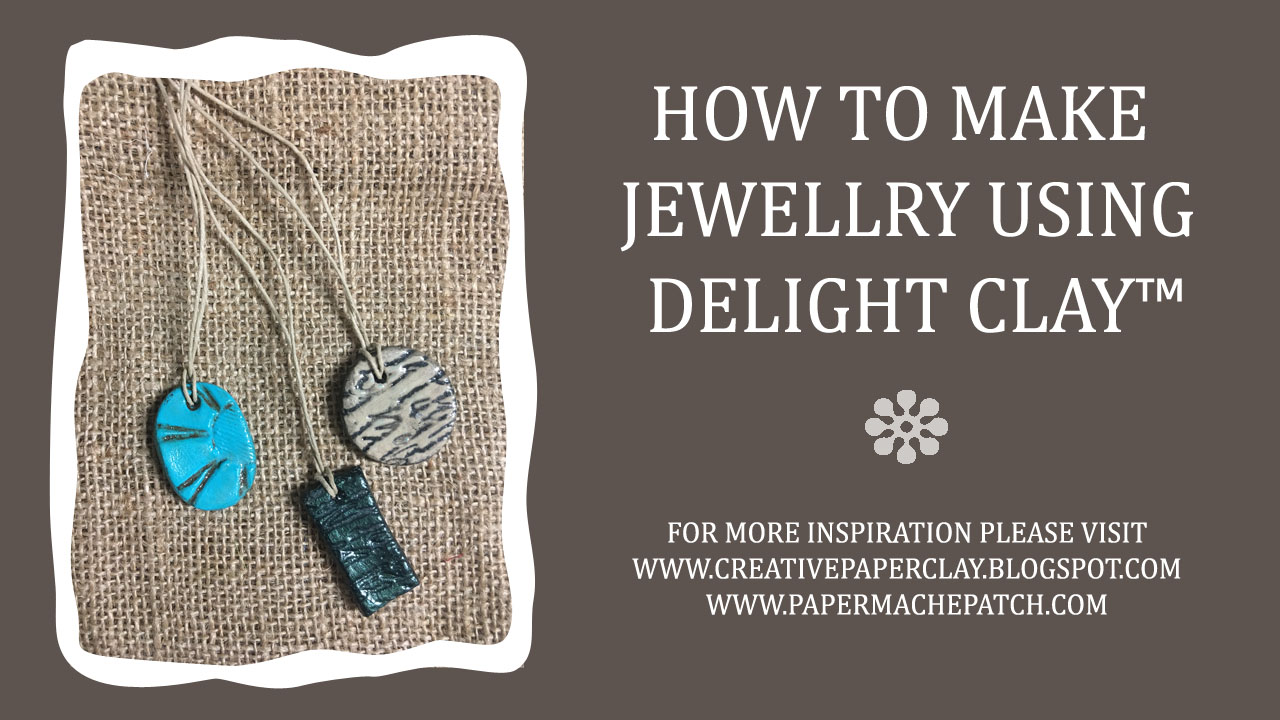
Making Jewellry with Delight™ Clay


Delight™ Clay is so light it's great for making jewellry! Today I will show you how to make these wonderful pendants using Delight™ Clay and a few other supplies you should have laying around the house. Let's get started!

Supplies needed:
Rubber Stamps
Clay or Cookie Cutters
Craft Knife
Craft Sticks and glue
Baby Powder
Paint Brush
Acrylic Paint


Step 1:

Glue two sets of craft sticks together. These will act as a guide for rolling out clay more uniformly.

Roll out the clay between the craft sticks. 


Step 2:
Press your rubber stamps into clay.


Step 3:
Use you clay/cookie cutters to cut out shapes.


Step 4:
Use the end of a paint brush to poke a hole at the top.


Step 5:
Leave to dry.

Step 6:
Apply a coat of gesso and put aside to dry.


Step 7:
Paint with acrylic paint and let dry.


Step 8:
Paint with a contrasting color and immediately wipe off with a paper towel. Alternatively you can brush with a mica powder. See video for demonstration.


Step 9:
Varnish and set aside to dry.

Step 10:
Add your favorite beading cord or string.


Follow along in this short video to learn how to make these fabulous pendants using Delight™ Clay.


Thank you for stopping by! Please be sure to visit me at www.papermachepatch.com for more inspiration and great tutorials!

Happy Crafting!
Suzette


Friday, July 15, 2016

Goddess Diary Necklace

Last month I showed you how to make goddess dolls using Creative Paperclay®. In this post I'll show you how I used one of my goddess dolls to make this goddess diary necklace.

Remember—I already had the goddess, so I'll walk you through making the diary. To make the diary cover, roll out a slab of Creative Paperclay® about 1/16" thick. I work on a teflon mat to make handling the clay a bit easier.

Next, measure strips of clay, and cut them with a craft knife. Remember to move the clay off the teflon mat before cutting or you'll have teflon strips. My clay strips are 1 3/8" wide.

Then, measure and the strips into 1 3/8" squares. Of course, you can make yours whatever size you desire.
Measuring the strips
Blank Covers
Now, let the cover blanks thoroughly dry. To keep them as flat as possible you can dry them on a screen and turn them frequently, or press them under a heavy book. Drying them under a weight takes a much longer drying time.

When the covers are dry, it's time to paint them. I started by sealing them with an acrylic medium. When that was dry, I dropped on small amounts of mica powders using the tips of tweezers, and recoated with the acrylic medium. Take care not to overwork the mica/medium.

Last step in my cover design was to stamp a rubber stamp image using Staz-On ink. 

I cut 1 1/4" pages for the diary. The number of your pages will be governed by the size of your jump rings. I stacked the pages with a cover on each side, and used a Crop-a-dile to pierce the holes for the jump rings. I also pierced a hole in the center bottom of the back cover to attach the goddess.

I added a jewelry bail to the back of the goddess with E-6000.
I used jump rings to attach the goddess to the back cover of the diary. Last step was adding the necklace chain.

Wear your goddess diary necklace in good health.

Carole

Tuesday, May 17, 2016

Tori's Tip - Create Lightweight Jewelry with Clay

I like making fun earrings for myself and others, and of course my medium of choice is clay!  Creative Paperclay® modeling material is my first choice for detailed scale miniatures that are to be worn as earrings.

Artsy earrings - 1:12th scale miniatures of a few of my favorite things!
Made with  Creative Paperclay®, mixed media

Garden goods - 1:12th scale miniatures
Made with  Creative Paperclay®, mixed media

For someone who likes to wear larger earrings, pendants, etc., Delight™ air dry modeling compound is sometimes a better choice because it is extremely lightweight.  The items shown below, created by my daughter and her son, show a variety of clay types and embellishments

Earrings and pendants with both types of clay -
finished with paints,  decopauge, transfers, rubber stamps, paints, embedded objects, etc.


A search of this blog for "jewelry" or "earrings" will show you many inventive ways to use clay for jewelry!


One of my previous posts shows how to embed the chain for hanging earrings
- and a really fun way to make jewelry :)
 http://creativepaperclay.blogspot.com/2015/03/hot-craft-crayon-art-jewelry.html

Thanks for joining me here again!  As always, play, experiment, and have fun!


I'd love for you to join me for more projects & art adventures on my personal blog
Find me on Facebook, or peruse & ponder pics with me on Pinterest

Friday, December 18, 2015

Easy Earrings

These earrings are so easy to create, that you could make a pair now for a last minute holiday gift. So, let's get at it!!

The first step is to roll out a stab of clay about 1/4" thick. Then, texturize the top of the clay. I used a clay texture sheet to press into the clay, but an embossing folder would work, too. Or a rumpled piece of foil. Just about anything that will add texture to the surface of the clay.
1/4" thick slab of clay
Texture sheet in place on clay
Next, take a clay cutter, cookie cutter, or free hand cut a shape for your earring.

Texturized clay
Cutting the earring with a canapé cutter
Use a toothpick or other sharp object to pierce a small hole in the top of the earring blank. This is where you'll attach the finished clay piece to the jewelry findings with a jump ring. Or, if you prefer, you can drill a hole in the dried clay blank.

When the blanks are dry, sand any rough edges. I like to use Sandits for this type of sanding.

Paint the blanks with your choice of acrylic paints. After the paint on mine was dry, I dry-brushed them with gold metallic acrylic paint, just hitting the high spots. Combine with beads and jewelry findings and attach to earwires. Voila!! A pair of earrings—ready to present as a gift.
Close up of finished purple earrings
Close up of finished coral earrings
Carole

Friday, August 21, 2015

Games of Thrones Mini Dragon Egg Necklace

Here you go, Game of Thrones fans—wearable art that Khaleesi would be proud to model!!

I started with a small ball of Creative Paperclay®, and formed it into an egg shape.

Next, I rolled out a small piece of clay until it was very thin—between 1/32" and 1/16" of an inch thick. (Oops!! There was leftover glitter from my last project on my work mat. See it in the clay? It really doesn't matter for this project, because the final product gets glazed.)

I used a slurpie straw as a cookie cutter to cut out the scales. These straws are about twice the size of a normal soda straw. A regular straw will work, there will just be more scales needed to cover the surface of the egg.

I began layering the scales starting at the bottom of the egg. 

I continued layering the scales, one row after another, until I reached the top of the egg. I used the smaller, regular soda straw for the last row of scales. Last step before drying is to add a screw eye to the top of the egg.

After the eggs were dry, I painted them with acrylic paints in dragon egg colors—cream, green, and black red. When the paint was dry, I brushed on a small amount of gold mica powder from Terri Sproul's  Mixers Jewel Effects Color Set Mixer to add the highlights. 

Here's the finished necklace.

Carole

Friday, March 20, 2015

Kid's Project: Easter Egg Necklace

This is an easy-peasy project for kids of all ages. With a little help from the grown-up, even the youngest artists can create a OOAK Easter egg necklace.

Chloe and I used Creative Paperclay® to make several small eggs. Try to get them as smooth as possible when forming them in your hands, but don't be too concerned with small surface imperfections. They will magically disappear later in the process :)

After the eggs were formed, I inserted an eye hook in the narrow end of the clay egg.

Egg and eye hook
Inserting eye hook
Egg with eye hook inserted

Next, the eggs were set aside to dry. As the eggs dry, they may shrink a bit and the eye hook might loosen. If this happen, just use liquid adhesive to hold it in place and reinsert it. Allow the adhesive to dry thoroughly.

Now, to take care of those surface blemishes. We painted the eggs with slip to achieve a smooth, finished surface. Allow the slip to dry, then paint your eggs. We didn't even have to sand the eggs. The slip left a magically smooth surface.

The last step is to add the eggs to a chain, and enjoy!!
Finished Easter egg necklace

Carole

Chloe

Table Cell Table Cell