Showing posts with label Halloween. Show all posts

Saturday, September 24, 2022

How to Create a Zombie Ornament


Hello everyone! My name is Cinnamon Willis and I am going to show you how I created this ornament! I had some left over plaster disks laying around after working on another project and I wanted to see if I can get some use out of them. You won't need plaster to make this ornament, you can just use some foil, paper or whatever you would like to use for the middle and cover it with the Creative paperclay.


Supplies:
  • Creative Paperclay®
  • Acrylic paint
  • Sanding paper
  • Aleene's Original Tacky Glue
  • Exacto knife
  • Wool or whatever you would like to use for hair
  • Pliers
  • Flexible wire


This is some left over plaster from a previous project, I let it cure in the bottom of a plastic cup so that I could get this disk shape and use it later. Take whatever you are using for the core of your piece and cover it with paperclay


Take your wire, tie it in a knot and then cover the knot with masking tape.


Take the knotted wire, put it in the back of the flat disk and cover it with clay. Bulk out the back of the head so that the wire sits smack in the middle of the piece. This ensures that the piece hangs right on the tree, if it is too far in the back the front will dip forward towards the floor.


Here I just started working on the face a bit. After working up the cheeks I sit the piece aside to let it dry for about 24 hours.


I find it easier to work in layers with paperclay. I let the first layer dry and then come back to work up more of the features like the eyes and mouth. I go through this process about four times before things start to look right for me.


Chisel into the face with your exacto knife to further create the desired face shape for your piece.


Now that I am happy with the way things look with the face, I can begin to sand it down to get it to look smooth.


Paint your piece with acrylic paint. I wanted to go for a zombie look.


Wanted to give her a little bit of freckles to add more interest to the face. After you are done with painting, make sure you cover the piece with varnish to protect the paint.


I am using yarn here for the hair. Cut to the length that I wanted want and then felted the pieces together so that there is a base for the head.


Take your Aleene's tacky glue or whatever glue you like to use and smooth it on to the top of the head.  Then take the hair that you prepared and push it down in place.


I take saran wrap and secure it over the head with a rubber band to make sure the hair stays in place. Let it sit overnight and make sure there isn't any glue coming through the hair to glue the wrap to the doll's head.


Here is the completed piece and it is currently for sale here!


Thank you all once again for stopping by, and I hope that you enjoyed today's tutorial! You can find Creative Paperclay® at the following retailers Creative Paperclay® Online Store, Michael'sAmazon, Joann's.

See more of my work at Melandolly.com and be sure to catch updates on my Instagram page


Friday, September 25, 2020

Create a Ghost like Skull for Halloween


 Hello everyone, today I am going to show you how I made 
this ghost like skull. With Halloween quickly approaching, 
I figured I'd make a small companion for my dolls. 
I will walk you through the steps that I took below.


Supplies: 

Creative Paperclay®
Masking tape
Scrap Paper,Cardboard or foil
Sand paper
Acrylic paint


I began by taking a piece of paper and rolling it up into a ball and taping
it in place with masking tape. When you are good the the shape,
begin to cover it with the clay.


When you have your ball nicely formed, set it aside and let it dry.


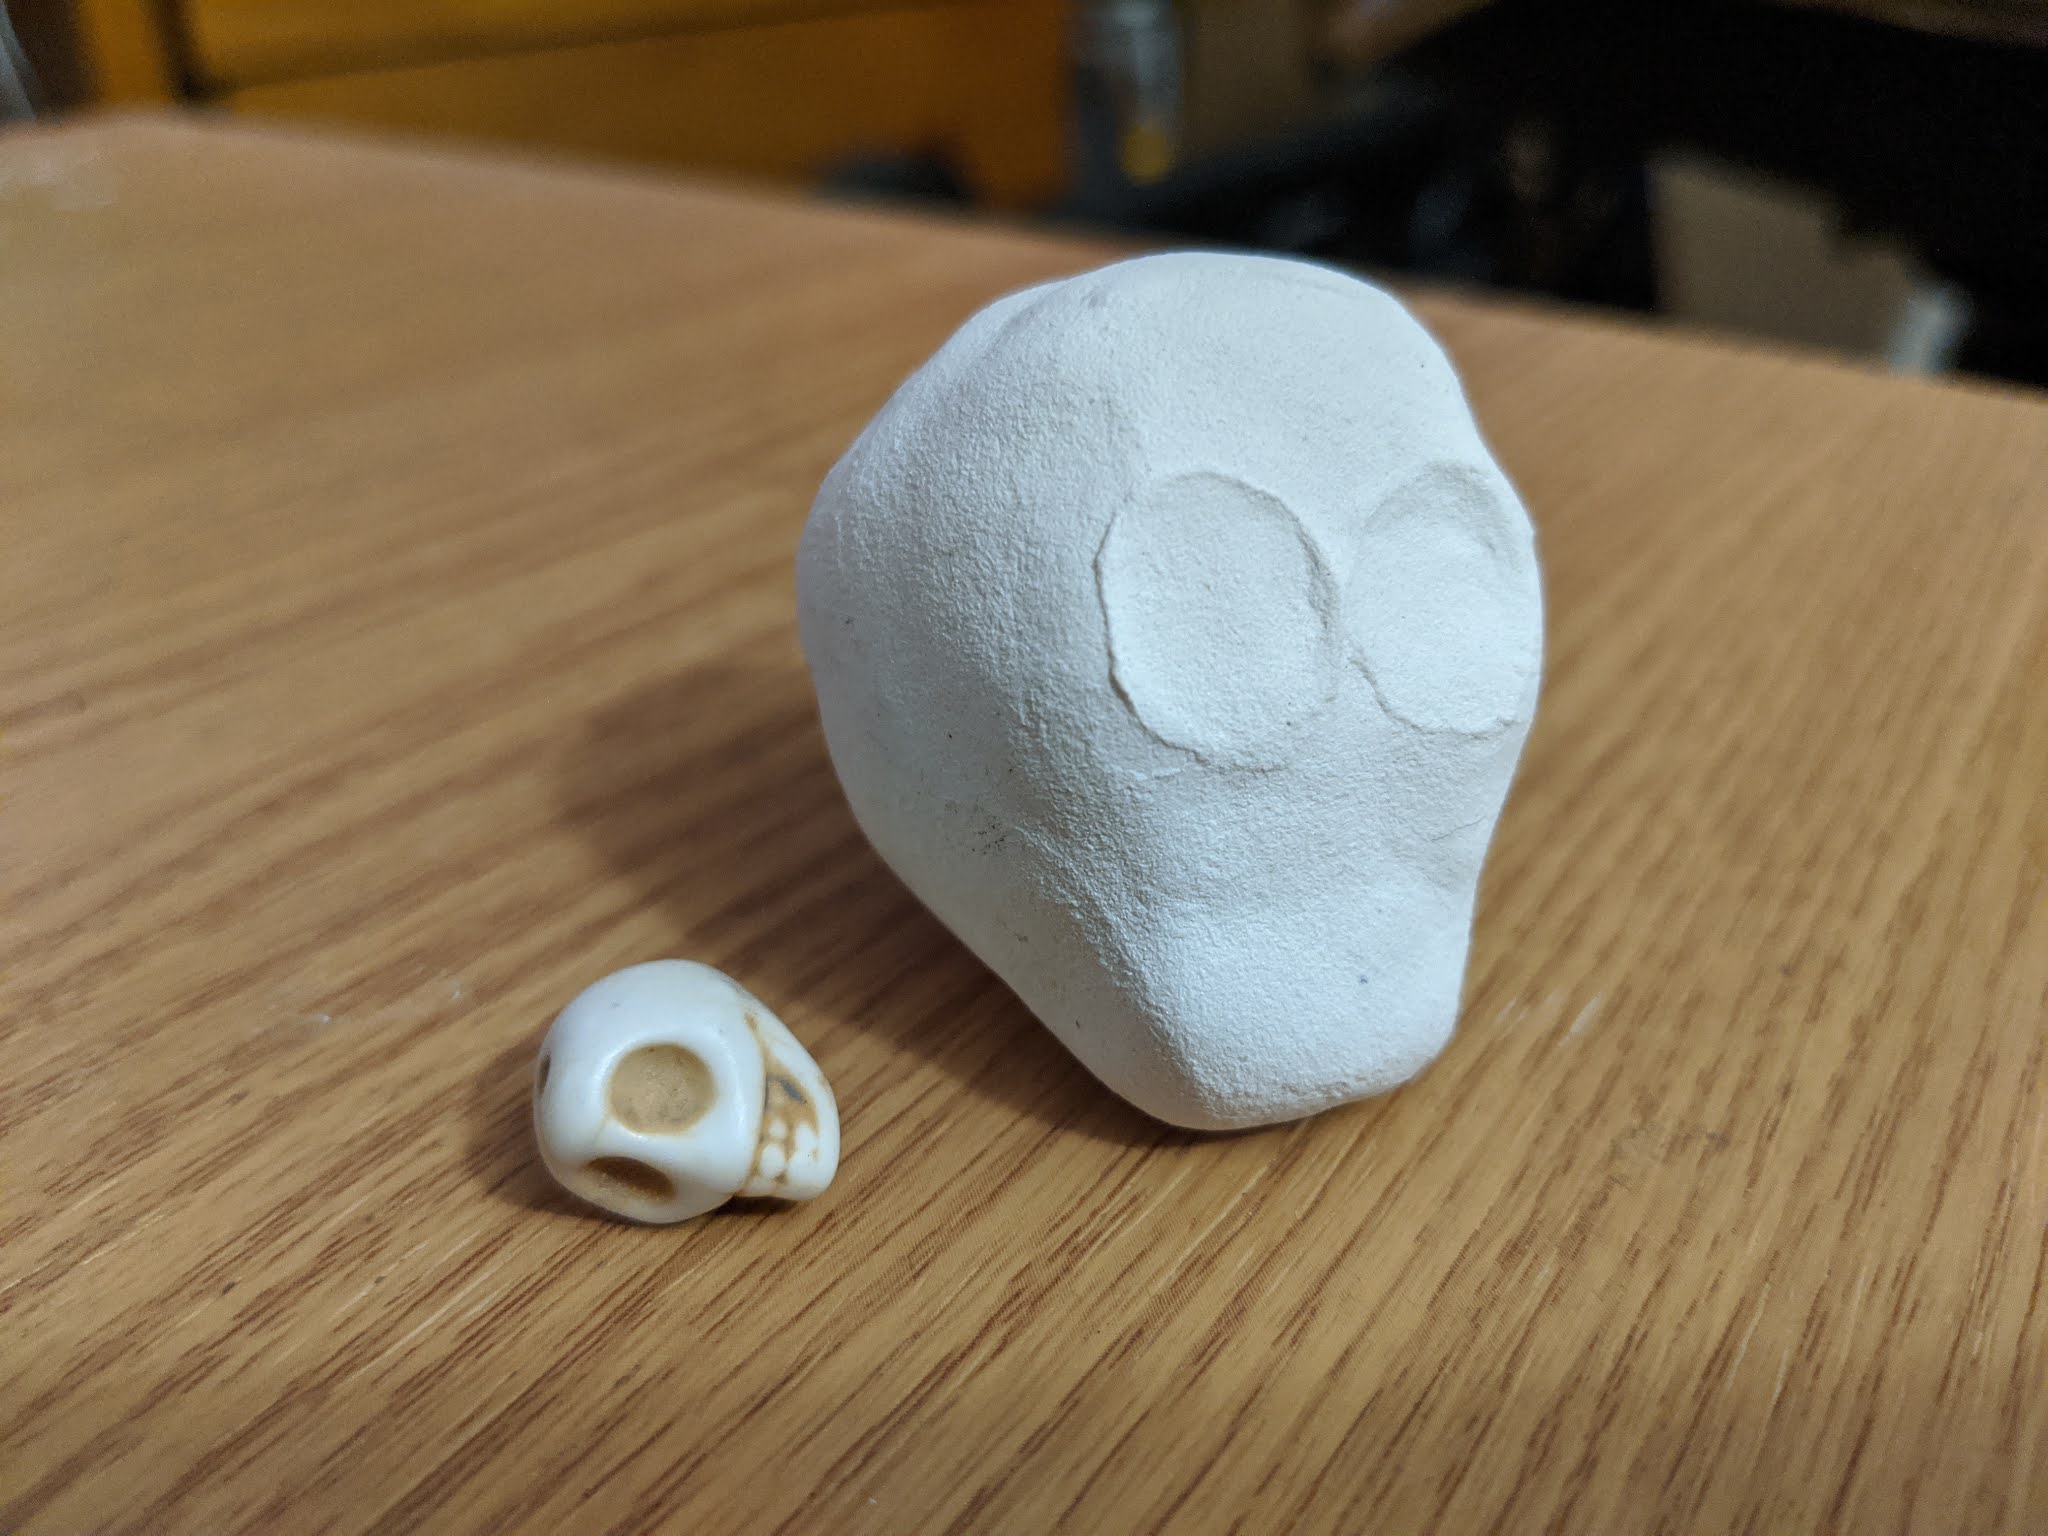
After letting the ball dry, begin filling out the jaw and the eye sockets.


I usually have a reference that I use when I am sculpting. 
I had this skull and the smaller one shown above that I
used while trying to create this piece. 


Here I am filling out the sides trying to find my way around 
the piece. It takes a few passes, so you need to have patience.
It took me a while to work this piece up to where I liked it.


I am building up the front of the skull. You need to 
emphasize the empty eye sockets when creating a skull.
I set this piece aside so that I could come back and 
work on it to build it up again when it dries.


Here is the next phase of me building up the front of the skull.


Here you can see that I am getting much closer in form 
of the skull. Keep building up until you are satisfied with 
the form of your skull as well.


This is the stage that I felt satisfied at. I did a very light 
sanding here so that I could keep it a bit rough.


I am painting the sockets and mouth black. This makes
these areas of the skull look like they are empty and hollow


 It kind of looks like the mask from Scream, but I am happy with it!


Thank you all once again for stopping by, and I hope that you enjoyed today's tutorial! You can find Creative Paperclay® at the following retailers Creative Paperclay® Online Store, Michael'sAmazon, Joann's.

See more of my work at Melandolly.com and be sure to catch updates on my Instagram page


Tuesday, February 21, 2017

Making Magic!


Earlier this month one of my crafty friends sent pictures of some wands she created.
I was so inspired that I thought I'd try making my own wand with clay.

To make the wand you will need:

Creative Paperclay®modeling material
3/16" x 12" wooden dowel
small screw-eye
drill
white glue
trinkets, yarn, or other embellishments
acrylic paint
sandpaper
rolling pin
craft knife


Start by drilling a small hole in the center of one end of the dowel and inserting a screw-eye just far enough to hold it firmly.  This will be what you hold on to while sculpting, and what enables you to hang your wand to dry.


Using sandpaper, taper the other end of the dowel and round off the tip


Coat the entire dowel with white glue, thread a piece of string through the screw-eye and hang the wand to dry.


Roll clay slab to approximately 22" x 14" and 1/16" thickness.  The dowel should be able to fit as shown.


Cut clay along the edge of wand, then into a triangle with curved edge as shown.


Dampen the dowel and place it at the edge of the triangle.  Pull clay up and smooth/attach it to the dowel.  Roll the clay around the dowel.  When the triangle is rolled onto the dowel, wet fingers and smooth as desired.  I chose to leave mine with an irregular spiral along the length.


Hang wand to dry.


While the wand is drying, gather up some embellishments you might want to use for your wand!


After my wand dried, I decided to add another spiral of clay wrapped around the wand with runes drawn into it.

If you choose to do this, cut the strip of clay, attach one end to or near the bottom of the wand by wetting the dry clay then pressing the wet clay onto it.  Continue wetting the dry clay and adding the strip a little bit at a time all the way up to the tip.  The runes were pressed/drawn into with a toothpick AFTER the strip had been attached to the wand.


Paint and embellish as desired.


I used layers and washes in several shades of blue & green, walnut, and iridescent blue, then added a simple gold cord and star drop earring.


Thanks for joining me here again!  As always, play, experiment, and have fun


Tori
Find me on Facebook, or peruse & ponder pics with me on Pinterest


Monday, October 31, 2016

Happy Halloween!

Happy Halloween! I've made 2 more accessories to complete my costume. I used the lighter "Delight" clay. It was very easy to work with and dried in a fraction of the time. The basic instructions for creating the shells is the same as the belt I created on my October 10th post.   These instructions are also posted below. My apologies for the shadow, I couldn't get a true color shot without one.
*SEE the entire costume at the end of this post.


SUPPLIES:
"Delight" Modeling Clay by PaperClay
Mold N Pour, Color Mist: Stream - Ranger Ink
Glimmer Mist: Suede - Tattered Angels
Colorful Glossy Cardstock: Deep Sea - Murdock Country Creations
Blue Metallic braided thread-Kreinik
Other: Velcro, Clear Acrylic Spray Sealant, faux pearl beads, sea shells, beading wire, plastic tiara, mini brads or eyelets, needle.

INSTRUCTIONS:
1. Create various molds of real shells with Mold N Pour.
2. Cast multiple "Delight" molds of each shape, 2 starfish are needed, one for the head piece and one for the necklace. You will need 4 clam shells and 2 other shells.  Let air dry completely.


3. Using a wet brush and a bit of water, brush the shells with Stream Color Mist then spritz with Glimmer Mist.


 4. The starfish was colored by first spraying with the Glimmer Mist, then brushing Stream Color mist on the peaks only. Let dry or use a heating tool.

5.  Glue a starfish to the center of the tiara and flank with 2 clam shells.
6.  Glue a few plastic pearl beads in the empty spaces.
7. Use a needle and beading wire to string the remaining shells and starfish. Place 3 or more beads between each piece.
8. Poke the needle through the clay shells, add one bead and exit front to back.  You can add jewelry closures or just tie off the beading thread.

The finished costume!  A paper doll mermaid :o)


Happy Monday!
Make art every day :o)
Becky