Showing posts with label decor. Show all posts

Saturday, September 24, 2022

How to Create a Zombie Ornament


Hello everyone! My name is Cinnamon Willis and I am going to show you how I created this ornament! I had some left over plaster disks laying around after working on another project and I wanted to see if I can get some use out of them. You won't need plaster to make this ornament, you can just use some foil, paper or whatever you would like to use for the middle and cover it with the Creative paperclay.


Supplies:
  • Creative Paperclay®
  • Acrylic paint
  • Sanding paper
  • Aleene's Original Tacky Glue
  • Exacto knife
  • Wool or whatever you would like to use for hair
  • Pliers
  • Flexible wire


This is some left over plaster from a previous project, I let it cure in the bottom of a plastic cup so that I could get this disk shape and use it later. Take whatever you are using for the core of your piece and cover it with paperclay


Take your wire, tie it in a knot and then cover the knot with masking tape.


Take the knotted wire, put it in the back of the flat disk and cover it with clay. Bulk out the back of the head so that the wire sits smack in the middle of the piece. This ensures that the piece hangs right on the tree, if it is too far in the back the front will dip forward towards the floor.


Here I just started working on the face a bit. After working up the cheeks I sit the piece aside to let it dry for about 24 hours.


I find it easier to work in layers with paperclay. I let the first layer dry and then come back to work up more of the features like the eyes and mouth. I go through this process about four times before things start to look right for me.


Chisel into the face with your exacto knife to further create the desired face shape for your piece.


Now that I am happy with the way things look with the face, I can begin to sand it down to get it to look smooth.


Paint your piece with acrylic paint. I wanted to go for a zombie look.


Wanted to give her a little bit of freckles to add more interest to the face. After you are done with painting, make sure you cover the piece with varnish to protect the paint.


I am using yarn here for the hair. Cut to the length that I wanted want and then felted the pieces together so that there is a base for the head.


Take your Aleene's tacky glue or whatever glue you like to use and smooth it on to the top of the head.  Then take the hair that you prepared and push it down in place.


I take saran wrap and secure it over the head with a rubber band to make sure the hair stays in place. Let it sit overnight and make sure there isn't any glue coming through the hair to glue the wrap to the doll's head.


Here is the completed piece and it is currently for sale here!


Thank you all once again for stopping by, and I hope that you enjoyed today's tutorial! You can find Creative Paperclay® at the following retailers Creative Paperclay® Online Store, Michael'sAmazon, Joann's.

See more of my work at Melandolly.com and be sure to catch updates on my Instagram page


Tuesday, August 16, 2016

Make a Mandrake with Glowing Eyes

Of course it's not too early to start working on Halloween decorations!  This year one of the "themes" of the Halloween party is going to be a spooky/haunted garden, so we started making mandrakes.  These are so simple and fun to make, we might have a whole greenhouse full before Halloween.


To create your own you will need:

Delight™ air dry modeling compound
an empty clear plastic bottle
scissors
fake foliage
white glue
acrylic paint
gallon size plastic bag for mixing clay and paint, if desired.  You can just mix it with your hands if you prefer
LED tea light
newspaper or stuffing of some sort to support the bottle during sculpting
planter with dirt


Start by cutting off the bottom of the bottle, I cut mine at an angle so it would sit back a bit in the pot.


Next mix the modeling compound with some acrylic paint until you get the color you prefer.  I mixed burnt umber and brown in part way and decided I wanted to leave it with the mottled look.


Stuff some newspaper or stiff paper into the bottle to keep it from collapsing while you work on it.  Roll or squish the clay flat in the baggie, then pull off sections and apply to the bottle.  If you have a problem with the clay sticking to the bottle, apply a layer of white glue to bottle and allow it to get tacky before adding the clay.


Cover the bottle completely - you might want to put it on a tile or piece of cardboard to stick it down before sculpting the face and adding foliage.


Use bits of clay to build up and sculpt the face, and add extra clay for arms or hands.  Remove clay from the inside are of the eyes (and mouth, if you like) so the light will shine through.

Cut foliage into individual stems, then insert them into the top of the bottle and put clay around them.  Again, if you have trouble with the clay sticking, use some white glue.


 I am making the hands separately to make it look like the mandrake will be climbing out of the pot. The hands for this one are just roughly sculpted from rolled clay to (hopefully) give them appearance of roots.


When everything is dry, brush a layer of acrylic wash over the piece to bring out the sculpting.  Turn on the tea light and place it in the planter, remove the stuffing from the bottle, then "plant" the mandrake over top of the light and push some of the dirt around the base.  Obviously, I went with a different pot than the one I used for sculpting, since my daughter had made one that fit the clay pot better and I thought mine looked better in this one.


Here they are together and with a few extra decorations


Thanks for joining me here again!  As always, play, experiment, and have fun!

Tori West

Find me on Facebook, or peruse & ponder pics with me on Pinterest

Friday, February 19, 2016

Kid's Project: Whimsical Owl

Chloe and I have been having lots of fun creating this whimsical owl wall hanging.

We started by rolling out a ball of clay about 3/8" to 1/4" thick. We made the pieces in a variety of ways—some we molded, some we cut following a pattern, some we free hand cut. For the body and the tummy piece, we cut around mixing bowls that were the right size. For the wings, we used a tart mold as a cookie cutter, then cut the clay piece in half lengthwise for the two wings.

The two circles for her eyes were molded. The head, beak, and feet were cut free hand.
Eyes

Beak and feet

We added different textures to the head, wings, and body using embossing folders and clay texture sheets.

Here are all of our owl pieces laid out to dry.

When the pieces were completely dry, we painted them with acrylic paints and glued them together using E6000 adhesive. We added a jewelry bail to the back of the head for hanging and adding her bow.

This owl wall hanging brightens any place she perches.

Carole

Chloe

Table Cell Table Cell

Friday, November 1, 2013

Fall Acorns by Rachel Whetzel

 Hello, Creatives Paperclay peeps!! Rachel Whetzel here! So, I'm DONE with Halloween for now, and I was looking over some of my Pinterest pins for some Christmas ideas, but then I realized if I jump into CHRISTMAS, I would skip over FALL, and fall is still my favorite time of year. Even if we're done with Halloween. That's when it hit me. I could create some acorns using Creative Paperclay® modeling material! I have tried saving acorns, and I know that you can bake them, or boil them to kill their little buggies inside, but frankly, the idea ooks me out. I LOVE the look of felted acorns, so I decided to use those as my inspiration!
 Below, I have created an inspiration board for you to see where my idea came from.
Photo credits: 
1. Glittered Top Acorn Ornaments
2. Blue Wool Felted Acorns
3. White Wool Felted Acorns
4. Acorns in a Bowl

If you'd like to make some for yourself,
YOU WILL NEED:

You guys, this project was seriously so easy...
First, I went outside and gathered some acorns from my yard.
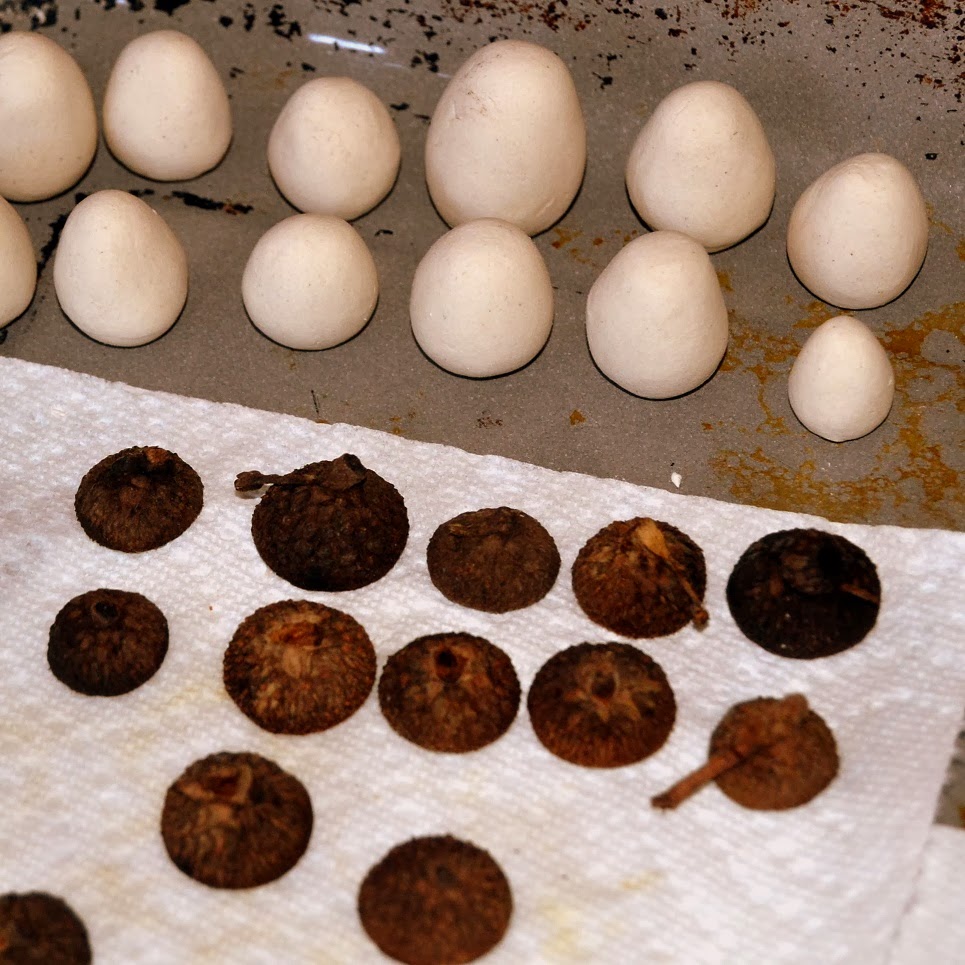
 They were a little dirty, so I put them in a tupperware container with some warm, soapy water, and swished them around for a bit. Then I set them on a paper towel to dry.
Next, I rolled some Creative Paperclay® into acorn shapes, and put them with my acorn tops to dry. I made them in various sizes, and set them upside down on the tray so that they wouldn't be flat on the body side of the acorns.
Once they were dry, I sanded the pieces down, and filled any cracks. Then I glued their tops on, and sprayed the unfinished clay with Krylon Matte finish. What do you think? I think they look great.
I hope you try your hand at making your own acorns! They were super dee duperly easy. Let me know if you try them! I would love for you to visit me at my "house" too!! Thank you so much for reading!!  ~rachel

Monday, March 5, 2012

Greek Inspiration with Creative Paperclay®

Hello all...
I have always been inspired by Ancient Greek art and design. Its fabulous and I could research it for hours!
Well thanks to the internet and Google images search I have looked and looked up Ancient Greek art and design.... Sculpture... Symbolism and colourings.

This is what I ended up with....


Here is how I made it
I used:
  1. Creative Paperclay®
  2. square plastic packaging from a cuttlebug die
  3. old barbie/fashion doll (the hair I cut off as it was matted - i am planning to re-hair her oneday)
  4. Amaizing mold putty - parts 1 and 2
  5. Inks/paints/brushes/ribbons etc to decorate
  6. Glue Gun
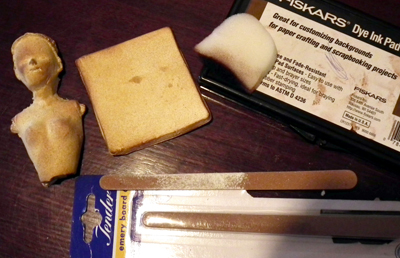
I molded the old barbie/fashion doll
Made one of full torso and then a head and a nose. I will only use the full torso for this project today...
When the clay was partly dry I popped it carefully out of the mold then shaped the face a bit by pinching the cheeks in to make the shape of the face I wanted. I also tore off the shoulder parts and the waist part to make it look like broken stone..... then let the clay dry for 3 days till totally hard.


Next I put some clay into the cuttlebug die packaging and molded a flat-ish square:

let dry for 3 days with the doll torso.


This is when I started really researching my design..... what did Ancient Greek wall sculpture look like?What colour was it? What colours did they use back then? What symbols did they use? What did the Greek alphabet look like?


Well after all that I came up with a loose design.


I also took the symbols of the Greek Alphabet in the form of my Initials DMB and got "Delta Mew Bay-tah".... so cool.  I think I'll start up a Crafting Sorority called that... what you think? LOL
As you see I was playing around with the logo design too.... The stamp is from Viva Las Vagas stamps

Decorative Frieze


 Spray with Pale Ale memories mists from Stewart Superior

 Tidy the edges and then ink with brown.


 Stamp your image on the panel piece then glue your ribbon around the torso and glue the torso to the panel


Next with a pencil draw your Greek Logo and then paint it.


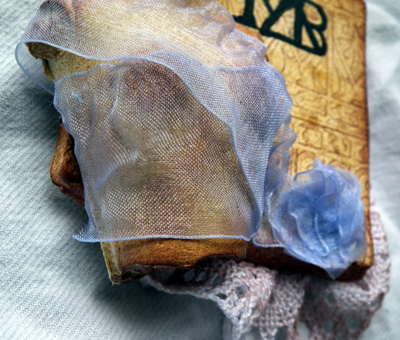
Now find some old looking lace, ink it up and glue it to the back of your art....
I like naming and signing the back or bottom of my work....
 
You are finished!
 
 Delta Mew Beta...... lets go and create ya! LOL

 And here it is in my space.
Thanks for dropping by.