Thursday, November 21, 2013

November Tip from LuLu Lancaster, Faux metal


Hello LuLu Lancaster here ;) I have a couple tips on creating a Faux Metal look with Creative Paperclay ® 
There is no limit to the metal type pieces you can create using Creative Paperclay ®  

 I found an old clock key that was a perfect size for my art dolls. I wanted to create the look of the key without a heavy hunk of metal weighing down my art dolls. So I decided to make my own keys and this is how I make them look like they are made from metal :)


I use
Gesso
 alcohol ink
mica pigments 
liquid acrylics 
and a black chalk pastel


First you will want to gesso your keys. 
this prevents the paint from soaking in and will allow it to "float" on top.

Paint a yellow base coat and let dry.

Next paint the shadow areas in red.


Use the dropper of the alcohol ink to cover the red areas. It is perfectly ok if it overruns the red.

I take a dry brush and rub the alcohol ink areas with the mica pigments.

Once dried take your finger and rub the shadow areas and cracks with black chalk pastel.


And here is the end piece with numbers painted in acrylic paint.

Thank you so much I hope I have inspired you to create your own faux metal pieces from CreativePaperclay ®

LuLu

Tuesday, November 19, 2013

Lynda's Snowman

Hello everyone, I am so excited to show you this idea - the first larger project I have made...most of mine are usually smaller projects for cards and embellishments for scrapbooking, so this was a big undertaking...and with a little bit of help from Terri Sproul - and my husband's input - this is what was created!  
  
Lynda's Snowman


Supply list:  
Creative PaperClay
Recycled creamer container
Tin foil
Toilet paper roll (empty)
White and black paint
Glass to cut brim of hat
Buttons (black, orange and gold)
Red brad
Red ribbon 
Green felt
Hot glue gun (or adhesive of your choice...)
Xacto knife

Directions:  
Step one:  Clean out the creamer container...(you don't want it to smell funny LOL) - allow to dry without the lid on to make sure it is completely dry.  I used a small Coffee Mate brand container for my base.  Starting at the top, start to add tin foil around the top to create the first ball.  
Step two:  Repeat adding the foil to create the next two ball's...making sure they go larger as you get to the bottom.  I used the existing container to start out the "balls", adding the foil around by bunching it up to form the ball around the base, glue with adhesive of choice.
Step three:  Start to roll out the clay - to make it as flat as you can (but not too flat) - and as long as you can.  Try to roll out enough clay that it will be able to go over the whole container - pressing down the clay as you go. 
Step four:  Allow creation to dry, making sure to wet your fingers or use a spray bottle to smooth out any type of imperfections you don't like.  
Step five:  If you need to add any more clay at all, add now...double check to see if there is any spots you have missed or you need to add more clay to.  
Step six:  After creation has completely dried, start to paint with the white acrylic paint.  I ended up doing about 4 or 5 coats...  Allow to dry good in between each coat.  
Step seven:  Cut toilet paper roll in half.  Roll out another piece of the clay - to put around the roll and on top of the hat.  Take the glass (making sure it is completely round) and cut the brim of the hat.  Place the toilet paper piece on top of the round piece, making sure to cut the clay out of the middle of the roll.  Using your fingers - start to roll the edge of the brim of the hat made out of clay up - and create it to look like a hat brim.
Step eight:  After the hat has finished drying...paint 3-5 coats of black, making sure to get the brim underneath too!  Allow to dry between each of the coat of paint.  
Step nine:   Using the hot glue gun (or adhesive of your choice) - add the buttons to the top for the eyes, nose and mouth.  Just make sure you have let it sit for a few hours at the least before you add the buttons.
Step ten:  Cut the felt piece 1 1/4".  Fold in half and then cut the "tassels".  Put around the neck, and then add the brad to it to keep the piece together.  **This is what supplies I had on hand...I might end up changing this at some point in time...feel free to change! 
Step eleven:  Add the red ribbon around the bottom edge of the hat using your glue gun (or adhesive of choice).   
 
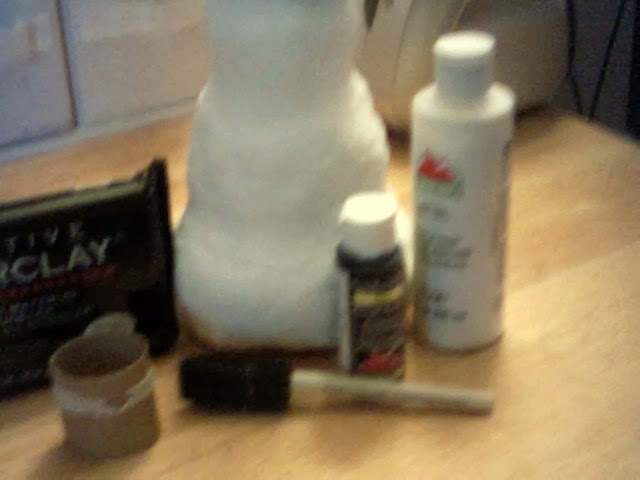
At first I was scared to death to even try something this big, BUT...after spending that time with Terri, and watching a bunch of video's...I was a lot more comfortable in making something this large.  Oh don't get me wrong, I still love it for my cards and scrapbooks, but I also love it for these bigger projects now too!  I can't wait to get started on the next thing - you can see the other snowman we ended up doing in the background, lets see what I can come up with for her!!!!  Thank you so much for checking out my project today!  You can see more of my work at Memories in Tyme for scrapbooking and card making!  I hope to see you there!  
Lynda Jeffs

Sunday, November 17, 2013

Sanding Creative Paperclay® Using Tools - Diane's Tips

Good morning! How are you all doing this fine day?
The design team  has had some wonderful tutorials and  fantastic tips, don't you think?
Today,  I would like to share some of my sanding tips using tools. Over the years sanding tools have helped  while finishing my clay creations.


Sanding is an important process in your design.  Some pieces may require more sanding than others depending on the look "you" as an artist want for your piece. A sculpt you would want very smooth will require more sanding. A Rustic look will require far less sanding.

A few years back, I struggled with the sanding process, especially the nooks and cranny's of smaller pieces.
 I observed my hubby who is a woodcarver, and noticed how he would use tools to sand his carvings... Ding! The light bulb turned on and it has been smooth sailing sanding ever since.
Here is what I've learned while on my creative journey.


The tools I use for sanding.
 The sanding tools I use are nothing more then household items as pictured above.
  My favorite is the cuticle stick, it has a beveled edge that can really get into those crevices,
  like wrinkles and such.
  Have fun experimenting with different items and you will soon find what will become your favorite tools.

Sandpaper. I keep two kinds of sandpaper in my finishing kit. A fine grit (tan)
and a wet/dry 330 grit carbide sandpaper (black). I like my sandpaper that i use on the Creative Paperclay® to be slightly worn. The reason for this, is because it is more pliable and easier to work with.


The steps I take to sand and finish a sculpt.

1. When the sculpt is dry, I give it a quick sanding using a fine grit sandpaper (tan).
      With this sandpaper you can sand down larger blemishes or bumps.

Now, a second  sanding using ( as pictured above in the first pic ) wet/dry 330 grit carbide sandpaper (black).  I love this stuff !   Using the wet/dry sandpaper you will start smoothing out your sculpt to a soft smooth finish. Though, this is a wet/dry sandpaper, you do not want to get the black side of the sandpaper wet and use on your sculpt, as it will remove your detail work.


3. For the detail sanding. Now getting to those wrinkles, crevices and tight areas. Using the wet/dry carbide sandpaper (black), with my finger I lightly moistened the back of the sandpaper with water,being careful not to get the front of the sandpaper wet. The reason for dampening the backside of the sandpaper is to make it pliable. Now that the paper is pliable, I wrap it around my desired tool, as shown above.


4. The sanding begins, and getting into those tight areas is much easier with the tools.
      Here in the pic above, with a light touch, I am sanding in the crevices of the wrinkles.

5.  I run my fingers over the sculpt making sure it is smooth. When I feel good about my sanding,
I then dust off  the sculpt using a soft brush to remove any loose dust. A soft, fluffy makeup brush works great.

6. To finish my sanding I buff it out.  I take a small piece of pantyhose, wrap it around my finger and lightly go over the Sculpt. Another, dusting using the soft brush and we are now ready to paint.

NOTE: Creative Paperclay® is an amazing clay to work with and the strength of this clay is very impressive, but at the same time the surface can be delicate before it is finished with paint and sealer.  When sanding your Creative Paperclay® creation, a light touch is all that is needed. Sanding to firmly, can leave unwanted divets, scratches, or it can sand away some of your delicate detail.

To a beginner this may sound like a big process. Don't be alarmed! Creative Paperclay® is by far the easiest clay I have ever had the pleasure to sand and the process goes very quickly.
   
I hope this will be a helpful tip  that you can take with you on your Creative Paperclay® journey.

Please, feel free to leave any questions or comments on this post and I will be sure to get back with you.
Oh, and your welcome to visit me anytime over at my blog.blog.

Many wishes for a wonderful Thanksgiving.
Happy Creating !
~Diane

Thursday, November 14, 2013

November Tip from Rachel Whetzel

Creative Paperclay® is such a versatile product. Several of our Design Team members have shared ways that they have used clay to create a mold past on canvas. I am here to remind you that not only can you use Creative Paperclay® on canvas, you can use it on art journal pages in the same way!
 Just take a small amount of clay,
add some water and mix them together.
You can see my finished journal page HERE! Thanks for stopping by! Happy Journaling!


Family Thanksgiving Project: Custom Board Game Pawns


Custom Board Game Pawns

Hi There! It's Susan from TheBoredZombie.com with my first Design Team project. I've cooked up a family project that is suitable for all ages and all skill levels and a perfect Thanksgiving day project for everyone to work on together between turkey and heavy napping!


Supply List:
  • Creative Paperclay® Modeling Material
  • Sculpting tools you have on hand
  • Glue (My favorites: E300, hot glue, or Aleene's tacky glue)
  • Finishing mediums you have on hand (paint, markers, etc)
  • Small embellishments (optional)
Everyone's will be different, rather than step by step, here are some guidelines to get the family started:


■ Because your pawn is going to be very small, keep your shapes simple. For example, a little one might want to make a small red car, but probably doesn't want to attempt Lightning McQueen.

■ Small pieces attached by pressing on to the main shape will likely fall off when dry. That's ok! A little dab of glue will fix that right up.

■ When finished, It needs to sit flat on the game board. No balls, hot dogs without buns, or other round things that might want to roll right off the table.

■ LeeAnn recently posted an amazing set of getting started tips for handling the clay.  It's a good refresher and reference for the true newbies.

■ Your family might be the type that produces some professional doll house quality miniatures or you could be more like my daughter and me. We're not making masterpieces. Small cracks, imperfect shapes, glued on pieces, and simple shapes are not only OK, but celebrated! This project is all about the experience and family time - no perfection required!

After the sculpting is complete for the pawns, put them in the oven at 210 degrees for 8 minutes. Turn them so the bottoms are exposed and bake another 8 minutes. They will likely be ready for painting, but if they still feel tacky or moist, give them 5 minutes at the time until your satisfied they are ready to finish.


We finished ours with some metallic permanent markers we had in the junk drawer from an old school project.  The markers worked really well for the little hands - they weren't too messy and a bit easier to control than paint. You could use any sort of finishing medium though. Good kid friendly choices could be washable markers or washable paints. 

If you all are feeling adventurous, go for it! Add embellishments like beads, threads, rhinestones, or small trinkets.


For the curious - I'm the joystick, snowman, and bluebird. My daughter is the snake and sea turtle.


The sky is the limit! Here's some my daughter and I thought of but didn't make - palm tree, coffee cup, birthday cake, baseball cap, tennis shoe, piggy face, owl, mustache, and camera.What would you make?

Optional Side Quest: Instead of making your own pawns, draw names from a hat and make pawns for each other!

Thanks so much for coming by the blog today and taking a look at my project idea. If you want to hear more about the inspiration for the project, come on to my house, theboredzombie.com. I love to hear what you think! Please feel free to drop any comments you have right here on the blog. If your family gives the project a try I REALLY want to see it, send me pictures or link me to your site!  


Tuesday, November 12, 2013

Thanksgiving Turkey Creative Paperclay® Sculpture by Gloriann Irizarry


Hello my dear friends. I wanted to introduce my self.
My Name is Gloriann Irizarry and  I enjoy so much to Sculpt, craft and create all sort of items. I do have to say one of my personal favorites mediums is using paper clay and  sculpting with Creative Paperclay has made it easy. I like Creative paperclay,  because its gives me great results. My creations always have a great finish.
 I wanted to create a scultp piece and since this is the month of giving thanks and enjoy our family. I decided to create a cute center piece for eveyone to enjoy at the table or even has a gift to a love one.
Now my kids and I decided there would not be nothing better than a little turkey. So here I will show you step by step how to have fun and be able to complete this cute little project. I hope you enjoy it.


Materials

 
One pack of Creative Paperclay
Clay Roller
One Styrofoam ball

One Styrofoam circle base

Tim Holtz Adirondack Inks (Ginger, Red and orange colors)

Old fashion clothes pin

Popsicle sticks

Saran plastic wrap

One pair of latex or plastic disposable gloves
Pencil

Little cardboard

Scissors

Acrylics Paints ( Walnut, Orange, Red, Black, Light blue and white)

Brushes

Disposable plate

White Glue

Glitter ( Green, Gold and Bronze) 

Water and paper towels


Turkey project instructions:


Stick 2 popsicle sticks to the Styrofoam ball. These will later be the turkey legs.


 Place the ball on top of the base. Make sure the ball is not too big since this will later be our turkey’s body.


I use a old fashion clothes pin for the neck and head. Make sure the neck length is the way you want your final piece to look like.


I place Saran plastic sheet on top of my working surface then I open the Creative paperclay package cut the bar in half and place it flat sheet. Then grab the Tim Holtz Alcohol ink in Ginger tone and place drops on top of the flatten paperclay and mix thoroughly. Check the tone you are looking for the feathers if not yet to the tone your looking repeat the steps until your favorite tone is achieved.


Once the color is all mix and ready to be used roll the clay to ¼  deep sheet.


Then cover the Styrofoam ball completely and run the edged completely smooth.


Now place the old fashion clothes pin to the ball to place the neck to the desired length.


Place a ball to make the head shape and cover the neck area with regular clay.


Cut a rectangle shape to cover the neck area.


Fold the bottom part of the rectangle to create the volume for the turkeys’ neck area.


Roll it and cut the sheet.


Smooth the neck area to create a seamless transition from body to head.


To create the turkeys head I find the position were I want my eyes to be place. I use my thumb and first finger on each eye the pinch to create the eyes sockets.


To create the chubby cheeks roll a little ball and cut it in half. Place each half to each side of the head below the eyes sockets and smooth.


Now let color the clay in orange for later used in the making of the Turkey peek, feathers and legs using the same steps to color the clay for the body.


 I used two triangle orange shapes to create the turkeys peek. Roll a little circle ball. Cut it in half. Place the circle halves on each side of the peek to give the turkey some cute peek cheeks.


Place the peek to the turkeys head to finalize the head.


 Using the previous coloring steps grab a little piece in red to create the wattle.


To create the turkeys base I roll a ball of clay and using the roll toll flat the ball in to a ¼ sheet. Cover the Styrofoam base and smooth it completely.  


I cut a circle to cover the top. Then a roll a snake and flat it to a ¼ sheet to cover the side of the base and I smooth the edges.


To create the turkey’s legs I grab 2 Pop sticks and some of the orange tinted clay.
I stick the legs pop sticks to the turkeys body and cover them with the orange clay to shape the legs.


Then I place the turkey on to of the base to cover them completely and create the correct length of the legs.


To create the toes. I roll a little to the thickness of 1/4 inches and cut it in half. I repeat the steps for each leg.
Attach them to the leg and smooth in with water and a brush.


 Now I wanted to give some texture to the turkey sculpt. I grab a popsicle stick and little by little press it against the clay in different places to create the shape of the body feathers like shown in the photo above.


I create the wings I draw a little template of how you want your final wing to look like and cut it off. I later place it directly on the ¼ clay sheet lightly trace it. Flip the template and trace is again. Now cut the wings shapes out of the clay of sheet.


 Place the wings on the turkey’s body and smooth them in shape.


Now I grab the remaining Ginger and orange color clay and flatten them into a ¼ sheet.


I cut the big tail feathers like the one on the photo above.


I grab a Popsicle stick and break it in half. After I moist the feathers shapes. I use the rough Popsicle stick has a tool to create the feather lines by stroking the rought popsicle stick to draw in the veins.


Follow these steps for placement of the feathers


I place the big ones first then add the smaller ones after all until I create a beautiful feather fan tail.


Cut 2 big orange feathers for later be placed on the back.
Lay the fan flat to dry overnight. They need to be completly dry before attaching them to the turkey. 


Once dry attach the feather fan tail to the bird. After is secured and dry I grab my acrylic Walnut color paint and water it down to create a wash.


Little by little get the watered paint apply to the piece making sure all the details are wet soon after dap the piece dry with the paper towel removing all the excess paint out before it dry. This will enhance the sculpture details right out.


Do this water washed down acrylic paint technique all over the piece. It will sure make a total difference, once this technique is complete. You will notice all the feather veins and details done during the sculpting process.


Now to finalize the base I brush on the base a coat of white glue and sprinkle my glitter colors all over it. Yes a little glitter here and a little there in a random pattern. Feel free to add has much has you want.


Now I paint the eyes using a base of black to create the eyes.


After is dry I use now the light blue. I stroke the brush in the correct direction to create the iris effect.


After it dry I add the outline in black and round the center has well.


I use a very small brush use the white acrylic dab the brush once to add one big drop on the top of the eye and a smaller drop to the bottom of the eye. This will bring light to the eyes and gives personality to your character.  My Daughters found this little bowin my crafty box and could not resist to dress the little turkey up.
Well, I Guess this little guys is already dressed for the banquet.


 I hope you guys had fun creating this adorable little turkey. I wanted to take time and wish to all my family and Crafty friends a very bless holidays.
 Now stay tune for more projects to come and feel free to ask any questions at Gloriann@byglori.com

God bless you and happy crafting.

Sincerely
Gloriann Irizarry
www.byglori.com