Showing posts with label tips. Show all posts

Tuesday, July 14, 2015

Best Creative Paperclay Tools Tips by Gloriann Irizarry

 
It is finally Summer. The weather is getting nice and hot. Now I have been ask about Creative Paperclay and what's the best tools to use so I will be answering this question to full extend today. Feel free to visit our Creative Paperclay Q&A Facebook page if full of many wonderful Creative Paperclay artist always helping others with any question you might have about Creative Paperclay .


Rollers are the best way to roll a clay sheet.
It doesn't have to be fancy or expensive a simple old aluminum foil paper roller will work.
Has long the cardboard is thick it should do the trick.

 
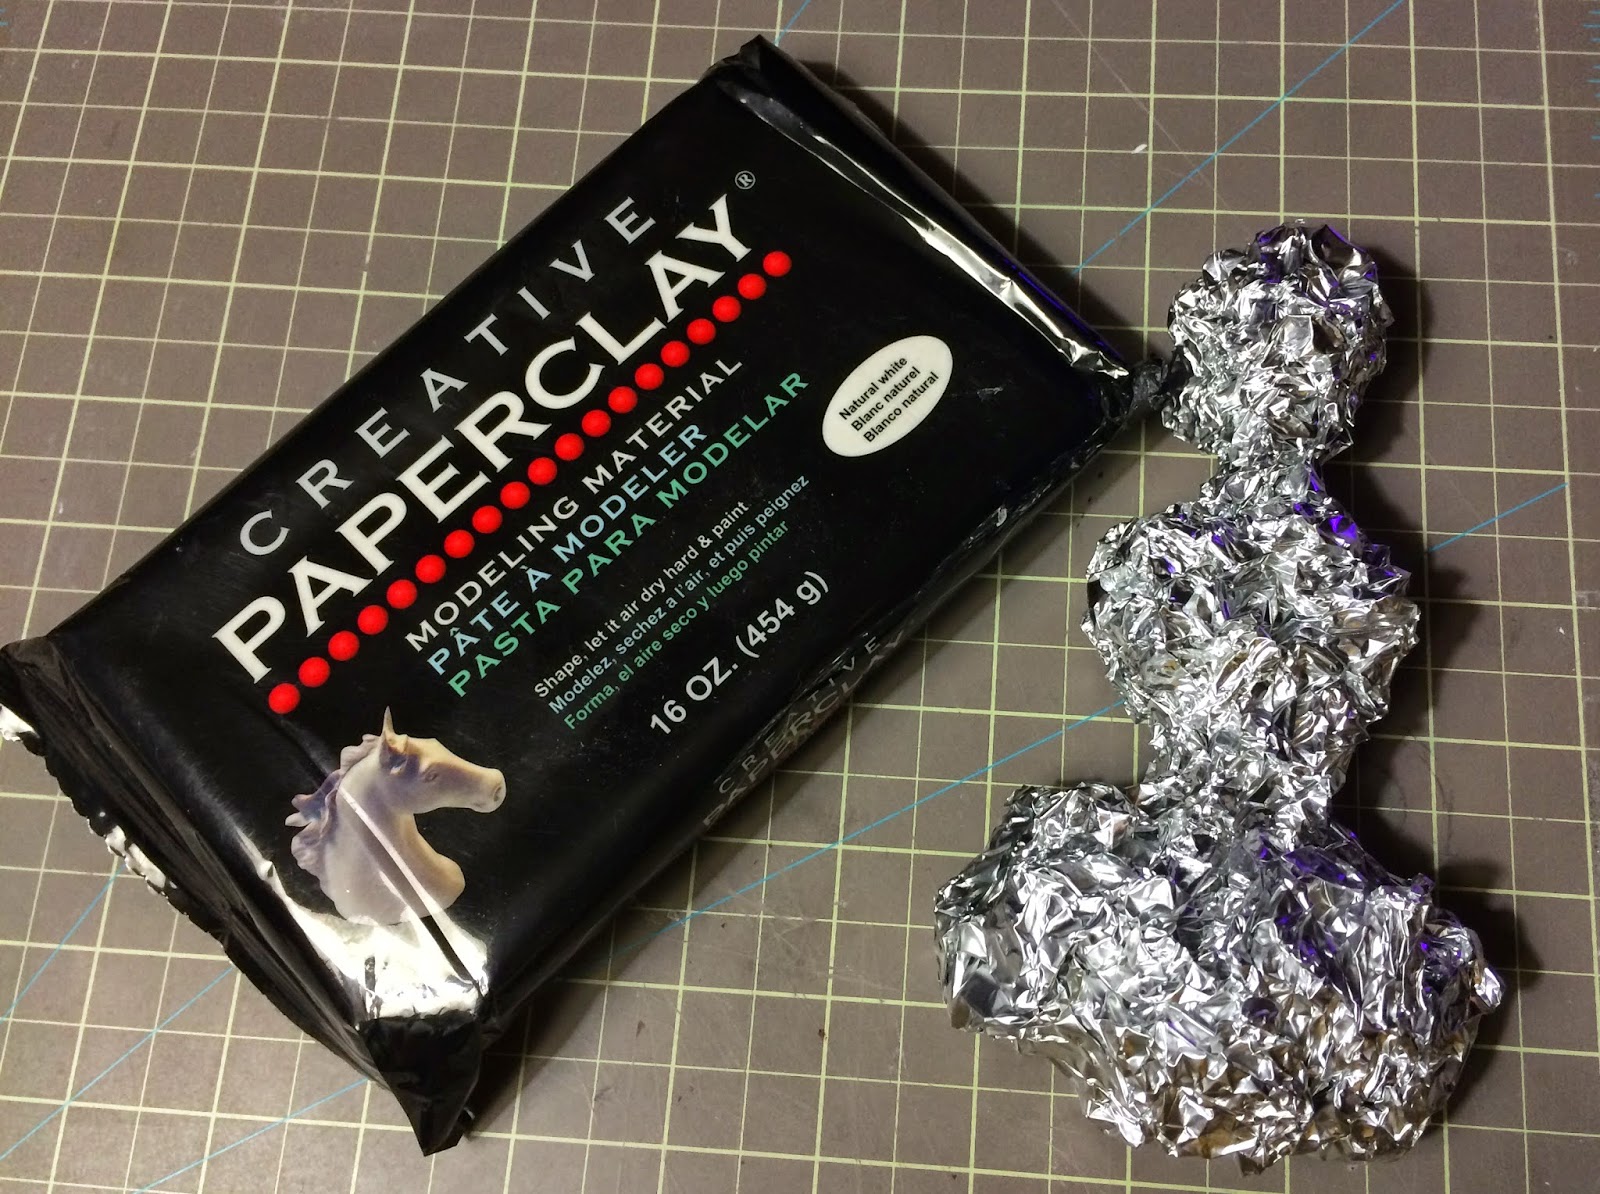
Aluminum foil is wonderful to create nice armatures and it is easy to bend and shape to most desired shapes. You can keep in the sculpt or removed the paper after the clay dry.

 
Freezer paper is great to keep the clay from sticking on your working surface.
Lay a sheet on your working table and can be use to keep the clay from sticking when you roll the sheets of clay out.


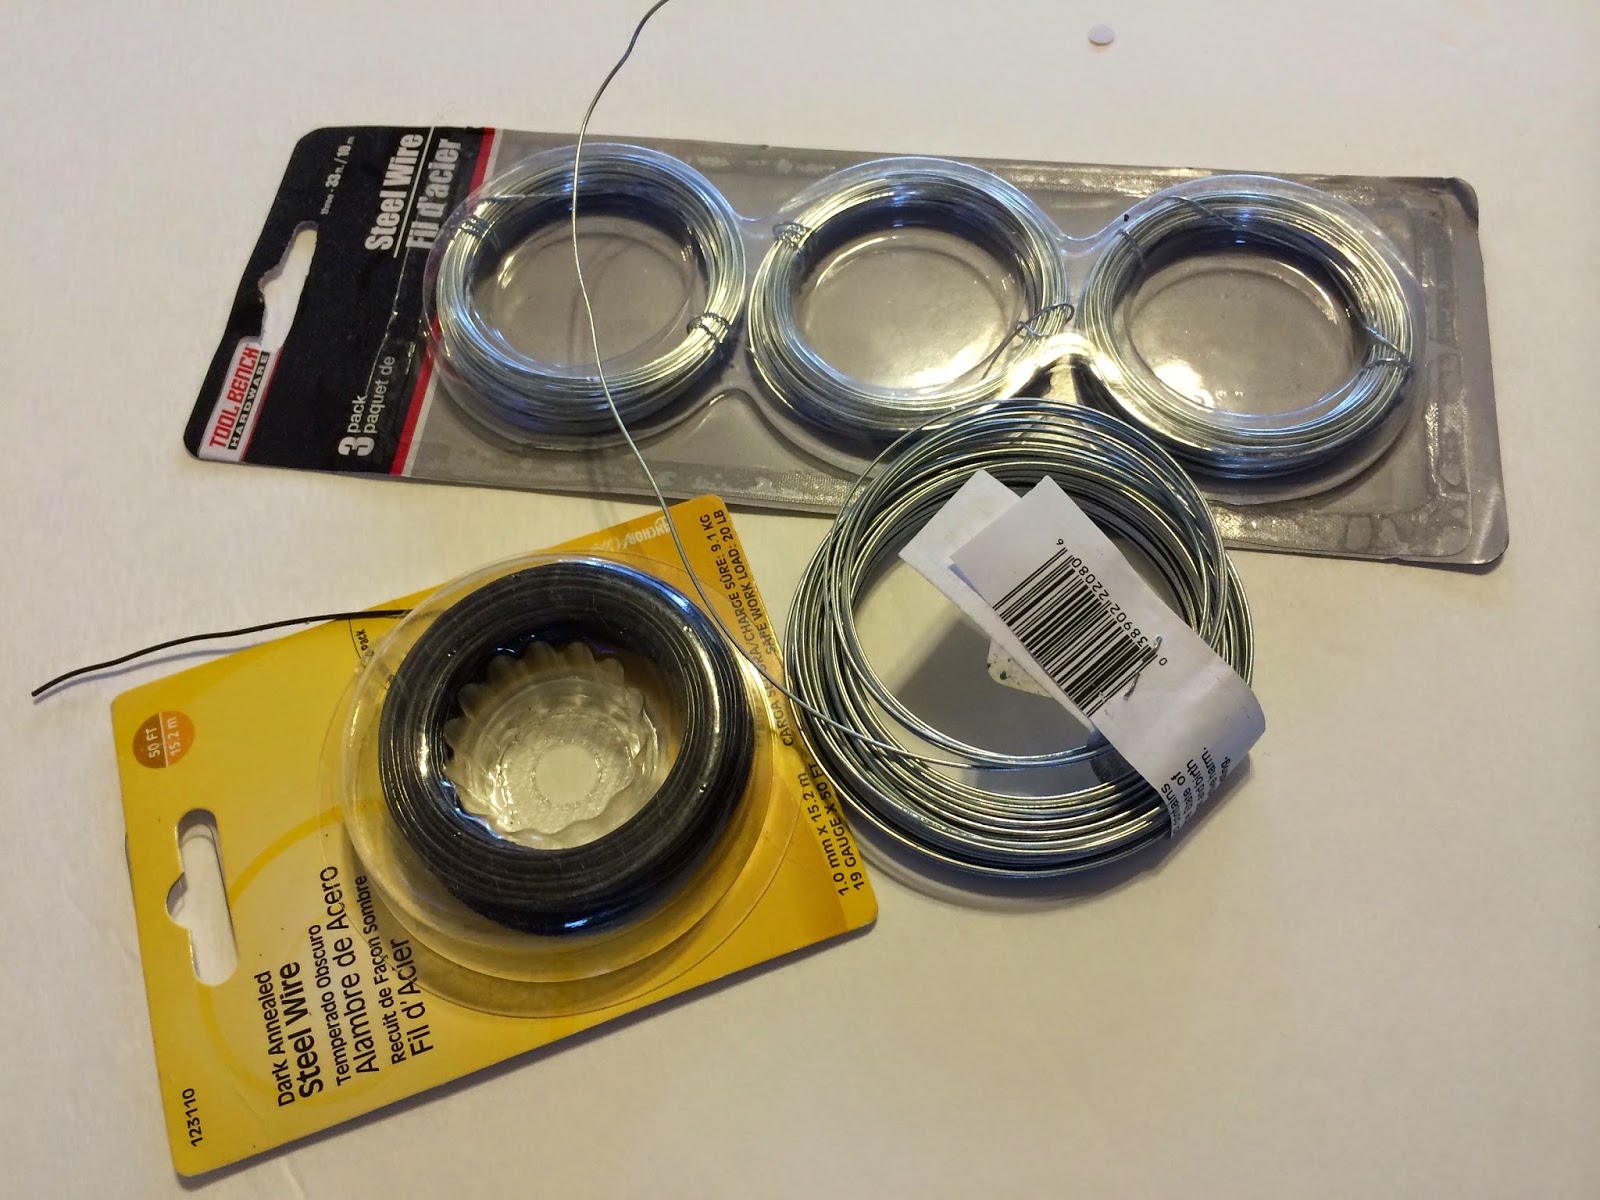
Stainless steel wires and foam forms are one of my favorites to use to create armatures for paper clay projects. They will save you time and money.


you can also use regular object like water bottles and foam to create intricate shapes. 
The best way to keep them from falling apart is Hot glue. Now the trick is not to use high temperature but use Low temperature instead and let it fully dry so it nice and thigh.


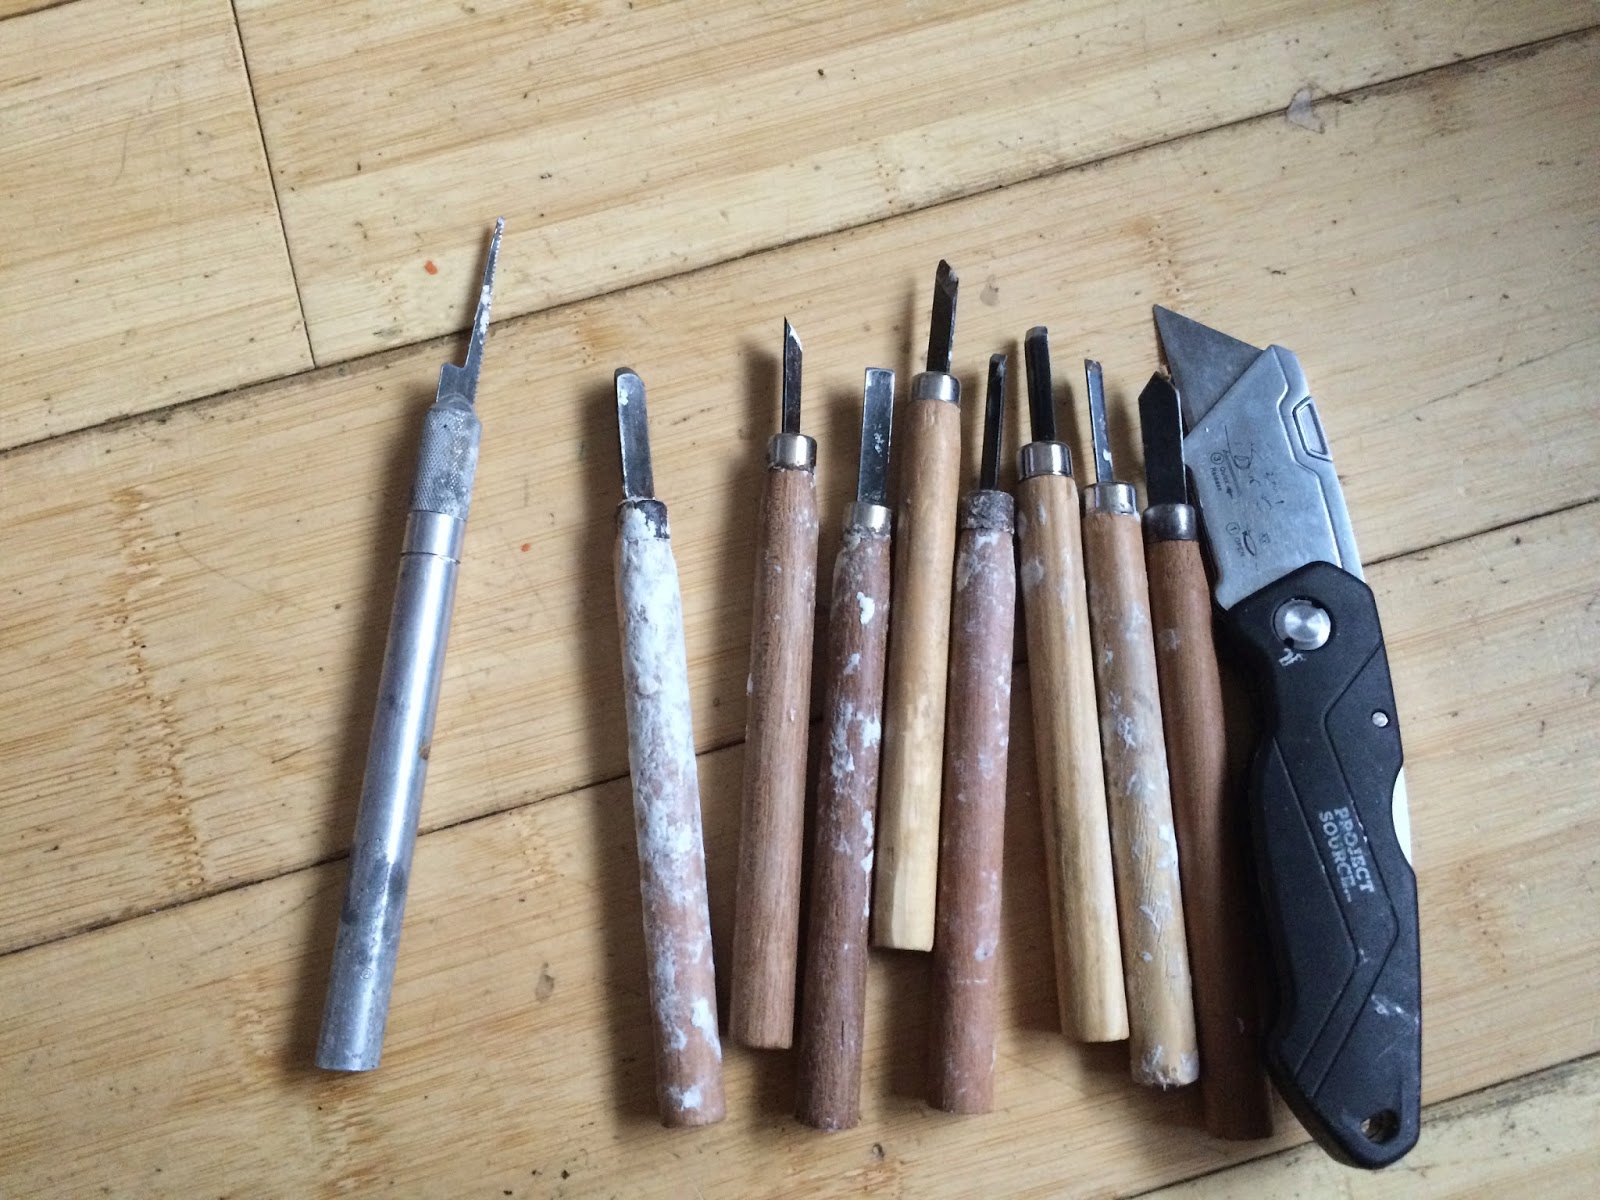
Hobby knife and carving tools work great .
 
Any spray bottle can be recycle for you to use has a water clay mister

 
Paper tape is wonderful to create nice armature or use has fillers for your sculpt.


Flat brushes are my favorite to smooth the sculpt with water.


Now don't be afraid to try other tools like executers, texture plates or mold design or marketed for either polymer clay of cake fondant they work wonderful on Creative Paperclay . You will be surprise all the wonderful thing available out there for you. If you cant find a tool you like don't give up is always fun to make your own too.  Now the possibilities are endless all you need to do is let your imagination Fly.
 
I hope this help and feel free to visit our blog for more wonderful tips by many other great designers team members so stay tune .    

 
 
Sincerely
 

Tuesday, April 28, 2015

Creative Paperclay Material Sanding Tips By Gloriann Irizarry

 
Tips and tricks by Gloriann Irizarry for Creative Paperclay®
 
Welcome back to your Creative Paperclay® Blogs spot. Today I have a great tip to finish and clean your Paperclay creations.
 
If your like me and like to have a clean sanded project you see your self all cover in white and spreading all the dust everywhere.
 
 
Well I manage to cut down on dust by reducing the amount of sanding by using a nice
soft square flat brush before the piece completely dry.  
 
 
With the combination of these brushes and water will significantly reduce the amount of sanding.
Your probably wonder how, Well is not that difficult to do. Simply dab your brush in water once your done with your piece and before you place it to dry smooth any edges with the wet brush.
Make sure every so often you clean the brush in a washcloth to remove any Creative Paperclay® build up from the brush.  Once your satisfy with the look you can go ahead and set the piece aside to completely dry. I found this technique very helpful by cutting my sanding process in half.
 
If you smooth and rough edges before it dry with the brush it will less clay you need to sand off to make it look smoother. Keeping the brush with clean water will leave a nice smooth surface for you to work on when it dry. Go ahead try it. The softer the brush the better results you will get.
 
 
Another tip is also to get better results on your next  Sandits™  sanding project make sure you gently wash your Sandits™ tip with a toothbrush and warm running water. This will removed any fine Creative Paperclay® excess and give you the nice porous surface the tools need for your next project.
 
I hope these tips help you on your next Crafting project and remember.
 
 
Sincerely Gloriann Irizarry
I  


Tuesday, February 24, 2015

February helpful tip

 
Wow I can not believe it but  February is almost gone and this winter sure has been a very interesting.
Now today I want to answer a very often ask question.
 
What tools are required to work  Creative Paperclay®?
 
I will answer it but I want to let everyone know that working the Creative Paperclay®
 it is different for everyone. Some artist develop their own techniques while other create 
and make their own tools to work with.
 Now if you are new to this wonderful sculpting medium don't be afraid. This article will guide
you and soon you will see your self grow and learning  what will work and what will not.
I will show you the tools I favor , but remember  every artist is different and have their own  techniques. That is why these are to be use  not instructions , but more of a guide so you can see what you like and will practice you will  learn how to make it your own.


 A roller pin I found this one at the baker section, scissors  and water bottle mist.
 
 
Xacto Knifes, wood carving tool and heavy cutter.
 

 One of my favorite Xacto blades is this one is serrated

 
Rubber wipe away tool I found these at Hardy's Hobbies Studio

 
Aluminum Foil
 
 
White, grey or black primer.To seal the final piece. I like to used it if you want a nice clean 
painted surface. If you prime it will allow the acrylic paint to cover in less coats. Will also
help to prevent  the paint from falling off once it dries.


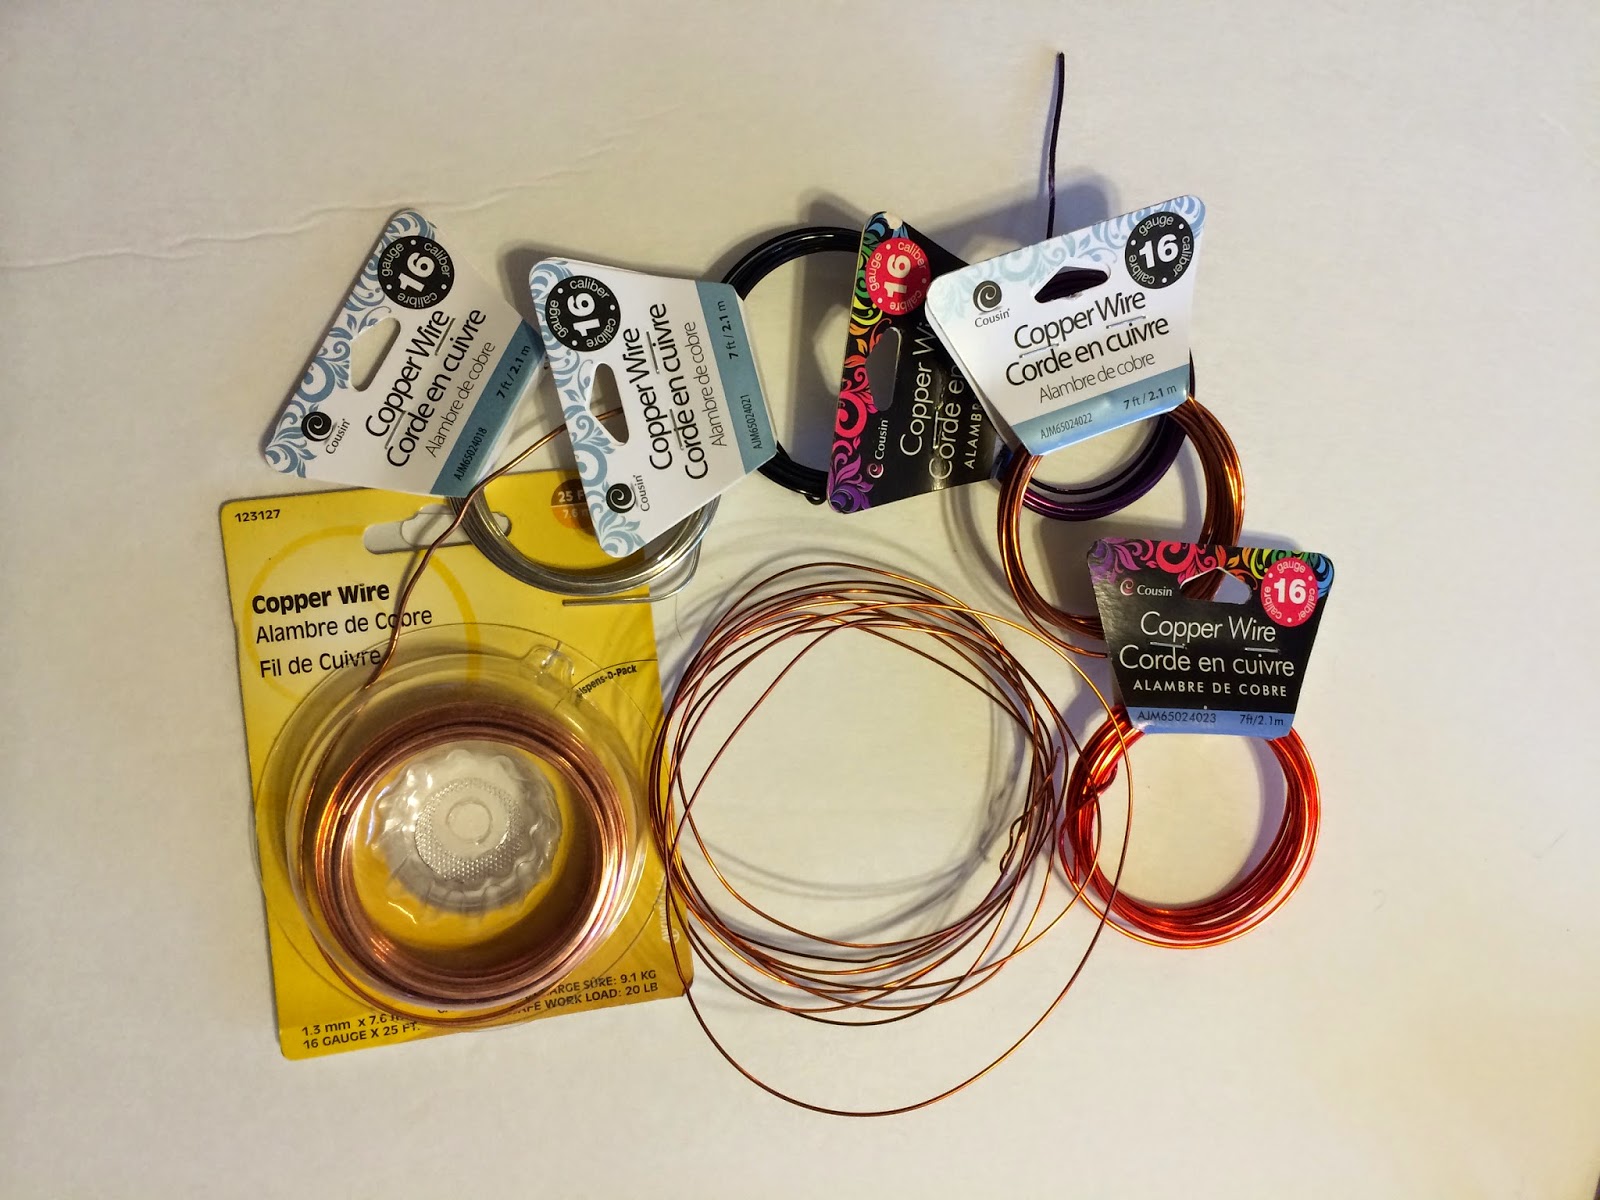
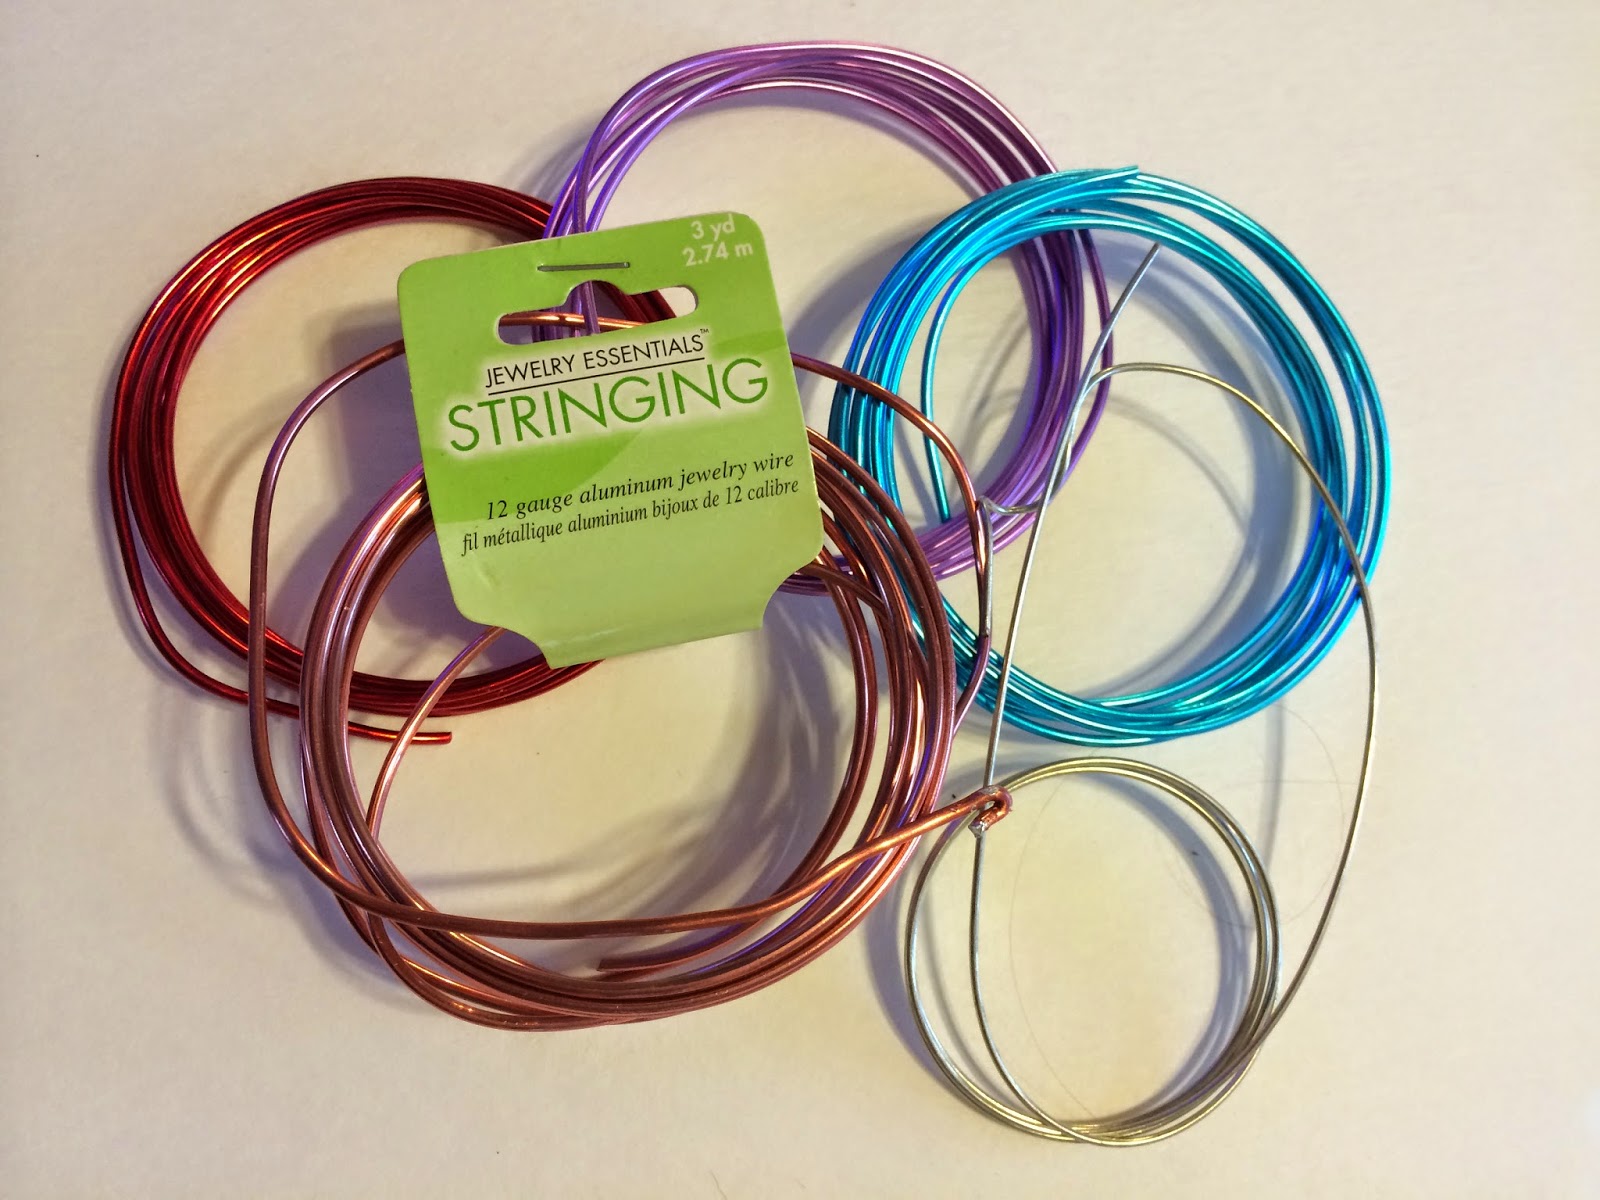
Copper, aluminum or stainless steel wires for armature making.
 
 
 Paper or painters tape. These is very useful to create armatures.

 
Flat wash paint brushes I use these to sculpt and soften the wet clay mix. A little water and this brush makes wonderful clean surfaces that will required less sanding once the piece dries.
 

 Now this bags are very useful and I love to keep them on hand. work good for storage your wet clay or pieces your working on. I like to have many sizes available. 


Now those are some of my must have in my studio If you have any questions or will like any more ideas how to use the Creative Paperclay Q&A  join us at facebook .
I hope this gives you an idea of the most commonly used tools.
 
Feel free to experiment and enjoy working with this one of a kind Creative Paperclay® Material
 
 
Have a bless day
Sincerely Gloriann Irizarry

Monday, November 24, 2014

Creative Paperclay Material® Armature wire contruction helping guide


Hi and welcome back to Creative Paperclay Material® blog page.

It is a beautiful winter day. It is kind of cold and stormy but watching the snow falling sure reminds you how strong and beautiful nature can be. Now on this cold winter day  I will show you a couple of tips to help you choose the right kind of  wire to construct the armature for your one of a kind Creative Paperclay Material® sculpting creation.  Check the detailed options listed below.
Have in mind that all metals will eventually oxidize (some just a little slower than others and some just not so visibly). This article will include some helpful information to help you choose the best one for you to use.

The wires choices are listed from softer to harder strength.

Strongest is the Steel Wire Option


Be careful with steel and iron. These can be the worst as the oxide for these is red. It is very important you choose a Stainless Steel. Stainless Steel is resistant to rust and corrosion because it is impregnated with nickel, chromium, niobium, molybdenum, or titanium. It is the best suitable for larger pieces because it is a lot harder to bend and it is a lot stronger. Steel also comes in many gauges and can be found at your local Hardware store wire section or at your favorite Craft Store in the floral or jewelry section.  Make sure it is water resistant because there is nothing worse than after you spend so much time sculpting you come back to a big rust stain on your final painted piece.


Medium Strength is Copper Wire Option


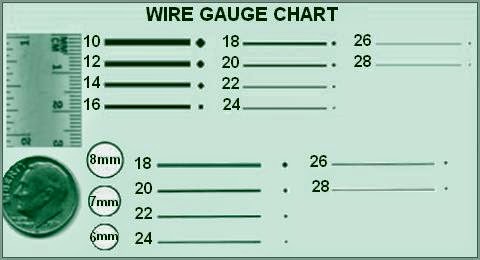
You can easily find Copper wire right at your favorite Crafts Store (check the jewelry making section). It can be also be found at your local Hardware Store in the electric wiring section . Now  they have many colors and gauges to choose from, and it will be the project that will usually determine the size you will need.  Not to worry:  I will include a very useful chart to help you choose the best wire at the end of this post.


Copper is very hardy and  rust free. It is very important that the wire is rust resistant because working with paperclay requires water and the clay is rich and moist. That can get the wire to rust and those stains will surface and damage your final sculpture. Keep in mind that copper metal is  a lot softer than the stainless steel, so for that reason I recommend copper wire for smaller armature figurines. Because copper is easy to bend, this will help you to create intricate patterns and bend it into shape.
I love this metal for sculpting small figures.


Softer Aluminum Option


Now one of my personal favorites is Aluminum.  It is my favorite because this metal is both malleable and sturdy. In fact aluminum is the 2nd most  malleable metal.  Available in wire or paper, this metal is one of the most useful in armature construction.. It is water resistant and very easy to bend. It also comes in different gauges and can be found at your favorite Craft Store in the floral or jewelry-making sections. This wire  can be also be found at your local Dollar Tree. Remember this wire is soft so if you need a stronger hold (for example a doll leg or arm) it is not recommended, But it is good for filler! Aluminum foil paper is well recommended for hollow pieces like 3D Wall Art and many other pieces that are required to be a lighter weight.

Having this information on hand, do feel free to have fun experimenting with the various qualities of all these metals. Keep in mind their unique properties before using them in your future crafting projects .

Now I will leave you with a very useful chart so you can get the right size for your next project.


Have a blessed day and remember


Stay tuned for more tips and tutorials here at your Creative Paperclay® Material blog.

Sincerely,
Gloriann Irizarry


Friday, August 15, 2014

Storing Creative Paperclay®

Creative Paperclay® needs to be kept moist after the package is opened.  Here’s how I store my unused Creative Paperclay. I keep the material in the original bag, but before reclosing it, I mist it with a few spritzes of water. I keep a mini-mister filled with water right on my worktable so it’s always handy. Then, I squeeze out as much air as possible, and put the package in a food saver bag and vacuum seal it.  [My food saver is similar to this one: http://www.samsclub.com/sams/foodsaver-v4800-machine/prod11060612.ip] I love getting double duty out of my food saver!!

If you don’t have a food saver, then I recommend following the preceding instructions, but instead of vacuum sealing, put the Creative Paperclay package into a ziplock bag. Again, squeeze out as much air as possible. Then, put this into a tight-sealing plastic container. Give the inside of the container another spritz of water, and you’re all set. Your Creative Paperclay will remain moist and pliable, ready for your next creative session.
Carole

Thursday, July 17, 2014

Creative PaperClay ® Tip for July with LuLu Lancaster


Hello :) This is LuLu Lancaster and today I have my monthly Tip.
 I thought about this months blog post while I was sculpting, and was pondering what could I tell you that would be of use. I think I have covered painting and sanding and just plain sculpting for the fun of it...but I had not shared the tools I use.

While there are a multitude of tools out there, I find that while using Creative PaperClay® I use some that are sort of non conventional,
and the one I use the most is attached, my hand!
My scarred up, dry skin, non manicured hands!

My fingers fit the eye sockets of my art dolls in just the perfect way. My thumb is the right size for smoothing the jawline. My middle finger can work wonders on the brow. Nothing can squish the clay or add water to it quite like my hands either. 


While my hands are my most used tool. I do have some odd tools as well, that nothing else seems to do the trick like.

I have an xacto knife for cutting clay
aluminum foil for adding crinkle texture or just armature
crochet hooks for effects and getting into crevices
dental tools for tiny details
wire ear and nose detail sculpting
brass tubing under lip detail
and many others!
chopsticks
dowels
screwdrivers
actual clay tools too! 

But my hands are by far my most used tool

Basically you do not have to go out and buy up all the fancy clay tools out there.
 You have one of the most versatile already with you (your hands) 
and then I am sure you have many more odd useful tools laying about the house <3

Thank you for reading along and Have a great day sculpting :D
LuLu


Friday, June 13, 2014

Tips for Working with Kids and Creative Paperclay

The fourth Friday of each month I'll be posting a Creative Paperclay project appropriate for kids. So, today I thought I'd share some general tips I've found that make kids' projects more successful.
  1. Before you begin the project, set the ground rules and expectations. Keep them short and sweet. One of my ground rules is that the clay needs to stay on the teflon mat. Let kids know that the clay needs to dry, so they don't expect a finished project immediately.
  2. Select a few tools to work with. I generally have three of four things available. A rolling pin. The handle of an old paint brush for drawing and etching in the clay. Cookie cutters. Texture plates. Embossing folders. Shapes cut out of chipboard for tracing and cutting clay shapes. Clay extruder. And the list goes on. You probably have other craft tools, too, that can do double duty as clay tools. Lots of household items are great for clay work—like a fork for textures. Remember, kids don't need every tool for every project. 
  3. Sometimes it's nice to collaborate on a project with kids, especially younger ones. Let the kids do everything they can, but let the adult work with the sharp or difficult tools. My grand-daughter loves the clay extruder, but her hands aren't strong enough to depress the plunger. So, we cooperate. She selects the tip and rolls the clay into a long narrow snake that fits into the tube. She loads the tube, and I press the plunger. 
  4. You don't always have to have an end in mind. Give kids a lump of paperclay, and let them have at it. Certainly not all their products will be museum quality, but if your child is happy with the end results, it is a success. The point is for kids to have fun and learn to enjoy art and working with clay.
  5. Decide how long you intend to spend, or if you're OK with an open-ended time period. If the child decides to leave the project before it's complete, I say let them go. Art is supposed to be fun, not punishment and something to be endured. I do have a ground rule that you can't just walk away—the work area and tools need to be cleaned and the clay put away.
I hope you have fun introducing the young ones in your life to Creative Paperclay.

Carole

Sunday, June 1, 2014

Tips by Memes Art Place!

Hello................. Creative Paperclay® followers!
It's me, Donna from Memes Art Place.

Today I have some tips for you!
I get asked all the time "How do I start?"-"What should I use as a base?"


I always say "Just try it and see if it works" - No harm can be done! Using Creative Paperclay® is really easy and fun! You can use Creative Paperclay® in so MANY ways!

Here is a $2 find! It is a compact mirror.
Pop off the top and you have a great base. 

How easy is that? You create a circle plate with the piece you just popped off. Then you can make impressions in the Creative Paperclay® or maybe make a pair of lips on it. (that would be fun and cute!)


We all see these paper mache' ornaments. Most of the time after Christmas you can pick these up for 25¢!
You can use this as a ornament for any season not just Christmas, think outside the box.


 I see a cute fairy body. Add some legs and arms and of course a head. How about those wings we just saw in yesterdays post by Gloriann Irizarry! You can see them here!

I see a Bumble Bee!
And some awesome wings! Oh, and a great big stinger!


This base could be a Basket! Add some handles. 


How fun would this be to add Creative Paperclay® to this paper mache' dress form. You could then dress her in her new gown using Creative Paperclay® to design it. Want tips on how to do that? Again, our Design Team member Gloriann Irizarry has tips to do that! You can see that here!

 My niece found this and thought I could do something with it. Hmmmm? I thought about it and thought how cool this would be if I build a top to go on it and use it to put plants under. Or even build scenes under it for different seasons or holidays! This is going to be a fun one!

  • So you don't always have to start with tin foil or wire armatures. You don't have to be intimidated by having to build that armature. Start easy and have fun trying new things. Keep your eyes open for many different items you could use!
Thanks for stopping by!

Let me know if you have some ideas for me! I would love to hear your great suggestions! Leave me a message and let me know if you have something for me to try!

If you would like to see what I am up to, visit me at Memes Art Place!