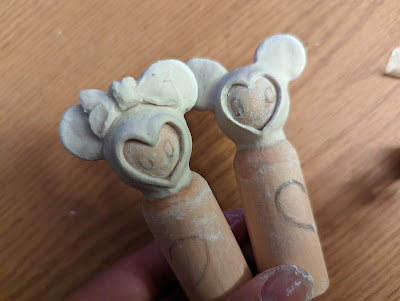
Supplies:
Creative Paperclay®
Plastic knife or flat clay tool
Acrylic paint
Sanding paper
Begin painting your pieces how you would like.
See more of my work at Melandolly.com, catch updates on
my Instagram page and here is a link to my shop!
See more of my work at Melandolly.com, catch updates on
my Instagram page and here is a link to my shop!
Potted Hearts and Ornaments
Valentine’s Day is quickly approaching and if you are looking or an easy and fun way to decorate check these out. Have the kids help too!
All you need is:
Creative Paperclay
Acrylic paint - I used red and pink
Knife
Rolling pin
Small pot
Foam
Moss
Skewer
Stencil, lace or something to make the pattern
Take about 1/3 of a package of Creative Paperclay (More if you want to make a lot of hearts) and using your rolling pin flatten out the clay.
Once the clay is flattened as thick as you would like your ornaments to be gently roll over your lace or stencil so the pattern becomes part of your heart. Next, draw a heart on scrap paper and then cut it out for a pattern (HINT: choose a side you like best of your heart and fold it in half before cutting it out so that both sides are the same).
Now using your heart pattern, use a knife to cut out hearts. Have the whole heart covered in a pattern or only a portion of it. Push a skewer into the bottom of your heart if you want to pot it up and then set it aside to dry. Alternatively, use a skewer to create a hole near the top of the heart to create an ornament.
Let them dry out for a day or two! Hint: Flip them over and use a book or two to help keep them flat as they dry.
Now grab your paint and paint them! For mine once they were painted and still wet I used a paper towel to remove most of the paint on the patterned sections to highlight them.
Once the paint is dry it is time to pot them up!
Cut the foam so it fits into the pot and glue it in (I used hot glue). Next poke the skewer with the heart on it into the foam (Add some glue to keep it in place). Then put moss on top to hide the foam and complete the pot.
For ornaments just add yarn or string to hang them and you’re done!
I would love to see all your hearts! Comment your photos below.
Cheers until next time!
Kelly Martin
Paper Hibiscus
www.Instagram.com/PaperHibiscus
www.PaperHibiscus.etsy.com
Hello and happy new year! I hope you had a wonderful holiday season. To start off the new year, I have a fun tutorial using Creative Paperclay - an incense holder. How exciting is that?
Isn't it beautiful? It is very simple to make and I have a video tutorial showing you how!
Here is a supply list for you:Diluted white glue
Rolling pin
Craft Knife
Bowl
Gesso
Fine-grit sandpaper
Plaid paint - Flag Red, White, and Bright Yellow
Golden Glazing Medium
Gloss Varnish
Follow along in the video below:
Thank you for stopping by. You can share your creations with us on our Facebook page. We would love to see them! For more inspiration have a look around the blog. There are tutorials for many levels using Creative Paperclay®. You can also visit my blog Paper Mache Patch.
You can find Creative Paperclay® online at Creative Paperclay Co and also at Michaels, Hobby Lobby, Dickblick and Amazon.
Thanks for stopping by!
Suzette
Blog/website: https://www.papermachepatch.com
Instagram: https://www.instagram.com/papermachepatch/
Pinterest: https://www.pinterest.com/suzettehussey/
YouTube: https://www.youtube.com/c/PaperMachePatch
Skillshare: https://skl.sh/2QyIn93
Clay Tree Luminaries
These are perfect for Christmas and also wintertime decorating. Place a tea light candle underneath for some gorgeous mood lighting on the upcoming frosty nights. I recommend battery operated lights.
All you need is:
Creative Paperclay or Delight
Acrylic paint - green (Or whatever color you want your trees to be!)
Knife
Rolling pin
String
Pencil sheet of paper
Drinking straw or other circular hole cutter
Wrap the string around the pencil and hold it tightly then hold the other end of the string in you other hand at one corner of the paper. Draw a half circle on the paper to create a tree template (The longer the string the larger the tree).
Take about 1/2 of a package of Delight and using your rolling pin (You can substitute a drinking glass if you don’t have a craft rolling pin) flatten out the clay.
Once the clay is flattened as thick as you would like your tree to be use your tree template and knife to cut it out. (note if you use Delight it does seem to really like sticking to paper so don’t press down hard on your template when cutting it out or else you will get clay stuck on your paper).
After cutting the tree out use a straw or other cutter to cut out holes in the tree for the light to shine through. I created more holes lower and less higher. Be careful how close to the sides you put holes since you will need to blend the sides to create the final 3D freestanding tree shape.
Now lets make our molds into cones by rolling and taping them (and putting wax or other nonstick paper on them if you are using Delight). Next using the cones as a base create a cone with the clay and press down to seal the trees in their 3D shape. Now is also a great time to make any needed adjustments so that the trees will sit flat on their bases.
Let them dry out for a day or two!
Now grab your paint and paint them! Don’t forget to get in the holes so you don’t see the white shining through.
Once the paint is dry it is time to try lighting them up and enjoying the magic!
I would love to see all your trees! Comment your photos below.
Cheers until next time!
Kelly Martin
www.Instagram.com/PaperHibiscus
www.PaperHibiscus.etsy.com
Hello everyone! My name is Cinnamon Willis and I am going to show you how I created this puzzle. I chose to create another piece with Alphie the Robot from one of my childhood toys. He is a reoccurring theme in some of my lighter work, but you can paint whatever you'd like for this project!
Start by flattening out your clay. I flattened out the clay by hand but you can use a rolling pin or something similar to get it more uniform.
I googled jigsaw puzzles online to make sure that I was creating the correct pattern for my puzzle. A bobby pin or Kemper needle would suffice for creating these shapes. Make sure that you dig deep enough when you are creating the lines on these pieces. It can be a bit difficult to separate the pieces after the clay dries without breaking them. Set the piece aside to dry.
After the puzzle dries, you may need to go back and weed out the pieces with an exacto knife. This is what it looked like after drying.
I am cleaning up some of the edges that needed to be better separated. Take your time on this part so that you don't cut into the side of the puzzle that shouldn't be cut.
This is what the pieces looked like after trimming them out.
When you are happy with the amount of smoothness that you get from sanding, plot out your sketch with pencil to prepare to paint. Put the pieces really close together to get the best drawing that you possibly can
Start painting your pieces with acrylic paint. Make sure to paint the top as well as the sides of the puzzle. It makes a big difference when you look at the piece from the top. The white edges will distract from the picture.
Here's to another piece added to my Alphie collection!
See more of my work at Melandolly.com, catch updates on
my Instagram page and here is a link to my shop!
Hello,
Welcome to another blog post. I can't believe that it is the holiday season again. I have been so busy that I didn't realize it was December! Instead of making another ornament, I have put together a list of past tutorials that I have done using Creative Paperclay® or Delight Clay™. I am sure you can find something to get you in the holiday spirit.
A Church for Your Christmas Village
A Santa Ornament
You can find Creative Paperclay® online at Creative Paperclay Co and also at Michaels, Hobby Lobby, Dickblick and Amazon.
Blog/website: https://www.papermachepatch.com
Instagram: https://www.instagram.com/papermachepatch/
Pinterest: https://www.pinterest.com/suzettehussey/
YouTube: https://www.youtube.com/c/PaperMachePatch
Skillshare: https://skl.sh/2QyIn93