Showing posts with label #DIYHeart. Show all posts

Sunday, January 23, 2022


Potted Hearts and Ornaments


Valentine’s Day is quickly approaching and if you are looking or an easy and fun way to decorate check these out.  Have the kids help too!


All you need is:

Creative Paperclay 

Acrylic paint - I used red and pink

Knife

Rolling pin

Small pot

Foam 

Moss 

Skewer

Stencil, lace or something to make the pattern 


Take about 1/3 of a package of Creative Paperclay (More if you want to make a lot of hearts) and using your rolling pin flatten out the clay.  


Once the clay is flattened as thick as you would like your ornaments to be gently roll over your lace or stencil so the pattern becomes part of your heart.  Next,  draw a heart on scrap paper and then cut it out for a pattern (HINT: choose a side you like best of your heart and fold it in half before cutting it out so that both sides are the same).


Now using your heart pattern, use a knife to cut out hearts.  Have the whole heart covered in a pattern or only a portion of it.  Push a skewer into the bottom of your heart if you want to pot it up and then set it aside to dry.  Alternatively, use a skewer to create a hole near the top of the heart to create an ornament.


Let them dry out for a day or two!  Hint: Flip them over and use a book or two to help keep them flat as they dry.


Now grab your paint and paint them!  For mine once they were painted and still wet I used  a paper towel to remove most of the paint on the patterned sections to highlight them.

Once the paint is dry it is time to pot them up!  

Cut the foam so it fits into the pot and glue it in (I used hot glue).  Next poke the skewer with the heart on it into the foam (Add some glue to keep it in place).  Then put moss on top to hide the foam and complete the pot.


For ornaments just add yarn or string to hang them and you’re done!


I would love to see all your hearts!  Comment your photos below.


Cheers until next time!

Kelly Martin

Paper Hibiscus

www.Instagram.com/PaperHibiscus

www.PaperHibiscus.etsy.com

Wednesday, January 29, 2020

The Transformation of Dough Art Using Delight Air Dry Modeling Compound!

 
Hello all!
Recently a Facebook post has been making the rounds on multiple artist friends' pages as well as on my own from well-meaning friends who said: "This made me think of you!".  Well, I had to rise to the challenge.  Could I take the pastry art shown and create the same pieces using Delight Air Dry?  I had to try and do it.  I grabbed a package of Delight and went to work.

The video is from a Chinese artist (I apologize, but I cannot pull up a working link to share).  The speed in which she works had me watching each segment multiple times to be able to create just one piece (haha).  After my "painstaking" research, I have broken down the steps into photos for you.

First up, "The Heart":
The heart begins with one circle.  (NOTE: The cutter size doesn't really matter since I believe these simple directions will work no matter what size you are creating.)  I own a set of Ateco circle cutters (12 pcs) and they worked great for this project!
Pull off a bit of Delight Air Dry Modeling Compound and flattened it with a roller on my work surface.  Cut three circles and place the remainder of clay in a damp paper towel to keep the clay moist.


Next, stack the 3 circles, one on top of the other, without squishing them together.
Use a skewer or needle tool of some sort to press the stack together in the center without cutting through.  I used a darning needle, but a knitting needle or turkey lacer or (in a pinch) a pencil should work just as well.
Fold the stack in half.  Again, do not squish (that is the technical term) the layers together.  Use the skewer to once again compress the stack together in the center without cutting through.  Fold the stack in half again, then turn it so the flat side is on your work surface.
 
Pinch the bottom to form the heart bottom and manipulate the rest of the layers to form a beautiful layered heart!
Set aside to dry.  Once dry, the heart can be painted with watercolors or acrylics OR it can be left white.  That's it!  Easy peasy lemon squeezy heart.  Imagine creating a batch of these for a mixed media canvas...Delight Air Dry is so lightweight that it can be glued to a canvas in multiples and hung on the wall for a lightweight seasonal decoration ❤

On to our next creation: The Rose
To start, pull off a bit of the Delight Air Dry (from the clay wrapped in the damp paper towel) and flatten it on your work surface.  Cut 5 circles (I cut 2" circles for this one).  Place any remaining clay back into the damp paper towel.
Cut each circle in half.  Line them up with the cut edges all in a line.  Overlap the points (as shown) and press together.
In the video tutorial, the pastry artist used a comb to imprint a texture on the curved edge of each petal.  I am a curly-headed girl and do not own a comb, so I found the next best thing: the attachment from personal shaver!  Tiny, but it worked to add a texture to the edge.  In the absence of a "personal shaver", you could add detail with a needle tool (one line at a time), the coil from inside a pen, OR the edge of a spiral binder!  Trust me when I say you will see texture in everything once you get started looking!
(NOTE: I forgot to take a photo of texturing the rose, so this is the same tool being used in an upcoming tutorial)

Once each petal has a texture, it is time to roll up the rose.  Begin at one end and roll tightly.  I did not press the petals at the top.  Instead, I focused on pressing the bottom of the petals (the flat edge) together.  This will allow the top of the petals to begin to flare out.
 

Once the rose is completely rolled up, place it face up on the work surface and gently flare out the petals to create a lovely rose (see above photo).  Leave to dry and then paint if desired.  Wouldn't this make a lovely pin for Mother's Day??

Next up: The Braided Feather/Leaf
This is probably one of the easiest of the ideas!  Pull off another piece from the reserved clay (damp paper towel).  On your work surface roll out a snake.  
Coil the snake, gently tucking the end into the center (as shown). 
Use a needle tool (I used a darning needle) to impress a line down the center of the coil without cutting through.
Pinch the top end and it is done!
Please note: After impressing the line, the feather/leaf can be curved to create a more natural effect.  Of course, set aside to dry and then paint as desired.

One last one: The Butterfly
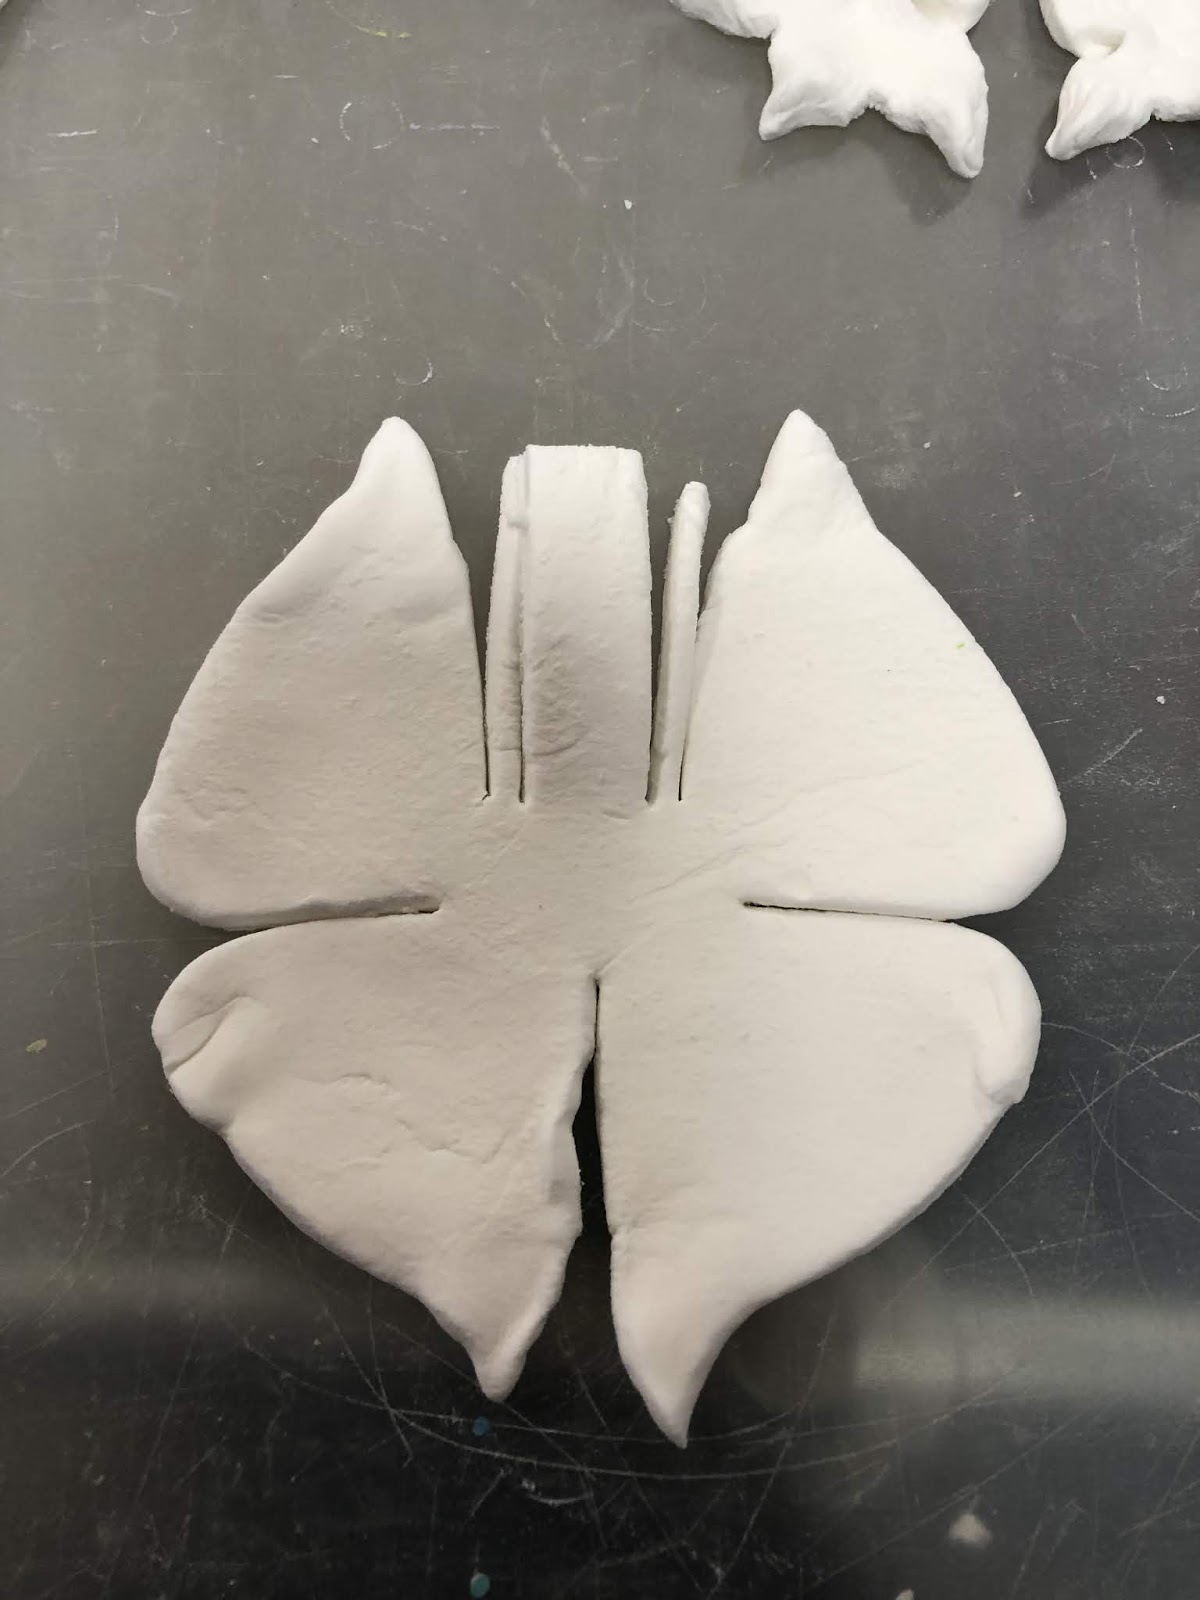
Begin the butterfly in the same way as the others by grabbing a bit of the reserved clay.  Flatten the clay on your work surface and then cut out a circle.  I used the largest of the cutters (approx 4") for this one.  Use a cutting tool (a plastic knife or butter knife will work well) to cut lines as shown below.
Next, manipulate the "wings" to add curves and points rather than flat edges.  Can you see the butterfly taking shape??
Fold down the center to create the butterfly's body.  Be sure to pinch the end to help the body take shape.  Curve the antennae.  Add lines to the wings using a needle tool (I used my darning needle, but the back of your knife will work just as well).  As you can see I used the attachment from the shaver to impress lines down the center of the body.
 

The final step? I decided to roll the antennae down onto the top of the body and add a couple of glass beads to give the butterfly sparkly eyes. 
Of course, the butterfly is just as beautiful with the antennae curved between the wings and no visible eyes.
As with the others, set the butterfly aside to dry and then paint as desired.

I hope you have enjoyed these quick and easy creations.  Return next month for a few more of the Delight "pastry creations".

Linda Hess


Wednesday, June 12, 2019

End of the School Year...A look back at the many ways Creative PaperClay can be used in the classroom

In my role as an Art Teacher (K-8th grade) I introduce my students to a variety of materials during the school year.  Nothing gets more excitement than when I pull out clay!  I am blessed to have a kiln in my classroom, but to be perfectly honest I prefer Air Dry clays and polymer clays for the ease of use.  My go-to airdry mediums are (of course) Creative PaperClay and Delight Air Dry ❤

Here are the many ways I have used Creative PaperClay and Delight Air Dry in my classroom this year:

4th grade used magazines to create recycled woven baskets.  Once complete we needed to create something to go into the baskets...eggs were the perfect choice!  Out came the Delight Air Dry clay.  The students loved that color can easily be mixed into the clay rather than colored on top...just dap the washable marker onto the clay and then mix in!  Easy peasy.  You can see from the photos no 2 eggs turned out exactly the same.


Next up: Jim Dine hearts
I created these with my 3rd graders.  We looked at many Jim Dine art pieces and talked about the colors, shapes, and designs.  They each created a background with tongue depressors focusing on color and pattern.  Next class we pulled out the clay.  I shared my example (bottom) and demoed how to mix color into the Delight Air Dry clay.  I encouraged them to make a variety of colors....a couple of students only processed "multiple colors" and added all the colors to the entire ball of clay.  Thankfully even "mud" can be gorgeous in the hands of a child (see far left photo).
NOTE:  This was a parent favorite ❤


Next up:  Easter Crosses
I teach art in a Catholic school so I am able to create religious pieces with students throughout the year.  For Easter, my 2nd graders used Creative PaperClay to create a cross or crucifix.  We talked about the thickness and how to best attach components to each other (a dab of water rubbed onto one piece and then the other attached was the favorite method).  I had a variety of texture sheets and texture tools for them to use.  ALL loved how easily the clay accepts texture.
For the background students could choose a wooden picture frame or a canvas.  Both were painted for the "perfect" backdrop.  For the frames, students chose a piece of wallpaper to cover the cardboard center.  Crosses were then glued into place.


Time for a Christmas project with my 1st graders.  We used Delight Air Dry for this project.  Again I demoed how to mix color into the clay rather than color on top.  I was WOWWED by what they accomplished!  Pieces dried in place, then were glued down with Elmer's school glue.  Heirloom project sure to be showcased year after year ❤


The final project of the year for my 6th graders featured Pop Art.  What better way to get POP than with clay??  The students used foam core, paint, and cardstock for bases.  Some created Benday dots using bubble wrap to print. The final step was to create lettering.  Some used cutters, but most free-formed letters to create a motion word.  Words dried in place and then were glued down (again with Elmer's school glue).  I think everyone can agree they all did an amazing job! 


I hope you have enjoyed this little walk through my year.  I look forward to introducing my students to more projects in the coming year using these fabulous products!