Showing posts with label valentines day. Show all posts

Friday, January 28, 2022

How to Create a Peg Couple


Hello everyone! My name is Cinnamon Willis and I am going to show you how I created these two Peg figures!


Supplies:

Creative Paperclay®
Pencil
Plastic knife or flat clay tool
Acrylic paint
Sanding paper
Masking tape or artist tape
Protective varnish or clear coat covering


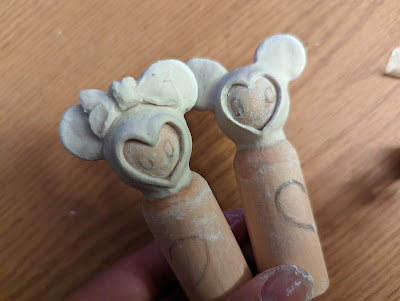
Start by planning out how you want your pieces to look. Get a pencil and draw on the peg to plot where you will add clay. Don't worry about making mistakes at this stage, you can cover them up later with paint or clay.


I knew that I wanted to put some kind of embellishment on the head. Take a dab of water and rub it on the part of the peg that you would like to add clay to. This will help it stick to that part.


I wanted to add ears to these pieces to make them look like everyone's favorite mouse couple. I shaped pieces of clay into disks and pushed them down into the head. After pushing the ears onto the head, I took a flat tool and went all around the base of the ear to secure the ears in place. The ear will lose it's shape at this stage, go back and rework the ear while it is still in the pliable stage.


I did the same ear shaping process with the girl version and added a bow to her head. Set the pieces aside and allow them to dry for around 24 hours or more. The drying time will vary depending on the moisture in the air.


When the pieces are dry, get your sanding paper and smooth out the lumps on your pieces to the texture that you would like.


Begin painting your pieces how you would like.


I used masking tape to get straight lines on this piece. Tape off the part that you don't want to have paint on and paint the other side. Carefully pull back the tape after it dries.


I wanted to add polka dots to the other piece. I free styled the dots on this piece but I am sure that you can find or make a stencil to get perfect dots!


And here they are. I decided to keep them faceless and I used gold acrylic paint. Don't forget to seal your work with protective varnish! 


Thank you all once again for stopping by, and I hope that you enjoyed today's tutorial! You can find Creative Paperclay® at the following retailers Creative Paperclay® Online Store, Michael's, Amazon, Joann's.


See more of my work at Melandolly.com, catch updates on 

my Instagram page and here is a link to my shop!


Sunday, January 23, 2022


Potted Hearts and Ornaments


Valentine’s Day is quickly approaching and if you are looking or an easy and fun way to decorate check these out.  Have the kids help too!


All you need is:

Creative Paperclay 

Acrylic paint - I used red and pink

Knife

Rolling pin

Small pot

Foam 

Moss 

Skewer

Stencil, lace or something to make the pattern 


Take about 1/3 of a package of Creative Paperclay (More if you want to make a lot of hearts) and using your rolling pin flatten out the clay.  


Once the clay is flattened as thick as you would like your ornaments to be gently roll over your lace or stencil so the pattern becomes part of your heart.  Next,  draw a heart on scrap paper and then cut it out for a pattern (HINT: choose a side you like best of your heart and fold it in half before cutting it out so that both sides are the same).


Now using your heart pattern, use a knife to cut out hearts.  Have the whole heart covered in a pattern or only a portion of it.  Push a skewer into the bottom of your heart if you want to pot it up and then set it aside to dry.  Alternatively, use a skewer to create a hole near the top of the heart to create an ornament.


Let them dry out for a day or two!  Hint: Flip them over and use a book or two to help keep them flat as they dry.


Now grab your paint and paint them!  For mine once they were painted and still wet I used  a paper towel to remove most of the paint on the patterned sections to highlight them.

Once the paint is dry it is time to pot them up!  

Cut the foam so it fits into the pot and glue it in (I used hot glue).  Next poke the skewer with the heart on it into the foam (Add some glue to keep it in place).  Then put moss on top to hide the foam and complete the pot.


For ornaments just add yarn or string to hang them and you’re done!


I would love to see all your hearts!  Comment your photos below.


Cheers until next time!

Kelly Martin

Paper Hibiscus

www.Instagram.com/PaperHibiscus

www.PaperHibiscus.etsy.com

Friday, January 25, 2019

How to Mend a Broken Heart


Hello everyone! My name is Cinnamon Willis and I am going to walk you through the steps on how I created this mended broken heart sculpture. With 
Valentine's Day quickly approaching, I decided to create a broken heart for those who may be in need of some healing at this time. The gold split in the heart was inspired by the Japanese art of Kintsugi where broken pottery is repaired with lacquer that is dusted with powdered gold to join the pieces back together. These repair lines become a beautiful reminder of the item's resilience, the same can be said about the heart and the scars that are left on it by others. The scars will only add to your brilliance, learn from them, and wear them with pride.

Supplies:
  • Creative Paperclay®
  • Wooden skewer
  • Masking Tape
  • Newspaper
  • Acrylic paint
  • Pencil
  • Sanding paper
  • Exacto Knife
  • Aleene's Original Tacky Glue


I began this piece by balling up newspaper and taping it around my skewer. I start on one side of the heart and then get to work on the other side. I tape them together and wrap them until they begin to resemble the rough shape of a heart.


Once the shape of the newspaper is as close as I can get it to a heart, I began my first thin coat of paperclay around it. I allowed the clay to dry for about 24 hours and I begin to add more clay with a little dab of water until it gets to the shape that I would like it to be for the heart.


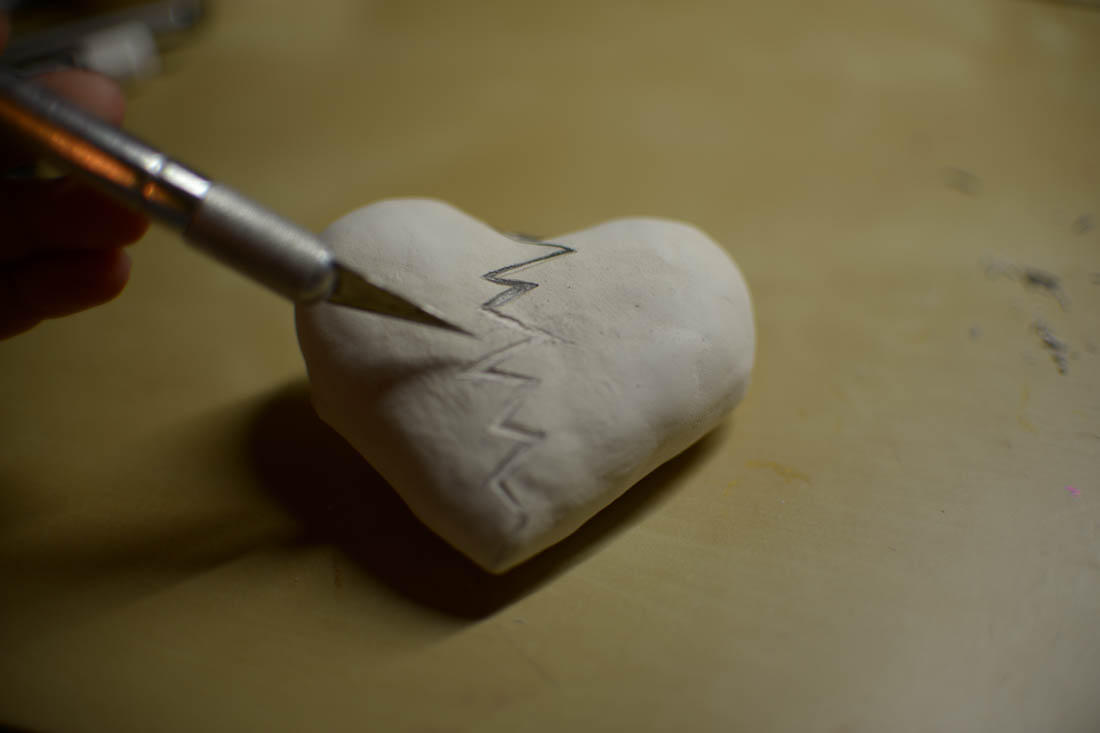
After allowing the second coat of clay to dry, I map out with a pencil where I would like for the split to be for my broken heart. I used a pencil because I always struggle with making zig zagged lines, it usually takes me a few tries.


I am just cutting out my lines with my excato knife here, a utility knife can work as well.


After the lines were cut out, I began to sculpt the front and back end of the arrow. I didn't do as much sanding down with this piece because I wanted the heart to be a little rough looking as if it had a rough journey. I also put a little bit of glue on both ends of the arrow where they join with the heart to keep it in place.


I painted the heart black so that I could blotch some red paint on it with a sponge as shown here. I didn't want the heart to have an even bright red coat of paint, I wanted it to look weathered.


I used gold paint here for the break in the heart to mimic that of the Kintsugi technique that I mentioned above.


I took a piece of nylon and tied it onto both ends of the arrow so that I could hang it on a nail. I sealed it with varnish so that the paint wouldn't chip off.


Here's the piece in it's new home on one of my walls with two of my favorite masks.

Thank you all once again for stopping by, and I hope that you enjoyed today's tutorial! You can find Creative Paperclay® at the following retailers Creative Paperclay® Online Store, Michael'sAmazon, Joann's.

See more of my work at Melandolly.com and be sure to catch updates on my Instagram page!