Showing posts with label Altered Tin. Show all posts

Friday, November 20, 2015

Altered Altoid Tin with Creative Paperclay® Figures

I'm having great fun altering tins—sardine cans, Altoid tins, etc. Creative Paperclay® is perfect for making the figurines that I include in them.

To begin I used pliers to gently open the hinges so I could remove the lid. Next, I spray painted the outsides of both the lid and bottom of the tin.

While the paint was drying, I created the snowman and tree using Creative Paperclay. The snowman is two small balls of clay with a wire support holding the head and body together.
Beginnings of a snowman
Wire support between head and body
To make the snowman's smile I cut away part of a soda straw, leaving just the right sized curve to press into the damp clay to leave the impression of a smile.

His hat was made in two pieces—a small flat circle and an egg-shaped pieces that I scored for the crease in the top of the hat. Looks a bit like a coffee bean, doesn't it? I attached the hat after is was dry and painted.
.

The tree was made by forming a cone of clay. Then, starting at the top of the cone and working round and round, use the tips of a pair of small, sharp scissors to make a series of snips. Gently lift these "branches" to form the tree.

Cone for tree
Newly formed tree
While the clay pieces were drying, I coated the inside of the lid and bottom of  the tin with Duo Adhesive and mica flakes. On the inside of the lid and outside cover of the tin, I added Christmas prints using double-sided adhesive along with embellishments. I cut the lamppost that is behind the snowman on my Zing electronic cutter.

Cover of the altered tin
Lamppost
Here's a close up of the snowman and tree—already for a Christmas display.


Carole

Tuesday, January 28, 2014

Easy trick to BJD making Creative Paperclay by Gloriann Irizarry


Easy trick to Creative Paperclay BJD making by Gloriann Irizarry
by Gloriann Irizarry 


Hola to all my wonderful followers, collectors and friends. 
Yes it is Gloriann Irizarry once more. Today I am revealing wonderful sculpting secrets.
 This is my  January Creative Paperclay tip. 

I been working on my Paper clay Ball Joint Doll for a while and learn many tricks on the way. 
Now for all of those who had tried to create one of these art dolls know these know they have tons of little pieces and yes they all need to fit together perfectly. 
Well many trial and fail experiments i came across one I l will like to share with you. 
A very neat secret to make joints a little easier.


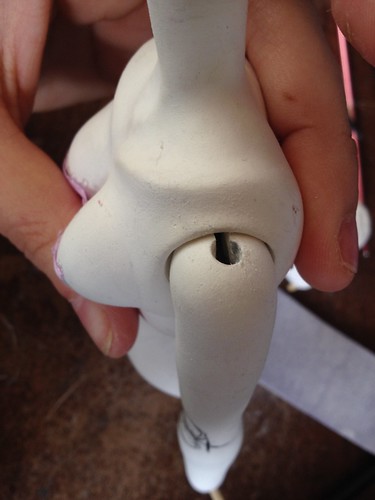
This is what we I'm going to explain. How to make a perfect ball joint in this case I will use the shoulder.

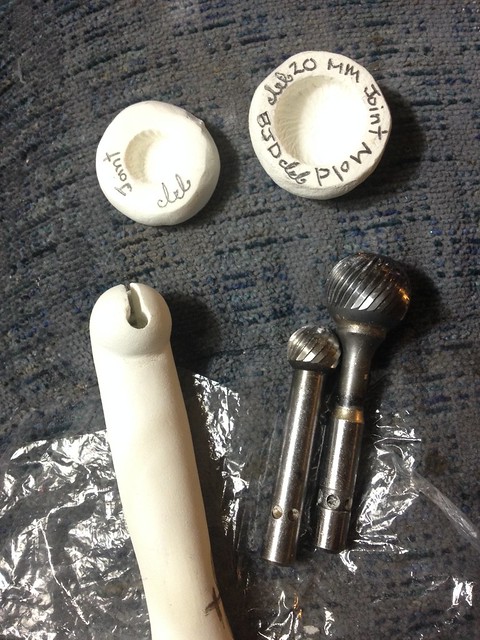
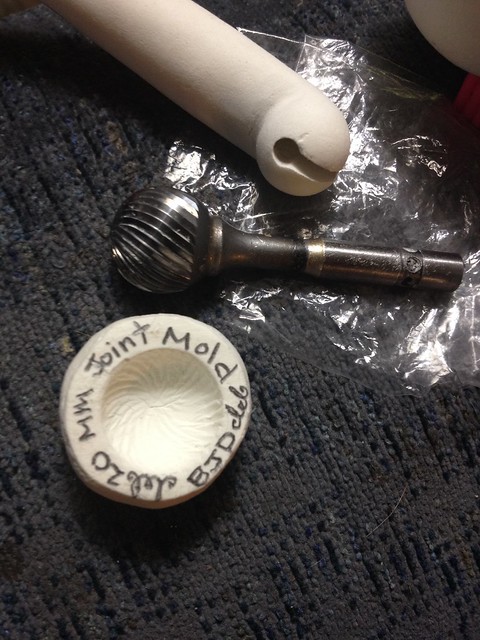
I have a nice set of round drill bits also know has bevelers in different sizes.


I got mine out of metal but there are some out there that look more like these 


Either one will work.

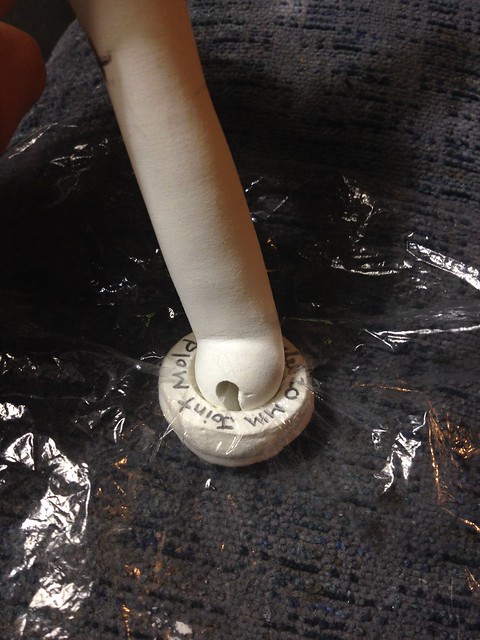
I start by rolling a ball of paper clay and cover it with a small plastic sheet.
Now I press the desired size to create a hard mold.


I use to paper to make sure i can easily remove the drill bit out. 


Now let it dry completely before is ready to be use.


To be able to use the new mold lay a clear sheet of plastic over it. 


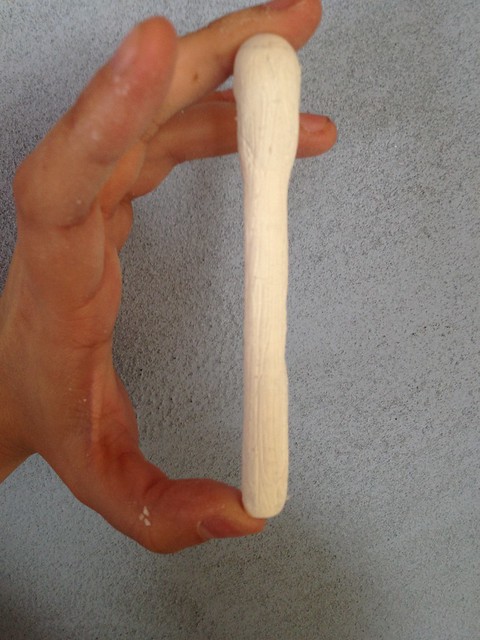
Grab your hollow arm piece and add clay to the mold and press the arm in while your rotating it to create the perfect size elbow joint.


If you need more clay make sure you moist it before adding it to the mold.
Keep moving the arm in circular motions to create the perfect round  joint.
Lay it down to dry.


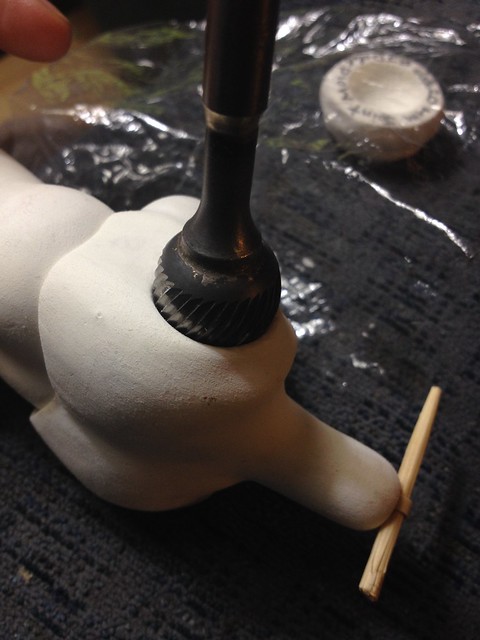
Sand the shoulder smooth. Mark with a pencil the threading and drill the hole from the top to the already hollow arm.


 Now use the same size bit and start to drill the shoulder socket to your desired depth.


Make sure you check the deepness constantly so you don't over drill the shoulder.
If you do over drill there is no problem you can fill the hole with fresh clay let it dry and start the drilling process once more. 


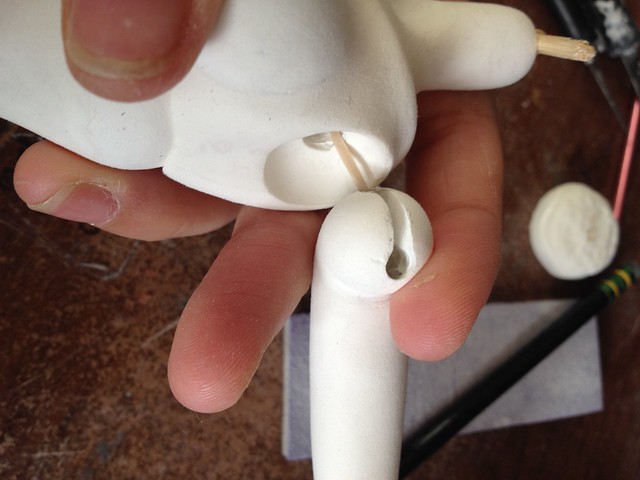
Once you have the desired look and you had drilled the new joint . I use the pencil and mark the drilling points one on the top ans another on the side. I use the hobby knife to cut an open canal between the two holes. 


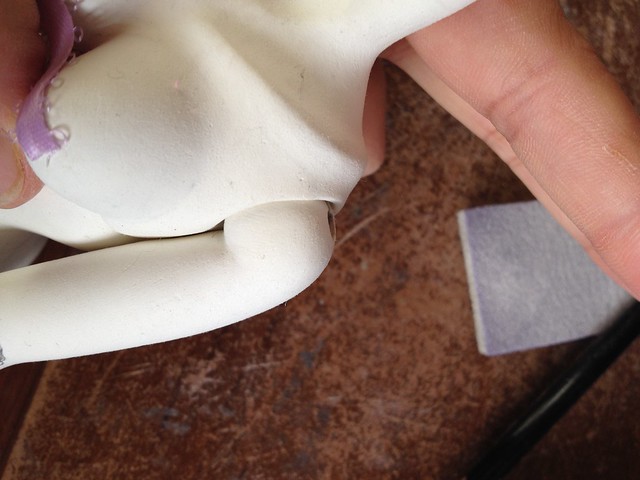
Sand here and there to achieve the look your looking for. Tread with the elastic and try your new joint. 

I use this process to create all my dolls joints. 


I hope this help. Free free to leave me a comment below or 
email me any question at Gloriann@byglori.com


Have a bless day and happy crafting!

Sincerely Gloriann Irizarry 

Saturday, October 20, 2012

Lyneen's Last Quick Tip

This is my last post as a member of the Creative Paperclay® Design Team. I have had a great time sharing my ideas with you this past year. 

For my final not so quick tip I thought I would share some of the projects I have done over this last year.  When viewing them I noticed they all had one thing in common, all of them are finished with Sakura 3D Crystal Lacquer, most have Terry Sproul Mixers. 

What I have found is Sakura 3D Crystal Lacquer is a one step finish on Creative Paperclay®.  When I used the lacquer mixed with the mixers I only had to paint my projects one time and had a sealed coating on the Creative Paperclay®
This mask was for my Creative Paperclay® Design Team application in April of 2012, it was never posted on the Creative Paperclay® blog. Made by molding Creative Paperclay over an inexpensive mask. The flower is a paper napkin adhered with Sakura 3D Crystal Lacquer. The rest of the mask is painted with Sakura Crystal Lacquer and Terri Sproul Mixers: Red Garnet and Citrine mixed (making a beautiful tangerine color.)  See more about the Mask HERE on my blog!
For this altered tin I molded a Frozen Charlotte with Creative Paperclay® from an Articus mold. She was painted with Sakura 3D Crystal Lacquer and Terri Sproul Mixers - Citrine. Original post is HERE!
My Creative Paperclay® wall pocket was inspired by vintage Victorian wall pockets. The pocket was painted with Sakura 3D Crystal Lacquer and Terri Sproul Mixers - Bronze. It has a very vintage look, see the original post HERE.

The Creative Paperclay® Fascinator is one of the only projects  that I painted with craft paint (black) and came back and sealed it with Sakura 3D Crystal Lacquer. Original post HERE!
The Creative Paperclay® crown fit for a princess was painted with Sakura 3D Crystal Lacquer and Terri Sproul Mixers - Gold. One of the only projects I gave a second coat of the Sakura 3D Crystal Lacquer/Mixers.  I was after a "rich golden color." Original post HERE!
This inexpensive bird house was altered with Creative Paperclay® peices. The Creative Paperclay® pieces were painted with Sakura 3D Crystal Lacquer and Terri Sproul Mixers:large leaves -  Pearl Green, tiny flowers - Citrine Pearl, large flowers - Rose Pearl, small leaves - Tanzanite Pearl mixed with Shimmer Citrine and birds Aquamarine Pearl. Original post HERE!


The Fall Tree was created for the Creative Paperclay® and Amazing Mold Putty Blog Hop, which was never posted on the Creative Paperclay® blog. The leaves are molded out of Creative Paperclay® and painted with Sakura 3D Crystal Lacquer and Terry Sproul Mixers - Citrine Pearl, Rose Pearl and Shimmer Garnet. I love how the colors mixed when I painted the leaves. Original post HERE!

You can bet I will be using Creative Paperclay® in many of my future projects and will be sharing them on my blog, Dreaming of Castles.