Showing posts with label how to. Show all posts

Wednesday, June 7, 2017

How to make a hollow Creative Paperclay ® art doll tip by Gloriann Irizarry #artbygloricom

How to create a hollow Creative Paperclay® art doll  
June 2017 Tip By Gloriann Irizarry
#artbygloricom
 
 
Wow,  it is almost summer!
  Weather is finally warming up, birds are chirping, and kids are playing outside. In this June tip I will include the way I make my art dolls hollow so that  they are lighter and can be attached to the painted canvas to be easier displayed. I love making these girls:  they are so much fun to make and they look great inside shadow boxes. Here is the process I came up with to make it a lot easier to remove all the inside armature without destroying the piece. It is easy to do so if you follow my instructions.
And if you DO like this post, feel free to share it with all your friends!
 
Materials
Heavy Duty Aluminum foil
Paper Scotch Tape


I like to use heavy duty aluminum foil because it is a lot stronger and thus easier to manipulate to create a strong armature for working on your art doll.


Find a shape that you want to use as the base for your figure and lightly shape and  recreate it by manipulating the aluminum foil.
You can use your hands, hammers or the tape to hold the shape in place.


Make sure to move the piece around and that it lays flat -  this will help you be able to create a even surface so you can later easier add your sculpture to the canvas.
 Turn the piece over and create a string with the scotch tape so you can later attach a  pen, pencil, or chopstick (something strong to assist you in pulling the final piece away from the armature).
 
 
Grab another sheet of aluminum foil.
Lay it flat over the already sculpted aluminum foil armature.
 
 
Press around the armature very lightly.
Work all the corners and edges so they are clean with the flat surface of the table.
  
 
Now you can roll a clay sheet to a 1/4 thickness and wrap it around the armature.
 
 
Make sure you press the clay all around the armature to make it lay flat, then set it aside to dry. I recommend you let it dry overnight  or set it in the oven at very low heat for an hour or two depending on the size and thickness your sculpt.
 
 
This is how the back of the piece will look once the clay is laid over your foil armature: 
Once the piece is dry, attach the pen or stick of your choice to help you remove the main armature core from your piece.


The image above shows how your figure will look like once the core is removed. Go ahead and carefully pull the aluminum foil away. Now it is normal that you may find a damp soft spot under this foil layer so be very careful when removing it.
 
 
This is how the final dry Creative Paperclay®  hollow piece should look.
 
 
I hope you have enjoyed this article. If you find it helpful, feel free to share it!
Sincerely
Gloriann Irizarry
Social media @artbygloricom #artbygloricom


Tuesday, January 3, 2017

Tori's Tip - Simple Relief Carving

Happy New Year, friends! 

Later this month I will be showing you how to create a set of "art dice".  I have chosen to do a relief carving in the center of each side of my dice, and although it isn't necessary to do this to complete the project, I'm sharing the how-to for my monthly tip.

This type of carving, done on dry clay, can be used for many different types of projects, including page embellishments, boxes, etc.

Bonus tip - I've included a diagram for making your own sculpting/scraping tool :)


Thanks for joining me here again!  As always, play, experiment, and have fun!

Tori
Find me on Facebook, or peruse & ponder pics with me on Pinterest

Friday, June 12, 2015

Art Doll

Hi, it's Ann here today with a new project, a Creative Paperclay® Doll.  I call her Wanda and she tends to get lost just like Waldo!

I am pleased to say that Wanda is made with some recycled pieces such as an empty pill bottle, some foil, and a new styrofoam ball.  Here she is:


To make her I started with the head which is essentially a styrofoam ball covered with a layer of clay. I rolled out several different sizes of balls to make the eyes, nose, lips, and ears.


I used a spray bottle filled with some water to adhere the pieces of rolled clay together.


The body of the doll is an empty pill bottle that I also covered in clay.


I formed the clay into a cup shape at the top.  By crumpling up foil I was able to insert that into the cup part to solid the neck and shoulder part.


I attached the head to the clay over the foil neck with extra rolled coils of clay and water.
I also usem spritzes of water to smooth out the doll as much as possible.

Once Wanda was dry I used a sanding sponge and some Sandits tools to even out any rough edges.


I used a collection of craft paints to colour Wanda.


For her hair I used ribbon and a hot glue gun.

Supplies:
Creative Paperclay® Modelling Material
Empty pill bottle (from recycling bin)
Styrofoam ball (Dollar tree)
Aluminum foil (Recycled pieces from my kitchen)
Sandits (thank you)
Acrylic Craft Paints "Craft Decor" from Multi Crafts:  Christmas Red, White, Flesh.
Pigma Micron pens in black and green.
Brown Ribbon Stamping' Up!

To look and find where Wanda has gone please stop by my blog : http://annmakes.blogspot.com, and try to spot her!  Also stop by for more FREE project how to's.

Thank you for stopping by today!

Thursday, September 19, 2013

Jess B's - Day of the Dead - Sugar Skulls

Hello Everyone 

Yesterday we had a huge rain storm and the power went out!
Enough said. lol

Today I wanted to share my
Hispanic culture with you

In November Mexico celebrates
Dia De Los Muertos
Day of the Dead
Day of the Dead
(Spanish: Día de los Muertos)
 is a Mexican holiday celebrated throughout Mexico and around the world in other cultures. The holiday focuses on gatherings of family and friends to pray for and remember friends and family members who have died. It is particularly celebrated in Mexico, where it is a national holiday, and all banks are closed. The celebration takes place on November 1 and 2, in connection with the Catholic holidays of All Saints' Day and All Souls' Day. Traditions connected with the holiday include building private altars honoring the deceased using sugar skullsmarigolds, and the favorite foods and beverages of the departed and visiting graves with these as gifts. They also leave possessions of the deceased.
Scholars trace the origins of the modern Mexican holiday to indigenous observances dating back hundreds of years and to an Aztecfestival dedicated to the goddess Mictecacihuatl. The holiday has spread throughout the world: In BrazilDia de Finados is a public holiday that many Brazilians celebrate by visiting cemeteries and churches. In Spain, there are festivals and parades, and, at the end of the day, people gather at cemeteries and pray for their dead loved ones. Similar observances occur elsewhere in Europe, and similarly themed celebrations appear in many Asian and African cultures.

First roll out some Creative Paperclay® found this silicone skull ice tray
at the Dollar Tree.  I filled each cavity with Creative Paperclay® and bake according to the
instructions 
 
My gave me a sugar skull coloring book and used that for reference
but of course you can go on the world wide web and find inspiration
 
I carefully designed my flowers and vines with used
Faber Castell Pitt Artist Pens and Sharpie Markers and Paint Pens


INGREDIENTS
Small canvas
Sharpie Markers and Paints
Faber Castell Pitt Artist Pens
Mulberry Flowers
Puffy Paints - white pearl and gold


DON'T FORGET!!!

Do you LOVE Halloween and Creative Paperclay®?
Well this is the LINK UP Party for YOU

Just make a Halloween Paperclay Project and post it on our Link UP party on Oct 5th on our blog

You will post your project on your blog or somewhere on the internet and 
LINK it up to our blog post on OCT 5Th. 

project MUST use 
Creative Paperclay® and be a Halloween Theme.
There will be prizes...

Thursday, August 15, 2013

Jess B. - Masquerade Mask Part II

Hello Everyone,

Since my last posting I've come to discover the my littlest one, Kymora, age 4, wants to be more involved with my projects.  I don't have a door to my craft room and as much I express Do Not Enter, it just goes right over her little head.  Kymora decided to play with my mask and the rest is history.

I cannot get too mad at her as she is inquisitive. If she wants to express herself artistically why not.
I created a new mask and let her paint, glitter, and bling out the other one.

MASQUERADE MASK PART II
Once it was completely dried, I began rolling out
more Creative Paperclay® and used Lisa Pavelka - Simple Elegance Border Mold

With a cup of water and paint brush to applied the border and used the
heat gun to help me adhere quickly. 
I sprayed Adirondack Color Wash Red Pepper and Tsukineko Walnut Ink
Heat gun dry again and used the hot glue gun to give it more texture.
 
 I used silver rub-n-buff and Color Box Gold pigment ink
INGREDIENTS
Lisa Pavelka - Simple Elegance Border Mold
Ranger - Adirondack Color Wash - Red Pepper
Tsukineko - Antiquing Solution - Walnut Ink
Hot Glue
Rub-N-Buff - Silver
Color Box - Gold Pigment Ink

I hope this inspires you to create one for yourself.
The possibilities are endless.
Here is another piece I am working on

Thanks for stopping by

Tuesday, February 5, 2013

Composimold Review and Honeycomb ATC

Hey Everybody, It's Edie, Do you ever buy random things because you just KNOW you’re going to make great things with it… someday??? That was the case with the neon green, silicone pot holder I bought several months ago. It looked like a honeycomb and I just KNEW I could make something super cool with it. I wanted to use it as a stamp, put it in a painting and at least five other projects came to mind just by holding and squishing that piece of random inspiration. The problem was, I didn’t want to USE the potholder because I only had one. I thought it was impossible to mold because it is so flexible and thin that is, until I discovered Compisimold! Compisimold is a pourable, food safe silicone mold that you can melt and remold over and over again and it was exactly what I needed for this project.

You can view BOTH full video tutorials below. I don’t own a microwave, so I melted my Composimold on the stove and poured it over the potholder. Once it was completely cooled, I removed the original and I had a reusable mold that looked just like my potholder! The Composimold did have a lot of bubbles which would ruin most molds but it actually enhanced this particular project, so I didn’t mind too much in the end. The Composimold instructions recommend stirring often, but I think that is what caused all of the bubbles. If I had just let it sit and melt, I don’t think I would have had near as many bubbles. Once the mold was ready, I broke out my Creative Paperclay® and started playing. I rolled out my Paperclay over the top of the mold which gave me an absolutely fantastic honeycomb texture, and then I cut my ATC out of the textured Creative Paperclay®. I let the ATC dry completely and then I painted it, glitterfied it and added the honeybee embellishment. I wrote out my quote, painted the paper and glued it to the ATC and then I covered the text with Glosssy Accents to make it shine.

Overall I was pretty happy with the Composimold and I plan on making more projects with it. If you have something that is an awkward shape or just too soft to mold, you may want to give Composimold a try. It worked great with the Creative Paperclay® and I am really happy with the way this ATC turned out. I hope you enjoyed this project and I hope you have a Valentine’s Day that is filled with love! BIG HUGS!
Visit my blog.


Tuesday, January 1, 2013

Edie's January Quick Tip

Hey Everybody. It's Edie.
Here is my Quick Tip for January - You can cut and shape Creative Paperclay® with just about ANYTHING! When looking for tools to use in your projects, think outside of the box. You can use bottle caps, cookie cutters, plastic knives, toothpicks, a ruler, or even your fingernail and that is just for cutting! Try pressing Creative Paperclay® into molds, stamps or embossing folders to get some great texture and different shapes.
Happy New Year!!!!!
Visit my blog

Tuesday, December 4, 2012

Super Fast (STRESS FREE) Ornaments

Hey Everybody, It's Edie, I can not believe it is already December!!!! This year has flown by and the Holiday Season is now upon us.

 With the holiday season comes gift giving, decorating, crafting and blog hops! With that in mind I have created a BRAND NEW CLASS "Mixed Media For The Holidays" and it is now available!

In the class, I teach you how to make three holiday projects that will help you in all of your decorating, crafting and gift giving endeavors. There is even a bonus lesson for an extra embellishment ;) All of the projects are made using simple, common household items and inexpensive crafty supplies!

After finishing the projects for my class, I was on a Holiday crafting roll! I was able to create the base for these TEN ornaments in less than 10 minutes using the technique I am sharing with you today. These ornaments are so simple, fast and stress free, you will be able to produce a handful of them before the holiday cookies finish baking in the oven!

 DSC07092

These ornaments are perfect for teacher's gifts, class projects, family crafting, art swaps, unexpected visitors, all of those people you would like to get something for but just don't have the money, your mail carrier, vet, favorite coffee barista and the list goes on and on!!!!

 DSC07106

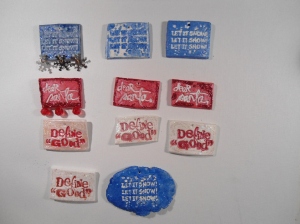
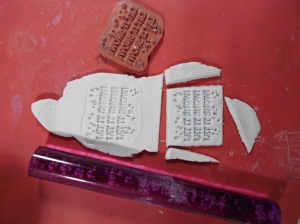
Simply roll out some Delight® or Creative Paperclay®. Brush a stamp with water and tap off the excess. Press the stamp into the clay and cut into desired shapes! Simple, simple, simple :) You could even use cookie cutters instead of a straight blade to give your ornaments even more personality.

DSC07093

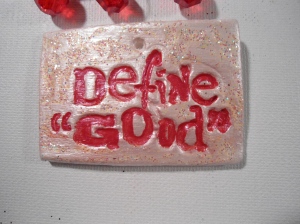
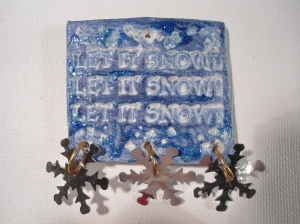
Paint, embellish and glitterfy to your hearts content and then share them with everyone you know. A great idea would be to have these hanging on a wreath designated for visitors. As they leave, they can choose an ornament to take home and display.


DSC07095

I hope you enjoy this project and I hope it helps to make your holiday season just a little less stressful. BIG, BIG Hugs!!!!!! You can always find inspiration on my blog.

 DSC07094

Tuesday, November 6, 2012

Edie's November Tip

Hey Everybody, It's Edie :) I just wanted to share this helpful quick tip for using Creative Paperclay® in your projects. Creative Paperclay® can be painted while it is still wet or after it is dry. However, if the clay is still wet, keep in mind that paint may make it TOO wet and you could end up accidentally messing up all of your hard work. If you want to paint a piece as soon as possible, stick it in the oven on 225* for 5 - 10 minutes. That will allow the outer layer of clay to harden enough to paint without becoming too wet. See you in two weeks with my project for the month!

Monday, October 15, 2012

Elphaba - Mixed Media Art Doll

 Hey Everybody, It's Edie,

On my personal blog I am doing a 31 Days of Halloween series. Today is  Day 15.
Today's post was two and a half months in the making, but I think it was well worth all of the time, effort, restarts, errors and triumphs! Elphaba is a 3ft tall mixed media art doll and she was inspired by the play "Wicked." You can view the full video walk through below.


She started as a wire armature covered in aluminum foil, then I sculpted her entire body using Creative Paperclay®. Her hair is individual sections of wool roving.


Her dress and hat are both handmade using fabric scraps, ribbon and lace. Her base was made using a wire armature, covered in masking tape, covered in Spackle, covered in MORE masking tape. I painted and stamped inside the base, then I added chipboard gears and stitched in the chipboard clock.

There is even a light up inside her base that shines down on everything inside.

The flying monkey is a hand sculpted polymer clay face with a Creative Paperclay® body.

The shoes are plastic cake toppers coated in fine, iridescent glitter.


The crystal ball is a clear glass Christmas ball that has been painted with layers of glaze and alcohol ink. The base was once a candle holder that I painted black, then I created the holder with an old earring.

The Grimmorie is a wooden block from a stamp that I covered in tissue paper and painted.

The green glass bottle was also painted with layers of glaze, then I added a glitter flourish and alcohol inks to distress it.


I am very proud of how she turned out. I never thought in a million years that *I* would be able to create something like this.
Elphaba is for sale, so if you are interested in purchasing her you can leave me a comment and I will get you my email address.