Showing posts with label dolls. Show all posts

Wednesday, June 7, 2017

How to make a hollow Creative Paperclay ® art doll tip by Gloriann Irizarry #artbygloricom

How to create a hollow Creative Paperclay® art doll  
June 2017 Tip By Gloriann Irizarry
#artbygloricom
 
 
Wow,  it is almost summer!
  Weather is finally warming up, birds are chirping, and kids are playing outside. In this June tip I will include the way I make my art dolls hollow so that  they are lighter and can be attached to the painted canvas to be easier displayed. I love making these girls:  they are so much fun to make and they look great inside shadow boxes. Here is the process I came up with to make it a lot easier to remove all the inside armature without destroying the piece. It is easy to do so if you follow my instructions.
And if you DO like this post, feel free to share it with all your friends!
 
Materials
Heavy Duty Aluminum foil
Paper Scotch Tape


I like to use heavy duty aluminum foil because it is a lot stronger and thus easier to manipulate to create a strong armature for working on your art doll.


Find a shape that you want to use as the base for your figure and lightly shape and  recreate it by manipulating the aluminum foil.
You can use your hands, hammers or the tape to hold the shape in place.


Make sure to move the piece around and that it lays flat -  this will help you be able to create a even surface so you can later easier add your sculpture to the canvas.
 Turn the piece over and create a string with the scotch tape so you can later attach a  pen, pencil, or chopstick (something strong to assist you in pulling the final piece away from the armature).
 
 
Grab another sheet of aluminum foil.
Lay it flat over the already sculpted aluminum foil armature.
 
 
Press around the armature very lightly.
Work all the corners and edges so they are clean with the flat surface of the table.
  
 
Now you can roll a clay sheet to a 1/4 thickness and wrap it around the armature.
 
 
Make sure you press the clay all around the armature to make it lay flat, then set it aside to dry. I recommend you let it dry overnight  or set it in the oven at very low heat for an hour or two depending on the size and thickness your sculpt.
 
 
This is how the back of the piece will look once the clay is laid over your foil armature: 
Once the piece is dry, attach the pen or stick of your choice to help you remove the main armature core from your piece.


The image above shows how your figure will look like once the core is removed. Go ahead and carefully pull the aluminum foil away. Now it is normal that you may find a damp soft spot under this foil layer so be very careful when removing it.
 
 
This is how the final dry Creative Paperclay®  hollow piece should look.
 
 
I hope you have enjoyed this article. If you find it helpful, feel free to share it!
Sincerely
Gloriann Irizarry
Social media @artbygloricom #artbygloricom


Tuesday, January 27, 2015

Gloriann Irizarrys ooak cloth dolls how to add a Creative Paperclay face tip


2015 Has arrived with new ways for you to share and learn from your Creative Paperclay Material ®. Yes a more interactive way for you ask questions and learn new ways, tips, tecniques and ideas. You can share photos and get feedback on new ways to tackle any thing Paperclay relate. Yes what a wonderful way to start a day by helping and guide others and we got a new way for your questions to be answer by the whole Creative Paperclay Designer Team and many other Members of our new Facebook community. All you have to do is search for us here  Creative Paperclay Q&A. Simply create a post with each question so we can answer each one to the fullest details. We will gladly share any tips or techniques that will guide you thru your Creative Paperclay Material®  designs.Feel free to stop by and join us for many great questions, tip and techniques.See you there :)

Now let share here one of our dolly community commonly asked question:
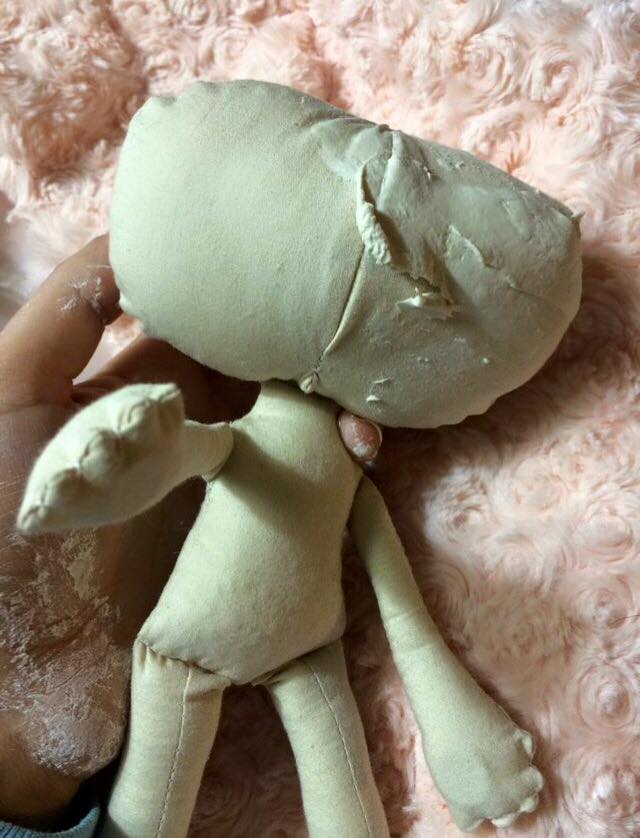
Wonder how do I add Creative Paperclay Material ® to the head of my cloth doll sculpt?
I want to sculpt more detailed face.

Easy I will be sharing my own technique in this post and let you examine all the groups responses just click here Creative Paperclay Q&A. Now  I will post photos of a doll i did and let you know all the techniques learned

2015 Llegó de una manera más interactiva para aprender a usar el Material Creative Paperclay®. Sí, aquí en nuestra nueva página de Facebook Creative Paperclay Q&A. Simplemente háganos sus preguntas en un post, y todo el equipo de talentosos artistas del Diseño podrán darle algunos links para que le ayude en su trabajo creativo.   


Ahora  vamos a compartir una de las preguntas más interesantes que recibimos en nuestra página de facebook,  especializada en hacer muñecas exclusivas, totalmente artesanales.  Todas son unas obras de arte.

¿Cómo podemos añadir Creative Paperclay Material® a las caritas de las muñecas de trapo?
Me gustaria poder escupirle y darles más detalles en las caritas de ellas.

Ahora para esta pregunta voy a compartirles mis propias experiencias y como es que yo las hago. Hay diferentes formas de hacerlo. Aquí les mostraré mi propia fórmula.
Cualquier pregunta, o si quieren compartirnos sus propias experiencias por favor, con  confianza, pase por nuestra comunidad abierta de Facebook clickeando aquí


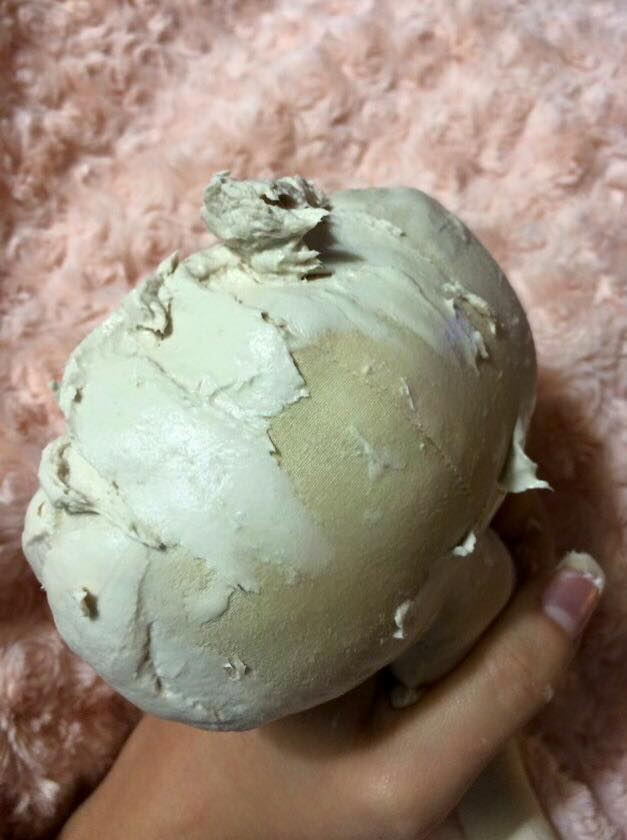
You want to make sure the clay adheres to the cloth properly so you sculpted face
will not  fall once the clay is all dry.
To achieve it make sure you add a thin layer of Creative Paperclay Material ® is very wet
and apply it all over the are you want the dolly face to be.
Press it firmly covering all the face in a thin layer and set it aside to dry.

Para asegurarse de que la masa se pegue bien a la cabeza de la muñeca, deje que cada capa de la masa Creative Paperclay esté completamente seca antes de añadir la segunda capa, sólo así se podrá asegurar que la masa estará completamente adherida a la tela.

La primera capa de la masa Creative Paperclay Material®  debe ser aplicada muy fina y húmeda. Apriete bien la masa con sus dedos contra la tela para que se pegue bien una vez que esta seque. Si desea puede proteger las partes de la muñeca donde no va a ser aplicada la masa de papel, con un plástico o si prefiere déjela al descubierto,  es decisión suya.
Déjela que seque completamente en un lugar seguro.
El tiempo de secado puede variar según el lugar donde usted esté trabajando.


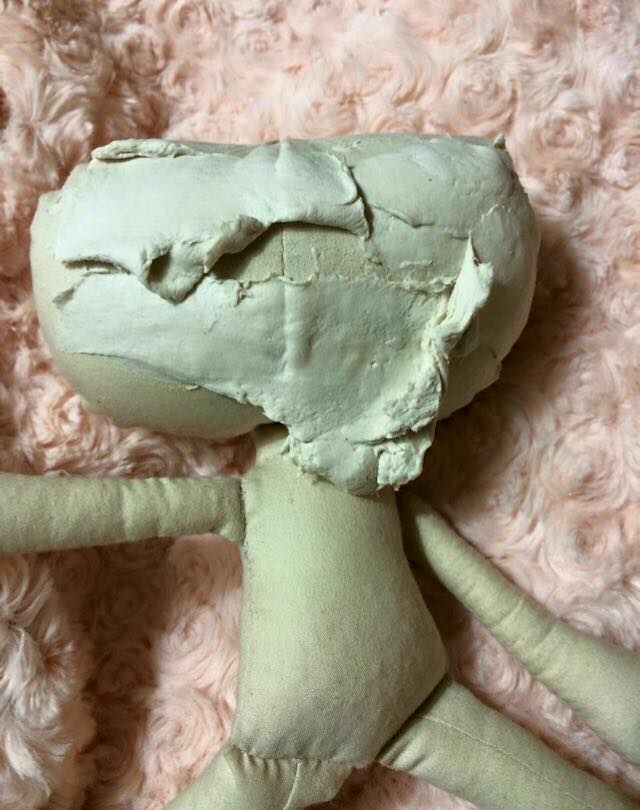
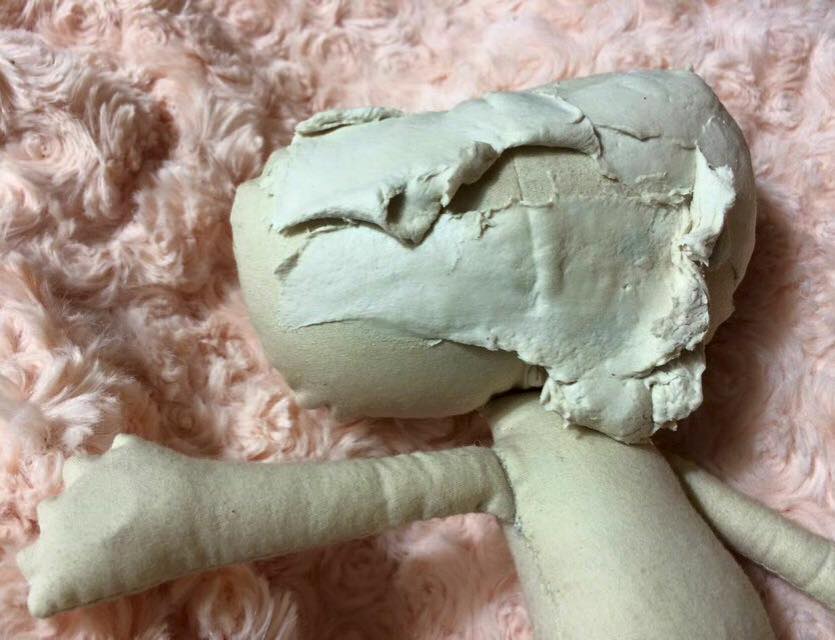
After the first thin layer of clay had dry go ahead and add a second little ticker clay sheet over.
Make sure is very wet and be a little gentle with the second layer you don't want to peel the first layer but to add more thickness so you can later work your details of you dolls face on the following layers.

Una vez que la primera capa de la masa de Creative Paperclay Material® esté completamente seca y libre de humedad, usted podrá comenzar a trabajar la segunda capa un poco más gruesa que la primera.
Hay que trabajar la segunda capa delicadamente ya que la nueva masa va a estar húmeda, y puede que debilite la primera capa ya que fue aplicada muy fina. Poco poco cubra la cara y déjela que seque completamente.

You can add little by little. Layer by layer till your satisfied.  Now there is no wrong way to where the clay needs to stop or were it need to be at. Yes it is all up to you and your artistic vision so feel free to add or remove has long you feel happy with the end result you will be able to create your own pattern for future dolls so feel free to experiment and and always take notes of what you like and don't like for you to reference on your next dolly or BDJ project.

Puede añadir poco a poco capa por capa hasta que se sienta completamente satisfecho del grosor que quiera que su trabajo al final tenga. La última capa es en la que va a esculpir los detalles finales de su muñequita. Siéntase libre de experimentar, poco a poco va a aprender el tiempo que toma en secarse cada una de las capas.
Al final esta masa puede ser tallada y lijada para darles los últimos detalles que va buscando que su muñeca tenga. Asi podra crear sus propios estilos y patrones. Recuerde siempre tomar nota para que le sirvan de referencia en los futuros proyectos que tenga en mente.


The back of the doll.
Well here you can add more clay if you want the whole clay head or don't if you have a wig plan no need to since these can be glued or even sewn  that will be up and your artistic vision.    

 La parte posterior de la cabeza

Aquí puede añadir masa o dejarla al descubierto.  Para esa decisión, es muy importante que tenga en mente que tipo de pelo va a poner a la muñeca. ¿Usará peluca? ¿O el pelo estará cosido con hilos de lana? Fácil, si le va a poner una peluca, yo recomiendo cubrir toda la cabeza con la masa de papel, y si va a coser el pelo de la muñeca pues déjelo al descubierto. Todo depende de su gusto como artista.

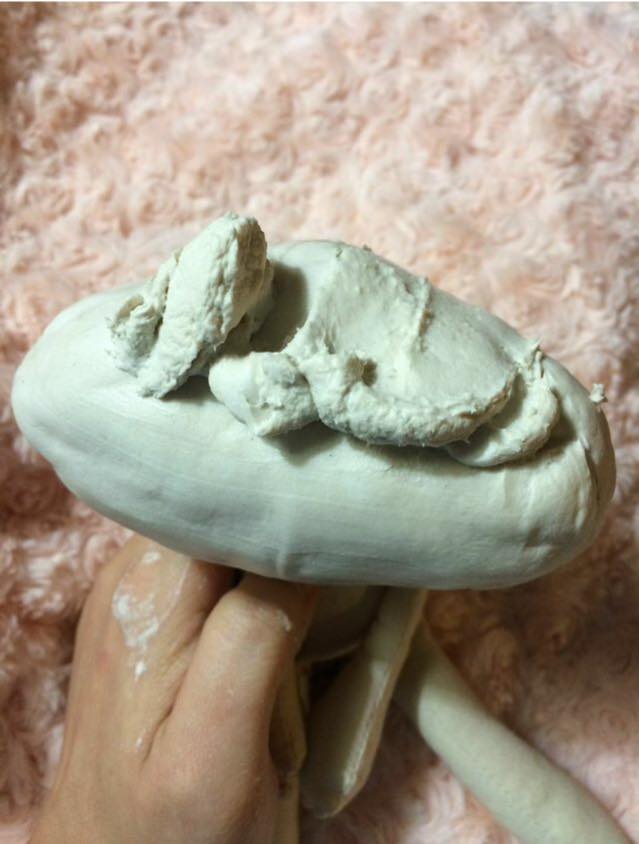
Top view
The top of the dolls head  should be fully covered in a few layers of the Creative Paperclay Material® This thick layer of Paperclay is for your gluing the wig it gets a solid surface to hold on. Make sure you smooth the la yer and set it aside to dry.

En la parte superior de la cabeza de la muñeca se le puede cubrir con más capas gruesas de Creative Paperclay Material®. Recomiendo esto si va a pegar una peluca para que luego esta no se despegue.

Antes de pegar la peluca, asegúrese que la masa esté completamente seca antes de ser pintada. Luego proceda al pintado y sellado dando, a cada paso, el tiempo correspondiente para el secado necesario.


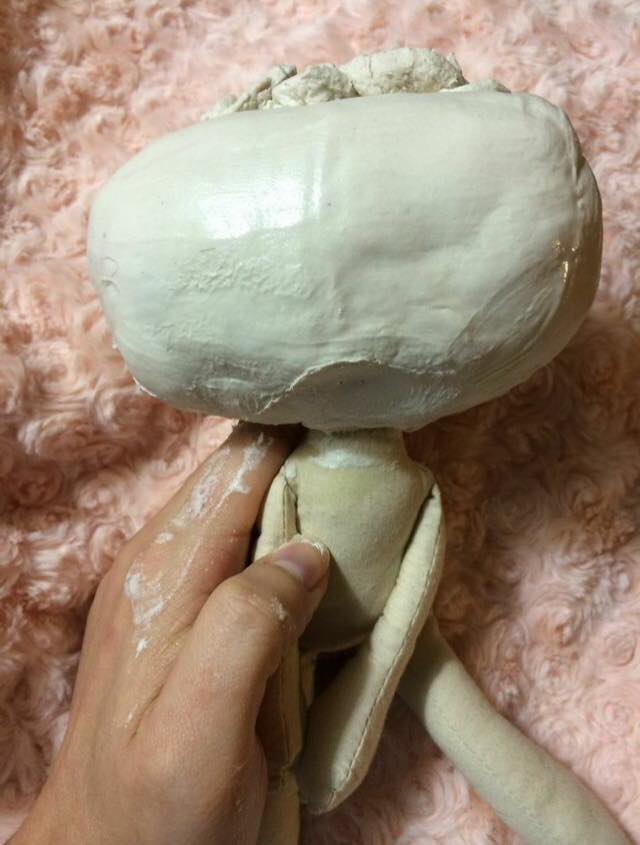
Front view.

Make sure all the clay is smooth before you let her dry so her head will be even and shape to the final size your looking your one of a kind Cloth + Creative Paperclay Material ® Doll.
Rubbing it with totally wet hands helps smooth the surface and reduces the chances of sanding later on. The finish product is entire up to you since there is so many ways to create many finished with the paperclay and this is why it is interesting once it added to a normal sewn cloth doll.
The possibilities are endless so feel free to experiment and share your finding with our Facebook community Creative Paperclay Q&A .


With this January 2015 Dolly Tip  I now leave you and remember  


Cuando trabaje la última capa asegúrese de humedecer bien los sus dedos y frote todas imperfecciones de la masa, esto le  va a economizar tiempo en el momento de   El resultado final es totalmente suyo, ya que solamente su visión le que va a guiar a lograr que su muñequita sea única y especial

Recuerde que si usted puede soñarlo, Usted puede hacerlo. Nunca se rinda.


Sincerely
Sinceramente


Friday, July 25, 2014

Kid's Project: Clay Puppets

Hi!! Chloe and Carole here with a fun Creative Paperclay® project for you.

Chloe loves imaginary play, and often sets up whole scenarios with dolls and toys. So, we decided to make clay people for her to use.

We started by forming a 1" ball of Creative Paperclay®.

Next, Chloe flattened the ball until it was about 1/4" thick. I inserted a plastic coffee stir. I found that this is easier to do if you leave the flattened ball on the work surface, and gently guide the stir into the clay.


We set these aside to dry, and made facial features for our little clay people. One nose is a tiny ball, the other a tiny flattened ball. The tongue was part of a popsicle made using a canape cutter. (I added the crease with my fingernail.) The mouth on the yellow doll was made by gently pushing the handle of a small paint brush into the clay at a slight angle. The hair was made using a clay extruder. 

As the clay faces were drying, I turned them over every few hours so they could dry evenly on both sides. When all the parts were dry, Chloe painted each of the parts. Then, we glued everything together and added googly eyes. 

Here are our finished clay puppets.


Carole

Chloe

Table Cell Table Cell

Friday, July 4, 2014

First Friday Fan Day July 2014 with Rachel Whetzel

Hello, once again, Blogiverse!  Rachel Whetzel here! Can you believe it's already JULY!? I don't think it's just me... this year seems to be flying by at a break neck speed. This month, I have been browsing the web, looking for creations from YOU using Creative PaperClay®!
I hope you hop over to the links I'm sharing with you today, and let your fellow Creative PaperClay® lovers know you saw what they shared too!


FACEBOOK
On Facebook this month,
Darlene McElroy shared THIS amazing piece she recently made, along with THIS ONE!

PINTEREST
Check these pins out!!
Ellen Harris' Dolls were pinned HERE, by Tere Wood 
Lisa Beem pinned THIS bracelet cuff on Great Craft Ideas
CraftersExChange pinned a SCARY TREE tutorial from MiniMotion.com

TWITTER
Diana Welte tweeted her DOLL IN PROGRESS

AROUND THE WEB
Design Team Member, Susan Owenby saw THIS amazing HARRY POTTER piece shared on the world wide web by Jen of Cake Wrecks on Epbot.

HELP ME FIND YOU!! 
Use the hashtag #CreativePaperclay on all your social networks. Be sure, when using Facebook, that you make your posts and images using the Creative PaperClay® hashtag are set to public, otherwise, I won't be able to find them. You can also share your projects to the Creative PaperClay® FACEBOOK PAGE. Each month, I'll browse the interwebs looking for projects from YOU, that I can share here! Be featured next month! START SHARING NOW!!

Thanks for reading! If you'd like to keep up with me, and see more of what I'm up to, I'd also love it if you'd visit MY BLOG and Subscribe! You can also find me on FACEBOOK!

Saturday, October 27, 2012

Creepy Kirk the Ghost

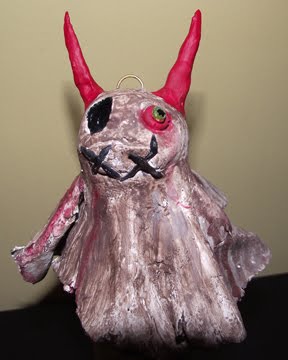
This my last post for the Creative Paper Clay Design Team. I had a blast working and coming up with so many new ways to work with this product and I had the privilege of working with amazing people. This month I made a Scary Ghost to hang with my Amazing Mold Putty Project. I took the Paper clay and rolled it out and didn't care how it went, the more raggedy edges the better! I rolled a piece of the clay in a ball for head and draped the rolled out piece of clay on top. I used a bottle for it to sit on and drape over. I then pinched the clay on bottom cut out eyes, added horns, added a mouth and added a few stitches by rolling small pieces of clay. Once dry, I painted it with watered down brown acrylic paint and added details and painted horns red. It was simple but fun and I love these sitting around inspiring me!

Saturday, October 13, 2012

Kellys Creative Paper Clay Tip 10/13/12

My Creative paper clay tip is a bit bizarre but I found out this by accident and then fell in love with it. I love doing dark dolls and art at times. If you make a mold out of your creative paperclay (by sticking a face,doll, bat etc) in it and leave it dry you can then use it as a mold and the small cracks and shrinkage add to the deliciousness of the project, especially when you paint it! Try it! It is fun especially for the kids!

Saturday, October 8, 2011

Skeleton Doll Tutorial

Halloween comes in just a few weeks and I have found myself very much in the zone for creating all things ghoul and ghostly. I have decided to give a tutorial on how to make a skeleton doll by utilizing a simple technique for making a skeleton head combined with my technique for making a doll body out of Creative Paperclay. Hope this gets you in the mood for trick or treating as much as it has for me!!!


What You'll Need
Creative Paperclay
Styrofoam ball - 2" or 3" cut in half
Cup of warm water for sculpting
Sharp pottery tool or toothpicks
6" of 12 gauge garden or jewelry wire
12" of 24 gauge jewelry wire
Acrylic paint
Fabric, lace, ribbon, buttons, etc.
Thread and needle or strong craft glue


What To Do
1.  Take your styrofoam ball cut in half, mold it a bit into an egg shape, and cover with paperclay. Use water to dampen, smooth, and blend the clay into the ball.


2.  Take two fingers or your thumbs and press eye sockets into the clay. Press up a bit to create little eyebrow ridges.


3.  Take your sharp tool or toothpicks and create little nostril holes in the shape of triangles or teardrops.


4.  Take a small bit of paperclay shaped in a symmetrical leaf shape, dampen with a tiny bit of water, and place where the mouth will be. 


5. Take your sharp tool and carve a mouth. I prefer lips and a line that divides the jaw and top of the head. Feel free to carve in teeth, a smile, a frown, a scared expression....whatever you prefer! I also like to add little details here, like little carvings above the eyebrow ridges, stitch lines over jaw line, heart shapes on the cheeks. You have creative control!!!


 6.  Take your 12 gauge wire and cut a 5" length. Insert this wire into your skeleton's head, a little off-center toward the back of the head. This will be your doll's neck and armature for its torso and waist pieces.


7.  Roll out a small snake of paperclay and insert it over the wire. Skeletons have bony necks, so make this part really skinny. Use a toothpick or your sharp tool to make the individual neck bones. 

8. Sculpt a two triangles out of the paperclay for the neck, top half of torso, and bottom half of torso. 

9.  Add two triangles with the tips touching each other to the wire.

10.  Dampen fingers and break off small pieces of paperclay to fill in gaps between the cylinder and two triangles. Smooth the clay as you go using slip which simply means that you take a small amount of paperclay, dampen it in your cup of water, and smoothing it between the two body pieces.  

11.  The pictures that were meant for the rest of this skeleton doll tutorial were lost due to a technical glitch. Sooo....To build the rest of this doll, visit one of my previous doll tutorials following steps #9-20. http://creativepaperclay.blogspot.com/2011/08/paperclay-kitty-doll-tutorial.html  You can also see how this doll body comes together by reviewing this tutorial!!! Please note that the neck style on the skeleton doll is completely different from the Kitty Doll. The skeleton doll neck does not need to be blended into the torso!!!

12.  Now that doll is assembled, go ahead and paint it. Allow paint to dry, seal with varnish and allow to dry again. 

13. And once the doll's paint is dried and sealed...EMBELLISH LIKE CRAZY!!! Visit another previous tutorial of mine to learn an easy technique for dressing your doll!!! http://creativepaperclay.blogspot.com/2011/08/glue-and-wrap-dressing-technique-for.html

My doll is far from finished, but this is what she looks like so far! 


Hope you enjoyed this tutorial! I'll be posting better pictures of my completed doll...hopefully this weekend. Please visit http://marissartdolls.blogspot.com/ when you have a chance! Until next time, happy creating!!!