Showing posts with label blog hop. Show all posts

Monday, October 6, 2014

Link UP party

We are so excited to see everyone project for the LINK up party

.
Today is the day to LINK up your Creative Paperclay® project(s).  One project per LINK please.   Below you will find a link to link your Creative Paperclay® project to this blog post.  Each person who link up a project will receive a small package of Creative Paperclay®  Please email Terri Sproul your address at terri@ultimatescrapbookretreat.com with LINK UP in regards and add your project to the email

One Lucky person will Win a Grand prize of 2 Large Packages of Creative Paperclay® - this person will win by Vote only...  All entries MUST using Creative Paperclay in their project.

One Luck Blog HOP will win a small package of Creative Paperclay® - all you need to do is hop to each of the link below and leave a comment on each of their posts.

IF you are interest in Creative Paperclay - we are have a Design Team call - you will be required to post two projects per month on our blog and will receive Free Creative Paperclay® for your 6 month Term.  See Blog (top button) for more information.

Here is the Link to LINK UP


Saturday, February 8, 2014

Valentine Link Party

Welcome to the Creative Paperclay® Link Up Party, where YOU have the chance to be part of the fun!
 
Have you been creating with Creative Paperclay® this Valentine season?
Now is your chance to show off what you've made!
If you don't have a project to share, you can STILL take part in our party!
Taking part in one or both of the following ways will enter you to win:
1 package of Creative Paperclay®
1 package of Delight

To be entered to WIN:
  1. Post a comment when you visit the blogs that are linked in the InLinkz widget below.
  2. Add a direct link to your project in the InLinkz widget below to be entered again! 
The Creative Paperclay® Design Team have shared their projects too, but are not eligable to win our prize. They will, however, be visiting YOU to see what you've shared, and leave you some love.
We can't wait to be inspired by YOU! 

Thursday, January 23, 2014

Susan's January tip & game: Wood armatures for sculpting.

Greetings from Susan at theboredzombie.com! I'm so glad you stopped by today for a few thoughts on wood armatures for sculpting. Armatures are important in your work for several reasons:
  • Strengthen your work by giving the clay a stable surface to adhere to through the entire sculpture
  • Can be used to permanently attach your work to a base
  • Saves clay and money by using inexpensive materials (such as wood or foil) for thick areas
One benefit of Creative Paperclay® Modeling material over polymer clay is that Creative Paperclay® can adhere to wood.  Wood is a natural material that shrinks and expands with varying amounts of moisture. It almost always leads to damages and cracks when used in polymer clay pieces. Creative Paperclay® is unaffected by the wood shrink which opens a world of options for this polymer artist.

I went on a trip to the craft store to take a look at some of the wood shapes they had. Here's a selection of them that have potential and all cost less than $2.75, most around $1.00.


Being able to use wood is so exciting to me! There's so many options and things to be made I just can't seem to make a decision. I thought it might be a fun challenge to make it a little game. You've all heard about the Creative Paperclay® Modeling Material Blog Hop coming up on February 8th right? I'm going to let you pick my armature! Choose which shape you like best for whatever reason you like it, even if that reason is to challenge my brain! Put its number in the comments and any suggestions you have to help me along. I'll buy the armature with the most votes on Jan 27.


If you're feeling really froggy, maybe you'll try the winning shape too?


Sunday, October 13, 2013

Link Up Party Winner


We Had a wonderful
turn out on our Link Up Party
Thanks So Much

Our Winner is
By: LeeAnn Kress

Thanks Again for all the wonderful comments, 
please continue to visit, we are announcing 
a new Design Team Soon

Friday, October 4, 2013

Link Up Party


Join Our Link Up Party

Link up your Halloween Creative Paperclay®
Project up and be enter to win

If you are here to enter:
click the Link Up button and add your project

If you are here to check out the Project
VOTE for your favorite

If you are wanting to join our Design Team
you should have sent your bio to Terri Sproul and now just add your link to our link up.  

Winner of the Link Up party will be announced on 
Oct 12th, here on this blog

Tuesday, September 24, 2013

Barbara's Tips and Techniques for September

Hello Creative Paperclay® fans, and welcome back to the blog.  Yesterday was the Autumnal Equinox, signifying the end of Summer and the beginning of Fall.  I am really looking forward to Fall, with that crispness in the air and cooler temperatures.  How about you?

The more I work with Creative Paperclay®, the more fun things I discover, from how to paint it, to how to mold it.  It never occurred to me, until recently, that the thinner I roll out the clay, the more flexible it is when dry.  I also discovered that it is quite strong and does not break or crack, like you might think.  This is a real asset when you want a piece of clay that is paper thin and will wrap around your project, or just be flexible for whatever purpose you choose.

So, don't think you have to roll out your clay thick, like 1/4" thick or so, unless you need it to be.  Think of it as making your own paper out of clay.  It is, after all, paper in clay form.  See my previous post where I made honeycomb so thin, the holes remained intact.  Or how about the "sheet" of music I made to add to any project, pun absolutely intended.

You can roll it out thinly on a texture sheet, a rubber stamp, or even a piece of lace or burlap fabric, to get a ton of various textures.  You can even mold items without filling the mold to get thinner pieces, if you want it to be flexible.  You are always only limited by your imagination.  So, unless you need something stable and strong, then have some fun making "sheets" of Paperclay®.

REMINDER ALERT

Don't forget that we are having a Halloween blog link up on 5 October, combined with a design team call.  What better way to showcase your work and share it with the world!!!  And you never know, you could win one of the prize giveaways.  So go ahead, give it a try.  Create something with Creative Paperclay® products and link up to the blog to enter to win!  And if you would like to try out for the design team, check out the information here.
I am so glad you stopped by today, and I hope you enjoyed my tips.  Please check out the Creative Paperclay® online store, and visit the blog for more inspiration.  If you have any questions about the link up, please feel free to ask me.

Have a wonderful week, and play with some clay for the link up!

Barbara


Friday, September 6, 2013

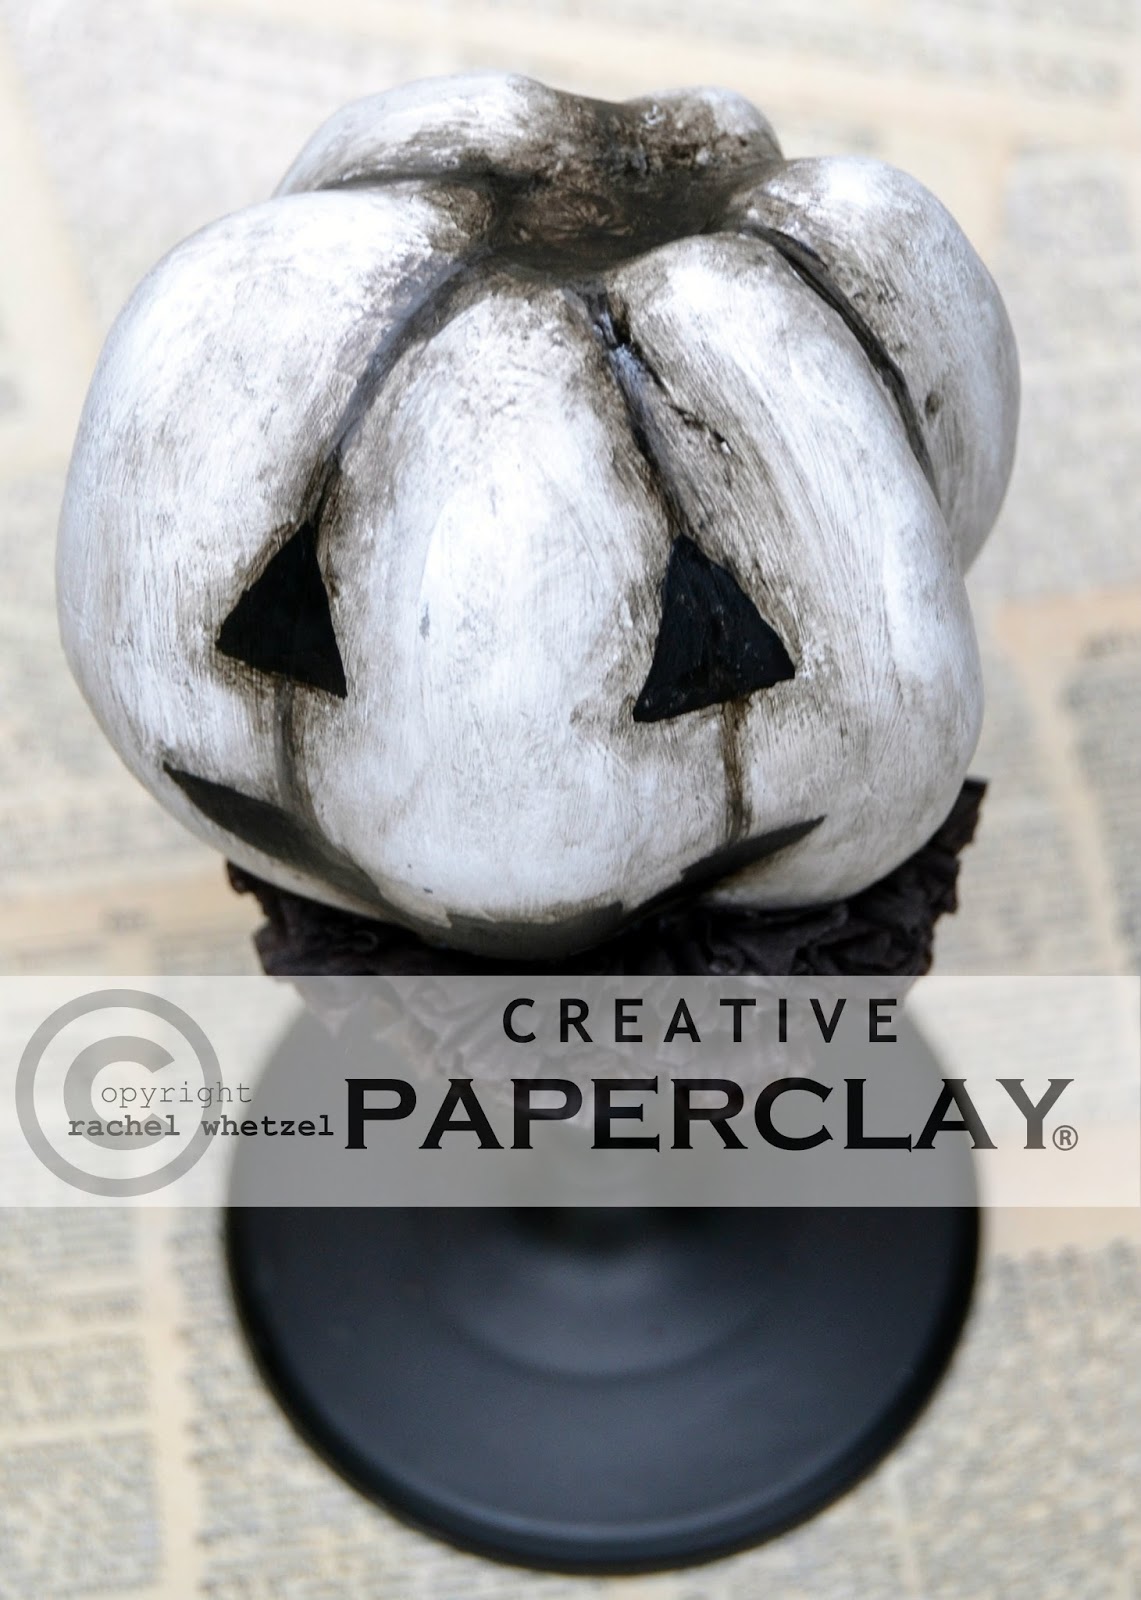
Halloween Pumpkin by Rachel Whetzel

Hello, Creatives!! It's Rachel here! The weather here is feeling more and more like Fall every day, and it's gotten me in the mood to create some goodies for Halloween!! Today, I'm going to share my process for making this spooky Jack 'O Lantern Pumpkin using Creative Paperclay® modeling material.
If you'd like to make one for yourself,
YOU WILL NEED:

I started by creating my base shape using the techniques I have shared with you in PREVIOUS POSTS.  Once the base' clay is dry, I made "ribs" for the pumpkin by rolling out some rough shapes.
 Then I laid the ribs onto the base shape, and pressed the ribs into it while they were still wet. To make the dry clay and the still wet clay stick, use some water to wet the dry clay. This will create a good bond between the two pieces.
 Here's what the ribs looked like when I was done pressing and shaping them onto the base.
 Once the ribs were dry, I painted grey stripes into the valley areas of each rib. Then I followed behind the stripe with some stain to shade and blend the lines a little bit.
 Next, I painted a Jack 'O Lantern face onto my pumpkin using black paint, and then added more shading with the stain. While that paint was drying, I made a crepe paper collar and glued that to the top of my candle stick. Then I turned the stick upside down to help hold the collar into place while the glue dried.
 Here is the finished piece!!
Have YOU got any ideas for something spooky to create with Creative Paperclay®? Leave me a comment, and let me know what you 're planning!!
Don't FORGET!!
 We'll be having a Halloween Link Up on October 5th, here on the blog!  
Be sure to get your creative juices flowing, and come share YOUR Halloween projects with us!
I would love for you to visit me at my "house" too!! Thank you so much for reading!!  ~rachel 

Saturday, September 29, 2012

It's a Blog Hop


WELCOME
The Creative Paperclay®
and
Amazing Mold Putty
Design Teams
are so happy you have join us on this exciting adventure.
These two team have join up together both using 
Creative Paperclay®
and
Amazing Mold Putty
But YOU are getting all the prizes
and all you have to do is
VOTE
yes, vote for your favorite project at the end of this hop.
you will be enter to win one of three Blog Candy prizes
or

Now it's time to check out all the blogs
next stop if our Team Leader's Blog

Here is the rest of the blog just in case you get lost along the way, 
DON'T forget to vote at the end.

Wednesday, February 1, 2012

BLog Hop - Love Cast in Clay

Welcome to our first blog hop with both Creative Paperclay® Design Team and Amazing Mold Putty design team.  These two products are a match made in heaven.  Truly they are...  with Amazing Mold Putty you can mold just about anything, and that team has tried...  LOL....
once you have made a mold - you can put your Creative Paperclay® into that mold.  SEE what I mean..  match made in heaven....  As you hop through this blog hop you will see what I mean...   


We are doing blog candy with this hop also.  I have 4 packages of Creative Paperclay® and 4 packages of Amazing Mold Putty to give away...  All you have to do is leave a comment and become a follower of all the blog on our blog hop and you are entered!  I will post a winner on Feb 5th on both this blog and Amazing Mold Putty Blog

Here is the list of all the blog - just in case you get lost..  Thanks so much for playing along.