Showing posts with label armature. Show all posts

Monday, November 4, 2019

Making Armatures for Your Sculptures


Hello, welcome to another post! Today I am going to talk to you about the insides of your sculpture otherwise known as the armature. To sum it up, the armature is the skeleton of your sculpture, the “bones” that support the actual body of the sculpture. An armature is needed when working with air-dry clays. It can be anything from a bottle to the cardboard tube that comes on a toilet roll or paper towel. I recently did a show on Armatures that can be used with Creative Paperclay®. I have included the video below. I go over the sculptures that I have made and what I have used as armatures.
For those of you interested in sculpting, I host a show called Clay Talk on Facebook live the first Thursday in every month. It is on the Creative Paperclay Modeling Material Facebook page. If you miss the live show don’t worry. I will be posting the videos here. Below is the show on armatures.


I hope this was helpful. If you have any questions just ask away in the comment section below. You can also learn a lot on the Creative Paperclay Q & A Group on Facebook. Don’t forget to join the live show on the 1st Thursday of every month.  This month another design team member, Gloriann Irizarry, will be hosting the show and will share with you how to make jewelry with Creative Paperclay®. Don't miss this one, you could make great presents! Mark your calendars - November 7th at 8pm EST


Thanks for stopping by!

Wednesday, June 7, 2017

How to make a hollow Creative Paperclay ® art doll tip by Gloriann Irizarry #artbygloricom

How to create a hollow Creative Paperclay® art doll  
June 2017 Tip By Gloriann Irizarry
#artbygloricom
 
 
Wow,  it is almost summer!
  Weather is finally warming up, birds are chirping, and kids are playing outside. In this June tip I will include the way I make my art dolls hollow so that  they are lighter and can be attached to the painted canvas to be easier displayed. I love making these girls:  they are so much fun to make and they look great inside shadow boxes. Here is the process I came up with to make it a lot easier to remove all the inside armature without destroying the piece. It is easy to do so if you follow my instructions.
And if you DO like this post, feel free to share it with all your friends!
 
Materials
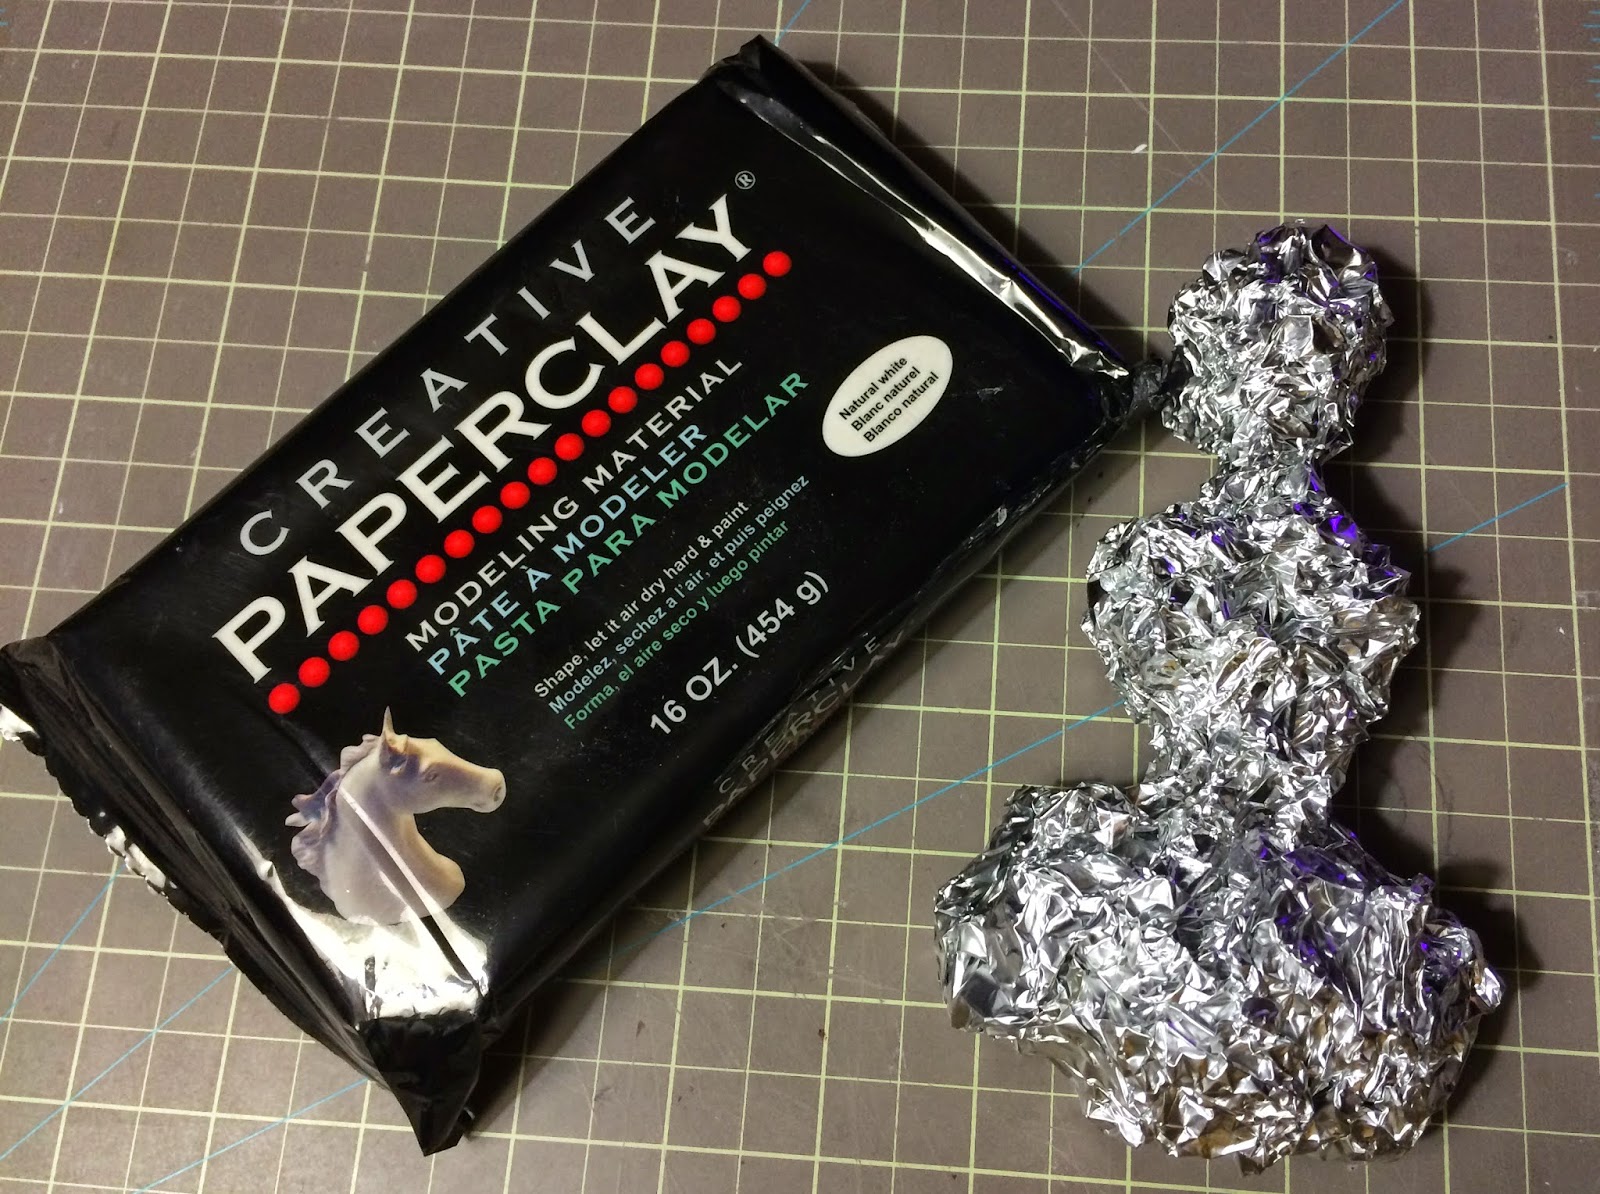
Heavy Duty Aluminum foil
Paper Scotch Tape


I like to use heavy duty aluminum foil because it is a lot stronger and thus easier to manipulate to create a strong armature for working on your art doll.


Find a shape that you want to use as the base for your figure and lightly shape and  recreate it by manipulating the aluminum foil.
You can use your hands, hammers or the tape to hold the shape in place.


Make sure to move the piece around and that it lays flat -  this will help you be able to create a even surface so you can later easier add your sculpture to the canvas.
 Turn the piece over and create a string with the scotch tape so you can later attach a  pen, pencil, or chopstick (something strong to assist you in pulling the final piece away from the armature).
 
 
Grab another sheet of aluminum foil.
Lay it flat over the already sculpted aluminum foil armature.
 
 
Press around the armature very lightly.
Work all the corners and edges so they are clean with the flat surface of the table.
  
 
Now you can roll a clay sheet to a 1/4 thickness and wrap it around the armature.
 
 
Make sure you press the clay all around the armature to make it lay flat, then set it aside to dry. I recommend you let it dry overnight  or set it in the oven at very low heat for an hour or two depending on the size and thickness your sculpt.
 
 
This is how the back of the piece will look once the clay is laid over your foil armature: 
Once the piece is dry, attach the pen or stick of your choice to help you remove the main armature core from your piece.


The image above shows how your figure will look like once the core is removed. Go ahead and carefully pull the aluminum foil away. Now it is normal that you may find a damp soft spot under this foil layer so be very careful when removing it.
 
 
This is how the final dry Creative Paperclay®  hollow piece should look.
 
 
I hope you have enjoyed this article. If you find it helpful, feel free to share it!
Sincerely
Gloriann Irizarry
Social media @artbygloricom #artbygloricom


Thursday, March 12, 2015

Give Me a Hand

I wanted to make an organic looking hand. It is actually a little creepy but I was thinking of New Orleans and all the voodoo shops when I was creating it.

SUPPLIES

Creative Paperclay®
Aluminum foil
Wood skewers
Encaustic Was
Raw umber acrylic paint


The easy part was to gather all the pieces for my armature as they were all in my kitchen.  I started with making a wad of aluminum foil for the palm area of the hand.


Next I pushed the trimmed skewers into the foil. I found that I had to trim the skewers a little more than I had originally.


Paper clay was applied to my armature. I did this in several steps. I would do one side, let it dry and do the other side. It made it easier to control plus it worked great as the new clay adheres to the dry clay well.

Finally I added a wash of raw umber paint. When dry I coated it with encaustic was.

Darlene Olivia McElroy

Monday, November 24, 2014

Creative Paperclay Material® Armature wire contruction helping guide


Hi and welcome back to Creative Paperclay Material® blog page.

It is a beautiful winter day. It is kind of cold and stormy but watching the snow falling sure reminds you how strong and beautiful nature can be. Now on this cold winter day  I will show you a couple of tips to help you choose the right kind of  wire to construct the armature for your one of a kind Creative Paperclay Material® sculpting creation.  Check the detailed options listed below.
Have in mind that all metals will eventually oxidize (some just a little slower than others and some just not so visibly). This article will include some helpful information to help you choose the best one for you to use.

The wires choices are listed from softer to harder strength.

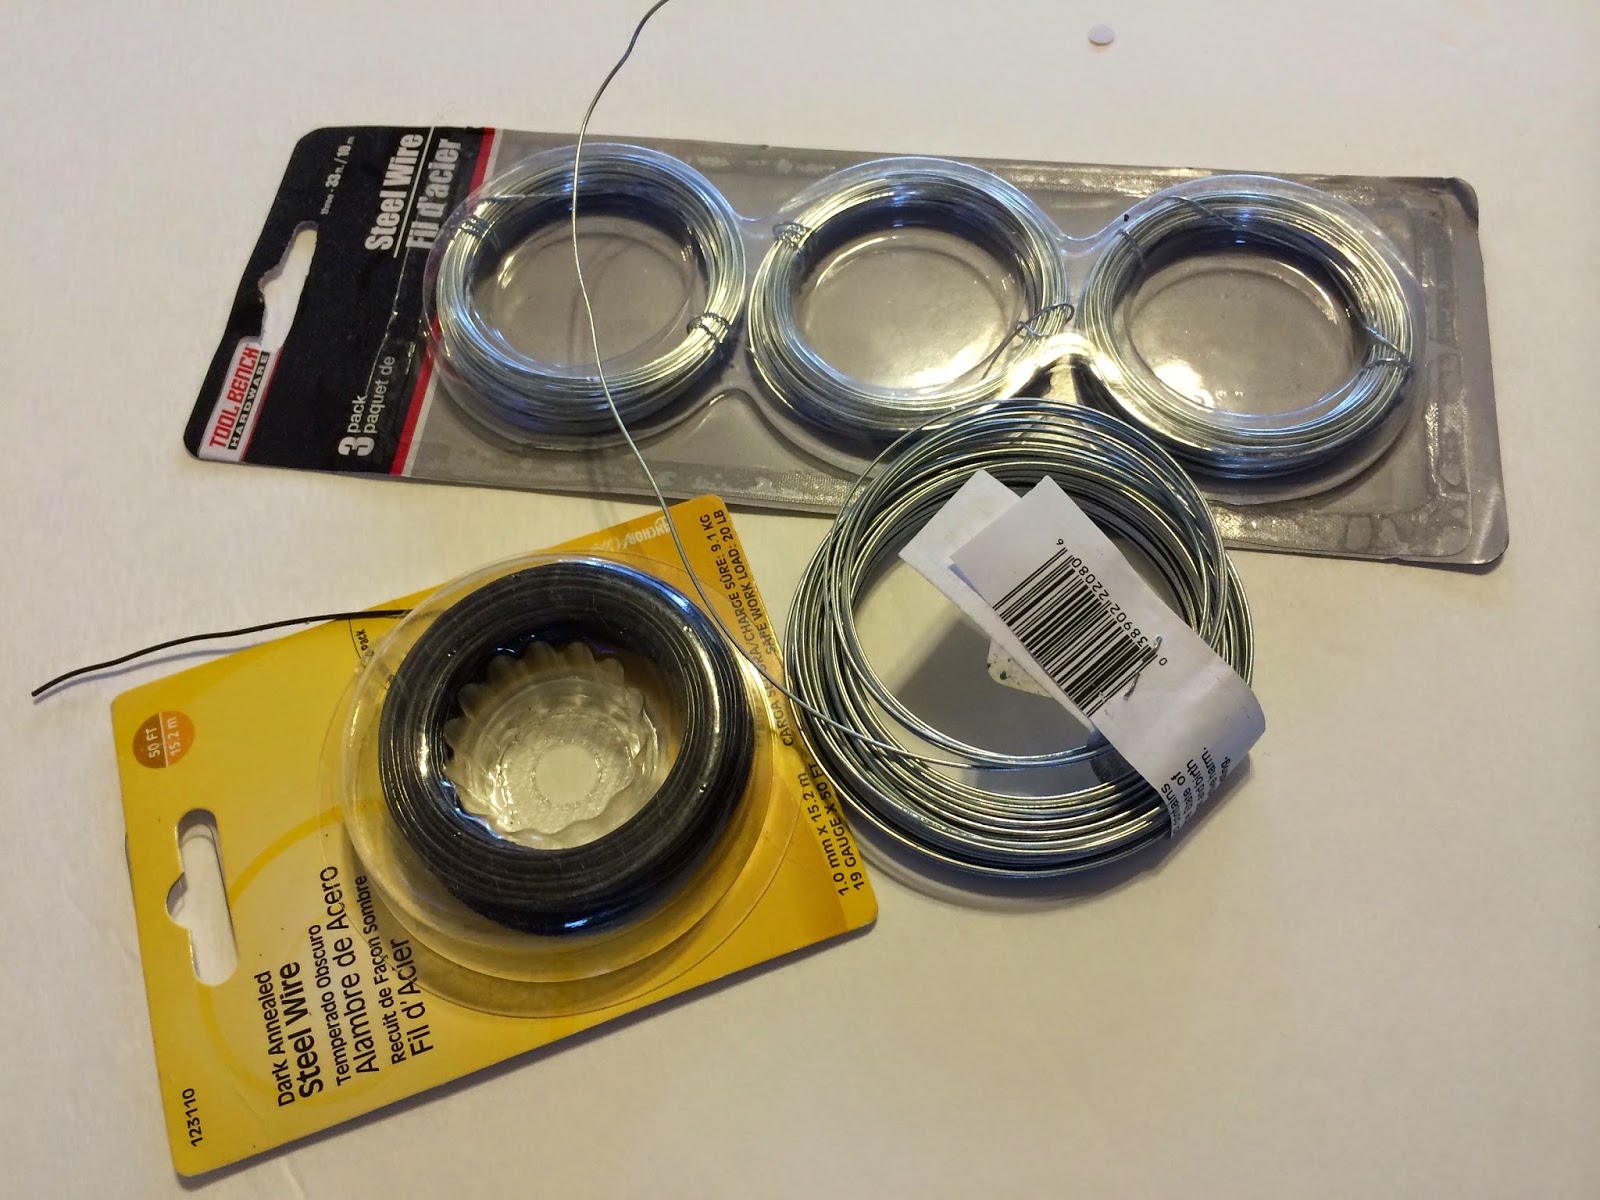
Strongest is the Steel Wire Option


Be careful with steel and iron. These can be the worst as the oxide for these is red. It is very important you choose a Stainless Steel. Stainless Steel is resistant to rust and corrosion because it is impregnated with nickel, chromium, niobium, molybdenum, or titanium. It is the best suitable for larger pieces because it is a lot harder to bend and it is a lot stronger. Steel also comes in many gauges and can be found at your local Hardware store wire section or at your favorite Craft Store in the floral or jewelry section.  Make sure it is water resistant because there is nothing worse than after you spend so much time sculpting you come back to a big rust stain on your final painted piece.


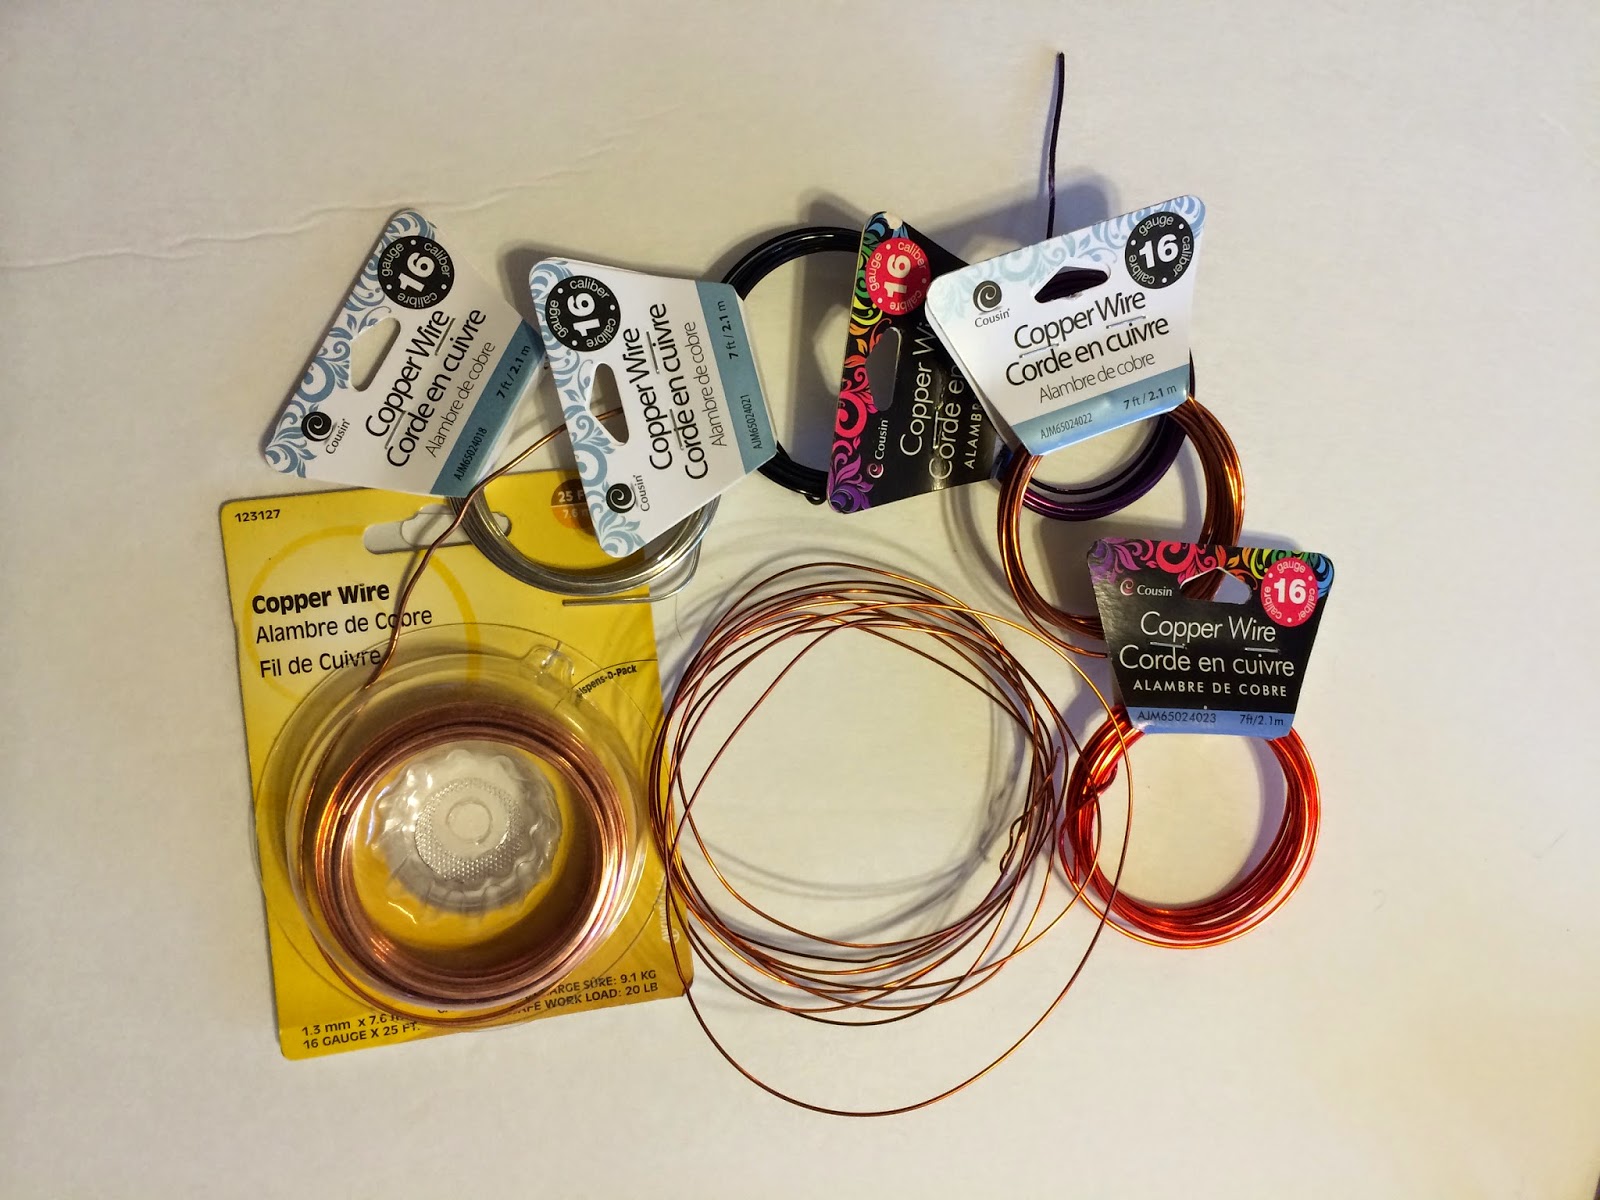
Medium Strength is Copper Wire Option


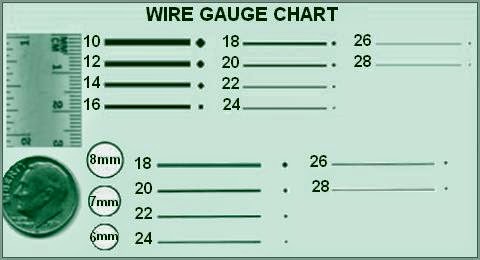
You can easily find Copper wire right at your favorite Crafts Store (check the jewelry making section). It can be also be found at your local Hardware Store in the electric wiring section . Now  they have many colors and gauges to choose from, and it will be the project that will usually determine the size you will need.  Not to worry:  I will include a very useful chart to help you choose the best wire at the end of this post.


Copper is very hardy and  rust free. It is very important that the wire is rust resistant because working with paperclay requires water and the clay is rich and moist. That can get the wire to rust and those stains will surface and damage your final sculpture. Keep in mind that copper metal is  a lot softer than the stainless steel, so for that reason I recommend copper wire for smaller armature figurines. Because copper is easy to bend, this will help you to create intricate patterns and bend it into shape.
I love this metal for sculpting small figures.


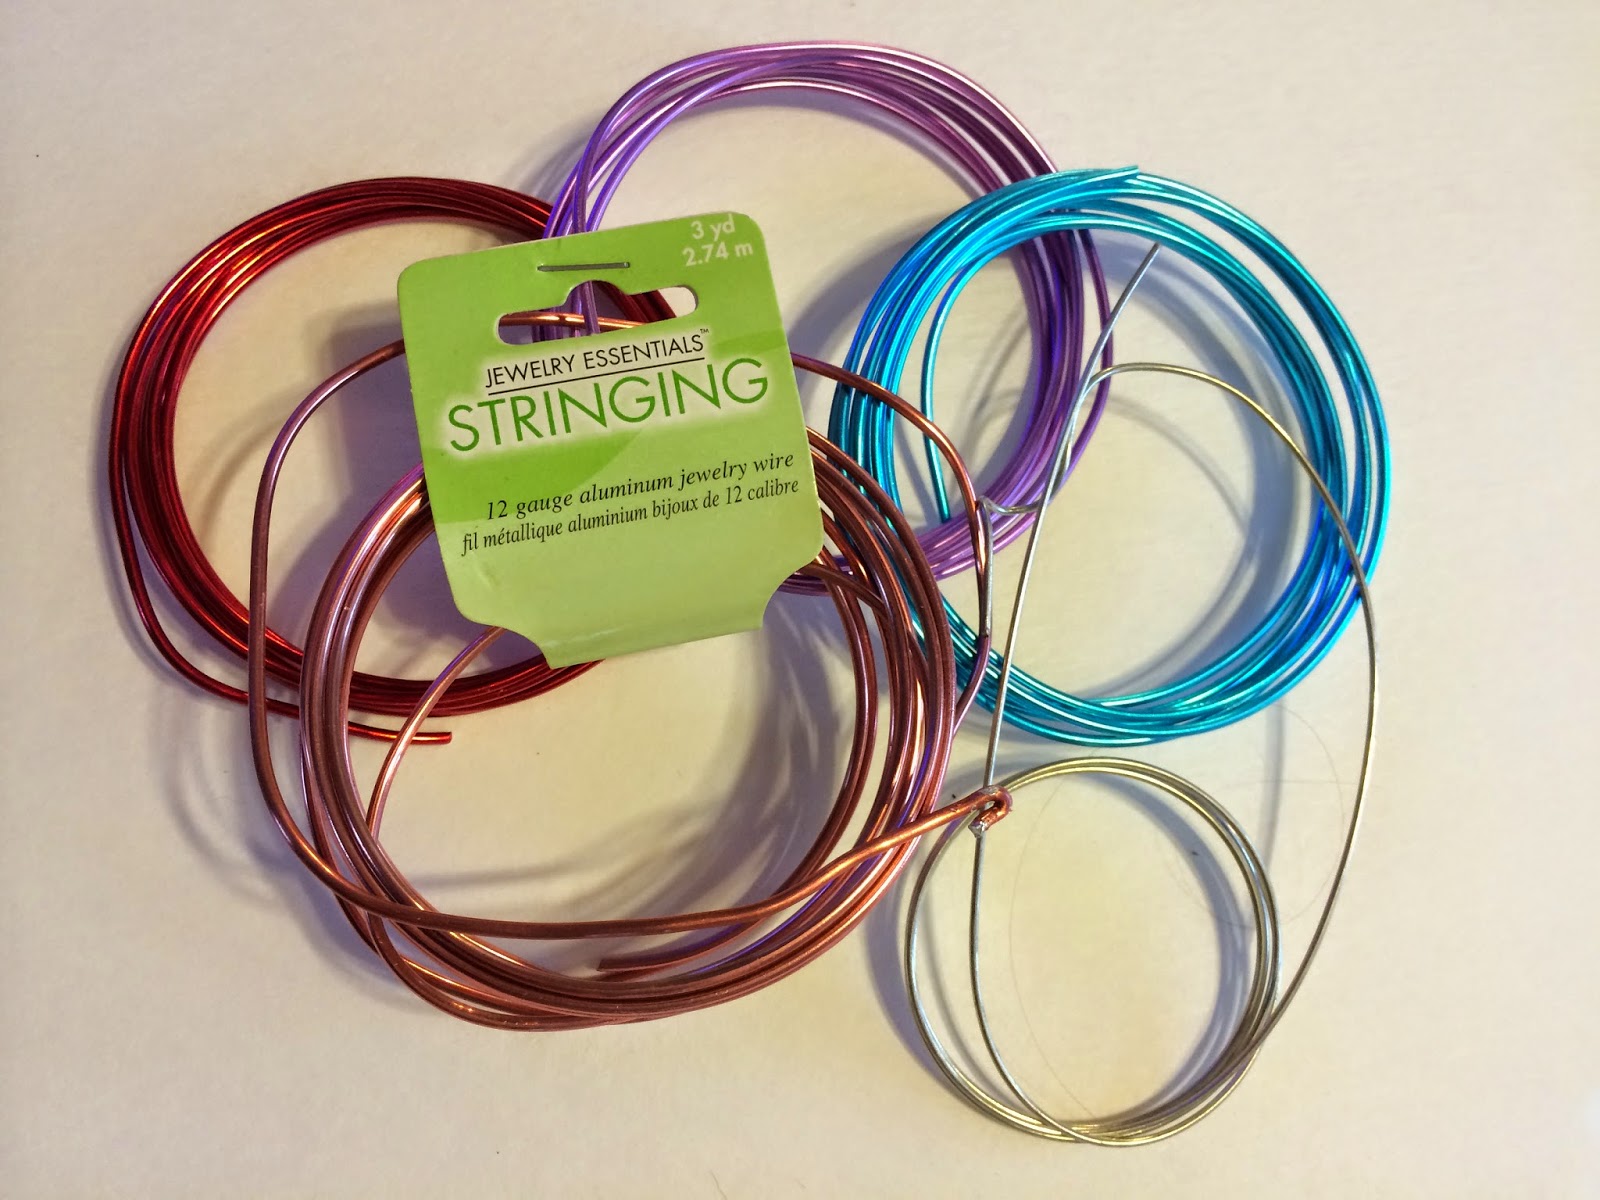
Softer Aluminum Option


Now one of my personal favorites is Aluminum.  It is my favorite because this metal is both malleable and sturdy. In fact aluminum is the 2nd most  malleable metal.  Available in wire or paper, this metal is one of the most useful in armature construction.. It is water resistant and very easy to bend. It also comes in different gauges and can be found at your favorite Craft Store in the floral or jewelry-making sections. This wire  can be also be found at your local Dollar Tree. Remember this wire is soft so if you need a stronger hold (for example a doll leg or arm) it is not recommended, But it is good for filler! Aluminum foil paper is well recommended for hollow pieces like 3D Wall Art and many other pieces that are required to be a lighter weight.

Having this information on hand, do feel free to have fun experimenting with the various qualities of all these metals. Keep in mind their unique properties before using them in your future crafting projects .

Now I will leave you with a very useful chart so you can get the right size for your next project.


Have a blessed day and remember


Stay tuned for more tips and tutorials here at your Creative Paperclay® Material blog.

Sincerely,
Gloriann Irizarry


Sunday, March 23, 2014

Using WireForm® as Armature for your Creative Paperclay® Sculptures - Tip #5 by LeeAnn Kress

Hi Everyone!

It's LeeAnn and I am back to give you a little more information on how to use wire contour mesh as a possible armature option in addition to aluminum foil when building your armatures.


Earlier this month, I posted a tutorial on how to sculpt a jointed bunny.  I showed you two different ways to create the bunny's ears.  One using aluminum foil and one using wire mesh called WireForm® (See the picture above.)  Today, I am going to give you a little bit more information on using the wire mesh.


WireForm® comes in a roll shown in the picture above.  I usually buy mine at www.dickblick.com  - this is a wonderful art supply company and has a multitude of items perfect for incorporating with Creative Paperclay®.

The wire mesh I use is very pliable, however it comes in several sizes and gauges depending on what you are going to use it for.  The roll above is 10 ft long - 20 inches wide.  It is the 1/16" pattern.

When incorporating wire mesh with your paperclay, the wire mesh (since it has holes in it) acts like re-barb would to cement.  Creative Paperclay® sticks nicely to it and fills in all those tiny holes for a super strong armature.  Because the wire mesh is pliable, you can bend it and form it any way you want. The sky is the limit to the possibilities of posing your sculpture.

Here are the suggested uses -- WireForm® is an excellent sculpting medium for light armatures and crafts, gently sculpt, pull, stretch, gather and twist the WireForm® into a shape or lift impression by pressing and stretching the mesh over an object.  Seam edges or join pieces by folding, crimping or hot gluing.


I love the fact that you can use scissors with this.  It is not hard to cut a piece off, in fact you can even tear off a piece.  I would suggest wearing some kind of protective gloves when you are scrunching it for a inner armature body shape.  The edges do get a little sharp.

I realize that there are a lot of us that use aluminum foil for inner armatures ... I do too.  But now that I have had some time to play with WireForm®, I have learned that I can also incorporate this with foil.  For example, maybe the body is made out of foil, but I want some really cool wings or a tall collar coming off my sculpture, with this wire mesh, it makes it so easy to do.  Personally, I think the mesh has more flexibility to bend and conform in the intricate shapes I want better than foil.

My suggestion is to use your foil for more bulkier parts of your armature and use wire mesh for your thinner more delicate parts like bunny ears, wings, long tails, horns, collars, etc.

WireForm® contour mesh is just another great option out there to put into your Creative Paperclay® toolbox.  That is why I love Creative Paperclay® so much -- it works with practically everything!!  I hope you give it a try someday!

Thanks for stopping by the Creative Paperclay® blogsite and if you have a little more time to spare, stop by my site at www.charmedconfections.com

Until next time!  LeeAnn

Thursday, January 23, 2014

Susan's January tip & game: Wood armatures for sculpting.

Greetings from Susan at theboredzombie.com! I'm so glad you stopped by today for a few thoughts on wood armatures for sculpting. Armatures are important in your work for several reasons:
  • Strengthen your work by giving the clay a stable surface to adhere to through the entire sculpture
  • Can be used to permanently attach your work to a base
  • Saves clay and money by using inexpensive materials (such as wood or foil) for thick areas
One benefit of Creative Paperclay® Modeling material over polymer clay is that Creative Paperclay® can adhere to wood.  Wood is a natural material that shrinks and expands with varying amounts of moisture. It almost always leads to damages and cracks when used in polymer clay pieces. Creative Paperclay® is unaffected by the wood shrink which opens a world of options for this polymer artist.

I went on a trip to the craft store to take a look at some of the wood shapes they had. Here's a selection of them that have potential and all cost less than $2.75, most around $1.00.


Being able to use wood is so exciting to me! There's so many options and things to be made I just can't seem to make a decision. I thought it might be a fun challenge to make it a little game. You've all heard about the Creative Paperclay® Modeling Material Blog Hop coming up on February 8th right? I'm going to let you pick my armature! Choose which shape you like best for whatever reason you like it, even if that reason is to challenge my brain! Put its number in the comments and any suggestions you have to help me along. I'll buy the armature with the most votes on Jan 27.


If you're feeling really froggy, maybe you'll try the winning shape too?


Tuesday, December 24, 2013

Gloriann Irizarry's Drying Your Clay Tips for Creative Paperclay®


Many Drying tips and techniques for different armatures and cores.

Drying times can be affected by altitude, weather,  humidity and armature type used.
Have in mind the best way for your clay sculpture to be strong is by having the clay dry evenly.
This will reduced the amount of cracking on your piece.


If you use Styrofoam you should never place it in the oven to dry your sculpt.
Styrofoam when it melts it will produced toxic gases. This is not safe to be exposed to.
Also if you try to rush the drying process with ovens or heaters the clay will not dry evenly. Drying the clay with heaters or ovens will produce more cracks and opening that will need to be repair and cover up . 


But Styrofoam ball are great to use. I like them because they reduce the amount of clay consumption.
 It will allow you to sculpt more with the less clay. I like to used them on my Ball Joint Dolls heads. Is very nice because it will give you a great base to work and you can easily cut it in half to add the other details to the piece. I allow the piece to dry normally.

If you want to lower the drying time with out hurting your pieces. Specially on those high humidity places. I can recommend a homemade  Creative Paperclay® drying booth method I use. 
Is very easy to make and it will help your pieces to dry properly. 


Materials:

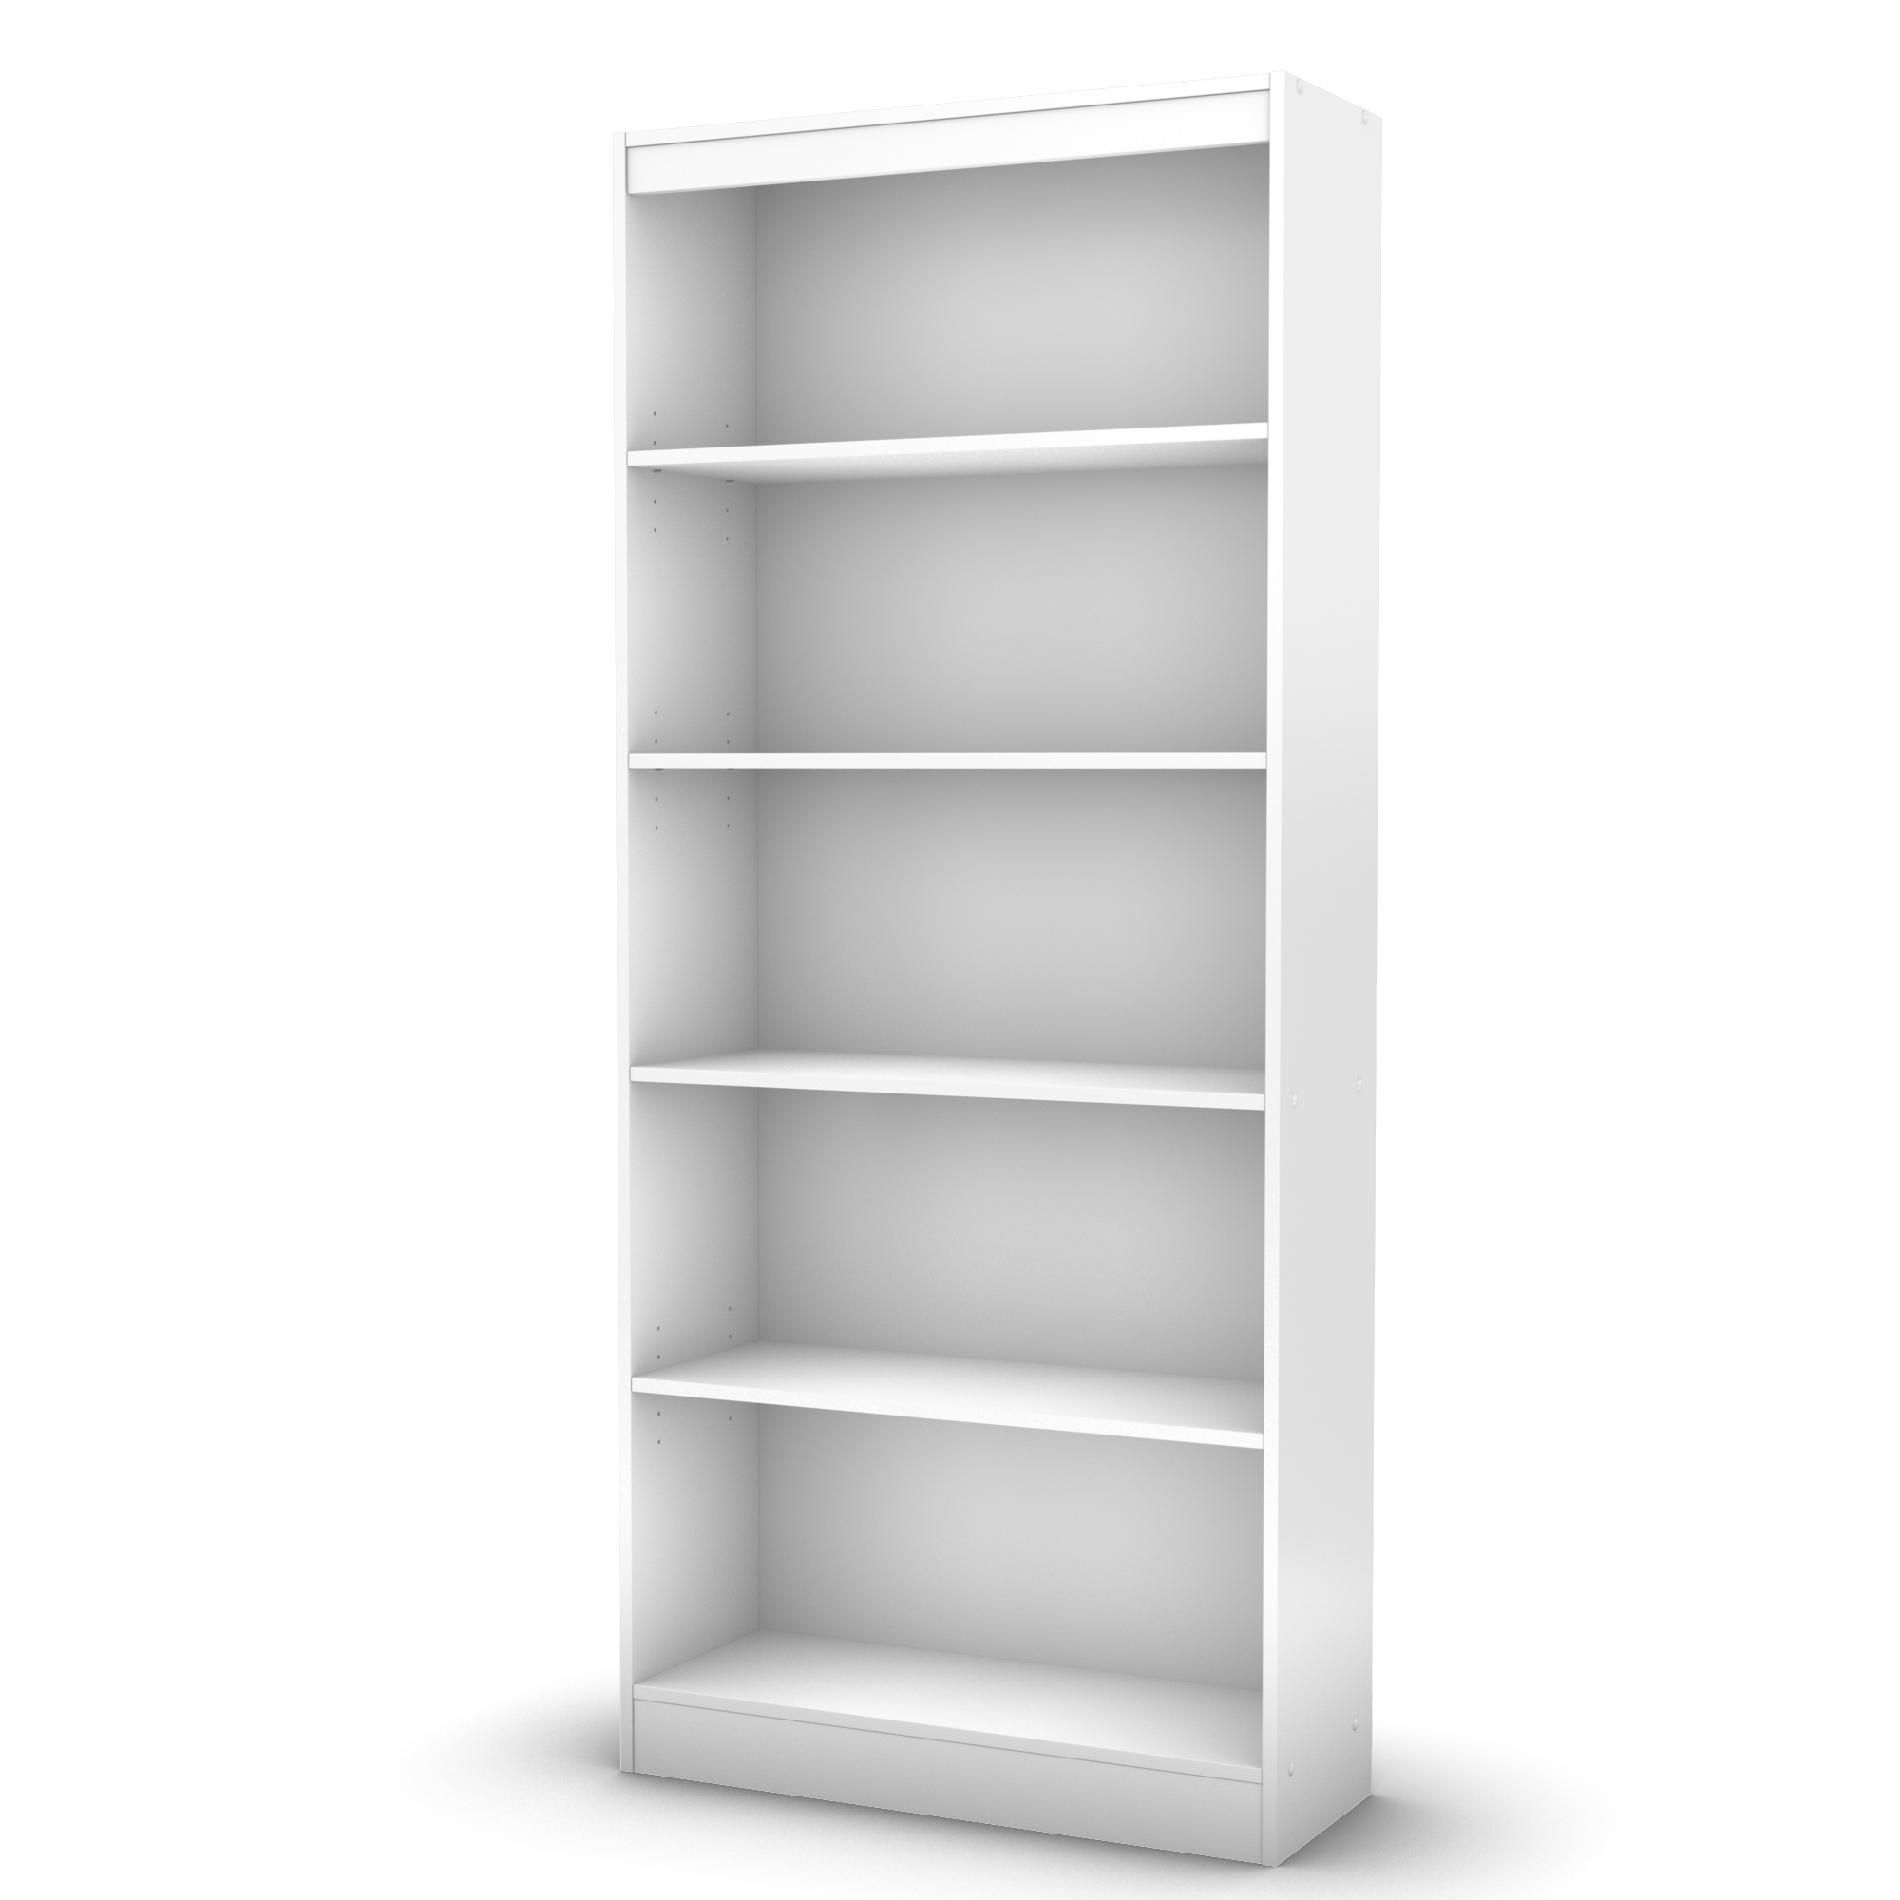
Book shelf unit.You can use a old bookshelf unit. 


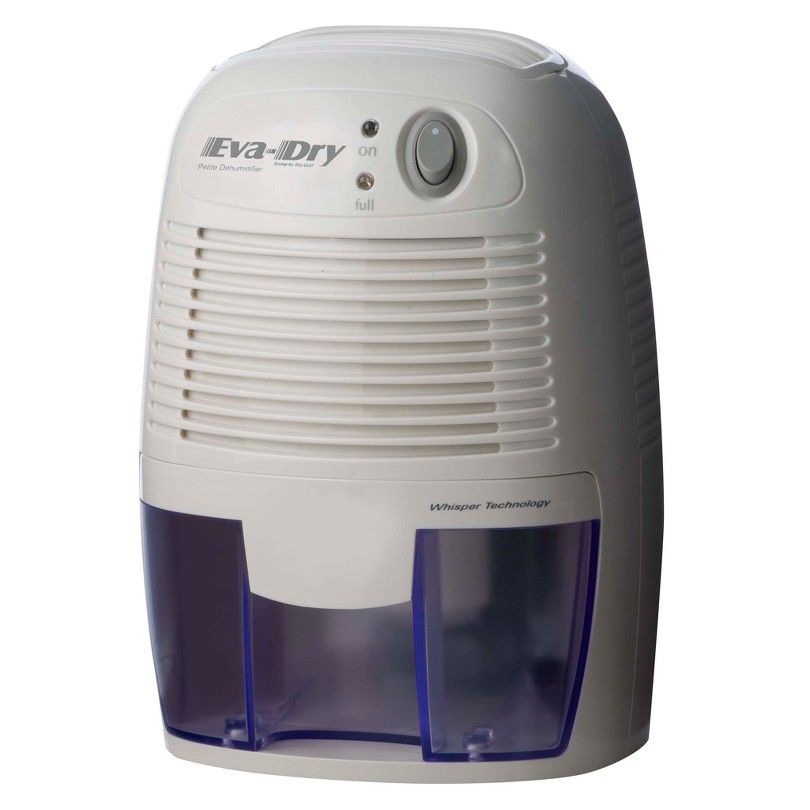
Eva-Dry Electric Petite Dehumidifier - White (EDV-1100)
A portable or small dehumidifier unit. 
 I can be a use one, garage bought or check your thrift store. All you need it to make sure it works safely. The one on the photo is from Target  Eva-Dry Electric Petite Dehumidifier (EDV-1100) 


Close this window
Painter's plastic sheets


DuckTape


Instructions:

Seal the painters sheet to the book shelf using the duck tape.
Make sure you place the dehumidifier next to the book shelf and cover it with the painters plastic sheets.
Create a door opening for you to load your sculpt and pieces to dry.
See the drawing for build reference.


More armatures and safe drying techniques I like to use is the wires, foil and masking tape. 
I favor this method for non moving parts Art Dolls Sculptures.
If your sculpting big pieces I strongly recommend it to be sculpt in layers and make sure the are fully dry before a new one layer is added. Doing this not only will ensure the project is properly dry but it will also be a lot stronger sculpt.

Built your armature with wires. Cover with aluminum foil and secure it with masking tape.

Start Layers one and wait to be completely dry.

Layer  two and wait to completely dry.

Layer three and keep doing this until your satisfy.


Between each step I place the sculpt in the homemade drying unit to get all the humidity out of the piece.
It works great, you will love how much even and faster your projects will dry. 
I hope you like these quick drying tips. More to come shortly so please stay tune . 


Any questions feel free to email me at 
Gloriann@byglori.com

Sincerely, 
Gloriann Irizarry


Thursday, December 19, 2013

Easy miniature armature Tip


Hello This is LuLu Lancaster and I have a simple little tip for creating miniature pieces with Creative PaperClay ®

I create many tiny elements and sometimes find that putting them together totem pole style can be helpful in keeping them put.

I use straight pins.

I start with a small subject sculpted from Creative PaperClay ® with a straight pin sticking out. This one I have made a tiny skull. Sometimes I build up the pin and sometimes the other direction. 

If I intend to use this in another sculpture sometimes I will leave the pin sticking out the bottom.


                     Building these skulls upwards the pin creates stability and keeps them all together.
here I have used the pin technique for a small cat 

and here I have added a bone to the top of the pin totem.


This totem I have kept a length of the straight pin coming out the bottom. It can be easily insert it into a sculpture.

Thank you so much for taking the time to read my December Tip ;)
LuLu Lancaster