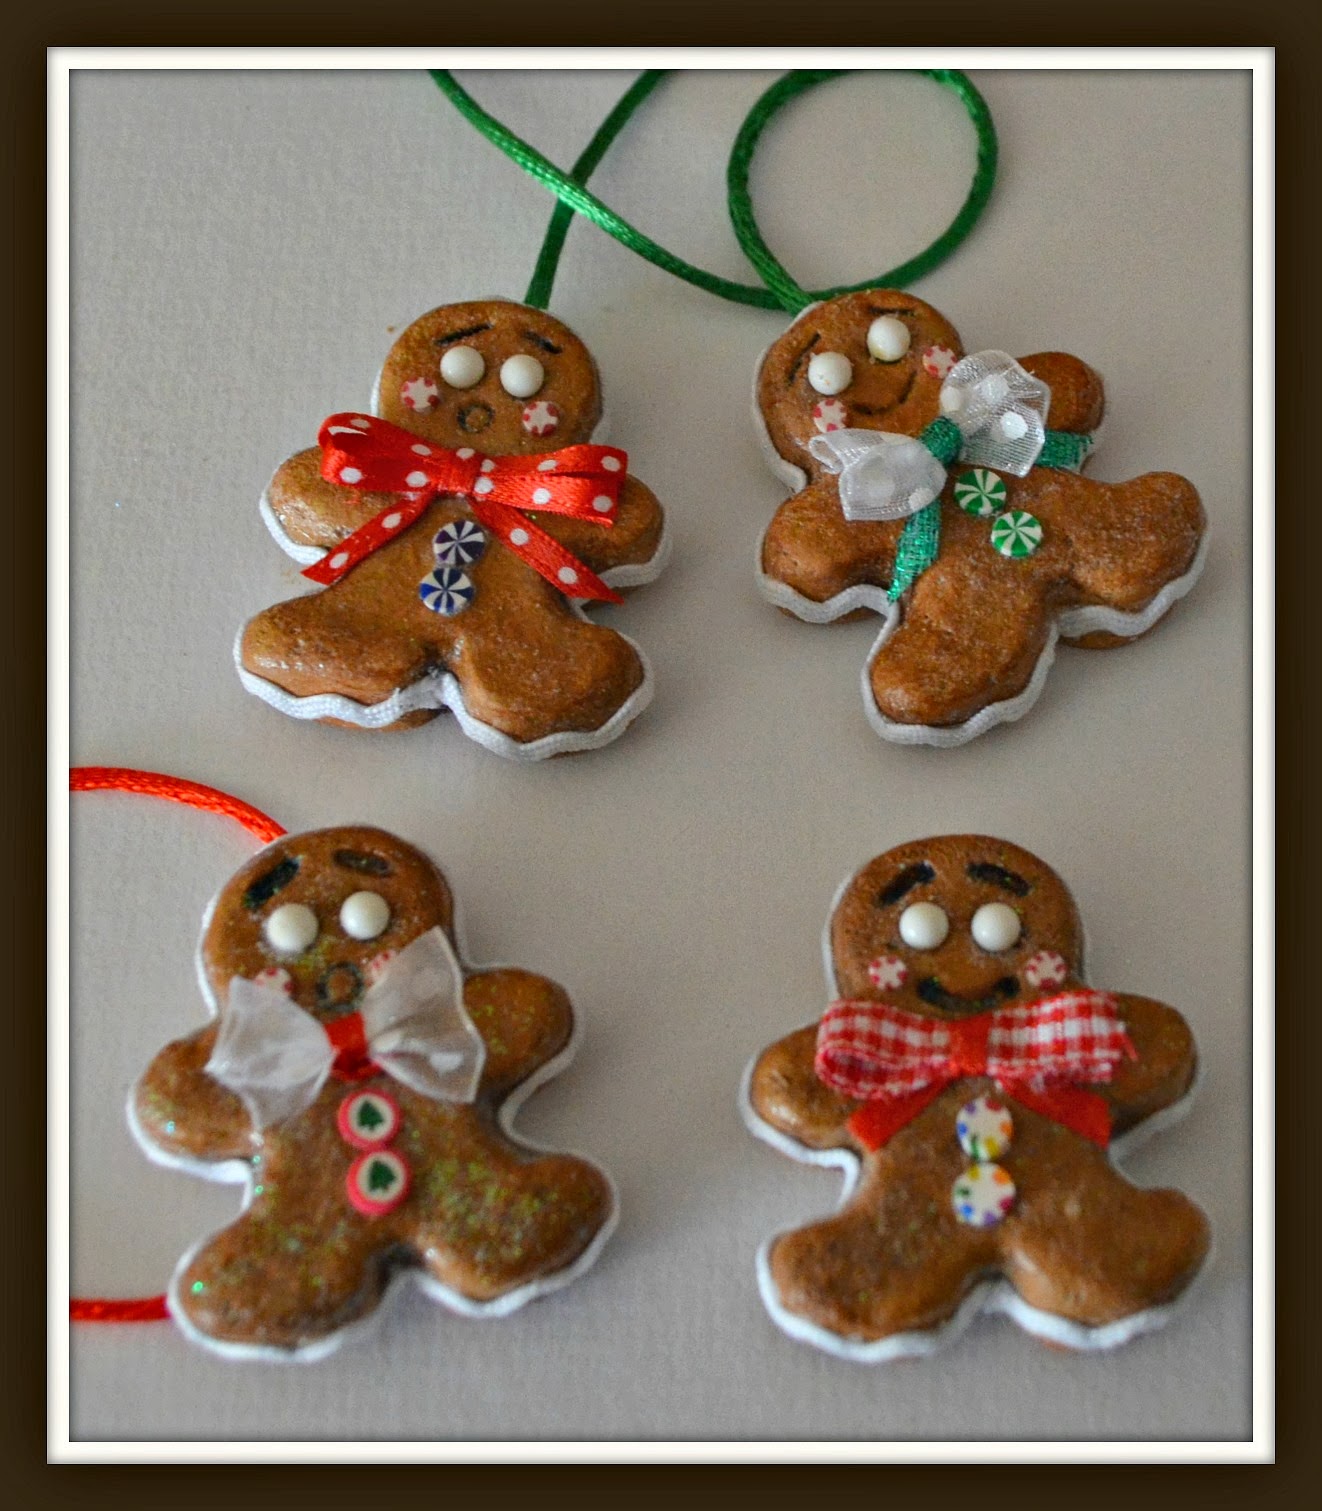
Hi Everyone!
Hope you are all well and happy in your corner of the world. Thanks for stopping by the Creative Paperclay® Blogsite. Thought I would share with you a cute, little tutorial on how to make Gingerbread Boy Tags / Ornies for Christmas. I know, I'm skipping right over Thanksgiving. Well, if I share this with you now, at least you have time to make them up. This is a great project for paperclay beginners, and if you have kids or grand kids get them to help you out and create some holiday memories crafting with them.
Here is what we are going to make!
Below are the supplies that you will need ... however, use what you have at home first. Ribbons and trimmings can always be what you have on hand.
Supplies:
Gingerbread Boy Silicone Mold or cookie cutter
Creative Paperclay®
Water Paint / Paint Brushes
Matte Varnish Fabri-Tac Glue
Super Glue Gel Stain
Ice Pick Scissors
Sand Paper Faux Candy
Ribbons, Cording & Trimmings Glitter
White Beaded Pins Pliers
Toothbrush
I bought this great gingerbread boy mold at Michaels last year thinking I was going to make some cinnamon wax gingerbread boys ... well, I never did it. So thought I would try out Creative Paperclay® instead! First, make sure your mold is clean and dry. (If you don't have a gingerbread mold, grab a gingerbread cookie cutter and cut some boys out.)
Remember to keep a small bowl of water and a wipe cloth handy. You're going to need it.
Take some paperclay out of the package and start filling up the mold with it. Make sure you really press down into all the groves. This will make your little ginger boys nice, even and smooth on their front side. Since this mold is a little deep, I am not going to fill it up to the very top.
If your clay is a little stiff or drying out, remember to just dip your fingers in some water to moisten them and continue to press your clay into the mold. Smooth out the top as best you can.
YAY, I'm done!! Looking good little gingerbread boys!!
Now, you have decision to make --- You can either put these little guys in the oven for a while, or you can let them partially dry out themselves. In the above picture, we are looking at their backside. This side will dry out first, since it is exposed to the air. We do not want these little guys to dry out completely, since we need to add their facial features and poke a few holes in them first.
I decided to let them sit out for a little bit (about two to three hours). They were drying on the backside nicely. When taking these guys out be careful. You might see some cracking, but no worries, we'll fit that. Take them out as best you can. They should still be moist on their front side. If their front side warps a little, I will show you how to fix that too!
Oh boy ... some of these little guys look roughed up. Now, to fix the imperfections, just wet your fingertips and give these little boys a massage. Ha! Ha! Seriously ... that's what we are going to do! Wet your fingertips and gently rub all the rough edges smooth. They should be set up enough to not throw off the shape with the handling of them. If they have some cracks, get a tiny bit of paperclay and smooth it over the crack using a little water again.

b
(Quick Tip -- If you are a busy girl like me and can't possibly finish giving massages to all these little guys in the time you have, put them in a ziplock bag. Just make sure you push all the air out before sealing. This will keep the clay a little moist until you can come back to it.)
For an example of where I am going with their design, I played with the top boy until I had the look I was going for. Take a white beaded pin and cut it with your pliers. We are going to use these as eyes. Cut off the pin short enough to not push though to the backside of the boy.
Push the pins in place and use your ice pick to draw a smiley face on your gingerbread boy. Again, if your Creative Paperclay® is drying out too fast, rub a little water on his face to loosen up the clay so you can draw in the features. Give him a cute mouth and some eyebrows. Use a coffee stir stick to make an "O" mouth. Too cute!
Next, to make your little boy look like he is kinda puffed up from baking. Give him a few taps with a damp toothbrush. The bristles of the brush will add some great texture to him. Don't forget to do the sides and back. Does he look like he is enjoying this or what? :)
Now you have some options. You can poke a hole in the top of his head to hang him like an ornament. You can poke a hole in his back to add some ribbon and tie him to a package or garland without it looking like a ribbon is coming out of his head ... or don't poke any holes in him at all and just glue him to something or leave him that way. The choice is yours. I am doing a few all three ways mentioned above.
Once you decide where all your holes are going to go. Let your Gingerbread boys dry completely.
Now that they are completely dry. Give them a little sanding with some fine grit sandpaper. Really, all you need to do is the mold edges along the back. Don't sand the front as you will remove all our wonderful toothbrush texture.
Oh my! Yes, we are going to pop out their eyes and get to painting. Painting will be easier with their eyes out. Don't be sad boys, you'll get them back. I think the top right one looks downright scared. Ha! Ha!
Here are the paint colors I am going to use. My sweet and very talented friend, Jody Johnson, uses these colors to paint her gingerbread creations. They are the perfect color combination. (Light Cinnamon, Honey Brown and Camel) This ones for you Jody!! XOXO (You can find a link to Jody's wonderful creations on my blog at www.charmedconfections.com)
I put a little of each color on a paper plate, mixing the two lighter colors somewhat together. Next, just paint your boys and let that dry - don't forget to paint the back.
Next, take your darker color (Light Cinnamon) and dry brush your gingerbread boy with that color. It adds some wonderful hues and gives it a real baked look.
Here are my boys all dry brushed and ready to be stained. Staining will bring out their features, as it goes into all the groves and covers any white spots the paint did not cover.
If you have some wood stain around your house, you can use that or any local hardware store carries stain. The one I am using is an oak stain. Just rub your little boy down with some stain and gently rub it off leaving some behind.
He is looking good. Now his little mouth and eyebrows really show up. I'm loving him! Stain all your boys and let them dry completely.
Once they are dried, seal them with matte varnish.
While the varnish is wet, sprinkle them with super, fine, sugary glitter.
Once the varnish is dry, you can now super glue their eyes back in. I think they are much happier now.
Ready for the fun part? Let's decorate these sweet, little guys!! I took some white ric-rack and used my fabri-tac glue to glue the trim all the way around their body. I started between the legs so that there would not be a break in the trim around their body.
Next, I used some tiny faux candies in peppermint shapes and colors. You can find these tiny candies on Ebay under nail art. Yes, these little polymer candies are used to decorate fake nails. Just goes to show you, how versatile things can be. These candies are so tiny - use super glue to attach them to your boys.
~~~~ If you love faux candies, I also created a faux candy tutorial on my blog, where I make some really cool, lollipops and candy canes. Go to www.charmedconfections.com and look under my labels "Tutorials". ~~~~
To dress up your little guys more, give them some cute bows made out of lace and ribbon.
Last thing to do! Glue some cording into the holes you put in your gingerbread boys. Now you can tie them anywhere!
These sweet boys look great on Christmas packages, holiday garland or wreaths. Tie them to your homemade jelly jars, make ornaments out of them or just toss a few into a bowl of holiday potpourri fixins. Use a paint pen on their back to personalize them. Either way, they are as sweet as can be. Here's to another Charmed Confection out of Creative Paperclay®.
Thank you for stopping by and viewing my tutorial. I hope you enjoyed it and will give it a try. If you have some time to spare, come by and see me on my blog at www.charmedconfections.com.
Have a Wonderful and Happy Thanksgiving everyone! Until next time .... LeeAnn


 I am a happy accident kind of person so when this heart came out of the mold with a crack through the center, I was thrilled. This will go into a piece about a broken heart.