Showing posts with label Edie Cournoyer. Show all posts

Tuesday, February 5, 2013

Composimold Review and Honeycomb ATC

Hey Everybody, It's Edie, Do you ever buy random things because you just KNOW you’re going to make great things with it… someday??? That was the case with the neon green, silicone pot holder I bought several months ago. It looked like a honeycomb and I just KNEW I could make something super cool with it. I wanted to use it as a stamp, put it in a painting and at least five other projects came to mind just by holding and squishing that piece of random inspiration. The problem was, I didn’t want to USE the potholder because I only had one. I thought it was impossible to mold because it is so flexible and thin that is, until I discovered Compisimold! Compisimold is a pourable, food safe silicone mold that you can melt and remold over and over again and it was exactly what I needed for this project.

You can view BOTH full video tutorials below. I don’t own a microwave, so I melted my Composimold on the stove and poured it over the potholder. Once it was completely cooled, I removed the original and I had a reusable mold that looked just like my potholder! The Composimold did have a lot of bubbles which would ruin most molds but it actually enhanced this particular project, so I didn’t mind too much in the end. The Composimold instructions recommend stirring often, but I think that is what caused all of the bubbles. If I had just let it sit and melt, I don’t think I would have had near as many bubbles. Once the mold was ready, I broke out my Creative Paperclay® and started playing. I rolled out my Paperclay over the top of the mold which gave me an absolutely fantastic honeycomb texture, and then I cut my ATC out of the textured Creative Paperclay®. I let the ATC dry completely and then I painted it, glitterfied it and added the honeybee embellishment. I wrote out my quote, painted the paper and glued it to the ATC and then I covered the text with Glosssy Accents to make it shine.

Overall I was pretty happy with the Composimold and I plan on making more projects with it. If you have something that is an awkward shape or just too soft to mold, you may want to give Composimold a try. It worked great with the Creative Paperclay® and I am really happy with the way this ATC turned out. I hope you enjoyed this project and I hope you have a Valentine’s Day that is filled with love! BIG HUGS!
Visit my blog.


Tuesday, January 1, 2013

Edie's January Quick Tip

Hey Everybody. It's Edie.
Here is my Quick Tip for January - You can cut and shape Creative Paperclay® with just about ANYTHING! When looking for tools to use in your projects, think outside of the box. You can use bottle caps, cookie cutters, plastic knives, toothpicks, a ruler, or even your fingernail and that is just for cutting! Try pressing Creative Paperclay® into molds, stamps or embossing folders to get some great texture and different shapes.
Happy New Year!!!!!
Visit my blog

Tuesday, December 18, 2012

Edie's December Quick Tip

Hey Everybody, It's Edie!
I am here with my December Quick Tip for Creative Paperclay® - Making holes in projects is obviously easier while the clay is still fresh and wet.  You can use a toothpick or a straw to make perfect holes every time. However, if you forget to make your holes and your clay dries, you can use a small hand drill, or even a regular drill bit turned by hand. I have a variety of tiny regular drill bits for this purpose. Apply steady pressure and be sure the drill bit won't damage anything when it pokes through.
HAPPY HOLIDAYS!!!! SEE YOU ALL NEXT YEAR ;)
Visit my blog.

Tuesday, December 4, 2012

Super Fast (STRESS FREE) Ornaments

Hey Everybody, It's Edie, I can not believe it is already December!!!! This year has flown by and the Holiday Season is now upon us.

 With the holiday season comes gift giving, decorating, crafting and blog hops! With that in mind I have created a BRAND NEW CLASS "Mixed Media For The Holidays" and it is now available!

In the class, I teach you how to make three holiday projects that will help you in all of your decorating, crafting and gift giving endeavors. There is even a bonus lesson for an extra embellishment ;) All of the projects are made using simple, common household items and inexpensive crafty supplies!

After finishing the projects for my class, I was on a Holiday crafting roll! I was able to create the base for these TEN ornaments in less than 10 minutes using the technique I am sharing with you today. These ornaments are so simple, fast and stress free, you will be able to produce a handful of them before the holiday cookies finish baking in the oven!

 DSC07092

These ornaments are perfect for teacher's gifts, class projects, family crafting, art swaps, unexpected visitors, all of those people you would like to get something for but just don't have the money, your mail carrier, vet, favorite coffee barista and the list goes on and on!!!!

 DSC07106

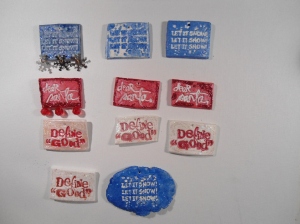
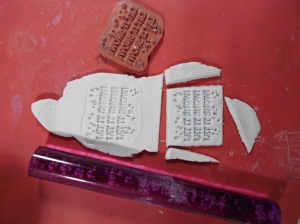
Simply roll out some Delight® or Creative Paperclay®. Brush a stamp with water and tap off the excess. Press the stamp into the clay and cut into desired shapes! Simple, simple, simple :) You could even use cookie cutters instead of a straight blade to give your ornaments even more personality.

DSC07093

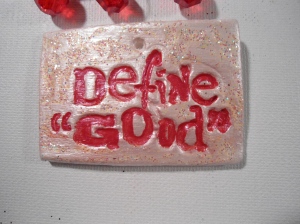
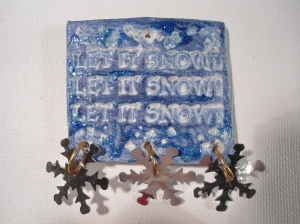
Paint, embellish and glitterfy to your hearts content and then share them with everyone you know. A great idea would be to have these hanging on a wreath designated for visitors. As they leave, they can choose an ornament to take home and display.


DSC07095

I hope you enjoy this project and I hope it helps to make your holiday season just a little less stressful. BIG, BIG Hugs!!!!!! You can always find inspiration on my blog.

 DSC07094

Monday, November 12, 2012

Where We Love Mixed Media Painting

Hey Everybody, It's Edie!
My husband's ship will be returning from an eight month deployment in the next few weeks and we will be having a party the night before homecoming for all of the spouses and family members. There will be snacks and goodies and door prizes. I have donated this painting and it will be given away as one of the door prizes. There *IS* a full video tutorial, but due to an editing NIGHTMARE, let me repeat... NIGHT. MARE, I have been unable to get the video processed in time to share it with you. I AM working on the problem and I will get the video added as soon as possible. Until then, please enjoy this written tutorial :)
Since I am creating a series of these 'HOME' paintings, the process for creating the background will be basically the same for all of them. I layered on torn sections of sheet music, book pages and scrapbook paper, painted the entire canvas with Titan Buff and blotted off the excess. I also aged the entire canvas with a wash of Van Dyke Brown and water.


I applied modeling paste to the corners of the canvas and stamped into it with a key stamp. I then added Antique Copper paint to the same stamp and and added it in random places over the entire canvas. I aged the entire canvas with a wash of Van Dyke Brown and water, then I added some Pure Gold paint to the raised bits of the modeling paste debossed keys.


I printed out my text, aged it with Vintage Photo Distress ink and then painted the edges with Pure Gold acrylic craft paint then glued it on using Matte Medium. I painted a strip of lace with Antique Copper then with Pure Gold and attached it to the canvas with clear tacky glue.

I printed out the ship and deployment information and attached it to chipboard to create a commemorative plaque for the painting. I aged the plaque with Vintage Photo Distress Ink then coated the entire thing with Glossy Accents. I hit it with the heat gun to create a rippled effect in the glue then once it was dry, I attached it to the painting with clear tacky glue.


I created the vintage door handle and plate, as well as the key using Creative Paperclay® and let them dry completely. I then coated all of the pieces with Black paint and with a dry brush I applied Antique Copper paint to the raised areas for definition. Lastly, I attached all of the pieces to the canvas using E6000 glue.
 I am very proud of this piece and I really hope the winner of the drawing likes it as well. If you are interested in purchasing a customized "Home" painting for your homecoming, please email me at ediecournoyerartist@live.com
You can join me every Tuesday for my LIVE SHOW and don't forget to check out my blog.
See you next time!  

Tuesday, November 6, 2012

Edie's November Tip

Hey Everybody, It's Edie :) I just wanted to share this helpful quick tip for using Creative Paperclay® in your projects. Creative Paperclay® can be painted while it is still wet or after it is dry. However, if the clay is still wet, keep in mind that paint may make it TOO wet and you could end up accidentally messing up all of your hard work. If you want to paint a piece as soon as possible, stick it in the oven on 225* for 5 - 10 minutes. That will allow the outer layer of clay to harden enough to paint without becoming too wet. See you in two weeks with my project for the month!

Monday, October 15, 2012

Elphaba - Mixed Media Art Doll

 Hey Everybody, It's Edie,

On my personal blog I am doing a 31 Days of Halloween series. Today is  Day 15.
Today's post was two and a half months in the making, but I think it was well worth all of the time, effort, restarts, errors and triumphs! Elphaba is a 3ft tall mixed media art doll and she was inspired by the play "Wicked." You can view the full video walk through below.


She started as a wire armature covered in aluminum foil, then I sculpted her entire body using Creative Paperclay®. Her hair is individual sections of wool roving.


Her dress and hat are both handmade using fabric scraps, ribbon and lace. Her base was made using a wire armature, covered in masking tape, covered in Spackle, covered in MORE masking tape. I painted and stamped inside the base, then I added chipboard gears and stitched in the chipboard clock.

There is even a light up inside her base that shines down on everything inside.

The flying monkey is a hand sculpted polymer clay face with a Creative Paperclay® body.

The shoes are plastic cake toppers coated in fine, iridescent glitter.


The crystal ball is a clear glass Christmas ball that has been painted with layers of glaze and alcohol ink. The base was once a candle holder that I painted black, then I created the holder with an old earring.

The Grimmorie is a wooden block from a stamp that I covered in tissue paper and painted.

The green glass bottle was also painted with layers of glaze, then I added a glitter flourish and alcohol inks to distress it.


I am very proud of how she turned out. I never thought in a million years that *I* would be able to create something like this.
Elphaba is for sale, so if you are interested in purchasing her you can leave me a comment and I will get you my email address. 
 

Tuesday, September 18, 2012

Happy Halloween Banner by Edie

HellooooOOOooo!
Edie here and it is so good to see you again! I know, I know, it's been too long. What have I been up to? Well let's see... I have been working on projects for Design Team posts, blog hops and... oh YEAH! I created a brand new class!!!! It is called Frightfully Fun Upcycled Halloween and it will be available as soon as I can get the silly internet to cooperate and upload my videos LOL! I will have to tell you all about that next time ;D

For today's post, I have a super simple, super cute project to share with you! It is getting close to Halloween, (YAY!) so I have already begun making new decorations to add to my collection. While looking for inspiration I kept seeing these cute Halloween paper banners everywhere. You know the ones with the GORGEOUS folded paper and embellishments? Yeah, those :)

I love the way they look, but because they are so flimsy, I had never made one. I started thinking that if I ever made one of those banners, I would want it to be sturdy and last from year to year without fear of it being crushed or ruined in storage. And then it dawned on me... why not make it our of Paperclay?! So, that's what I did!

 I wanted to make sure this would work, so I made a mini-banner to begin with. I rolled out my Delight® air dry clay and cut a 1.5 in wide strip, then I cut 1 in wide triangles to make my flags.


Once my clay was completely dry, I painted the background of my flags orange, black and titanium buff.


 Next I used the same paint colors and stamped images and text, in alternating colors, on each of the flags.


 I cut tiny flowers out of watercolor paper using a flower punch and painted all of the flowers orange, then I used a regular hole punch to cut the circles and I hand wrote the letters.


I glued my flowers and letters onto the flags, then glued my flags onto a 20 in strip of Halloween ribbon. This banner is the perfect size to hang on a picture frame, mirror or small shelf. I am actually thinking about using is as an embellishment on an upcoming painting.


Since this banner turned out so beautifully, I plan on making a full size one that will hang in my home for Halloween.


This would also be a great project for kids to make and since they are so easy, you can make one for every Holiday and season!

That is all for today. It is time for me to get back to work and get my class online and out into the world :D You can see more of my work on my blog.

Wednesday, September 5, 2012

Edie's September Quick Tip

Hey Everyone,
It's Edie and I am here with a couple of quick tips for working with Creative Paperclay.
Since Creative Paperclay is air dry, you don't have to worry about baking or firing it. However, to speed up drying time, you can put it in the oven on 220* for about 15 minutes. Be sure not to leave it in too long or it will crack.
When allowing clay to air dry, flip it over after about 12 hours. This allows air to get to the 'bottom side' of your project and aids in drying.
You can also sit your projects outside in the sun to rapidly increase drying time.
You can always find more Creative Paperclay tips and projects on my blog.

Tuesday, August 7, 2012

Mushroom Fairy Part 1

Hey everyone, it's Edie.

Do you ever go through artistic phases? You know, those times where all you want to do is paint roses or make ATC’s. Right now I am on an art doll kick. I am currently working on my largest art doll EVER, and in the mean time this little fairy came to life. Actually, she took over and would not let me sleep until she was finished!!! You can view the full video tutorial below.


The whole project isn’t actually finished, but at least the fairy part is done. You will have to wait until next month to see the totally finished project ;) I created a wire armature and completely covered it on Creative Paperclay® and sculpted her face. Once she was dry, I painted the entire thing with acrylic paint in portrait pink, then used a flesh tint to paint the shadows and white for the highlights. I painted all of her facial features and dress using acrylic craft paint in metallic peridot and napa red.


I cut a small piece of lace for the base of her skirt. I added several strips of yarn and ribbon, to give it a bit of flair and whimsy, then glued it in place.

I have these really unique, “fairy wing” leaves that fall from the tree in my front yard. I coated both sides of the leaves with melted bees wax, and then attached them with fabric glue.

I made my own spray ink by mixing butterscotch and cranberry re-inker with water. I then sprayed a small section of undyed wool roving to get the color I wanted for her hair, then I glued it in place with more fabric glue.


For the finishing touch, I colored a chipboard butterfly sticker with glitter gel pens and glue it in her hands.

As I said, this is only part one of the entire project, so you will have to tune in next time to see the finished piece. I have already begun working on it and it is SO cute!

You can see more of my work on my blog.

 http://www.youtube.com/watch?v=FO7yUGFm460

Tuesday, July 17, 2012

Edie's Quick Tip for July

Did you know you can add paint directly to your Creative Paperclay® and Delight® modeling material???  Simply mix in a bit of craft or acrylic paint and blend until no streaks remain. You can also add in mica powders or inks for cool effects!
For these starfish I added some Terri Sproul Mixers - Shimmer Rose to my Creative Paperclay® and worked the clay until the color was well blended. Next I fill an Amazing Mold Putty mold with my Creative Paperclay® and let it dry overnight. I now have some super cute SPARKLY Paperclay starfish to use in an upcoming mermaid painting!


Wednesday, July 4, 2012

Num Num Monster by Edie

Last week in my Art of Healthy Living Group on Facebook, we were talking about hunger and intense cravings during weight loss. During that conversation it was said that at certain times, it is like a ‘num num monster’ takes over complete control of your mind and makes you eat whether you are hungry or not! Since I am using art as a means to work through the emotional side of my weight loss journey, I decided to create my num num monster out of Delight® clay in an attempt to regain the control it seems to steal from me on occasion.

You can view the full video tutorial below.


First, I created my basic monster shape using aluminum foil, then I rolled out my Delight® air dry modeling material, covered the entire body and set it aside to dry completely. Next, I began shaping the feet of my monster with Delight. I cut spaces between the toes and shaped them before using a cuticle pusher to create the toenails.


Once the body and feet were dry, I gave everything a coat of purple craft paint. Next, I used red and blue metallic craft paint and dabbed spots all over my monster’s body.


I used tacky glue and two small pieces of wire to attach the feet to the body. While the glue and paint were drying I started working on the mouth of my monster. I imagined my num num monster to look all cute and fluffy, until it’s opens it’s mouth! I shaped another piece of Delight® clay into a rounded triangle, then using some small tools, I placed individual teeth in my monster’s mouth. Delight® easily sticks to it’s self with a little bit of water, so I kept the mouth and the teeth moist while I worked.


Once the mouth was dry I painted the inside with metallic red and the outside with metallic peridot. Delight® is a bright white clay, so I didn’t have to fuss with painting those tiny, little teeth. I also gave my monster’s toenails a coat of the metallic peridot while I was at it. While that was drying, I began working on the next part of the project. I took an old, ratty, Halloween wig and cut a section of hair off the back off of the wig. I sprayed the hair with homemade, red spray ink then separated the clump of hair into smaller sections. Next, I took a couple of the smaller sections and sprayed them with homemade, blue spray ink. It helps to work the paint into the hair a little bit before it dries. Once the hair was dry, I used tacky glue to attach the mouth and sprigs of hair all over the monster.


 I’m very happy with the way my monster turned out and I feel like bringing that negative aspect of my weight loss journey to light will help give me a little more control over my cravings and unhealthy eating in the future.

If you would like support on your weight loss journey, feel free to join my Art of Healthy Living Group on Facebook.

You can always find great ideas and projects on the Creative Paperclay® blog.

 http://www.youtube.com/watch?v=CX8c14hF788&feature=youtu.be

Tuesday, June 5, 2012

Power Spoon by Edie

Last year one of my best friends (we will call her *N*) was diagnosed with fibromyalgia and was having an extremely hard time understanding it for herself, much less explaining how she felt to other people. One night, while talking on the phone about an exceptionally emotional day she was having, I sent *N* a link to a YouTube video for Christine Miserandino’s Spoon Theory.

We sat on the phone as she watched the video and I could hear her crying even more on the other end. Even though *N* has Fibro and Christine has Lupus, the feelings and concept associated with The Spoon Theory are the same… limited Spoons.

Throughout the video *N* kept saying “Yes! That’s it!” and when it was over she felt like she had FINALLY found some understanding for herself a s well as a way to explain her illness to other people. I will never forget the relief in her voice and how she said she felt after watching that video.

Every since that night, *N* has had an affinity for spoons. She notices them in the most random places and has started collecting them for her home. Knowing this and knowing that she is a believer in the power of positive thought, I decided to make her a Power Spoon.
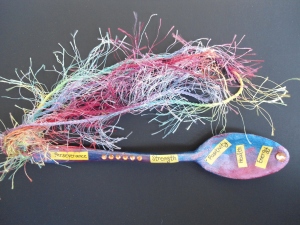
 

I have wanted to create a Power Spoon for MONTHS now and although I wanted to use a real spoon, I didn’t want to have to drill or sand a real spoon to alter it. Rather than pull out the power tools, I created this Power Spoon by pressing Creative Paperclay right over the top of a vintage spoon I had been saving for the project. I followed the line of the real spoon, pulling away excess clay as I went. I pressed my clay into the well of the spoon and smoothed the edges with water. Using a toothpick I poked a hole in the tip of the handle which would allow me to add embellishments to the finished project.
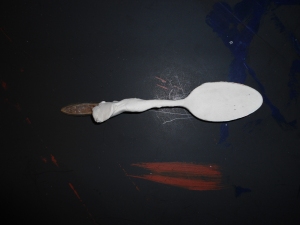


Once the Creative Paperclay was completely dry, I gently removed it from the real spoon and was able to work with it as normal. The handle of my Creative Paperclay spoon is thin, so I let my clay spoon rest on the real spoon as much as possible as I worked to ensure I didn’t break it by accident. I learned to make the handles thicker in the future :)
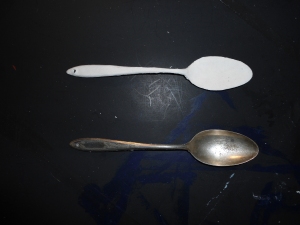
 

With out telling her why, I asked *N* to give me a list of colors that made her feel happy and energized. I painted the entire spoon with acrylic paints in three of those colors, then used the other two power colors for the embellishments.


Next, I printed out a list of empowering feelings I wanted *N* to feel while looking at her Power Spoon, colored the paper with Mustard Seed Distress Ink and attached them to the spoon using gel medium. I also added some bling to the handle and on the very end of the spoon, then painted the entire spoon with gel medium to give it some shine.
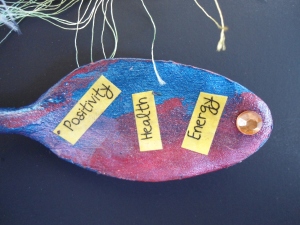
 

 Lastly, I added some really cool yarn though the hole for even more fun, but also to allow the Power Spoon to be hung. I wrote *N* a note explaining what the spoon represented and sent it in the mail as a surprise. She hasn’t gotten it yet, but I will be sure to let you know her reaction when she does get it I will be making more of these Power Spoons and I think I may even offer them for sale *squee!*
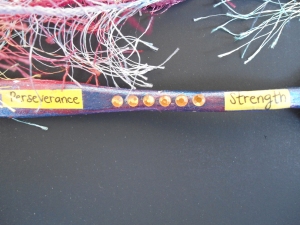


Since making this first Power Spoon, I have changed the process quite a bit, but you will have to wait until much later in the month to see that I love that these Power Spoons can be customized for each individual in every way and that it may give them that extra little boost they need when they are running low on spoons <3 You can see more of my work on my blog.