Thursday, September 22, 2011

Polka Dot Pumpkins

Polka dots are very popular right now, and with the coming of autumn, Halloween and even Thanksgiving, this project is something to add a flash of color and a bit of whimsy to your home decorating.

You will need:
Creative Paperclay http://www.paperclay.com/
Styrofoam or papermache' pumpkins from the hobby store ( I suggest a group of three)
Acrylic Paint in your choice of colors
White glue (optional)
Paint brushes

Step one: Cover your pumpkins with a thin layer of white glue and let it dry at least part way. That will assure that the clay sticks permanently to the piece, especially if you use styrofoam.

Step two: Cover the entire pumpkin with paperclay. I pinch a ball of clay into a flat elongated oval, pinching more in the center to make it concave. Put the clay on the pumpkin, and starting at one end of the oval, press your thumbs against it, as you move around the circumference of the pumpkin's body. Then bring the clay up over the top and bottom, and make sure the seams are sealed. Take your pinkie finger, and lay it against the pumpkin, where one of the indentations are, and rock your finger back and forth to press a smooth indentation in the side of the pumpkin. Do this with every indentation, then wet your fingers to smooth out the clay, moving toward the top and the bottom. Remove any extra clay that forms at the stem and bottom, and smooth that area flat.

Step three: Make a stem by rolling a cone shaped piece of clay, then flaring one end out larger than the other. Flatten both ends, and make indentations in the sides of the stem with whatever tool you have handy (toothpick, knitting needle, etc.). Place the stem and pumpkin somewhere to dry, then once the surface is dry, attach the stem with white glue. If you skip the glue, and just stick the stem on before drying, you will probably find that it comes loose later, so it's best to just glue it from the start.

This is what you get:
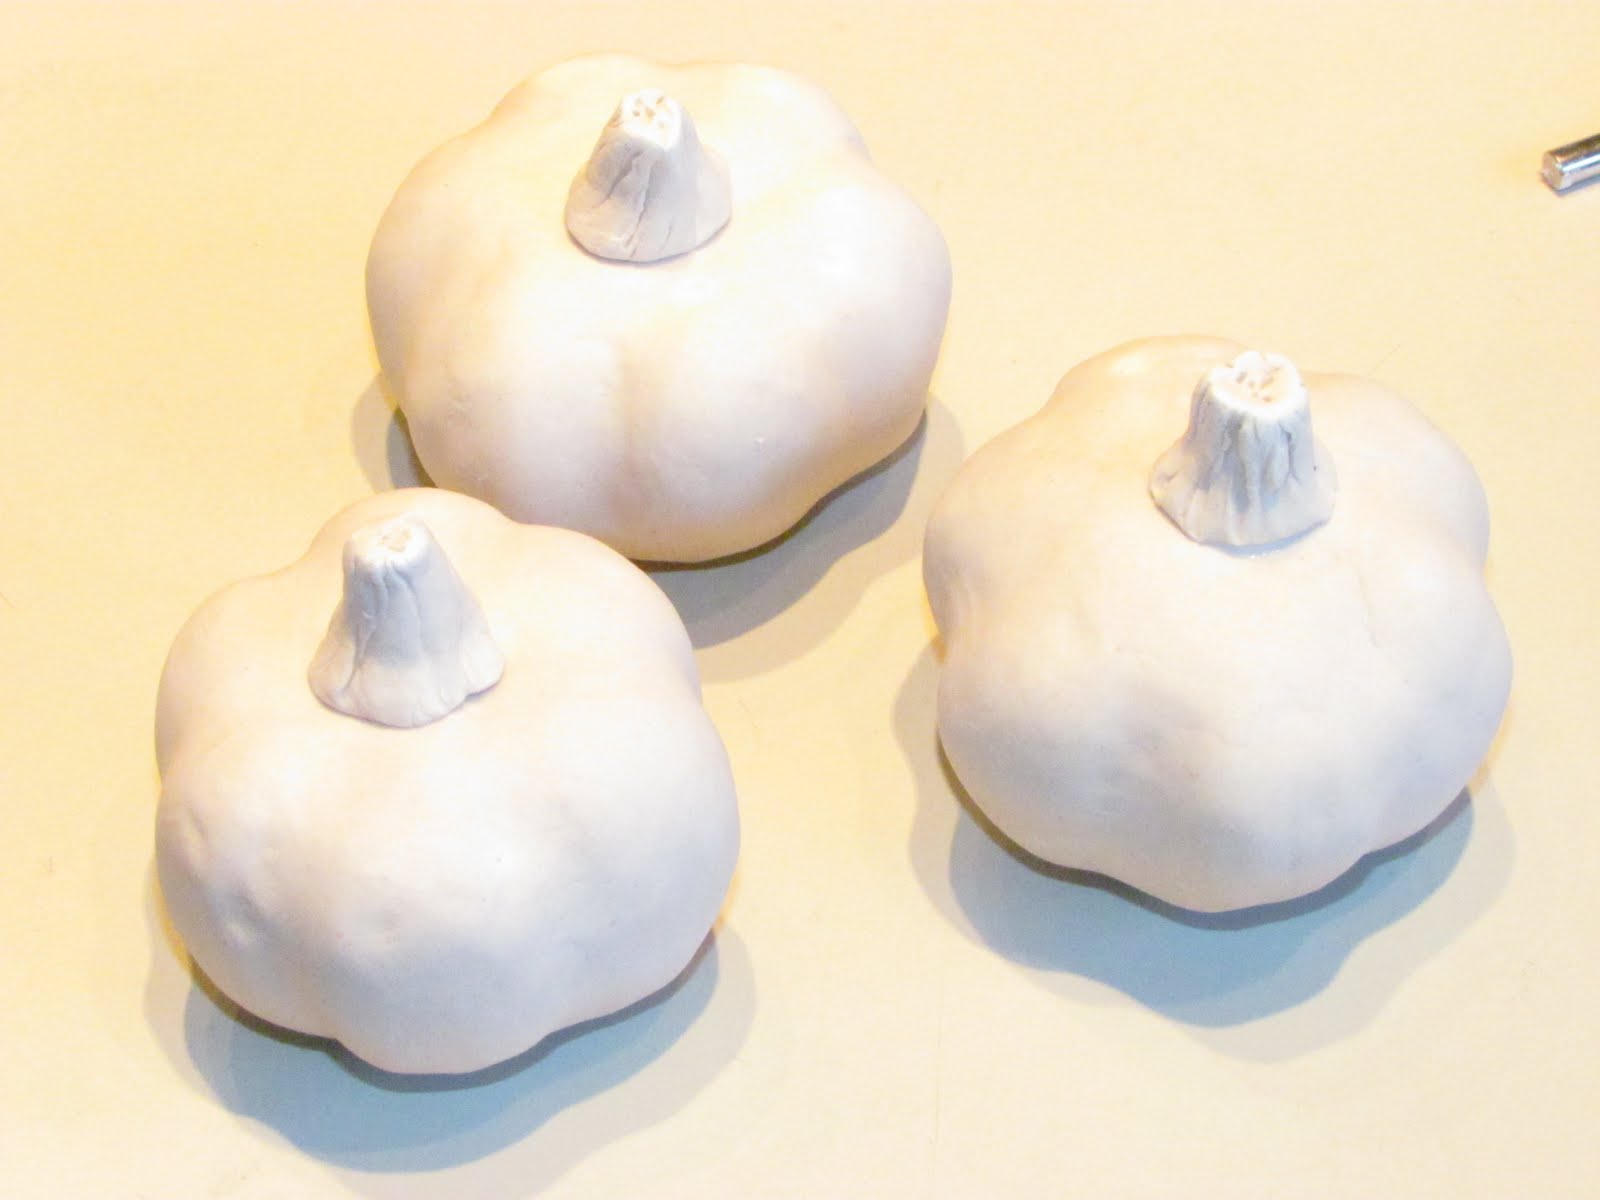

Step four, and always my favorite part of the process when I use Creative Paperclay: Color!!! Paint the pumpkins solid, using the color(s) of your choice. I made mine for Halloween, but I plan to make some for November as well, with earth tones. The dots will be mossy greens, most likely. But for now, a little pizzazz is in order with orange, purple and bright green being dominate, and a touch of black and white for contrast and balance. I made the dots different sizes and placed them randomly, but you could do a pattern, instead.

If you like glitter, the dots could be done with glitter paint or real glitter. You could even put a coat of clear glitter over the entire thing, but only if there is a good contrast between your colors. Otherwise the dots will get lost in a blur.


Tuesday, September 20, 2011

stamping on Creative Paperclay

Terri Sproul here, I am having so much fun with this Design Team for Creative Paperclay.  Are they not just amazing or what?
Anyways, today I just want you to see how you can using paperclay in another way,
how about with Stamps?
  Add this to a card or a scrapbook page....  Super easy....


Supplies:
Stamp:  “Italian Sonnet Background” #16210 by Viva Las Vegastamps!
Black Ink:  “India Ink” – Stewart Superior
Glaze: “Patina Green”:  Golden Artist colors
Cardstock:  White to make cardbase 5” ½ x 4” ¼” finished size
Pattern Paper:  Die Cuts with a View:  World Traveler Stack
Brown Ribbon
Rolling Pin, cutting tools if need

Here is a video to help you out....  i have more of my video at http://www.youtube.com/terrisproul


Directions
         Roll out Delight clay to about 1/8”  – ¼” thick.  Ink Stamp with India Ink and Press stamp into clay – see video for help.
2)      Let clay dry and paint with Patina Green Glaze.  Add color lightly and add more as needed… 
3)      Adhere the Pattern Paper to cardbase with Miracle tape….
4)      Adhere the Ribbon to my card with Miracle tape
5)      Adhere my Delight stamped image to my card with my Miracle tape….


Super easy to add some new dimension to your cards/scrapbook/mixed media project.  Pick up a package of Creative Paperclay or Delight soon and start playing.
hope you stop by my blog and visit...  here is the LINK  

Thanks...
Terri Sproul

Thursday, September 15, 2011

How To Make a Monster Bookmark in 5 Steps!

By Amanda Marks

This idea is nothing new I originally saw something very similar on Pinterest with the Wicked Witch of the East in a book.  My friend Leslierahye did an amazing bookmark out of felt with one of my digis for a design team project.  I really needed a bookmark and I decided to combine both ideas to make one (I have already lost my new bookmark to my daughter.)

Materials Needed:
Creative Paperclay
Chip board (I used a coaster)
Scissors
Fondant Roller
Circle Clay Cutter
Sculpting Tools
Black String
Needle with the end snipped off stuck in a cork
Googly Eyes
Paint
Paint Brush
Water
Sandpaper (optional)
1.  Roll out clay to a unformed thickness.  Take circle cutter and cut two circles.

2.  Cut coaster to the desired width.


3.  Score clay and lay the coaster in the middle of the bottom circle.  Add water and score the other piece of clay and smooth them together.  Add two circles for googly eyes and detail for the mouth.


4.  Taking the needle insert the string into the top of the "head" to produce hair.  Allow to dry for 24 hours.


5.  Sand if desire.  Paint and seal!  Find a good book to keep your new bookmark in!


Tuesday, September 13, 2011

Halloween wreath using paperclay embellishments

Good morning friends

Today I want to share a project that was super easy and fun involving some more cookie cutters.  I just love working with it for embellishments for my scrapbooking but this time I used the paper clay to make pumpkins for a wreath.

Here are my step by step instructions, kinda picture heavy.
Just roll you paper clay like usual.  The thickness depends 
totally on you and how thick you want you embellishment to be.
Then just cut it out with your cookie cutter.
I picked this one up at Michaels in the 
Halloween section for $.99
I also cut out some circles that I will turn into buttons.
Now let them dry...again, drying time depends on 
the thickness of them.  These dried in about 4 hours.
Then I painted them with standard acrylic paints.
I used a stamp with embossing ink to stamp my button
and then embossed it my black embossing powder
just gives it a really cool effect.  Now you can
make ANY button to your hearts content.
Then I embellished the pumpkin with google eyes,
cardstock nose and mouth cut with my E-Craft 
and some silk leaves just for a more dramatic affect.
Now I started with a free frisbee we got at the
sportsman's show at the beginning of summer and
wrapped it with sparkly purple ribbon.
Wreath...
I made some stick pins and added them behind some
silk flowers that I took apart and hot glued to the wreath.
I added some glass tiger eye blobs to the center and
used my new "glitter gelly roll" pen to give accent
to the purple flower petals.  Really sparkly!!!
I hot glued 4 pumpkins around the wreath.
and added some Halloween colored
glass ornaments to more of the same
purple ribbon and hot glued one of
my homemade buttons to the center.


Isn't this just cute?  Well, I think so anyway.  I hope you liked my Creative Paperclay project today.  I hope I've inspired you to create your own embellishments and make something with them using some Creative Paperclay.  You can purchase Creative Paperclay here or you can even get it at Hobby Lobby or Michaels.

Saturday, September 10, 2011

Help to Remember the Summer With Your Own Sun Ornament!!!

I love the autumn, but I cannot believe how fast this summer has gone by! I decided to make some ornaments that will remind me of the summer sunshine. I hope these ornaments do the same for you!

What You'll Need
Creative Paperclay
3" Styrofoam Ball
12 gauge jewelry or gardening wire
Butter knife or other sharp object able to cut through styrofoam
Non-stick craft mat
Acrylic paint (not pictured)
Embroidery floss (not pictured)


What To Do
1. Take the styrofoam ball and cut it in half.


2. Take some paperclay and cover one half of the styrofoam ball. Put the other half of styrofoam ball away for another ornament or project. Or, cover both and feel free to make an ornament buddy...like a moon!


3. Add bits of clay to the flat part of the covered styrofoam to build a face. I start with the nose and work my way out. Small dots of clay and teeny tiny snakes of clay work really well for building facial features. I use my fingers for most of the sculpting, but sometimes a toothpick is really helpful in placing tiny features onto a face.


4. Add the sun ornament's "rays" by sculpting 9-12 triangular shapes out of the paperclay. Make sure these pieces have some length so that they can be blended into the back of the sun.

5. Repeat this process until the sun has all of its "rays." If you have fumble fingers or are dislike doing things more than once (like me), then I suggest allowing your sculpted sun's face to dry before continuing with the ray application process. Very often, some of the face will be smooshed and will require a few quick fixes during the ray sculpting process.

IMPORTANT: If you prefer your facial features to dry completely, please skip to step 6 before you pop your ornament in the oven or set in on the windowsill!


6. Take 5 inches of your 12 gauge wire, fold it in half allowing for a loop at the top. Twist the wire and push it into the back of your sun ornament. Make sure it is nice and secure inside the styrofoam. Allow your ornament to dry completely, or pop it in a 225 degree oven for 15-20 minutes. (Every oven is different, keep a very close eye on your ornament or you may have a blown up alien-looking ornament instead!)


7. Once your sculpted ornament is dry, it's time to decorate it! I use acrylic paints...you can use whatever your heart desires!!!


8. Once your sun ornament's paint is dry, take some embroidery floss (or yarn, strong thread, whatever you have on hand) and string your new sun ornament up. I like to hang mine from a ceiling fan or door knob. My sun ornament reminds me of summer all year round! Hope it does the same for you!!!