Showing posts with label Debbie Luttrell. Show all posts

Thursday, October 27, 2011

Flying Piggy Needs a Little Nap


If you've ever had a dream where you can fly, you understand what I'm talking about when I say that I wonder of animals who can fly dream about walking, or running, or just plain laying around doing nothing. Here's a little tutorial on how to make my little sleeping winged piglet. It was one of the tutorials that I made to apply for the Creative Paperclay team last spring. But hopefully, it will give some of you who are new to paperclay, or to making armatures a way to look inside a figure, and see what you need to do to build up the inner workings.

This will be my final tutorial for the Creative Paperclay Company. I have enjoyed my stint doing these tutorials, but life is so busy for me that I chose not to re-apply for the current team. I wish all the new team members success, and lots of traffic to your own blog. Have fun, and best of luck!

The first thing to think about when doing an armature is 'shape'. Look at an object and see what 3-d shapes it's made of. If you can see a shape in something, then it's a simple process to replicate it.
My piglet's body is very much an egg shape, so that is the logical piece to use as a building block. Fortunately, I go to thrift stores a lot to find odd and end crafting materials for armatures as well as other work. I don't buy new styrofoam shapes, as I am very environmentally conscious, but had these on hand from a bag of junk store treasures. You could also use any other medium to build up an armature, such as aluminum foil. My foil is clean, repurposed foil. I never throw away anything that I can use in my art. It is not only cheaper, but the right thing to do. I leave a restaurant with foil neatly folded in my pocket to put through the last of the hot soapy dish water later that night. You would have to use hot glue to glue that together though. Foam can be put together with toothpicks, and bent paper clips.

The only things needed for this project are:

one 3" foam egg
one 2" foam ball
one 1" foam ball
Toothpicks or paper clips
White glue
Masking tape
Creative Paperclay
Acrylic paint


I tried to use the entire foam egg and ball. The only part that I had left over was half of the ball that I used for his snout. That went back into my supplies. I used masking tape to hold the pieces together, as well as inserting toothpicks and paper clips, because when you spread the paperclay over the armature, you want it to stay together well.

Once the armature is completely built, the only thing left to do is to spread it with paperclay. I like to spread a little white glue over the armature, and allow it to dry until it's just a bit tacky before trying to add the clay. You can do it in sections.
Then I take a piece of the clay, and try to press it relatively flat and thin with my fingers, then place it over the armature, adding others as I go, and then wetting my fingers to smooth the clay. I don't like to have to sand later, so I try to get the clay as smooth as possible. Shape the feet into hooves. Make nostrils in the snout.


The last part to make is a pair of wings if you want your pig to have them. Just a simple flat triangle, with some indentations made with the open end of an ink pen or straw, and a butter knife or small knitting needle. Let them dry separately, rather than attaching them now.

After he is dry, you can paint him whatever color you'd like. I made mine pink, but dry brushed a little cocoa color over him for a dirty pig look. Paint the wings, and after they dry, attach them with a little glue. I curled a wire and inserted it for a tail after he was finished. When you have a thinner layer of clay over something like styrofoam, it's easy to penetrate it with the wire or a needle. I took the wire out, and added some glue before re-inserting it. I later painted the wire, but when I took this photo, I was planning on making a different tail. I'm glad that I didn't, because he makes a perfect holder for a pen or pencil.


Well, folks, like Porky Pig said "Th-th-th-th-th-at's All F-f-f-f-f--f--f-olks!!!" I hope to stay in touch with all of you, so please consider following me on my:


Thursday, October 13, 2011

Funny Bird


For this project, you will need:


3" styrofoam ball


2" styrofoam ball


1 1/2" styrofoam ball


1" styrofoam ball


(or you can substitute balls of foil, if desired)


2 thin bamboo skewers, or stiff wire, like from a clothes hanger


an additional piece of stiff wire, about 8" long


aluminum foil


Spanish moss for the nest


acrylic paint


masking tape -1" is a good width


white glue -like Elmer's


hot glue, and gun

CREATIVE PAPERCLAY


Step ONE:


Cut the 3" ball in half to make the base for the statue.


Cut the 1' ball in half to make the tail. You will only need 1/2 of each ball for this project.


Then build the armature of the bird using the 2" and 1 1/2" balls, by inserting the skewers as shown below. The top of the head should have the two skewers perfectly lined up in the center, and about 1/2" apart. See the two tallest head feathers in the photo? Those are the two skewers, covered in paperclay.

Take the 1" ball half, and tape it to the back side of the bird, down low for his tail.


Bend the piece of wire into a flat armature for the branch, then wrap foil around it to
make it into a cylindrical shape, about as thick as a pencil. You can create a forked appearance to your branch, by bending the wire in two narrow loops at one end.


I like to cover everything with masking tape before covering armatures with clay. Your choice, of course.


Step TWO:

Cover the bird armature with a layer of clay. I coat mine with glue to assure sticking. The clay should be about 1/5 of an inch thick. I am a polymer clay artist, so I have a pasta machine devoted to clay. It works with paperclay too, so if you want to use a pasta machine to roll your clay flat to cover the armatures, use the third largest setting.

Make sure that you cover the two skewers and shape them as you like. I made mine flatter on the front and back. You can make the beak now, or later. Use something like the eraser on a pencil to make indentations where the beak parts will go. You can attach the beak either before drying, or dry it separately, then glue it on later. You can indent some feathers in his chest with a fingernail, or the end of a straw, etc.

While the body is drying, you can make two wings from paperclay. I have an example below for you, or you can design them your way. You can use household items to make indentations for the feathers. I used a thin straw, and a flat sculpting tool.

Also make the tail feathers, and set them aside. I did a group of three, which are painted blue and red in the photo above. Make the feet by indenting two places in the edge of a small disc of clay.

If you are very steady with your hands, and feel confident, you can apply the feet, beak, wings and tail feathers now, with the use of a bit of glue, paperclay, or both. You will have to have a sturdy place to set him aside, so he won't get knocked over while he's drying. Otherwise, you can attach them later, and let him dry in about any position.

You can also either add the shorter head feathers before he dries, or wait to do it when you can hold onto his dry body while you work. Either way, you need to make three upside-down teardrop shaped feathers to add around the two tall feathers on his head. Smooth them out at the bottom, like an inverted V, so they will look like they are part of him, not just sitting on his head.


Step THREE:

Make the base by covering the rounded side of one half of the 3" ball with clay. You can cover the bottom as well. Or you can glue on some felt later. Smooth it, and set it aside to dry.
___________________________________________________________

Step FOUR:

Take some long strands of Spanish moss ( about an inch wide), and twist them to make a loose rope-like strand. Not too tight. This is the nest, but it will be shaped like a donut.

Also at this time find something like a piece of styrofoam, that is about 1/2" thick, and about the same wide. Like the size of a die out of a game. This can be made form the clay too, but I like to re-use things, so I used a piece of styrofoam packing material. All this piece does is serve as a rest for the bird's butt, to raise him up level with the branch his feet will be on. You'll cover it with bits of moss to hide it.


Step FIVE:

Cover the branch with a thin layer of clay, leaving the forked ends bare to add leaves. I added a wire extension so that the top leaf would be higher. Use a butter knife or sculpting tool to create lines in it, like bark. Add a few leaves stuck on the ends of the wire and one or two here and there. I let the two on the ends of the wire dry on it, but I made the middle leaf separately, and glued it on after drying and painting. Your choice.

Step SIX:

Assuming that everything has been assembled, and is now dry, you can sand lightly, if desired, then paint in your choice of colors. I painted the base sky blue, and added leaves to give the appearance that the nest is in a tree, but you could make the base any solid color. I painted the branch and leaves a darker color, then dry-brushed a lighter color over that to show the textured details.

Step SEVEN:

Heat your glue gun. Assemble as shown in the picture above, by gluing the nest on the base, leaving the center of the moss ring open, like a nest.

Then set the branch in place, making sure that it makes contact with the base, You don't want to glue it on the nest so much, as you do the base. You need stability to set the bird on it, and don't want it tipping and tearing off the moss. So, position the branch where you want it, and hot glue the back half of it to the base, leaving most of the opening in the moss for the bird.

Then set the bird with his feet on the branch, but don't glue him. See where you need to put the square riser piece to support him. It will probably be right in the center of the opening in the moss, but it might need to be back some. Glue it directly to the base when you know where it needs to be. Then add a little more glue around it, and tuck some scrap moss around it, but not on top.

Put glue on the bottom of the bird's feet (lightly) and on top of the riser, then quickly set him in position and hole him while the glue cools.

You can glue felt to the bottom if you wish, and didn't cover it with clay. You can also put it on a wooden decorative base, like you buy at the craft store.


Thursday, September 22, 2011

Polka Dot Pumpkins

Polka dots are very popular right now, and with the coming of autumn, Halloween and even Thanksgiving, this project is something to add a flash of color and a bit of whimsy to your home decorating.

You will need:
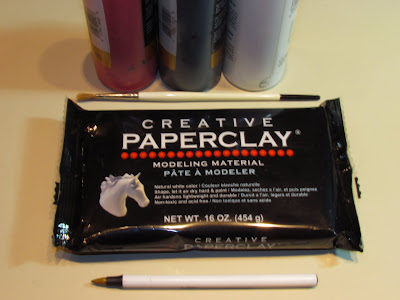
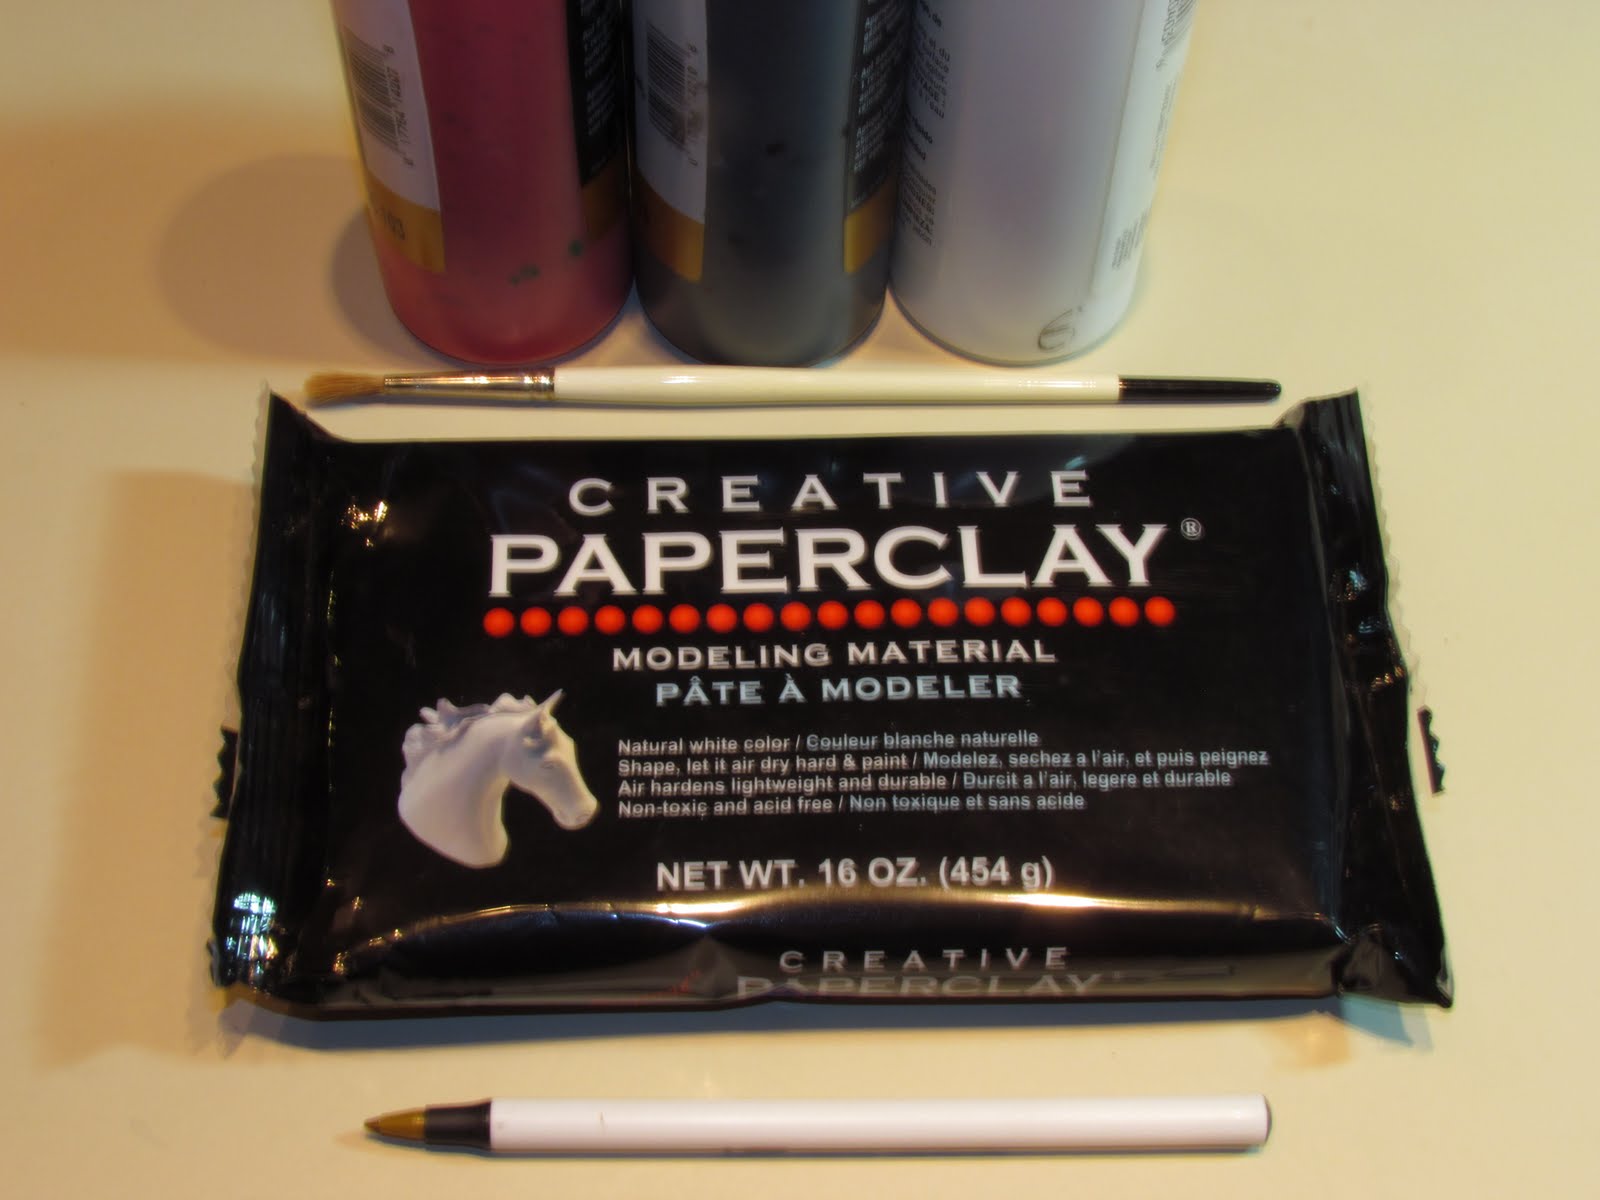
Creative Paperclay http://www.paperclay.com/
Styrofoam or papermache' pumpkins from the hobby store ( I suggest a group of three)
Acrylic Paint in your choice of colors
White glue (optional)
Paint brushes

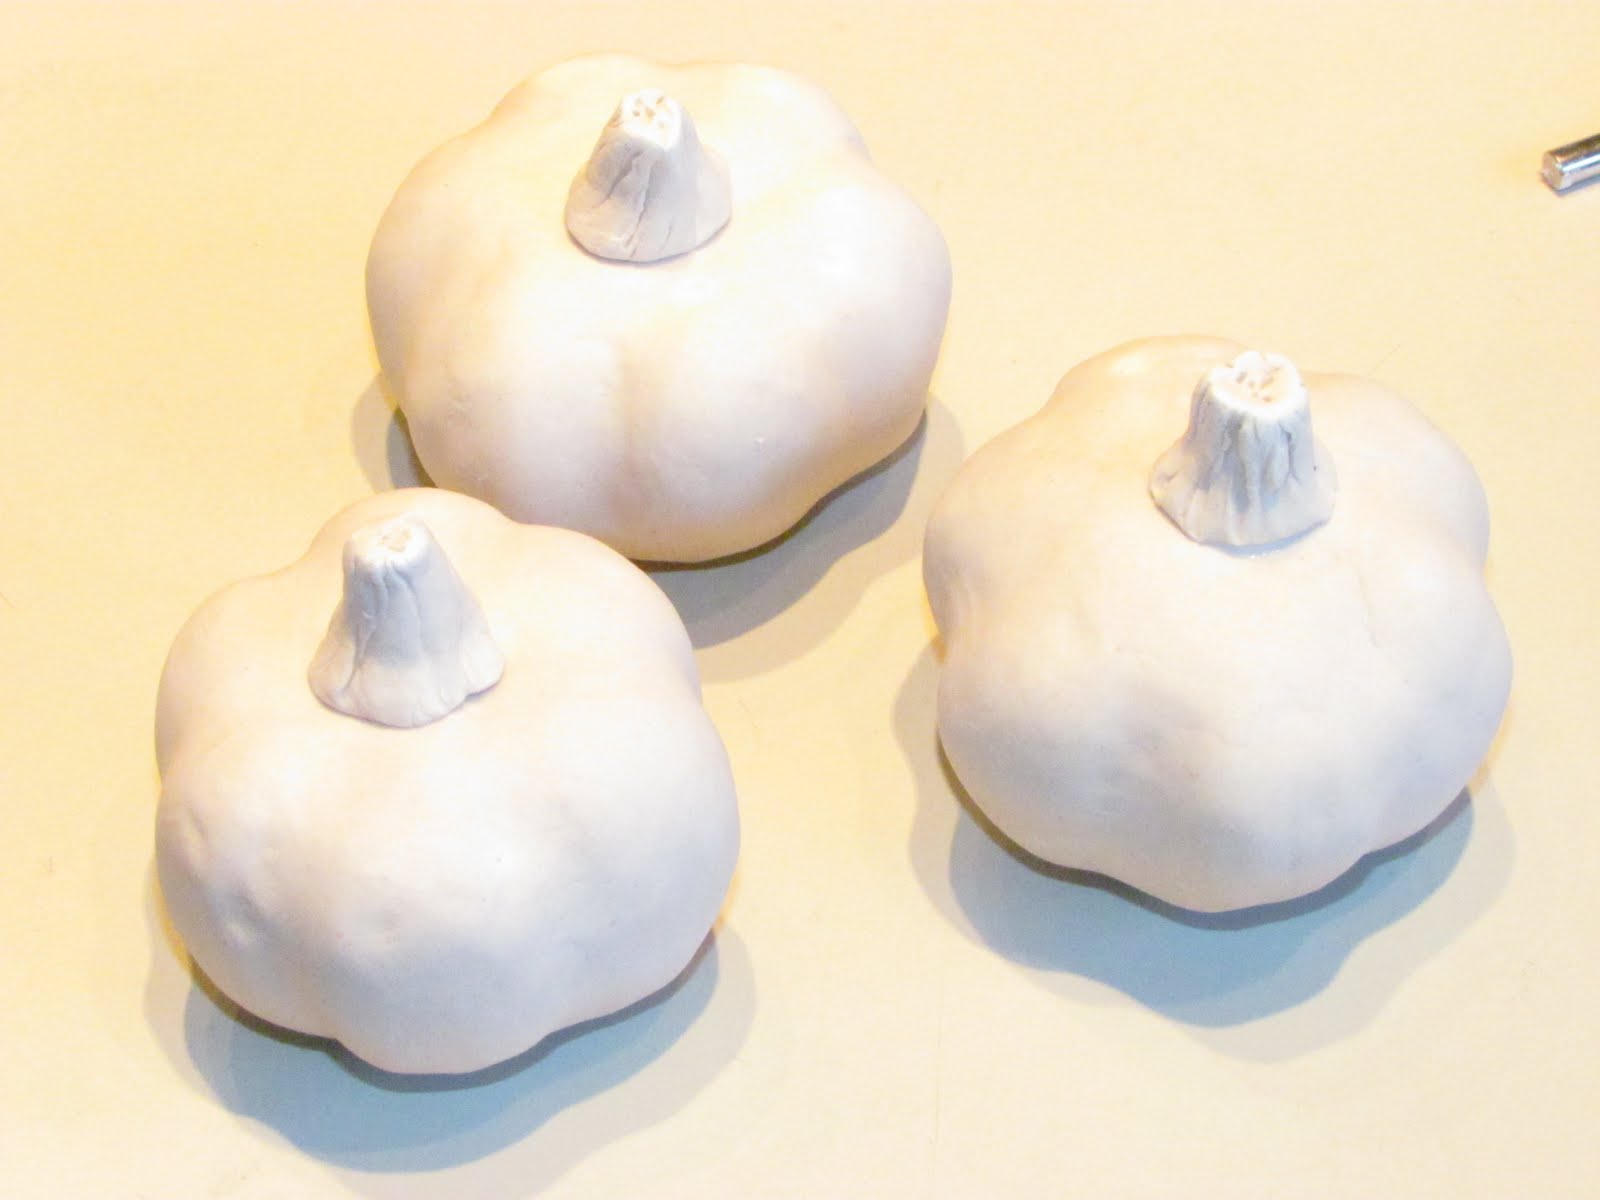
Step one: Cover your pumpkins with a thin layer of white glue and let it dry at least part way. That will assure that the clay sticks permanently to the piece, especially if you use styrofoam.

Step two: Cover the entire pumpkin with paperclay. I pinch a ball of clay into a flat elongated oval, pinching more in the center to make it concave. Put the clay on the pumpkin, and starting at one end of the oval, press your thumbs against it, as you move around the circumference of the pumpkin's body. Then bring the clay up over the top and bottom, and make sure the seams are sealed. Take your pinkie finger, and lay it against the pumpkin, where one of the indentations are, and rock your finger back and forth to press a smooth indentation in the side of the pumpkin. Do this with every indentation, then wet your fingers to smooth out the clay, moving toward the top and the bottom. Remove any extra clay that forms at the stem and bottom, and smooth that area flat.

Step three: Make a stem by rolling a cone shaped piece of clay, then flaring one end out larger than the other. Flatten both ends, and make indentations in the sides of the stem with whatever tool you have handy (toothpick, knitting needle, etc.). Place the stem and pumpkin somewhere to dry, then once the surface is dry, attach the stem with white glue. If you skip the glue, and just stick the stem on before drying, you will probably find that it comes loose later, so it's best to just glue it from the start.

This is what you get:


Step four, and always my favorite part of the process when I use Creative Paperclay: Color!!! Paint the pumpkins solid, using the color(s) of your choice. I made mine for Halloween, but I plan to make some for November as well, with earth tones. The dots will be mossy greens, most likely. But for now, a little pizzazz is in order with orange, purple and bright green being dominate, and a touch of black and white for contrast and balance. I made the dots different sizes and placed them randomly, but you could do a pattern, instead.

If you like glitter, the dots could be done with glitter paint or real glitter. You could even put a coat of clear glitter over the entire thing, but only if there is a good contrast between your colors. Otherwise the dots will get lost in a blur.


Thursday, September 8, 2011

Tic, Tac, .... BOO!

It's that time of the year again. Cooler weather, leaves beginning to turn just a bit, and for me at least, thoughts of Halloween and what I'll be making for treats for the kids in the family. All kids can play tic-tac-toe, and most of us have access to some small tins. So here's a way to use that tin, show some creativity, and make the kids happy too.


For this project, you will need:

Creative Paperclay, available at Dick Blick's, HobbyLobby, and on-line at http://www.paperclay.com/
A small tin with a lid, like the ones mints come in
White glue
A bit of decorative paper for the lining (optional)
Acrylic paint and brushes
Odd and end tools to make impressions in the clay
Spray paint for metal in black or your choice of colors


First you will want to sand the tin, and paint it. I like to use a sanding sponge. It goes around curves so much easier than paper. If you don't sand, the paint will not stick well. Paint the tin, doing at least two coats. Make sure you sand and paint the inside, whether you use the decorative paper or not.

While your coats of paint dry on the tin, you will make ten tiny figures in two styles. I made five ghosts and five pumpkins, but you could do it another way. You could do ten tiny figures, all different and then paint five one color, and five another color. And think ahead. This could be a Christmas theme with snowmen, Santas, fir trees, etc..

To make the pumpkins, I rolled a small ball of clay, almost a half-inch wide, then took a bamboo skewer and rolled it along the side five times to make the segments. Then I inserted the skewer into the top to make a hole to add a tiny cone shaped stem. Use just a touch of white glue in the hole, or when the stem shrinks with drying, it will come loose.

For the ghosts, I rolled a small cone shape, flattening the bottom well, and rounding the top. Then I used the skewer to make holes for the eyes. Simple as can be.

Paint the ghost's eye area black, and the entire pumpkin black as well.

While that dries, you can cut the lining paper for the inside of your tin. To get the right size, place the bottom of the tin on the paper, and trace around it. That will be almost the perfect size for inside the lid. Then do the same for the bottom inside of the tin, but you'll have to trim it a bit all around to make it smaller and therefore fit inside. Check it before trimming, so you don't remove too much.


For the top of the tin, you need to make a game board. Some tins have the name-brand indented into the top. No problem. Just roll a thin sheet of Creative Paperclay to fit. Smear a layer of glue on top of the tin, then put your rolled sheet of clay on top and trim all around the sides to fit. Using a wet finger, smooth the clay to remove mars. Decorate the top as you'd like.

I made tiny ropes of clay to create a border for the actual game area. I then took a small knitting needle to indent the grooves , creating a rippled effect. I used the knitting needle to mark the squares in the center, for placement of the playing pieces.


The last thing to do is the painting. I finished the pumpkins by wiping the orange paint side to side, leaving the black paint in the dents. The ghosts just needed a coat of white everywhere but the eyes. The tin was painted as you see it, just using Halloween colors. The pieces are small enough that they fit easily inside for storage.

Wouldn't this make a cute stocking stuffer? You could do it Christmasy, or in about any theme. Dinosaurs, cars, flowers, fairies... the choices are practically limitless.

Come visit me on my Facebook page: https://www.facebook.com/NightmaresAndDayDreams

Thursday, August 11, 2011

Paperclay Bowl


Today we're going to make a bowl, which will take more clay than I usually require for one of my tutorials. You will need a 16 oz package of Creative Paperclay, most likely, depending on the size of your bowl
You will also need a bowl or similar shape to form your bowl over, and some foil. Once you have it finished, you will want to paint it, so I recommend acrylic paints.
I found it easiest to roll the clay out on the foil, so that I could lift it ont the bowl I used as a form. I created a texture for interest while it was still flat.


Then I picked it up, foil and all and draped it over the upside-down bowl. I pulled the clay away from the foil some where it was crimped, so that the clay would not dry around the folds and get stuck. If you just release the clay a bit from the foil, and smooth the foil flat, that clay will lay against it well.


Let your bowl dry for about three days, then pull the foil away from the bowl, gently, as you go. You might find that you should allow the clay to dry a bit more before you paint. But you can use this time to add an edge along the top of the bowl, to hide raw edges. I just made small balls of clay, wet them a bit, and folded them over the edge. You can make the legs ahead of time, so that they will dry at the same time as the bowl, and be ready. See the picture below. I made a foil core, then covered that with clay to make the legs. Once both the bowl and the legs are dry, you can choose about any glue or adhesive to attach the two.


Basically, all you have left to do is paint. I suggest that you use a rather stiff brush to get the paint into the texture well, and that you dry brush a lighter color over the dark once you have good coverage of the base coat. I have painted my base coat on this bowl, but I'm waiting to do the final color because I am getting ready to paint the room it's going in, and I want them to match. I will post another pic of the finished bowl showing the final color that I chose, once my room is done.

You can order Creative paperclay at: http://www.paperclay.com/

Thursday, July 21, 2011

A Fruit-Themed Necklace for the Kids to Make


I wanted to design a project that is easy for the kids to do before they have to return to school. Something summer-like. And of course, something fun and colorful. This necklace can easily be adapted if your son would prefer not to wear a necklace made of fruit. We'll get to some ideas on that later in this tutorial.You won't need much for this project, as far as tools go. Just a few household items, such as an ink pen, a skewer or needle tool, and your hands. Then a little paint after the pieces have dried.

Rather than using the standard Creative Paperclay product, we'll be using Delight, which is a lighter, fluffy product, similar to marshmallow fluff, without the stickiness. It's also an air-dry medium, but you don't want to try to rush drying in a low oven, so give yourself at least a couple of days to dry, before attempting to paint it. Three days in humid weather. You can add color to the clay before molding it, but I would only use food coloring, if little hands are going to be in it. An adult could probably try powdered pigments, or even a bit of paint. I'll try it later and get back to you on that one.


Start by making balls of Delight about an inch wide. Roll on one side of a ball to taper it slightly into an apple shape, and a bit more rolling on another ball to shape it into a pear. Do one at a time to avoid drying. I found that wetting the palms of my hands a bit with a damp sponge really helped to make the balls smooth, and keep it from drying too fast.


After getting the apple and pear made, use the ink tip of a cheap pen to create the stem opening on the top, and a small bud opening on the bottom. Then insert a small stem made from Delight. Use the ink tip of the pen to gently poke small dents all over the ball that will be an orange. An optional stem would be a whole clove glued in after painting. You could insert it, then remove it while the drying and painting are going on. On the orange, you would want to insert it deeply, and just leave a bit out to be seen.


Here I have made a wedge of watermelon, too. Try to get the edges sharp on it, so it will look like it was cut. Then to make a cluster of grapes, you will make a 1/2 "cone shape from Delight, and cover it completely with small balls. I found that touching them against the damp sponge helped the ball to stick. When you are done,it will be about an inch high. Insert a small stem of Delight in the top of the cluster.


Now you will want to decide whether you fruit will become beads for a necklace or perhaps a keychain before making the holes. If you want to make a keychain, I would drill the holes more top-to-bottom, than from the side. You could stack all the fruit on top of one another for a keychain, or just use one piece per keychain. It could be a bookmark if you string a cord through it that is long enough, like about 8 inches at least. Or a cell phone fob, etc. Your kids might have ideas all their own.

But if you are going to do a necklace, it would be best to drill the beads side-to-side. And don't make the holes half-way up, but more toward the top of the bead. To make holes, use a skewer, toothpick, or needle-tool and wet it first. Using a drilling motion, insert it into the fruit until you feel it drilling through the other side. Remove it, and complete drilling the hole by inserting the tool into the hole on the opposite side, where you felt the tool coming through. Again, wet the tool first. That will make drilling a breeze, and be less likely to distort your bead. And keep the tool rotating as you go. Once the tool is inserted completely through the fruit, remove the fruit, and place it in a safe place where it won't be disturbed for up to three days if necessary.


Once dry, the fruit can be painted. I found it easier to re-insert the skewer while painting, and then you can leave it on while the paint dries.

Mine was made into a simple necklace with a hemp cord, but the possibilities are endless. I think some brightly colored pony beads would look nice, or perhaps it could become a lei, by threading on some smaller silk flower sections.
Don't limit the fruit to what I have made. I think a lot of kids would like bananas (perhaps accompanied by a monkey head?), kiwi, plums, peaches, etc.. Even limes and lemons would be nice. And by using Delight, you could put fruit on a necklace by the dozens, since it is almost weightless. You could even make a fruit hat like Carmen Miranda wore and it wouldn't be heavy at all.
Find Creative Paperclay products at Hobby Lobby and Dick Blick's, as well as ordering them direct from the company at http://www.paperclay.com/

Please feel free to follow me on: Facebook https://www.facebook.com/NightmaresAndDayDreams and on my art blog at http://nightanddayartetc.blogspot.com/

Thursday, July 7, 2011

Spirit Dolls


Many cultures have a history of creating dolls that hold spirits or just represent faith and spirituality. The Native Americans made dolls that they believe represented the guardian spirits that inhabited the forest, mountains, rivers, and plains. Regardless of your beliefs, spirit dolls have become a collectable piece that many people enjoy as art in their home, or on their person. For these small dolls, you will need:

Creative Paperclay
Face mold, or talent in sculpting small faces
Acrylic paint
Yarn in natural fibers, thin strips of torn cloth, wire, or whatever you want to wrap her with
Sticks- I used some craft sticks that are about two and one-half inches long
Glue
Any embellishments you might like, such as charms, beads, etc.

The first thing is to cover at least one end of the stick in Creative Paperclay, somewhat like a swab. You can cover the entire thing in clay, if you desire, and if you have plenty of clay to work with. I am about out, so will need to be running to Michael's or Hobby Lobby this coming week. I can't imagine not having Creative Paperclay on hand at all times now that I know how many things can be made with it. If you don't find it near you, you can order at: http://www.paperclay.com/


Add your face, either by sculpting or using a mold, then use a bit of white glue to make sure it will stay attached well. Let it dry.

Then you can paint it in the colors of your choice.


Then unless you used a lot more clay to pad out the body, you will need to build some volume here with yarn or strips of cloth. I used some regular yarn, and saved the natural fibers for the outside. You could also use fiberfill to pad the body out, if you cover it well. Glue the ends down, as you go from one yarn or cloth to the next, and wrap your doll with a variety of materials and colors. You can add a pin back to make her a fashion accessory, keep her in your pocket for good luck, hang her from a rear-view mirror (She will fade quickly if the dyes are natural), or attach her to a package when giving a gift. Think of the variety you can create with these dolls. I am going to make more of them in the next few days and add the pics here, so that you can see them. I'm going to do a personal one with a few strands of my kids' hair, torn strips from some favorite old clothing, tuck in a few small personal items that my kids have made, and whatever else I think of to make it have special meaning to me. I will also do some with charms, strings of beads, and perhaps vintage buttons. Only your imagination limits you. Have fun! You can visit my blog at: http://nightanddayartetc.blogspot.com/, and my Facebook page at: https://www.facebook.com/#!/NightmaresAndDayDreams

Thursday, June 23, 2011

Flower Garden Pincushion


For this project, you will need:

Small, flat can (mine had water chestnuts, but a tuna can would work. Just wash it well with vinegar to remove odor)
Fiberfill
A small piece of cloth
Buttons (optional)
Paint, brushes, and hot glue

First, you will cover the sides of the can with the clay, then you will make leaves by rolling a small teardrop shape, placing it on the can, then making indentations for leaves with the handle of the paintbrush. Let that dry completely, then paint it. I used a shade to match my cloth, then lightened it a bit with white paint to do the highlights.

And yes, I used the can for a paint palette, since it wouldn't need to be washed out. I'm lazy that way.
Then you will cut a circle from the cloth that is approximately twice the width of your can.

Now comes the tricky part. I don't really like hot glue, but for this project, it is the easiest method. If you want to take the time to baste around the edge of the cloth circle, to gather it and make the gluing job easier, I would recommend it. I was in a hurry as usual, so I just glued the cloth to the inside upper rim of the can, about one inch at a time, gathering and tucking as I went, to make it fit. I only burned my fingers a little, no big deal. I left a gap about an inch wide as an opening to stuff the fiberfill in. When you stuff it, it's best to use a trick that doll-makers use. Tear your filling into small balls first, and stuff them in one at a time, so that your finished work is smooth. Trying to stuff a huge piece into the small opening on your can might also cause the glue to pull away from the metal, so be patient. When you think that you have stuffed all the fiberfill into the can that it can hold, stuff in a few more handsful. You want firmness.

Then tuck the cloth down into the can for the last bit. Don't try to glue it before the cloth is tucked or that's when you'll really get a burn. Once it's tucked down, use the nozzle of the glue gun to get the glue where you need it, inside the can, then hold the top down firmly until you're sure the glue is cool. Once it's cool, you can add your flowers. I used colorful buttons, but you could cut flowers from felt, use artificial flowers, or come up with another idea.

You can get Creative Paperclay at Michael's, Hobby Lobby and online at: http://www.paperclay.com/

Wednesday, June 8, 2011

Decorative Pens

Hi- it's almost father's day, so I thought I'd do something relatively simple, as well as functional that the kids can get involved in. I've done a lot of ink pens covered in polymer clay over the years, and thought 'why not do some in Creative Paperclay '. And I like the results that I got.


Use any pen you'd like that has an area that can be covered in clay. A cheap one like mine, or one that clicks. They won't be exposed to the oven, like polymer is, so the pen can stay intact, too. Just don't cover any working parts, like the clicker.

So, the supply list is short, consisting of only a pen, paint, a brush, some white glue, and of course Creative Paperclay.


The first thing you want to do is to roll out a thin sheet of clay the size of the part of the pen you are covering. I pinched the clay to make it thin, then cut a rectangle out the approximate size that I needed.

Cover the part of the pen that will be covered with a thin layer of white glue, and let it dry a bit to get tacky. This will assure that the clay will stick. It sticks to itself well, but you need a bit of help when applying it to another surface.

In the next three pictures you will see my 13 year old son demonstrating how to roll the clay on the pen. His was a bit lumpy and too thick when first put on, and he wanted it thinner, so I told him to press his fingers down on the clay as he moved his hands straight ahead, so it would even out the clay, and (this is important) remove any air that is trapped under the clay.


By moving your hands directly away from you, and pressing down, the trapped air will be pushed out to the edges, and remove bubbles. Don't press too hard. The glue is a big help with this step, so the clay stays tight against the pen as you roll. Trial and error, folks.


See how he keeps his hand in the same position? This pen does not have clay on it, I took these pics as an afterthought, and my son was nice enough to help.

You will find that the extra clay will need to be removed from either end, after you roll the clay on, since it will stretch longer than the pen, most likely. No big deal, just use your fingernails if you want, or a dull blade.


The pen on the top belongs to my son. He left it to dry, so that it would be easier to work with when he added the designs.

The one in the middle was rolled on a large rubber stamp to make a pattern.

The one on the bottom has a starfish and octopus added, then left to dry.
Here's how they turned out after my son finished his and we painted them. He made his for his dad for Father's Day. He duplicated his dad's favorite guitar, and amp, complete with power cord.
I think they turned out nicely. I am going to put a coat of paste wax on them, so they will be resistant to sweat and oils from human hands. Eww... gross, I know. The good thing about these pens is that if the ink runs out, we can pull out the ink chamber and replace it. Cheap, and fun.

If you can't find the clay at Michael's or Hobby Lobby, you can always get it at:


Visit my personal blog at:


My Facebook art page: