Saturday, June 8, 2013

How to Make A Clay Bird

One thing I love is jewelry making. And what's more fun than jewelry making? Making your own beads, of course!
Hi, it's Diana here, to show you step by step how to make your own bird bead!

First, form your clay into a small round ball. It should be about the size of a nickel.
Then, pinch two sides, as shown:

All I've done above, is pinch the sides. Now, you're going to flatten the top, and start forming the clay into what will look like a bird.


All I've done here, is flatten the sides a bit, and elongate the beak and tail. After that, an eye is made by poking the clay with a toothpick.

Now, you're going to make a little wing. 
Once again, start with a little ball, then flatten it like so: 

Then, pinch one side, to form a tear drop shape.

Add a bit of detail to the wing if you wish, then apply it by wetting it slightly first. Once you've done that, make it into a bead by adding a hole through the middle with a toothpick. It should look like this:

Now, you're ready to add paint. My advice is to use a paint spray. When leaving the painted bead to dry, lay it out on a piece of wax paper, or plastic wrap (so it won't stick while drying).
After that, add a bit of protection from mother nature, by coating it with glaze. I used Glastique finishing glaze by Globecraft & Piccolo.
Here is the finished bead, glazed up, beaded up and ready to wear: 


You can make a bunch of these as gifts for the holidays, birthdays, or any time!
Happy Crafting!


Diana Gonzalez

Friday, June 7, 2013

The Invasion Continues!


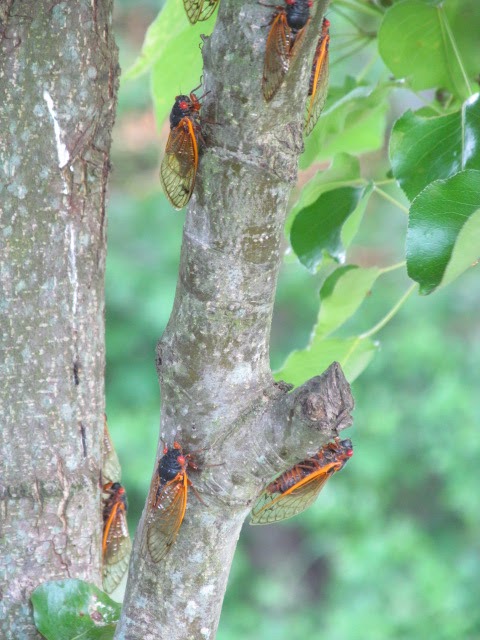
Anyone who is currently living on the East Coast knows about the emergence of the 17yr cicada brood.  Over the past few weeks the hummmm (think alien spaceship landing) of these creatures has been the background music for everyday life.  Even inside, with doors and windows closed tight, there is no escape from the call of the cicada as each looks for a mate.

So it is not a surprise that cicadas have now crept their way into my art thoughts.  Using the actual body would be a bit crunchy...using the gorgeous red eyes would be too gross even for an immune mom of 3.  So I went to the one part of the cicada that I could "harvest" without the natural heebie-jeebies that would accompany the other parts: The wings!  They are absolutely gorgeous and in great supply as the cicada carcasses are littering my yard :-/


I decided that one of the easiest ways to use the wings was to mount them on a flat surface.  I love creating mixed media canvases with paint, glitter, clay, inks, etc.  Cicada wings are just a new embellishment to be experimented with :-)  My husband discovered my wing stash before any creative process had begun and asked "Why?"  My response (of course) was "Why not?"


Time to get crafting...

Part 1 Materials:
small stapled canvas (one shown is 6"x6" gallery wrap)
acrylic paints in choice of colors
sponge
paper plate

Procedure:  Pour a small amount of each color of paint on the paper plate.  Using the sponge, begin to sponge paint your canvas.  I usually start "painting" with the darkest of the colors and then layer lighter colors and highlight on top.  Be sure to cover the top and sides with each layer, overlapping colors as you go.  (FYI: Do not worry about multiple sponges, as one will be perfect for helping colors to flow one into the other).  Set canvas aside to dry when you are happy with the look.


Part 2 Materials:
Delight Air Dry Modeling Compound (white)
acrylic roller
texture of choice (I recycled a mesh tomato bag)
Pinata Color Ink (shown: Burro Brown)
Rubbing Alcohol
sponge brush
work surface (I recycled a piece of glass from a broken frame!)
Paper Towels

Procedure:  Remove a small amount of Delight clay from package.  Immediately wrap remainder of clay in a plastic Ziploc bag squeezing air out of baggie (if you wish to get a second project out of the package :-)  Place clay onto work surface and use the acrylic roller to flatten clay into a sheet.  Place texture over clay sheet and roll texture onto clay surface.  Remove texture to reveal the textured surface! 

Now comes the fun!  Drip ink from bottle directly onto the textured surface.  Ink should begin to spread into the nooks and crannies.  Ink can be blotted if the look is too dark.  To lighten the inked surface, dip the sponge brush into rubbing alcohol and lightly brush across inked surface.  Occasionally blot with the paper towel until the clay surface is completely painted. 

Set aside to dry.  (Please note:  I placed mine outside in the sunshine to help speed the drying process.  Flip occasionally to dry front & back evenly.)

Once your inked sheet is dry, the clay can be torn into pieces for the project.  Try to imagine what your finished canvas should look like.  I envisioned the wings forming flowers.  I planned on using the inked sheets for ground and stems.  With this in mind I torn the sheet into thin, curved pieces.  Tearing the clay towards you will reveal the unpainted white clay underneath!  

Part 3 Materials:
The Ultimate! glue
Ancient Page ink pads ( Coal Black shown)
assorted rubber stamped sayings and alphabets
scrapbook paper
Envirotex Lite 2-part epoxy
small plastic cup for mixing plus popsicle stick 
disposable brush

Procedure:
Rubber stamp saying to canvas (if desired).  Rubber stamp scrapbook paper with lettering.  Once dry, tear paper edges towards you to reveal white edges (if desired).  Of course, edges can be cut with scissors for an even edge, but I really like the organic nature that tearing allows.  Position clay, paper, and wing components on the canvas.  Do not glue anything down until you are happy with the look.  Use glue on the clay and paper components, but not the wings. 
For the wings, mix a small amount of the Envirotex Lite according to manufacturer's directions.  With the disposable brish, paint small amounts on the back side of each wing and "glue" in place on canvas.  Once all of the wing components are in place, additional Envirotex Lite can be carefully brushed over the top of the wings.  this process will #1 glue fragile wings in place and #2 give the wings more strength once dry.  Set canvas aside to dry for 24 hrs.


Obviously you have noticed that my "flowers" have gone through a transformation and have grown into palm trees!  Allow your "plan" to change as the canvas progresses and don't get frustrated if it isn't exactly your original vision.  This one turned out better than the "vision" and I think the cicadas would be pleased that their temporary outdoor entertainment and beauty will remain with us...possibly until the next emergence in 2030!

ENJOY :-)


Thursday, June 6, 2013

Jess B's - Creative Paperclay® Tip for June

Hello Everyone
today I wanted to chat with you about my experience with
acrylic paints 
 
kneading acrylic paints into Creative Paperclay®
you can combine several colors together 
and created a marbleized effect
kneading acrylic paints into Delight™
helps extend the playtime you have to complete
your projects

For me, this a bonus as I get 
interrupted several time by my kiddos (lol)
 Look at the fun and vibrant colors you get! 

SUGGESTIONS
Use latex gloves
 to mix your acrylic paints and
Creative Paperclay® and Delight™

The more you apply the more vibrant the colors

Allow the Creative Paperclay® and Delight™ mixture sit for approximately 20 minutes so
before rolling out and using.  Sometimes you might need to knead again and set for a few more
minutes.

I store my finished Creative Paperclay® shapes in a plastic container 
I store my unused  Delight™ in a air tight container and all dried cut shapes into a zip lock bag

Wondering what else you can do

Thanks for stopping by


Tuesday, June 4, 2013

Scrapbook Embellishments by Lynda

My first love was card making - buying every stamp I could from 1990 until I moved back home.  I think at one time I counted and I had over $6000 worth of stamp sets easily!  Over the years I learned I only needed a few that could do the trick!  This was in Colorado - then I moved back home in 1997 to Salt Lake City Utah...Scrapbooking heaven!  Where the magazines are at, or a lot of them anyway...  A lot of the manufacturers are there - and sales... oh you have no idea when they have their warehouse sales the stuff you leave with!!! 
I have recently started working with clay products - and to say I am hooked is an understatement!  Also being in temporary quarters for just a bit longer - makes it so I can't do a lot of the fun things I have planned for you until we actually are in our own place!!!  
This project is a vertical paper bag album, with this for the cover!  I used Creative Paperclay product and a mold I have to create the flower!  This is actually one of my favorite flowers now, along with a daisy I painted and embossed...  For the flower, I painted it with two different colors I had of Radiant Pearls paint and then let dry!  This is the paint I happen to have...use what you have!  I am still experimenting with what can be done with this awesome stuff!  
Here are some things I will recommend for you to work with this clay:
  • Make sure your hands and surface is clean - using gloves if you have them.  Since I do not, I make sure I have a dry towel (or paper towel) and wash cloth available to wash my hands and surface often.  
  • After you open your package up - make sure you have a big enough Ziploc style bag to put the rest in.  This way it is nice for you to have your clay in one place and not exposed to dry out.  
  • Look for something to put all the stuff you are working with in one place.  This way you can take it someplace if you have to wait for a long period of time.  A clear shoe box is perfect for this reason!  
  • Look through this blog's previous posts - to see the different things you can do with this clay if you are just starting out!  Take the time like I did and learn all the fun things you are able to do with this fun stuff!!!  
Thank you for checking out my project and a few tips today!  You can check out the entire project at Memories in Tyme blog, just scroll down on the right side - looking for the Vertical Paper Bag Album links!  This was one of my funnest albums done so far!  I really like how the flower looks on top of the bow - which made me think of a few other fun ideas I can do using this clay and mold!!!  I hope you are enjoying it as much as I am!!!  

Thanks for stopping by,

Lynda Jeffs
Creative Paperclay Design Team


Tuesday, May 28, 2013

Barbara's Creative Paperclay® Tips for May

Hello everyone, and welcome back.  I hope everyone had a wonderful Memorial Day weekend.

Barbara here, and I have a few tips to share with you that I learned along the way while making my project earlier this month.  This is a picture of what I made in my earlier post this month.  If you missed it, you can click here to see how I made it.
The basket of flowers is all made using Creative Paperclay®.  As you can see, there were lots of tiny bits and pieces to mold and air dry.  So, my first tip is this:

1)  Get a ridged plate, like a microwave bacon cooker, from the dollar store, and place a scrap piece of screen wire on top to dry your clay on.  It works fabulously because this allows air to circulate beneath the clay, as well as on the top.
I also found that these Stampin' Up trays, used to hold alphabet stamps, have ridges that will hold the screen wire up off the bottom, as well.  The lid closes and will keep the dust off. 
 
2)  When you want to work on a piece of Paperclay® that you now need to trim with your craft knife, lay it on a piece of white cardstock.  This will allow you to easily rotate the piece while you work on it without handling it, which could possibly cause it to stretch out of shape.  You can also leave it to dry on the paper and then you can easily move it from your workspace.  This was invaluable to me when I was cutting out the basket I had made.
3)  I also found that, while painting my Paperclay® pieces, if I want to dilute my acrylic paints with water, the water would re-wet the Paperclay®, causing it to lose some of its definition.  However, using an acrylic glazing medium (instead of water) allowed me more time to color my flowers without wetting the Paperclay®.  The glazing medium also made the acrylic paint more translucent and allowed me more time to play with mixing my colors,  again without re-wetting the Paperclay®.
I hope you enjoyed my tips this month, and that you will be able to utilize them in your own projects, perhaps making it easier and more fun to create something using this fabulous product.  I hope you will also take a minute to visit the Creative Paperclay® online store, as well as come back to the blog for more inspiration, tips and techniques from the wonderful Creative Paperclay® designers.

Have a wonderful, creative week!

Barbara

Saturday, May 25, 2013

Diana's May Tip

Hi there, I'm Diana Gonzalez, and here's my tip for using Creative Paperclay!
First, my project:


This is a set of rubber stamped pendants that I made.
When working with rubber stamps, paint and clay, at times you'll find that the finish is a bit dull. I did give my clay a nice coating of acrylic paint, but  I wanted to achieve a sort of "faux ceramic" look, which can be achieved by using spray acrylic coating. Be generous. Spray a generous amount, let it dry, then spray it again.
If you're worried about fumes, do this on your porch outside, or if you are an urban dweller such as I, then just open the bathroom window, and do it in there.
After the sealer is dry, you can rub some ink on it. I used a bit of Pigment ink by Clearsnap. Use whatever shade you want. And voila! You've got yourself a cool "faux ceramic" stamped pendant!

Diana

Friday, May 24, 2013

Dawnmercedes' May Tip


I learned this tip the "hard way."  
When I was creating these organic balloons earlier in the month, I didn't make any extras.  
One of my balloons deflated before the Creative Paperclay © was dried...
and the shape lost its form.

TIP:
If you are creating a project that involves repeated forms or shapes,
make a few extras.  Planning ahead for "just in case" will keep your artistic endeavors running smoothly!


Thanks for stopping by today!!


Dawn Mercedes, of Sunnyside Up