Showing posts with label Flowers. Show all posts

Thursday, May 10, 2018

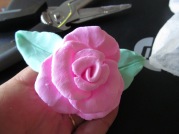
Mother's Day Rose


Mother’s Day Rose


With Mother’s Day approaching my crafting bug is itching.  I teach art to students K-8th grade during the day and run a polymer clay after school program in the afternoon..  My clay kids have created hands holding flowers for their moms (turned into pins and magnets).  Some of my art classes have created cards and dimensional flowers.  So of course flowers are at the forefront of my mind.
When I received my Creative PaperClay™ and Delight™ ari dry modeling compound I immediately thought of roses!  Ooooooooooo, super simple amazing roses.  Could be a pin, could be a magnet…a forever rose for Mom ♥
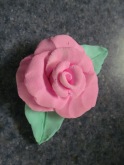
 IMG_6260
Materials:
Delight™ air dry modeling compound
Crayola® washable markers
damp paper towel
Optional:  scissors or knife, pinback or magnet, superglue

Step 1: Open a package of Delight™ clay and pull off a small amount.  Place on top of damp paper towel and fold towel over the top to keep clay moist.  IMG_6231
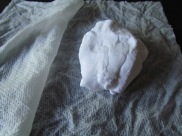
Rewrap the remaining clay in a ziploc baggie and press out the air.
Step 2:  Remove clay from paper towel and pull off about half (place remainder back in damp paper towel)  Flatten in your hand.  Choose a color for your flower and begin to dab clay.
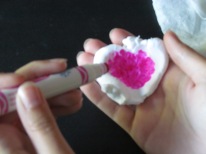
IMG_6232
Step 3:  Mix the color into the clay by kneading.  Add more color if the color is too light (I repeated the process three times to get a deep pink).  NOTE:  Color will darken as the clay dries
.IMG_6234
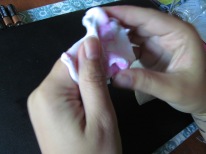
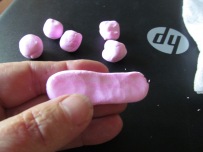
Step 4: Divide into 6 balls.  Place them on top of the damp paper towel until you are ready to shape them.  IMG_6237
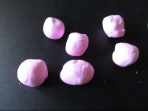
Step 5: Roll one of the balls into a short log.  IMG_6238
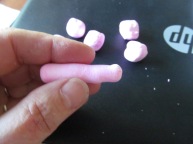
Flatten the log to about 1/8″ thick.  IMG_6239
Pinch the entire top edge from end to end between your thumb and forefinger.
This is to create a natural edge for your flower (a rose).            img_6240.jpg
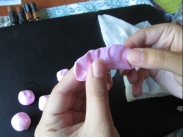
Step 6: Roll the flattened log from one end to the other.  Make sure your fingers are rolling at the bottom (the thicker edge).  This will help the thin edge to flare out as you roll.     IMG_6241  This becomes the center of your rose.
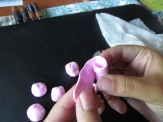
Using a finger, gently flare out/ruffle the top edge.  Set aside (on top of damp paper towel to keep it from drying).  IMG_6243
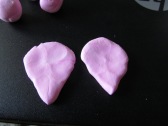
Step 7:  Take two more of the balls.  Shape each into a teardrop shape by flattening into a round and then pinching one end.  Adjust the thickness as you go so the teardrops end up about 1/8″ thick.  IMG_6244  Pinch the top edge of each teardrop between your thumb and forefinger (just like you did for the center of the flower) to give it a natural edge.  These are your first 2 petals.  IMG_6245
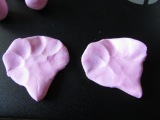
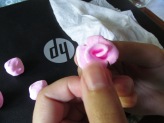
Step 8:  Pick up the center of the flower.  Wrap one petal around one side and the other petal around the other side.  The petals will overplap just as a natural flower would do.  Be sure to focus all the pressure on the bottom part of the flower (thicker part).  Once you are happy with the look, gently flare out the top edge to create a natural looking petal.  IMG_6246
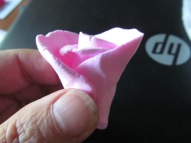
Repeat process with remaining 3 balls.   IMG_6247IMG_6248
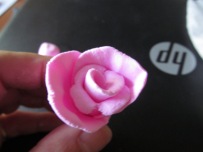
Step 9: Cup your hand and gently turn the rose over in it.  Use scissors to cut the bottom off flat.  IMG_6250
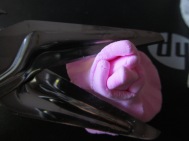
Place excess clay (that you cut off) back under the damp paper towel to keep it moist.  Place the “cut” rose on top of damp paper towel while you create a couple of leaves.IMG_6253
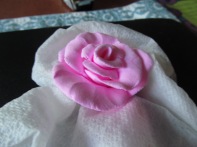
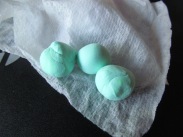
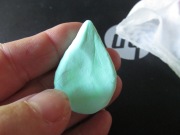
Step 10: Remove uncolored Delight™ clay from damp paper towel.  Repeat coloring process (steps 2-3) with chosen leaf color (as you can see I chose bright green).  Roll clay into balls.  One at a time flatten the balls, then pinch into teardrop shape.IMG_6252  IMG_6254 IMG_6255
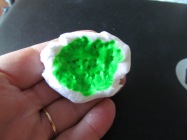
Pinch the edges flat to create a more natural look.  Leave the bottom of the teardrop thick.  NOTE:  The back edge of the scissors can be used to impress a line down the center 
Step 11:  Turn the rose over in your hand one more time.  Position the leaves and then gently press into place.  Do not use too much pressure or the rose petals can flatten.  IMG_6258    IMG_6257
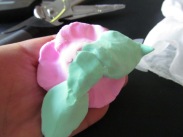
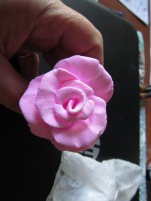
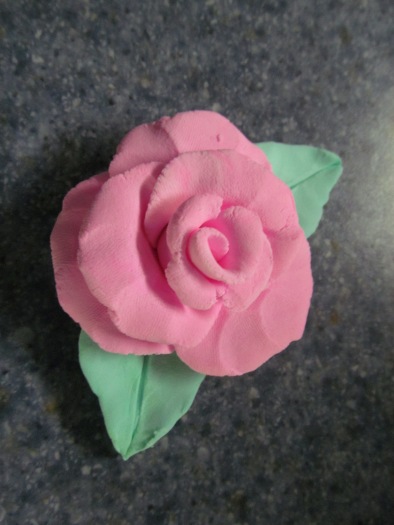
Set the completed rose on your work surface.  Make sure the bottom is somewhat level.  If not, pick it back up and gently press the bottom to flatten.  Petals and leaves can be adjusted if necessary.  Set the rose aside to dry (overnight should do it) and then add a pinback or magnet if desired.
IMG_6260s

Tuesday, December 27, 2016

Simplicity of Nature in Clay

I like to have a personal touch on any gift that I give. One easy way to create personalized hang tags with Creative Paperclay® using nature as my stamp. These were given to a friend who has a passion for anything blue. I used these as hang tags but they could be converted to wrap around a napkin or hang from a window/

SUPPLIES
Creative Paperclay®
Blue acrylic paint
Raffia
Leaves & flowers
Brayer


I started with two wads of clay that I had flatten. I placed the flower and pine needles on top of the clay then brayered them flat.


This is how they looked when I pulled the flower and needles off the clay.


I placed a glass over the clay making the circle cutout and then made little holes for the raffia.

After removing the clay outside of the round shape, I smoothed the edges of the circle shape with a little water on my fingers.

I like simple things that have multiple uses. Plus this is a kid's perfect project.

Dream in Color.

Darlene Oliva McElroy

Tuesday, April 5, 2016

Whimsical Windflower Whirligig


The weather has been so nice in Tucson that I couldn't help but do another garden project this month - I might just keep doing them until December!  This flower is a kinetic sculpture, the inner flower petals move one way when the wind blows, and the outer petals move the other.

The materials needed to create the flower are:

Delight™ Air Dry Modeling Compound
tape
pencil
paper
tracing paper
compass
protractor
scissors
craft knife
bowl - the one I used is about 4" across the top
acrylic paints
wooden toy wheels (available in hobby stores)
- the ones used for this project are 3/4" diameter, by 3/16" thick, with a 3/16" hole.
wooden beads - the ones used for this project are 1/2" round, with a 3/16" hole
brass rod in the diameter that most closely matches the hole dimensions of the beads.
plastic wrap
rolling pin
Paverpol


Start by cutting a strip of paper, holding it in place inside the bowl, and marking the edges to get the inside dimension of the bowl.  Measure the length of the marks, then draw a circle with the same dimensions (or, cut the paper to the marks, fold it in half, and set your compass to match that distance :) )


Divide the circle into five sections (72 degrees on the protractor).  Trace the circle and divisions and set this aside for later use on the inside flower pattern. Cut out one of the sections, fold it in half, and draw a petal shape onto it as shown.  Cut out the petal shape and trace the design onto the remaining four sections.  Tape the original petal back in place, then cut out the remaining sections on the paper to create the entire flower pattern.

Mix the desired color of paint with enough modeling compound (clay) to make a 1/8" thick circle large enough for your flower pattern.  Roll the clay into a ball, place between plastic wrap, then roll it out to 1/8" thickness.


Place the pattern gently onto the clay and poke a hole in the center, marking it into the clay.


Line up the center mark on the clay with the center of the wheel and press the wheel into the clay.  Work the clay around the wheel until the wood is covered, and clear the clay from the center of the wood.  Again lay the pattern onto the clay, align the centers, the cut the clay out to the pattern shape (don't press the pattern into the clay or it will stick - another method is to place plastic wrap over the top of the clay, align the pattern, then trace around it gently with a toothpick to transfer the pattern to the clay, remove the plastic wrap, then cut out the design from the clay)


Once you have the clay cut out, cut out the petal sections of your paper pattern, fold each in half and place a small piece of plastic wrap over each folded petal.  Use these petal shapes to prop up your clay flower petals, lining them up so that the fold of the petal is half-way underneath the clay petal as shown.  Make sure you put them all facing the same way around the flower.  Set aside to dry.


For the inner section of the flower, start by drawing a second circle, 1/4" less in diameter, over the tracing you made from the first circle, then create the pattern the same way you did for the first one (cut out one section, draw petal shape, etc.)  Mix clay to desired color, and complete the steps for rolling out the clay and inserting the wooden wheel as you did for the first set of petals.  Line the bowl with a piece of plastic wrap and place the flower inside.


Cut the petal shapes from the pattern, fold each petal in half and cover with a small piece of plastic wrap.  Place the petals under the petals of the flower as you did for the first set, but this time put the folds going in the opposite direction.  Set aside to dry.

While the petals are drying, paint wooden beads to use as spacers between the petals, and, if desired, cover another wheel with clay and sculpt the center of the flower.  I was originally planning on using a bead for the center, but then decided to sculpt a larger center piece.

You'll need three or four beads, or three beads and a wheel.

When all the pieces are dry, sand any rough edges, and, if desired add additional paint accents - I brushed on some ColourArte Twinkling H2O's watercolors to add some extra sparkle.

Cover both flower sections and all remaining pieces except brass rod with Paverpol and allow to dry.
Test assemble the piece on the rod as shown; bead, outer petals, bead, inner petals, bead, end cap or bead.  Make sure the petals turn freely. If not, remove them from the rod and clear the hole with the tip of your knife or a tiny bit of rolled up sandpaper.  Once the flower sections can move freely when everything is assembled, mark the rod where the first support bead will sit (behind the outer petals) then remove all the pieces.  Bend the rod if desired - the whirligig will also work well if the flower is left upright.  Attach the support bead to the rod with Paverpol and allow it to dry.  Re-assemble the remainder of the sections, then attach the end cap/bead with Paverpol.  Allow everything to dry before placing it in the wind.  Enjoy the breeze!


Unfortunately, every time I tried to get a video of the whirligig outside, all I got was gusts of wind which didn't show how the petals turned.  So I made a quick vid. using the blow dryer - which made it spin too fast for you to see the different directions...so then I tried to slow it down a bit and back the dryer off - well anyhow, here is a 13 second video so you can at least see that the petals do actually turn quite well :)  I hope you will make your own flower(s) and enjoy them moving in the garden.


I'd love for you to join me for more projects & art adventures on my personal blog
Find me on Facebook, or peruse & ponder pics with me on Pinterest
Connect on Google+ or see what new creations I may have on Etsy


Tuesday, April 7, 2015

Garden Gear - Upcycle project

Tori West here, letting you know that Spring has sprung on Meadow Lane and it's time to get outside and get to work.  Wishing I had a convenient place by the back door to store my hat, gloves, work shirt and maybe the odd garden tool or two, I decided to upcycle an old over-the-door clothes hanger into a piece of wall art & gear hanger.


Supplies:

metal over door clothes hanger
Pliers
foam-core or cardboard
Creative Paperclay® modeling material
Delight™ air dry modeling compound
acrylic paints, paintbrushes
Sandits sanding sticks
collection of flower molds and cookie cutters (I created all of my own, the smaller flowers were from molds of various jewelry pieces, and the large flowers were cookie cutters made from my patterns - see how to make your own cookie cutters from cardboard on my January post)
gesso
acrylic varnish
coffee filters, newspaper, or other paper maché material
white glue


This is what I started with, 
a simple metal door hanger
that hadn't been in use


Using pliers, I straightened out the bars that allowed the piece to hang on the door, then laid the flattened piece on a large piece of paper and traced around it to use as the basis for my design.


As you can see, the bars aren't perfectly flat. That's okay, they will still work for this project.  I also enlarged the screw holes slightly to allow standard nail-in picture hangers to fit through them.  When I was done modifying the metal, I applied several layers of gesso and a coat of varnish to cover any exposed metal in the chipped paint areas, to prevent the metal from rusting.


Once I had the design sketched out, I cut a piece of foam core to fit the outline, then glued it to the metal piece.  To further secure it and create a smooth transition from the metal to the foamcore, I covered all of the connecting edges with a layer of my favorite paper maché material; coffee filters and white glue.


When the paper maché layer was dry, I applied a thin layer of Creative Paperclay®, and then added cut-out clay forms over that.  I made extra leaf shapes to add in with the flowers later, and set this all aside to dry while I created some flowers!


The flowers were made by mixing various colors of acrylic paint with Delight™ air dry modeling compound, then pressing the clay into molds or rolling the clay out, stamping it with a cookie-cutter, then cutting out the clay shapes and assembling the pieces (a technique very similar to the one demonstrated by Linda Hess).

I laid them on the design sketch while I was working, and also made some extra flowers for filling in areas, or to use should I decide to change the design a bit.


...BTW, there are lots of great flower making techniques on this blog, just type "flower" in the search box at the right under the blog heading!


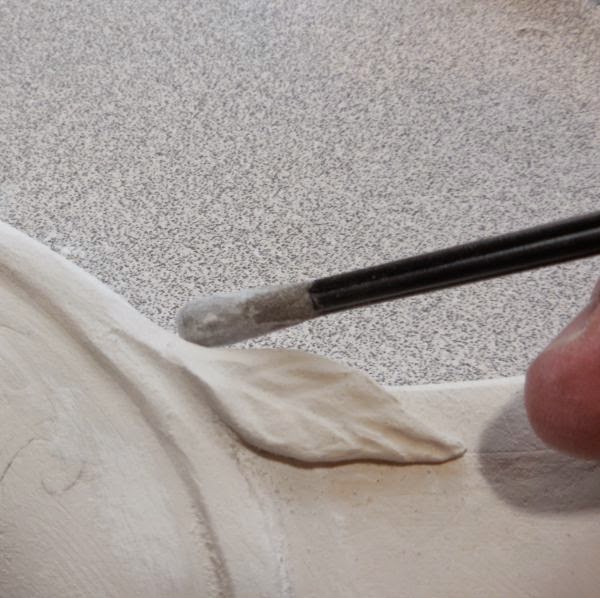
When my base piece was dry I used Sandits to shape and smooth the leaves and vines.  They work well for getting in to smaller areas, but what I like most about them is that they seem to have just the right amount of flexibility and length in the shafts to make smoothing around curved areas easy.


When everything was sanded, I applied a base application of paint in various colors of green as a background to the flowers.


All that was left to do was glue the flowers and leaves in place, paint the saying in the center, and add some sparkle!  Although you can't see it very well in the photo, I used Twinkling H2O's on the center lettering, and on all of the flowers except the small purple ones.  I wanted the effect to be subtle, which it is, the glimmering just catches my eye as I'm heading out to the garden!


I hope Spring is blissful wherever you are! Thanks for joining me here!


I'd love for you to join me for more projects & art adventures on my personal blog
Find me on Facebook, or peruse & ponder pics with me on Pinterest


Connect on Google+ or see what new creations I may have on Etsy