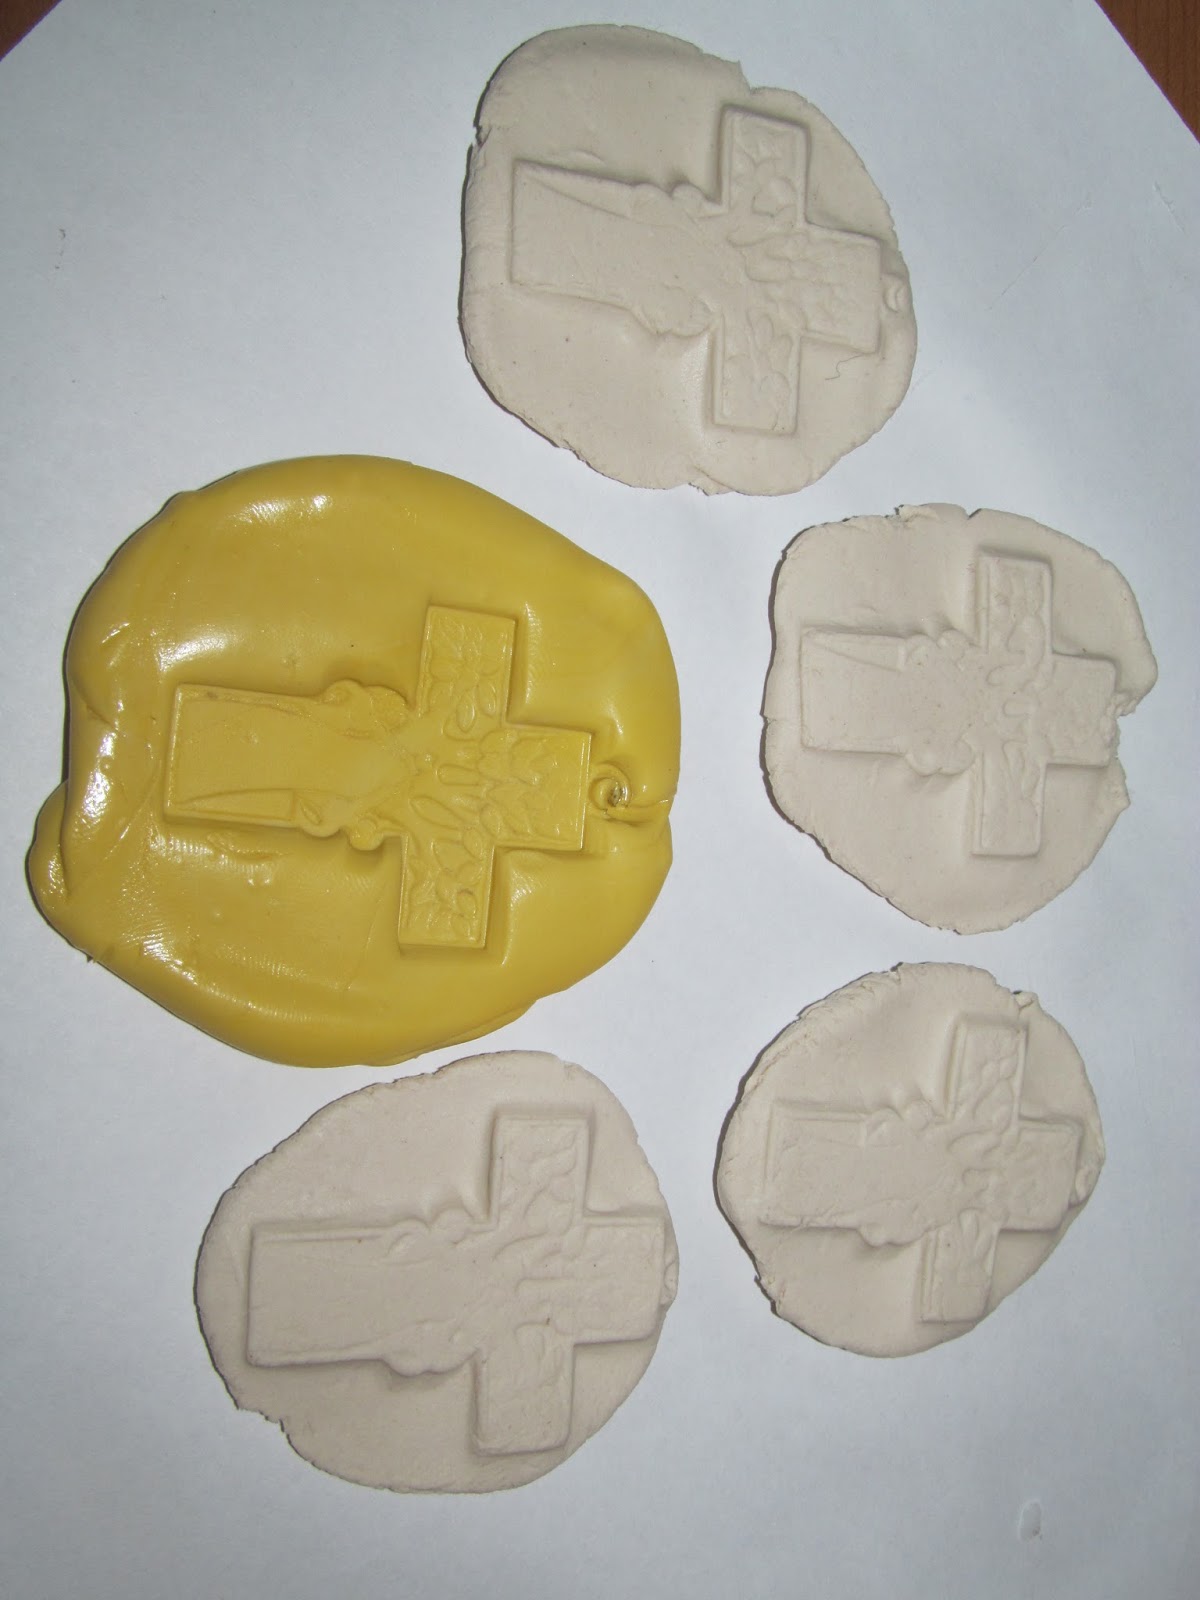
Hi all! A quick tutorial on molds and Creative PaperClay®. Do you have a piece in your stash that you wish you could "clone". Well I certainly do. It is a cross that I found in Mexico a number of years ago.
I have searched all over the internet in hopes that I could find more or discover the artist who created it with absolutely no luck. After exhausting all possibilities, I decided to create a mold of the piece to use.
(NOTE: Never EVER make a mold of a copyrighted product or an original piece that can be attributed to a specific artist. To do that would be like stealing.)
Amazing Mold Putty (www.moldputty.com) is my go-to mold making product. There are times I wish I had some in my pocket as I travel around and discover something with a cool texture! This molding material is available at most craft stores. In the box are 2 containers.
To create a mold, mix together equal sized balls (one from each container) between your fingers until the colors are completely blended. Place the blended material on your work surface and flatten slightly with your fingers or a roller. Press the item to be molded into the material (as shown)
and let it set for 20 minutes. Once set, the original piece can be removed and you have a flexible mold to use and reuse.
It is amazing (just like the name suggests) the amount of detail that this product picks up!
Now to create a few reproductions from my mold. I teach art at a Catholic school, so you can imagine the amount of excitement that surrounded Pope Francis' visit to the DC area. I thought how lovely it would be to create a simple pin or bookmark for my fellow teachers. I think this will be the perfect highlight for those creations. Pull a small amount of Creative PaperClay® off the block and roll it into a smooth ball.
Press the ball into the mold making sure it fills all of the crevices.
Then flex the mold to remove your clay piece.
Place it on your work surface and repeat until you have multiple pieces to use.
Now to detail. If you are an impatient sort (like me) you may not want to wait until your pieces are dry to ink or paint or color them. Let me present my "experiment" which shows why you need to wait. For this piece I pulled out a leaf green Ancient Page ink and laid the cross on top of it. I lightly pressed on the back until (I thought) it had picked up the ink. When I turned it over I discovered way too much ink had transferred to the piece and I needed to remove some. Since the clay was not dry, I couldn't wipe it (this would have smooshed the design). Instead I placed a piece of paper over the top and lightly blotted. This removed some ink from the top, but not the the background,,,still, an interesting look.
I cut away the excess clay and plan to detail the trunk with markers or colored pencils after it dries completely.
I tried one more time (because that is what I do) with another color of ink. This time I used a lighter touch and the background remained light colored while the raised portions picked up the ink and "POPPED".
Again I cut away the excess clay and set it aside to dry.
NOTE: If desired, the molded components can be placed into the oven at 275 degrees to quick set. it will not completely dry the components, but will make them a bit more easy to detail without the danger of smooshing and having to start again.
Pieces cut away can be reused. However, be careful of them starting to airdry (after all, this is AirDry clay). As you can see from this photo, the molded piece has a very distinct crack across the top.
To get around this possible problem, keep a damp paper towel handy and wrap any cut away or excess clay up immediately. The paper towel will keep the clay moist and help you avoid nasty cracks & crevices.
I plan to use the crosses for pins or bookmarks, but they would also be beautiful on card fronts or as bag ties. I hope you have enjoyed this intro to molds and Creative PaperClay® Have fun and experiment.
Showing posts with label ink. Show all posts
Monday, September 28, 2015
Tuesday, August 11, 2015
Lets add some color to Creative Paperclay Tip By Gloriann Irizarry
August is in and today tip will be base on a question I been asked many times.
Can you add color to Creative Paperclay® Material?
Well the answers is:
Yes you can.
This material is so versatile you can sculpt is right out of the package or lets add some color to it.
Its easy you can use many mediums out there like:
Water Colors
Acrylics
or my personal favorite the Tim Holtz Adirondack Alcohol Inks
If you want to try to add color to your Creative Paperclay® start by adding some color to your paperclay.
Open your favorite color of Tim Holtz Adirondack Alcohol Inks and add drops directly to your clay.
I do recommend to wear gloves while mixing the clay since the alcohol ink will stain your hands.
Mix has much color has you want. Remember the more colorful you want the more ink you need to add to the Creative Paperclay®
I like to color my clay when I'm sculpting masks, Art dolls and Ball Jointed Dolls BJD
By adding the color directly to the Creative Paperclay® is simple. This step will save you time by not having to color or paint it once your done sculpting your piece.
Have in mind the color of the clay will lighten up once it dry.
Look at these BJD torsos examples of already dry Creative Paperclay®.
The Creative Paperclay® used one on the left torso is lightly tint with Tim Holtz Adirondack Alcohol Ink and the started torso on the right is plain white right from the Creative Paperclay® package.
Sanding the tinted clay will not change the end color. Try it and feel free to share with us your results with us at our Creative Paperclay® Q&A Facebook page Click here to join us.
Thank you so much for joining us today and stay tuned for more wonderful tips soon to come in this your Creative Paperclay® Blog.
Sincerely
Saturday, May 25, 2013
Diana's May Tip
Hi there, I'm Diana Gonzalez, and here's my tip for using Creative Paperclay!
First, my project:
This is a set of rubber stamped pendants that I made.
When working with rubber stamps, paint and clay, at times you'll find that the finish is a bit dull. I did give my clay a nice coating of acrylic paint, but I wanted to achieve a sort of "faux ceramic" look, which can be achieved by using spray acrylic coating. Be generous. Spray a generous amount, let it dry, then spray it again.
If you're worried about fumes, do this on your porch outside, or if you are an urban dweller such as I, then just open the bathroom window, and do it in there.
After the sealer is dry, you can rub some ink on it. I used a bit of Pigment ink by Clearsnap. Use whatever shade you want. And voila! You've got yourself a cool "faux ceramic" stamped pendant!
Diana
First, my project:
This is a set of rubber stamped pendants that I made.
When working with rubber stamps, paint and clay, at times you'll find that the finish is a bit dull. I did give my clay a nice coating of acrylic paint, but I wanted to achieve a sort of "faux ceramic" look, which can be achieved by using spray acrylic coating. Be generous. Spray a generous amount, let it dry, then spray it again.
If you're worried about fumes, do this on your porch outside, or if you are an urban dweller such as I, then just open the bathroom window, and do it in there.
After the sealer is dry, you can rub some ink on it. I used a bit of Pigment ink by Clearsnap. Use whatever shade you want. And voila! You've got yourself a cool "faux ceramic" stamped pendant!
Diana
Tuesday, July 17, 2012
Edie's Quick Tip for July
Did you know you can add paint directly to your Creative Paperclay® and Delight® modeling material??? Simply mix in a bit of craft or acrylic paint and blend until no streaks remain. You can also add in mica powders or inks for cool effects!
For these starfish I added some Terri Sproul Mixers - Shimmer Rose to my Creative Paperclay® and worked the clay until the color was well blended. Next I fill an Amazing Mold Putty mold with my Creative Paperclay® and let it dry overnight. I now have some super cute SPARKLY Paperclay starfish to use in an upcoming mermaid painting!
Subscribe to:
Posts (Atom)